

With 2023 Again a New Year
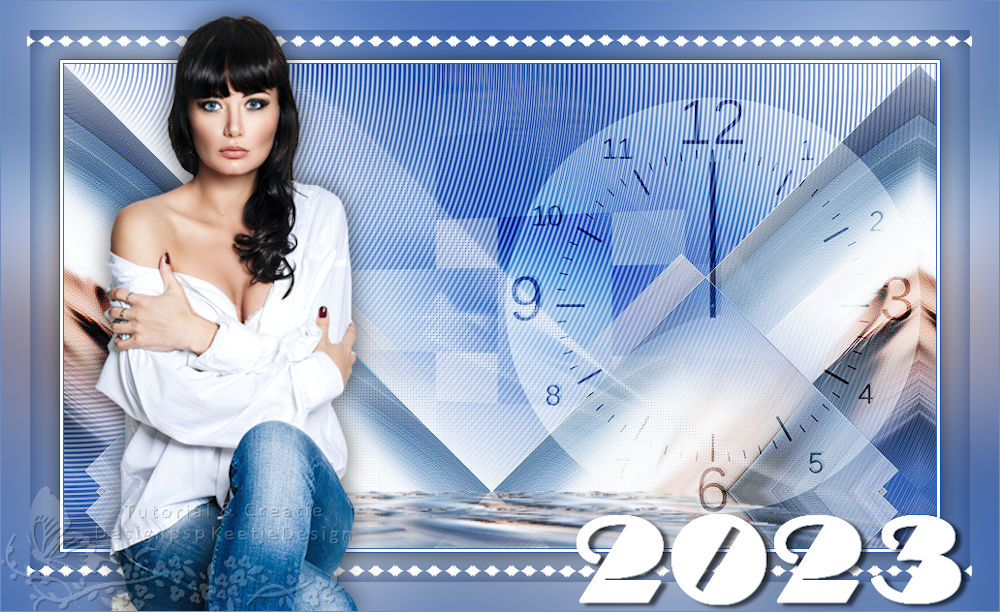

This tutorial was created , written and translated by KeetjeDesign 19-12-2022, the © is mine.
It is not allowed to copy, link and / or place these or parts thereof without my permission.
If you want to use this tutorial on your own club or group , please ask me for permission.
The tutorial is written with PSP 2020 but can also be made with other versions.
If this tutorial resembles another tutorial, it is purely coincidental
The © of the materials used is for the rightful owner and the tube maker.
I thank the tube maker Jewel for the tube and Narah and Ildiko for the masks
Materials used:
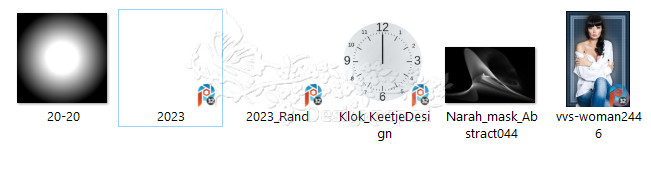
Open the material in psp / duplicate with shift+D / close the originals minimize masks
Plugins used:
Mura’s Meister – Copies
Mura’s Meister – Perspective Tiling
Filter Factory Gallery T – Tripolis
VM Natural – Weave Distortion
The tutorial is written with these colors and materials.
If you use your own colors and / or materials, you may have to play with the settings of Blend Mode and/or Opacity.
1
Material palette – Foreground color #305fb1 / Background color #ffffff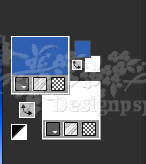
In the Foreground make the gradient Linear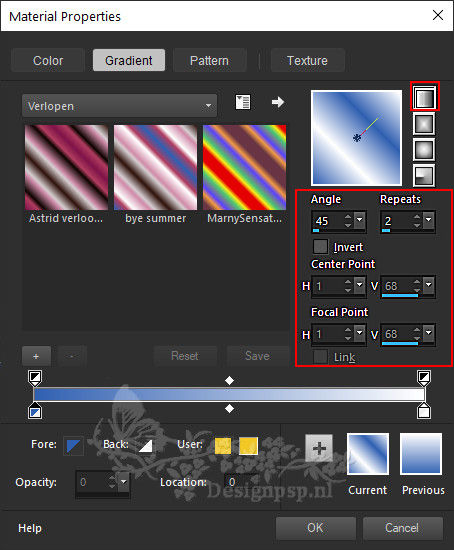
2
Open a new transparent image of 900 x 500 pixels
Fill with the gradient
3
Layers – New raster layer
Selections – Select all
Open the tube vvs-woman2446 – Copy – Paste into selection
Selections – Select none
Image – Resize – Resize with 85% – Uncheck all layers
Layers – merge – merge down
4
Effects – Image Effects – Seamless Tiling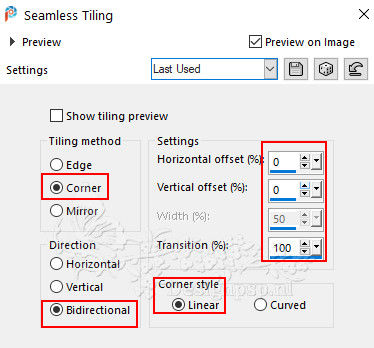
Adjust – Blur – Radial Blur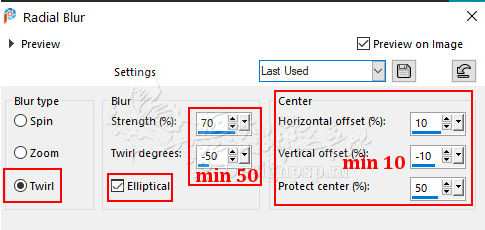
5
Adjust – Sharpness – Sharpen High-Pass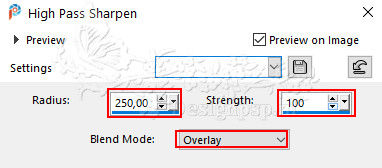
Effects – Edge Effects – Enhance
Effects – Geometric Effects – Skew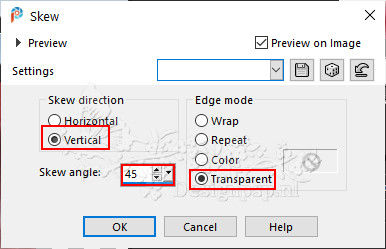
6
Layers – Duplicate
Image – Flip (Horizontal)
Layers – merge – merge down
Effects – 3D Effects – Drop Shadow / 0 / minus 3 / 55 / 43 / Color # 305fb1
7
Layers – New Mask Layer – From Image: 20-20
Layers – Merge – Merge group
8
Material Palette – Foreground Gradient Linear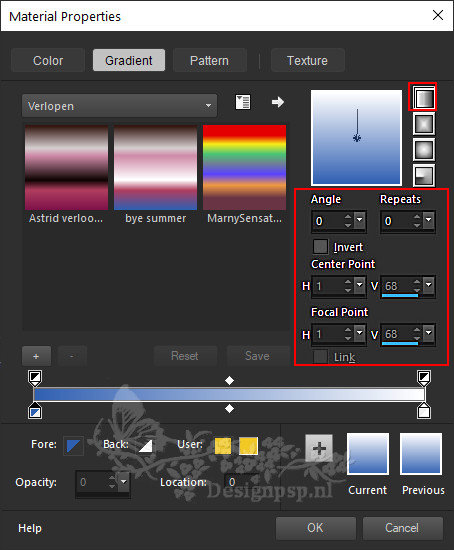
Layers – New raster layer
Fill with the gradient
Effects – Distortion Effects – Ripple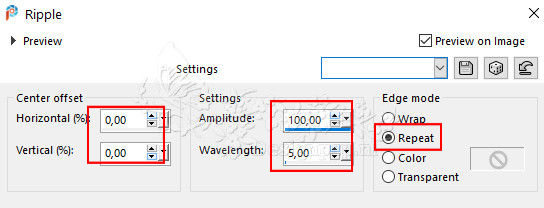
Layers – Arrange – Send to Bottom
Adjust – Sharpness – Sharpen
9
Layer palette – Activate the top layer
Layers – Duplicate
Effects – Plugin: Mura’s Meister Perspective Tiling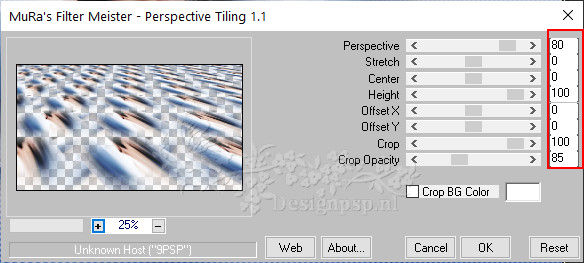
Adjust – Sharpness – Sharpen
10
Vieuw – Rulers
Activate the Pick tool / Mode to Scale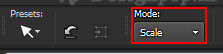
Stand in the top center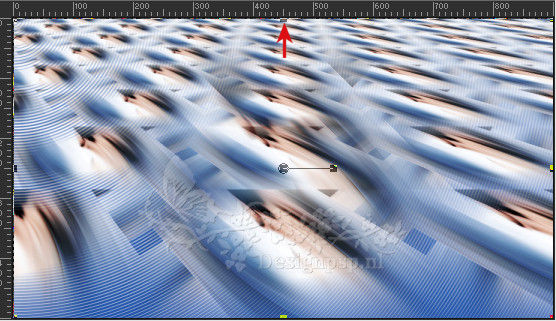
Slide the layer from top to bottom to 400 pixels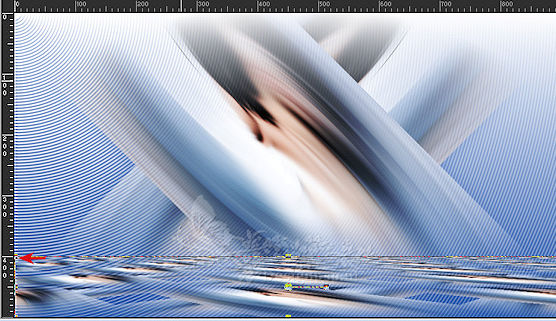
11
Set the Mode to Perspective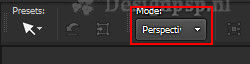
Stand on the block on the left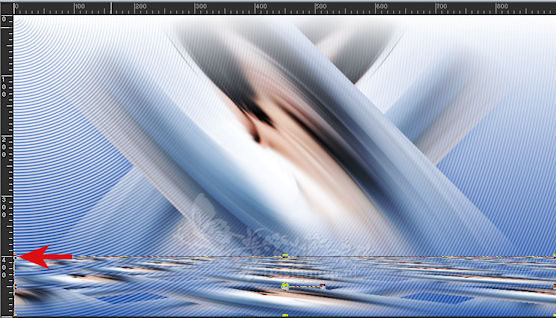
Slide in from left to right to 300 pixels
The right side goes with it on its own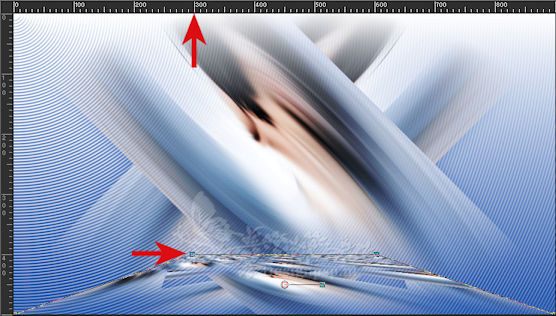
Type M to close the tool
12
Effects – Plugin : Mura’s Meister – Copies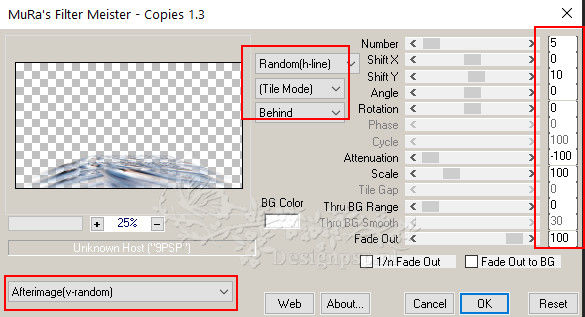
Layer palette – Close the layer
13
Layer palette – Activate the middle layer
Effects – Plugin: Filter Factory Gallery T – Tripolis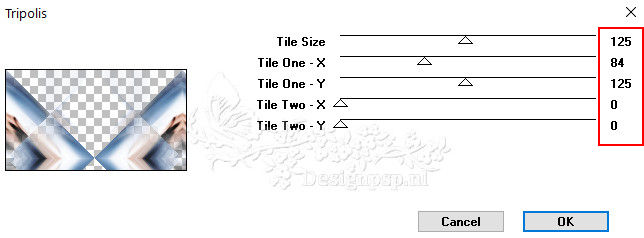
Effects – Edge Effects – Enhance
14
Layer palette – Open and Activate the top layer
Activate the Pick Tool / Mode to Scale
Slide the layer down as shown in the example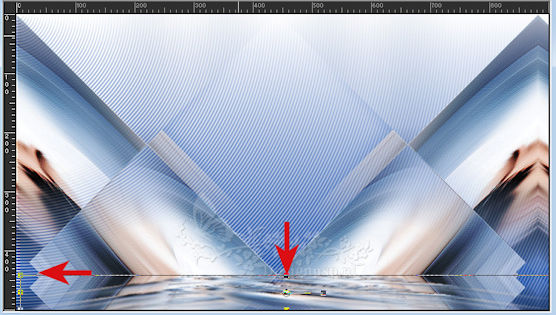
Type M to close the tool
View – Rulers (to close the rulers)
15
Layers – New raster layer
Fill with the color #305fb1
Effects – Plugin: VM Natural – Weave Distortion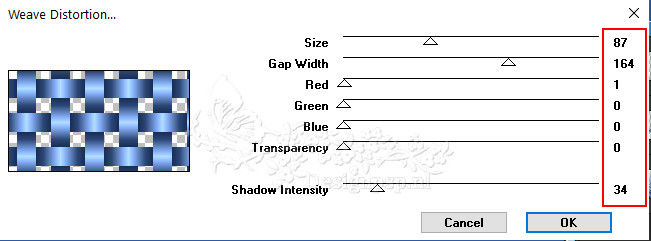
16
Layers – New Mask Layer – From Image: 20-20
Layers – Merge – Merge group
17
Effects – Geometric Effects – Perspective Horizontal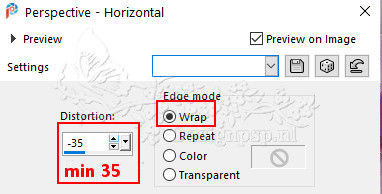
Layers – Arrange – 2x Down
Layers – Properties – Blend Mode Burn / Opacity 55
18
Layer palette – Activate the top layer
Open the tube Klok_KeetjeDesign – Copy – Paste as new layer
Place to the right
Layers – Properties – Blend Mode Soft Light
Adjust – Sharpness – Sharpen
Layers – Duplicate
19
Layer palette – Activate the fourth layer from the bottom
Layers – New raster layer
Fill with the color #ffffff
Layers – New Mask Layer – From Image: Narah_mask_Abstract044
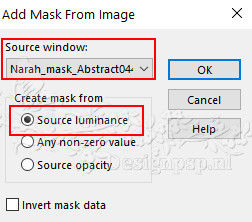
Layers – Merge – Merge Group
20
Effects – Texture Effects – Weave
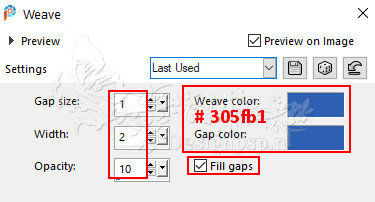
Layers – Properties – Opacity 65
21
Image – Add Borders – Symmetrical
1 pixel color #305fb1
3 pixels color #ffffff
1 pixel color #305fb1
Selections – Select all
Edit – Copy
22
Image – Add Borders – Symmetrical
60 pixels color #ffffff
Selections – Invert
Edit – Paste into selection
23
Adjust – Blur – Gaussian Blur / Range 50
Selections – Invert
Effects – 3D Effects – Drop Shadow / 0 / 0 / 60 / 30 / Color # 000000
Selections – Select none
24
Selections – Select all
Selection – Modify – Contract 30 pixels
Layers – New raster layer
Effects – 3D Effects – Cutout
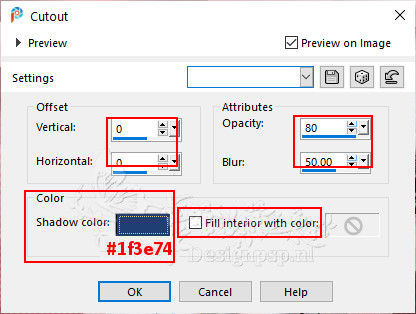
Selections – Select none
25
Open the tube 2023_Rand – Copy – Paste as new layer
Do not move
26
Open the tube 2023 – Copy – Paste as new layer
Place on the bottom right
Effects – 3D Effects – Drop Shadow / 3 / 6 / 60 / 5 / color # 000000
27
Open the tube vvs-woman2446 – Copy – Paste as new layer
Image – Resize – Resize with 85% – Uncheck all layers
Place to the left
Effects – 3D Effects – Drop Shadow / Your choice
28
Place your Name/Watermark
Image – Add Borders – Symmetrical
1 pixel color of the border my color is #708dc0
Image – Resize – Resize to 1000 pixels width
Save as Jpeg
Marianne thank you
© DesignPSP KeetjeDesign 19-12-202