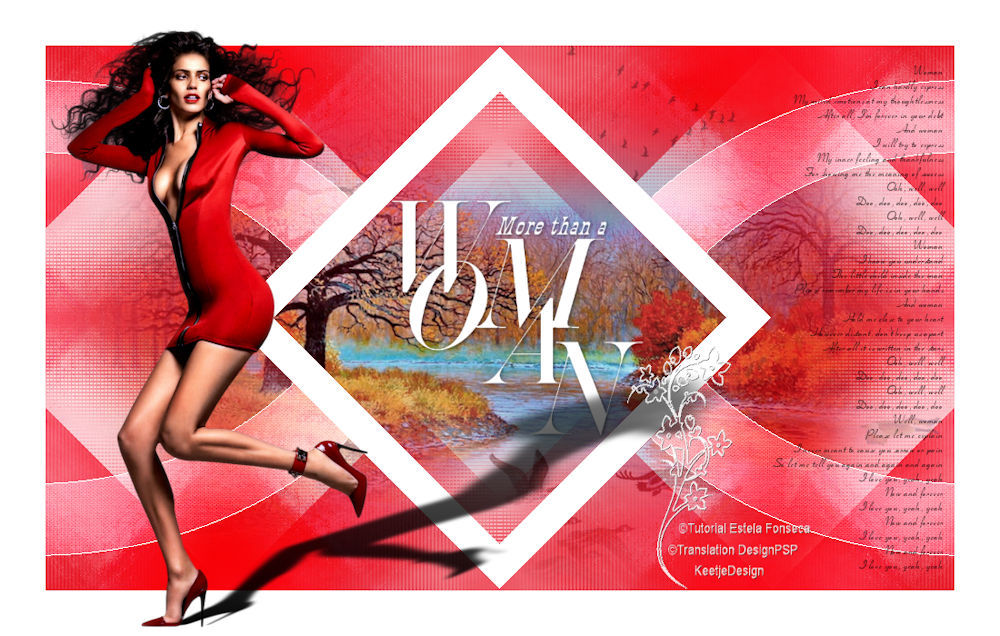
Woman
Original tutorial Here
This tutorial is written by Estela Fonseca the © is from her.
You’re not allowed to copy, link and / or place these or parts of it without her permission.
The © ️ of the materials wich are used is for the rightful owner.
If you want to use this tutorial on your own forum, club or group, you have to request permission from the writer herself.
We have permission to translate Estela Fonseca’s tutorials into English.
Thank you Estela for the permission to translate your tutorials.
Temos permissão para traduzir os tutoriais da Estela Fonseca para o inglês.
Obrigado Estela pela tradução dos tutoriais.
Place the selection into your PSP folder Selections
Open these materials in PSP / Duplicate with Shift + D / Close the originals

Plugins Used
Len K Landksiteofwonders – L en K’s Katharina
Simple – Pizza Slice Mirror
Simple – Blintz
Simple – Top Left Mirror
Simple – 4WayAverage
MuRa’s Meister – Cloud
VanDerLee / UnPlugged-X
Unlimited 2 – Paper Textures – Canvas Fine
Alien Skin Eye Candy 5- Impact – Perspective Shadow
The translation was made with PSP 2018 , but can also be done with other versions.
Note : When working with your own colors , play with the Blend Mode and/or Opacity at your own discretion
1
Material palette – Foreground color # d5010f / Background color # ffffff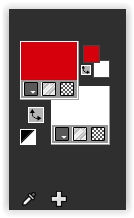
Make the gradient Radial in the Foreground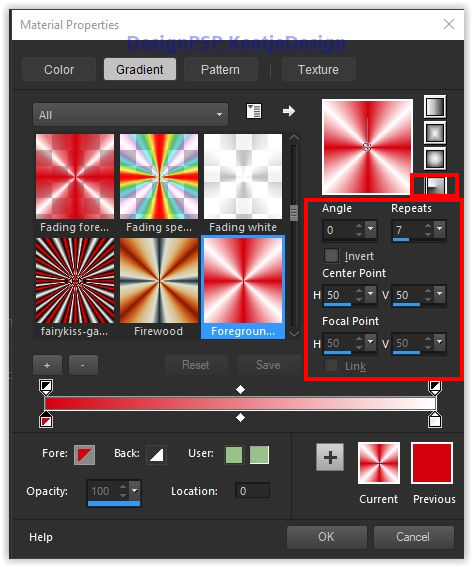
Open Alpha-Woman – Duplicate with Shift + D – Close the original we are working on the copy.
Fill in the gradient
2
Effects – Image Effects – Seamless Tiling / Default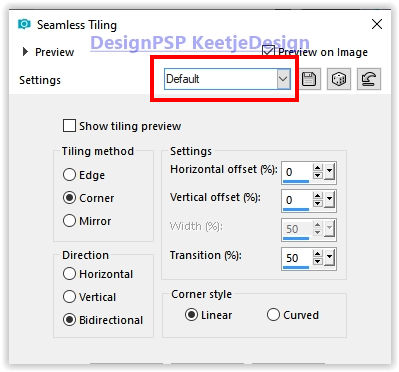
Adjust – Blur – Gaussian Blur / Radius 30
Effects – Plugin Len K Landksiteofwonders – L and K’s Katharina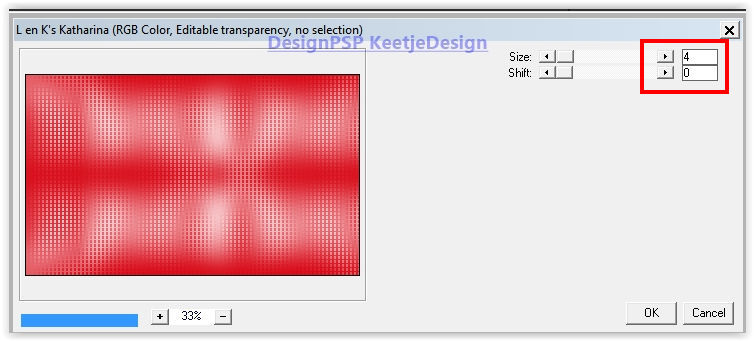
3
Effects – Plugin Unlimited 2.0 – Simple – Pizza Slice Mirror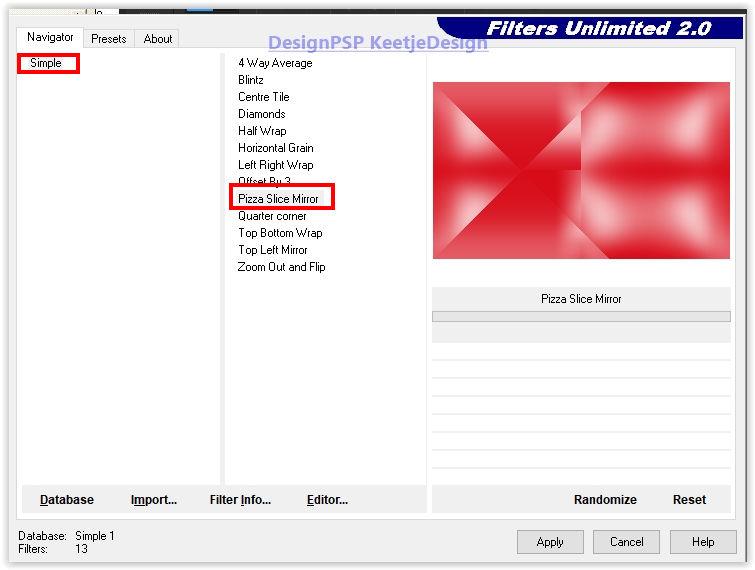
Effects – Reflection Effects – Rotating Mirror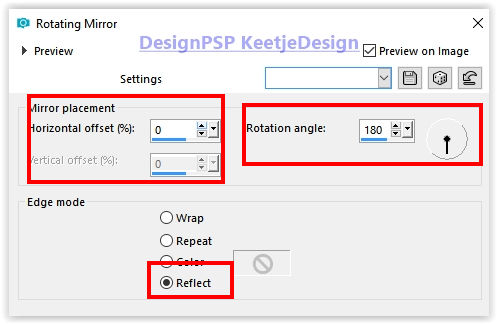
4
Effects – Plugin Unlimited 2.0 – Simple – Blintz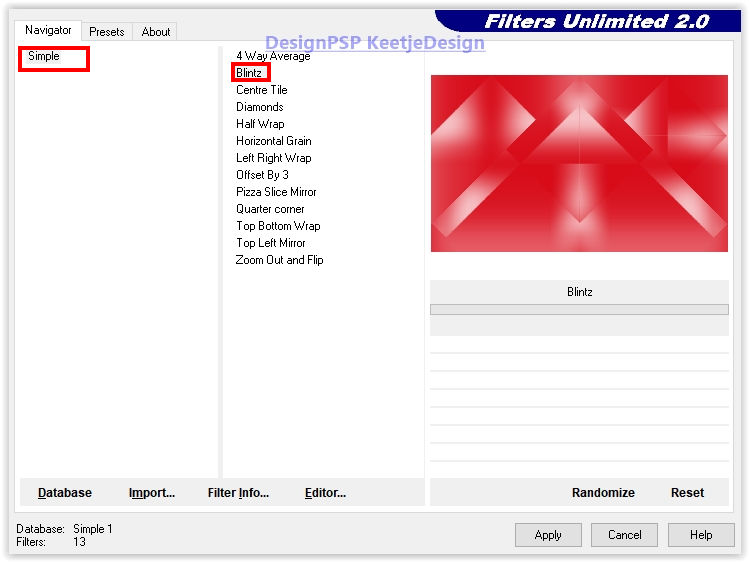
Effects – Reflection Effects – Rotating Mirror / Same setting
Effects – Plugin Unlimited 2.0 – Simple – Top Left Mirror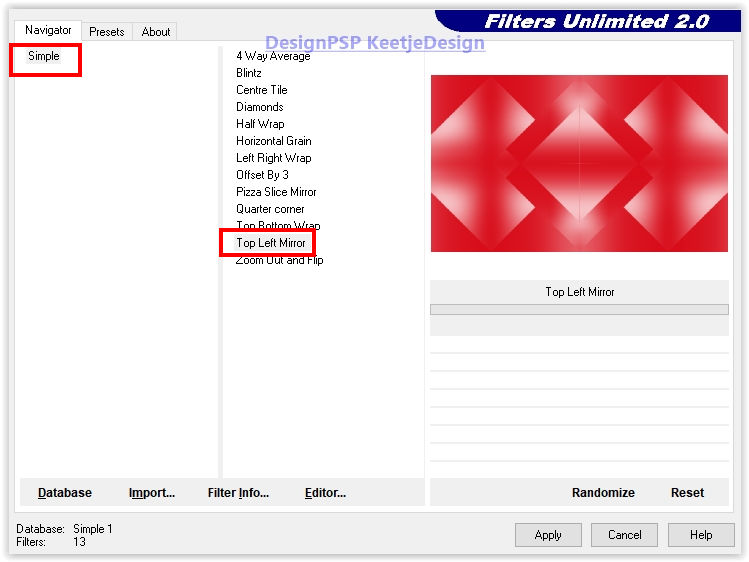
5
Material palette sets the Foreground to color again
Layers – New raster layer
Effects – Plugin MuRa’s Meister – Cloud
To change the result, click on the preview window, until you get the preferred result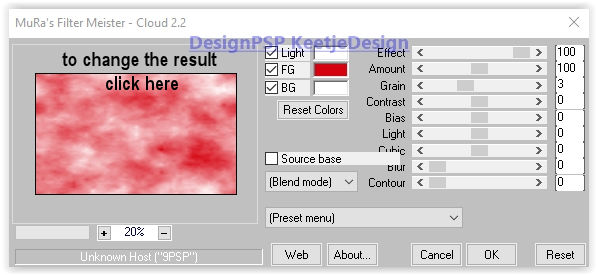
Layers – Properties – Blend Mode Soft Light
6
Layers – New raster layer
Effects – Plugin VanDerLee / UnPlugged-X / 45 ° Rectangle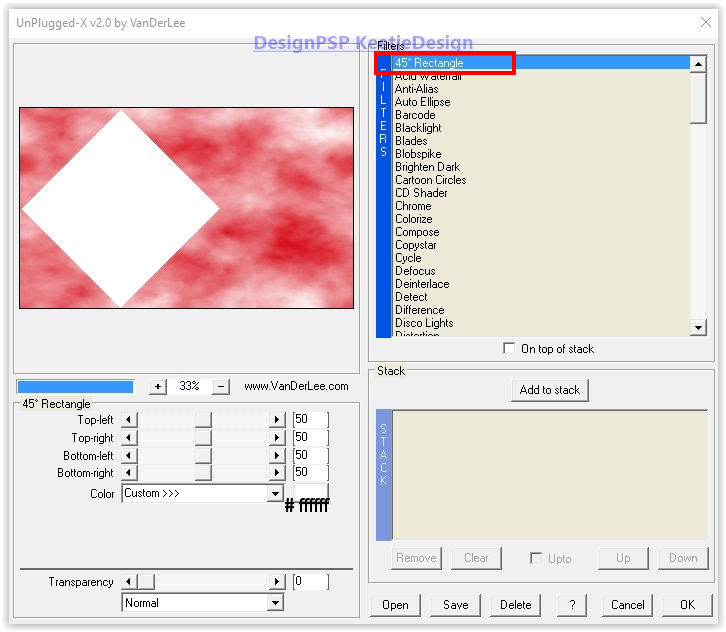
Objects – Align – Center on canvas
7
The work now looks like this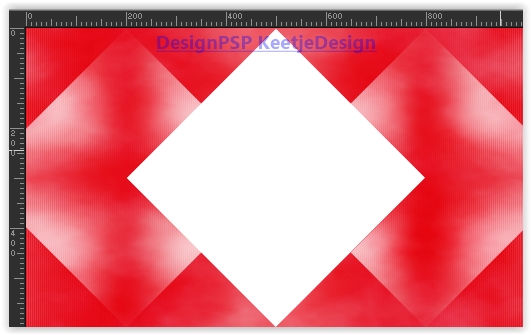
8
Selections – Load / Save – Load Selection from Alpha Channel Selection # 1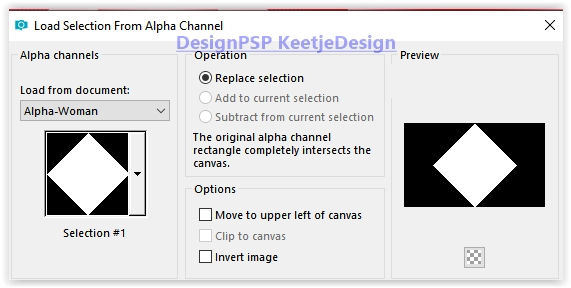
Selections – Modify – Contract 35 pixels
Press Delete on the keyboard
Selections – Select none
Layers – Properties – Opacity 65
9
Layer palette – Activate the bottom layer (Raster 1)
Selections – Load / Save – Load Selection from Alpha Channel Selection # 2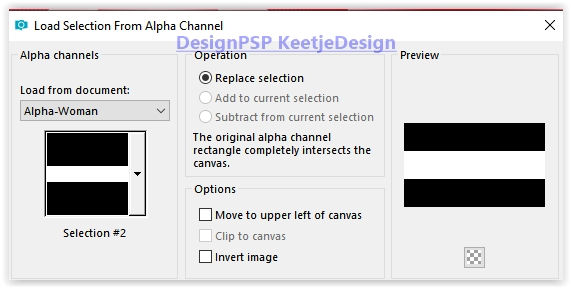
Selections – Promote selection to layer
Selections – Select none
10
Adjust – Blur – Gaussian Blur / Radius 30
Effects – Texture Effects – Mosaic Antique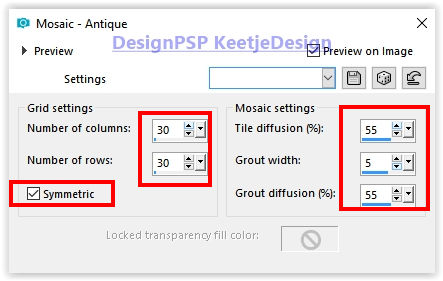
Effects – Geometric Effects – Skew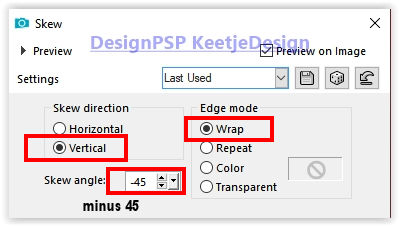
11
Effects – Reflection Effects – Rotating Mirror / Same setting
Effects – Plugin Unlimited 2.0 – Simple – 4WayAverage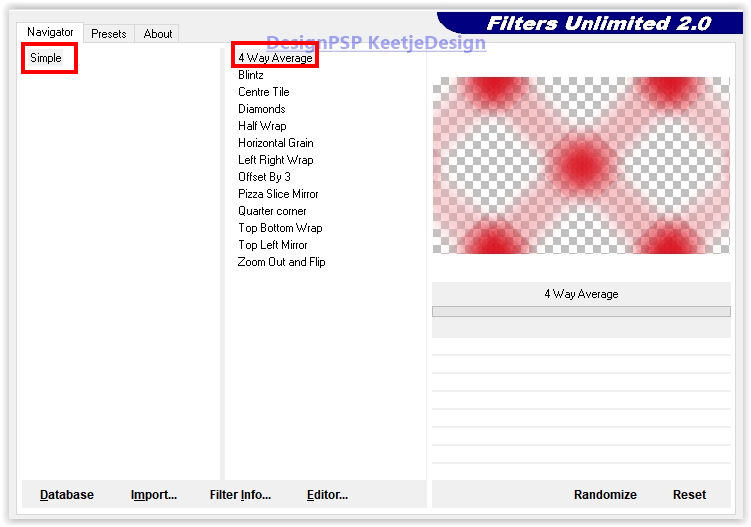
Layers – Properties – Blend mode Hard Light dark colors ( Multiply light colors)
Hard light was used for the tutorial
12
Layer palette – Activate the top layer (Raster 3)
Edit – Copy special – Copy merged
Edit – Paste as a new layer
Adjust – Blur – Gaussian Blur / Radius 50
13
Selections – Load / Save – Load Selection from Alpha Channel Selection # 3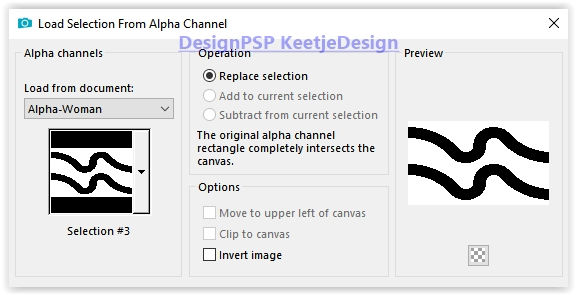
Press Delete on the keyboard
Selections – Invert
Effects – Plugin Unlimited 2 – Paper Textures – Canvas Fine / Default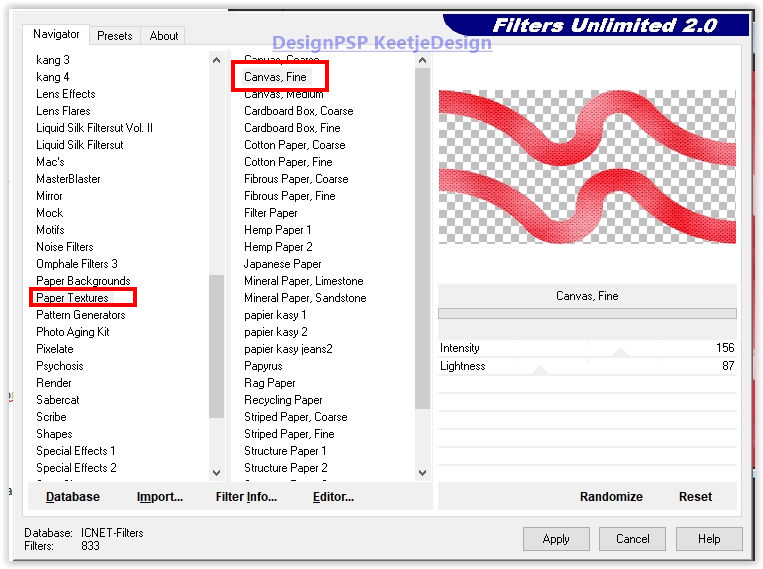
Selections – Hold
14
Selections – Modify – Select selection borders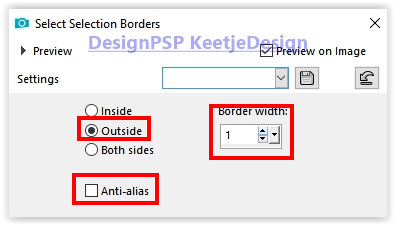
Fill in the color # ffffff
Selections – Select none
Effects – Plugin Unlimited 2.0 – Simple – Top Left Mirror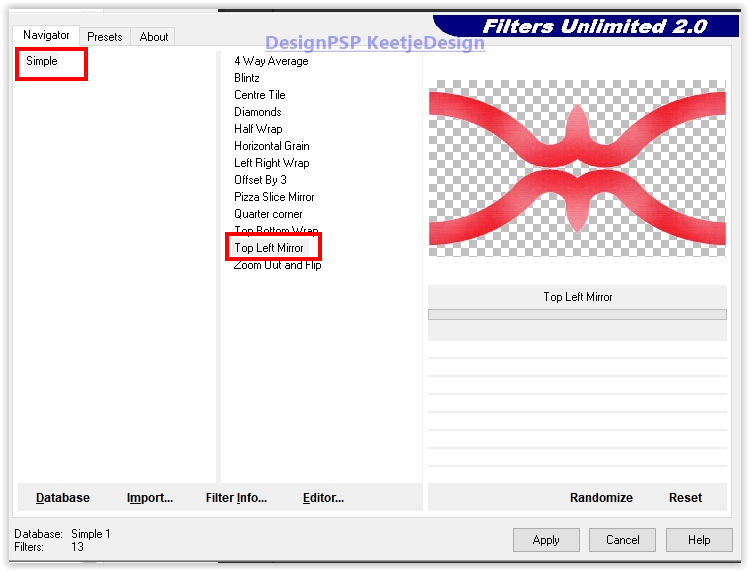
15
Selections – Load / Save – Load Selection from Alpha Channel Reload Selection # 1
Press Delete on the keyboard
Selections – Select none
Layers – Properties – Blend mode Screen for dark colors (Hard light for light colors)
Screen was used for the tutorial
When using your own colors, adjust the blend mode to your own color
16
Open the tube CAL-2103-100617 – Copy – Paste as new layer
Layers – Arrange – Down 2x
Layers – Properties – Opacity 56
17
Selections – Load / Save – Load Selection from Alpha Channel Reload Selection # 1
Edit – Cut (To keep the cut in memory)
Selections – Modify – Contract 35 pixels
Layers – New raster layer
Edit – Paste into selection
Selections – Select none
18
Open the tube Riet Tekst_woman_620 _250720 – Copy – Paste as new layer
Activate Selection tool (K) / Scale mode / Position X 381 / Position Y 171
Type M to close the tool
Image – Negative image
Effects – 3D Effects – Drop Shadow / 1/1/55/5 / # 000000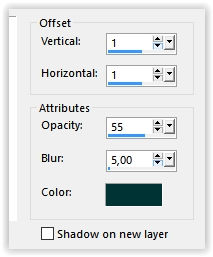
Layer palette – Activate raster 3
Layers – Properties – Opacity 100
19
The Layers Palette – Now looks like this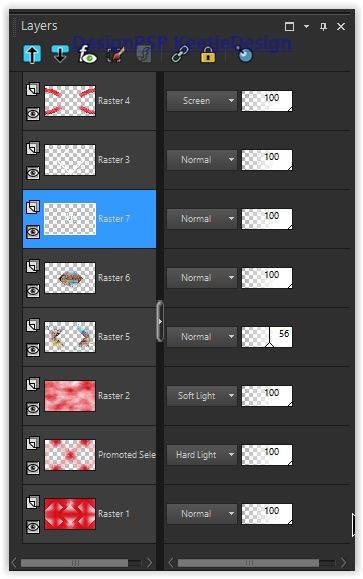
We will now have this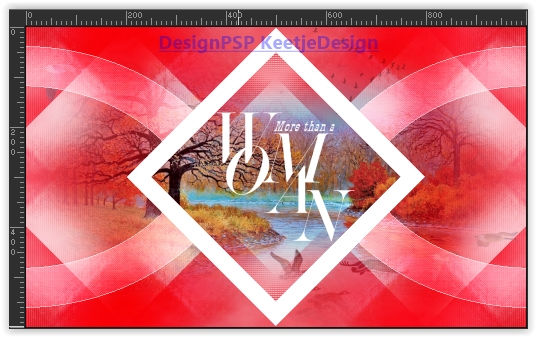
20
Layer palette – Activate the top layer
Open the tube Texto – Copy – Paste as new layer
Place to the right
Layers – Properties – Opacity 61
21
Image – Add Borders – Symmetric
50 pixels color # ffffff
22
Open the tube Gabry-woman 927 – Copy – Paste as new layer
Image – Resize – Change with 60% – Uncheck all layers
Adjust – Sharpness – Sharpen High Pass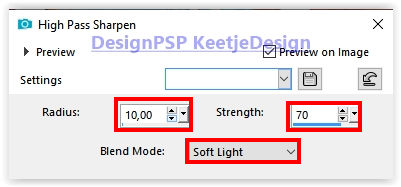
Place the tube to the left – See example crea
23
Effects – Plugin Alien Skin Eye Candy 5- Impact – Perspective Shadow / Settings Long Perspective Shadow, in Back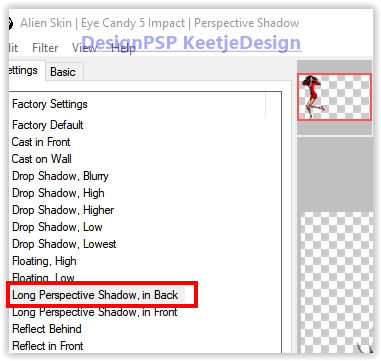
When using your own tube You can chance in basic Overall Opacity
24
Sign your work
Layers – Merge – Merge all layers
Image – Resize – Resize the width to 1000 pixels
Save as Jpeg
We have finished the tutorial from Estela
This translation has been tested by Marianne.
Marianne thank you very much
© Translation Woman DesignPSP KeetjeDesign


