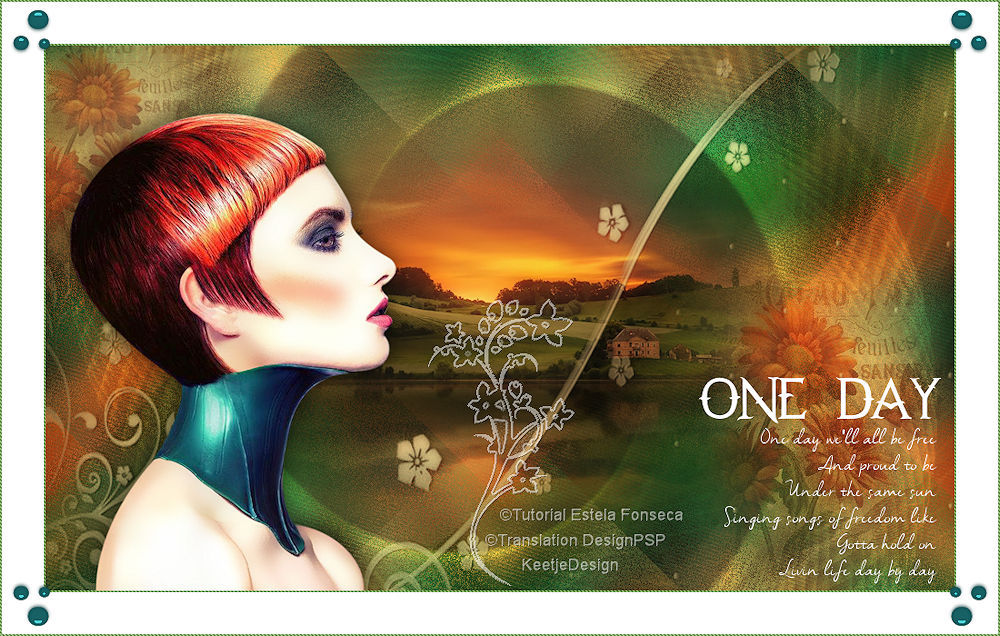
One Day
Original tutorial Here
This tutorial is written by Estela Fonseca the © is from her.
You’re not allowed to copy, link and / or place these or parts of it without her permission.
The © ️ of the materials wich are used is for the rightful owner.
If you want to use this tutorial on your own forum, club or group, you have to request permission from the writer herself.
We have permission to translate Estela Fonseca’s tutorials into English.
Thank you Estela for the permission to translate your tutorials.
Temos permissão para traduzir os tutoriais da Estela Fonseca para o inglês.
Obrigado Estela pela tradução dos tutorias.
Materials Used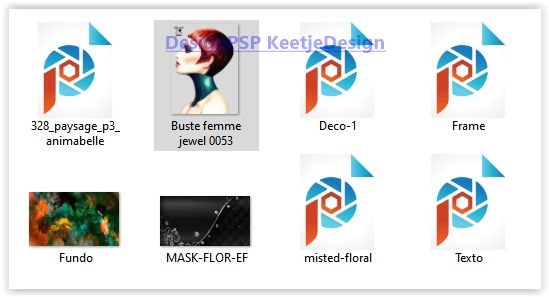
Open these materials in PSP / Duplicate with Shift+D / Close the originals / Minimize Mask

Plugins Used
Unlimited 2.0 – &<Bkg Designer IV> – sf10 Slice N Dice
Unlimited 2.0 – Filter Factory Gallery G – Double Image
Unlimited 2.0 – VM Natural – Speed
Xero – Porcelain
Graphics Plus – Quick tile I
Nik Software – Color Efex Pro – Glamour Glow
The translation was made with PSP 2018 , but can also be done with other versions.
Note : When working with your own colors , play with the Blend Mode and/or Opacity at your own discretion
1
Open a new transparent image of 1000 x 600 pixels
Selections – Select all
Open the image Fundo – Copy – Paste into selection
Selections – Select none
You can now adjust the color with the Adjust Variations plugin
2
Adjust – Blur – Gaussian Blur / Radius 50
Effects – Plugin Unlimited 2.0 – & <Bkg Designer IV> – sf10 Slice N Dice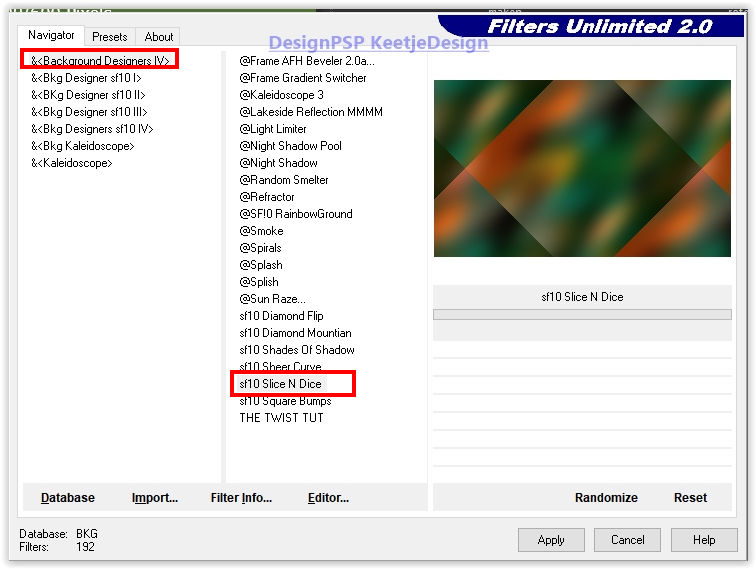
3
Effects – Reflection Effects – Rotating Mirror / Default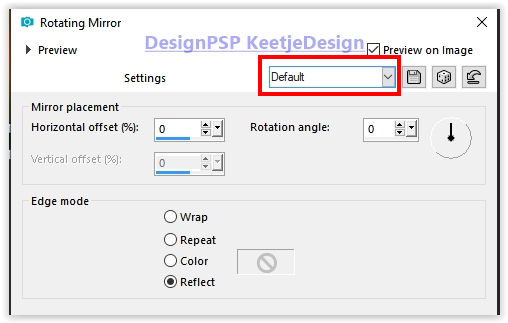
Effects – Plugin Graphics Plus – Quick tile I.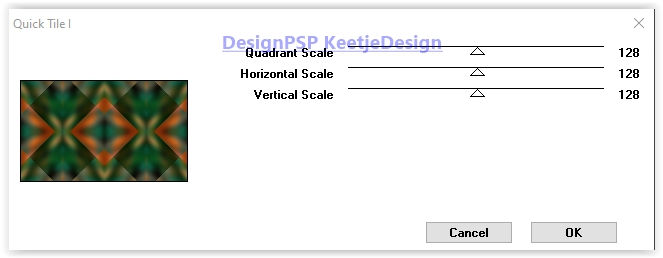
4
Effects – Plugin Unlimited 2.0 – Filter Factory Gallery G – Double Image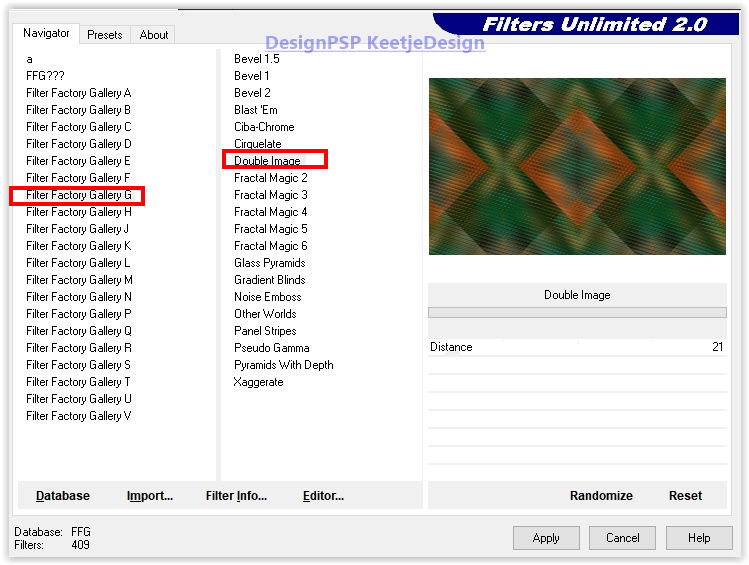
Effects – Plugin Unlimited 2.0 – VM Natural – Speed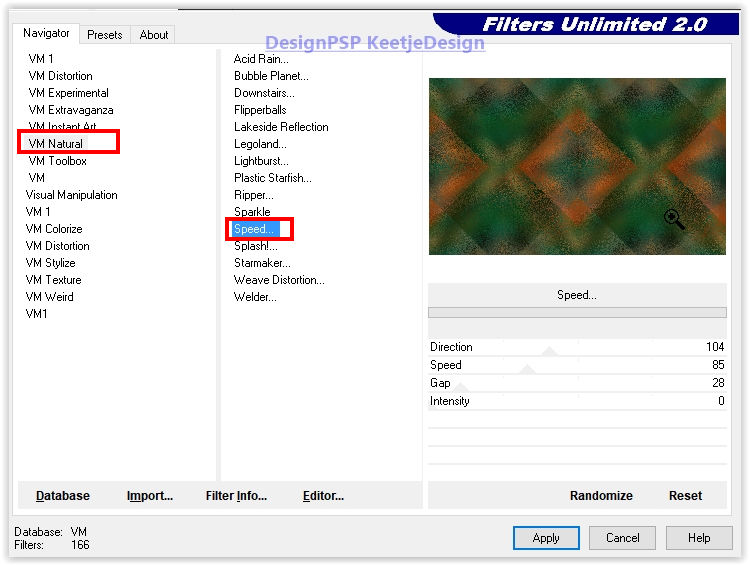
5
Open the tube Deco-1 – Copy – Paste as new layer
Layers – Properties – Blend Mode Overlay (adjust to your own colors)
6
Open the tube 328_paysage_p3_animabelle – Remove the watermark – Copy – Paste as new layer
7
Open the tube misted-floral – Copy – Paste as new layer
Place in the lower right corner
Layers – Properties – Opacity 55
Layers – Duplicate
Image – Resize – Change with 80% – Uncheck all layers
Place in the top left corner
8
Layers – New raster layer
Fill with the color # ffffff
Layers – New mask layer – From image MASK-FLOR-EF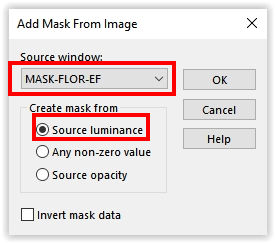
Layers – Merge – Merge group
Effects – Plugin Xero – Porcelain / Default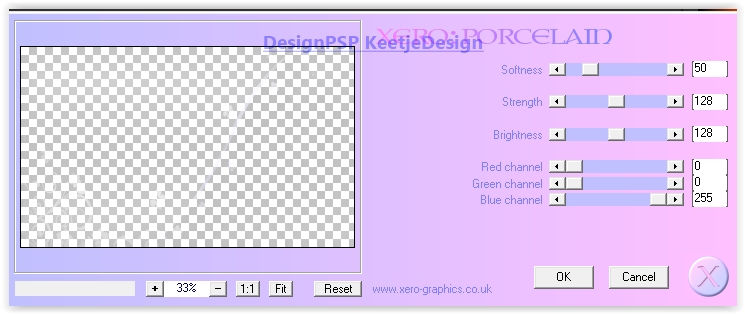
Effects – 3D Effects – Drop Shadow / 1/1/50/1 / # 000000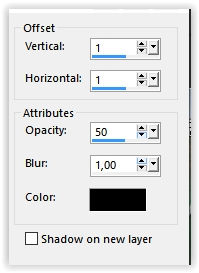
9
The layers palette now looks like this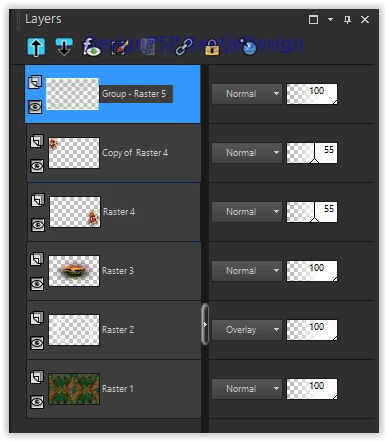
Your work now looks like this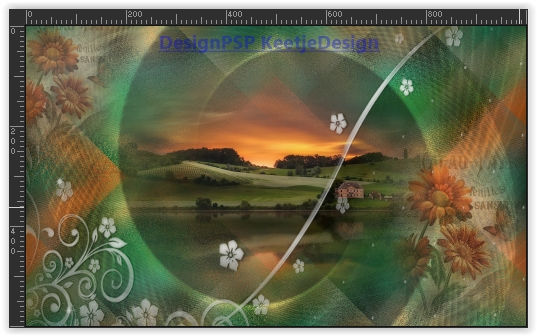
10
Layers – Merge – Merge visible layers
Effects – Plugin Nik Software – Color Efex Pro – Glamor Glow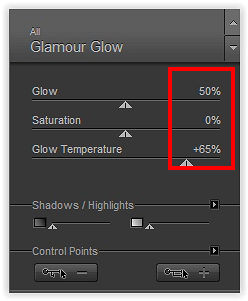
11
Open the tube Buste femme jewel 0053 – Remove the watermark – Copy – Paste as new layer
Image – Resize – Change with 80% – Uncheck all layers
Image – Mirror (horizontal)
Place to the left – See example crea
Effects – 3D Effects – Drop shadow of your choice
12
Image – Add Borders – Symmetric
50 pixels color # ffffff Or another light color
13
Open the tubeTexto – Copy – Paste as new layer
Place right below – See example crea
14
Open the tube Frame – Copy – Paste as new layer
Looks good right away
15
Place your Name / Watermark
Layers – Merge – Merge all layers
Image – Resize – Change the width to 1000 pixels
Save as Jpeg
We have finished the tutorial from Estela
The translation has been tested by Marianne.
Marianne thank you very much
© Translation One Day DesignPSP KeetjeDesign
This translation is registered with LSBene


