New York
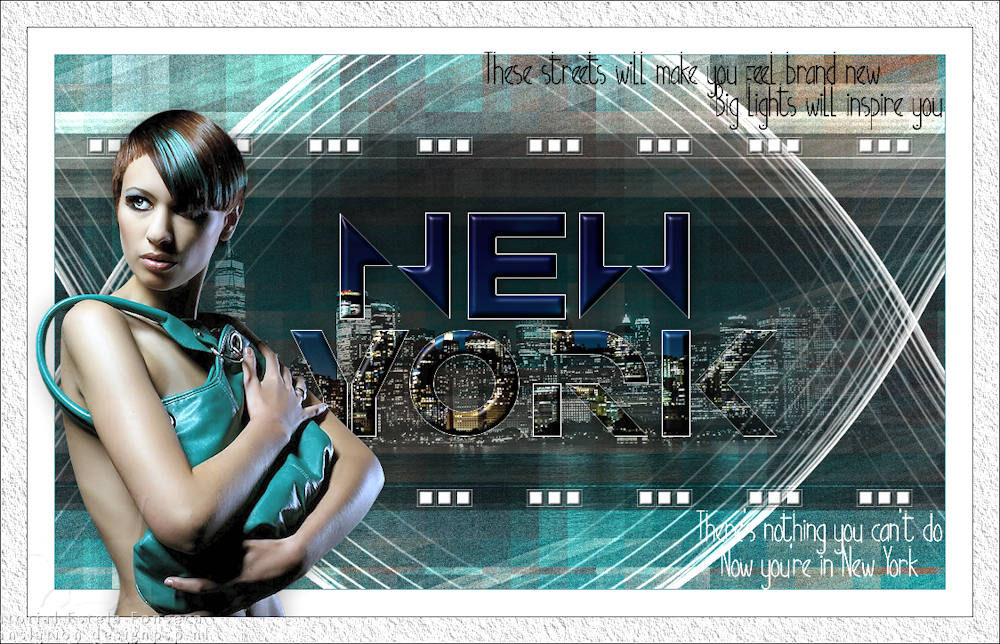
Originele tutorial Here
This tutorial is written by Estela Fonseca the © is from her.
It is not allowed to copy, link and / or place these or parts of it without her permission.
The © ️ of the materials wich are used is for the rightful owner.
If you want to use this tutorial on your own forum, club or group, you have to request permission from the writer herself.
We have permission to translate Estela Fonseca’s tutorials into Dutch and English.
Thank you Estela for the permission to translate your tutorials.
Temos permissão para traduzir os tutoriais de Estela Fonseca para holandês e inglês.
Obrigado Estela pela permissão para traduzir seus tutoriais.
Materials Used:
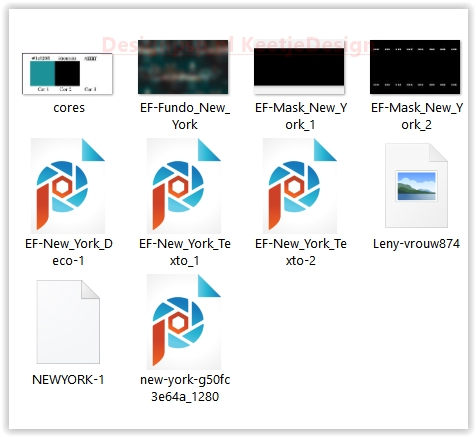
Plugins Used:
Deformation – Scrambler
Deformation – Send me an angle
Mura’s Seamless – Emboss at Alpha
AAA Frames – Texture Frame
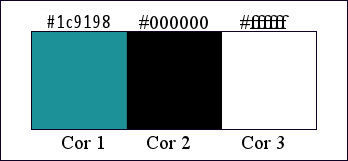
Colors Used:
The translation was made with PSP 2020 , but can also be done with other versions.
Note : When working with your own colors , play with the Blend Mode and/or Opacity at your own discretion
1
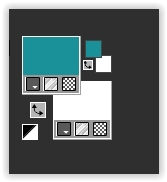
Materials Palette – Foreground Color #1c9198 / Background Color #ffffff
2
Open the image EF-Fundo_New_York – Window – Duplicate (or use Shift+D )
Close the original / We work on the copy
Layers – Promote background layer
When using your own colors or tubes you can color it to your own color
3
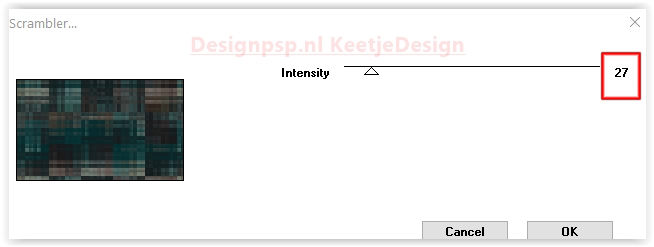
Effects – Plugin Unlimited 2.0 – Deformation – Scrambler / Default
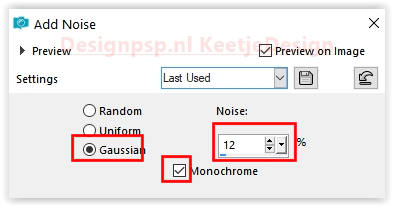
Adjust – Add/Remove Noise – Add Noise
4
Layers – Duplicate
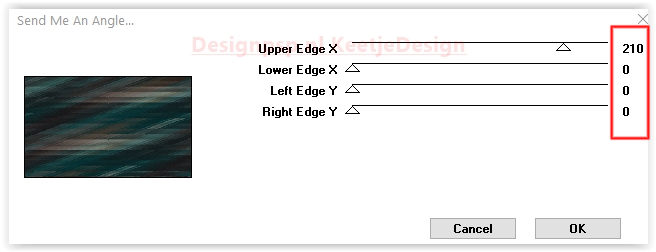
Effects – Plugin Unlimited 2.0 – Deformation – Send Me an Angle / Default
5
Layers – Properties – Blend Mode Bleach / Opacity 67
Effects – Edge Effects – Enhance
Layers – merge – merge down
6
Layers – New Raster Layer
Selections – Load/Save Selection – Load Selection from Disk: NEWYORK-1
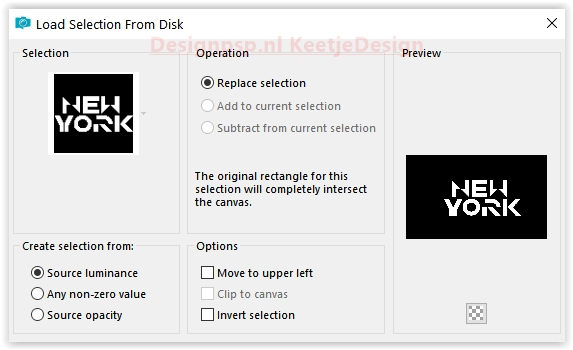
Fill with the color #ffffff
Selections – Modify – Contract 1 pixel
7
Open the tube new-york-g50fc3e64a_1280 – Copy – Paste as new layer
Do not move
8
Selections – Invert
Press Delete on the keyboard
Selections – Invert
9
Layers – merge – merge down
Effects – 3D Effects – Inner Bevel
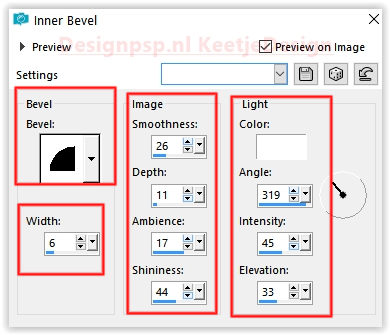
10
Selections – Select none
Effects – 3D Effects – Drop Shadow 0 / 0 / 50 / 30 / Color #000000
11
Edit – Paste as new layer (the tube is in the memory)
Layers – Properties – Blend Mode Luminance / Opacity 67
Layers – Arrange – Down
Adjust – Sharpness – Sharpen
12
Layer palette – Activate the top layer
Open the tube EF-New_York_Deco-1 – Copy – Paste as new layer
13
Layers – New Raster Layer
Fill with the color #ffffff
Layers – New Mask Layer – From Image: EF-Mask_New_York_1
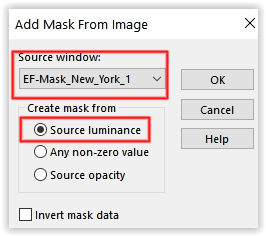
Layers – Merge – Merge Group
Layers – Properties – Blend Mode Overlay
14
Layers – New Raster Layer
Fill with the color #ffffff
Layers – New Mask Layer – From Image: EF-Mask_New_York_2

Layers – Merge – Merge Group
15
Effects – Plugin Mura’s Seamless – Emboss at Alpha / Default
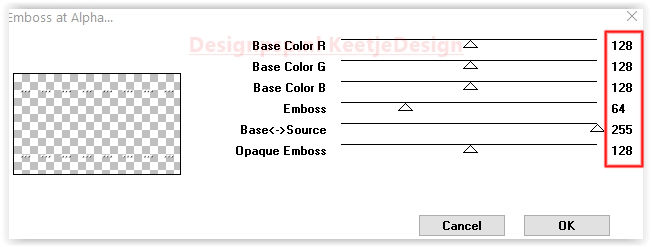
Effects – 3D Effects – Drop Shadow / 1 / 1 / 50 / 1 / Color # 000000
16
Image – Add Borders – Symmetric
1 pixel color #1c9198
30 pixels color # ffffff
17
Open the Leny-woman874 uw874 tube – Copy – Paste as new layer
Image – Resize – Resize by 75% – all layers unchecked
Place the tube on the left or of your own choice
Effects – 3D Effects – Drop Shadow / 0 / 0 / 35 / 35 / Color # 000000
18
Image – Add Borders – Symmetric
1 pixel color #1c9198
30 pixels color # ffffff
Effects – Plugin AAA Frames – Texture Frame
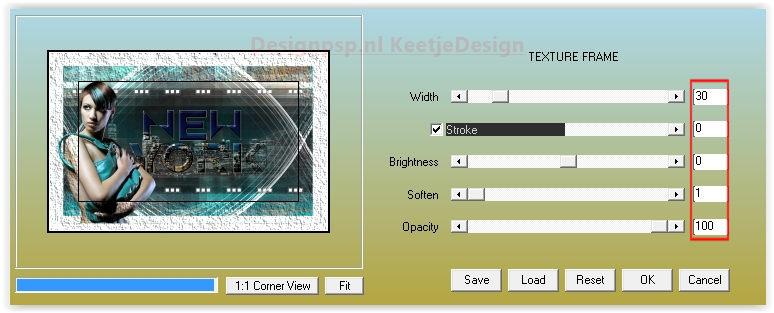
19
Open the tube EF-New_York_Texto_1 – Copy – Paste as new layer
Place in the top right corner
Layers – Duplicate
Layers – Properties – Blend Mode Darker
20
Open EF-New_York_Texto_2 – Copy – Paste as new layer
Place in the lower right corner
21
Image – Negative
Layers – Duplicate
Layers – Properties – Blend Mode Dodge
22
Sign your work
Layers – Merge – Merge all layers
Image – Resize – Change to 1000 pixels width
Save as Jpeg
We are done with Estela’s tutorial
The translation has been tested by Marianne.
Marianne thank you very much
© Translation DesignPSP KeetjeDesign 2022


