

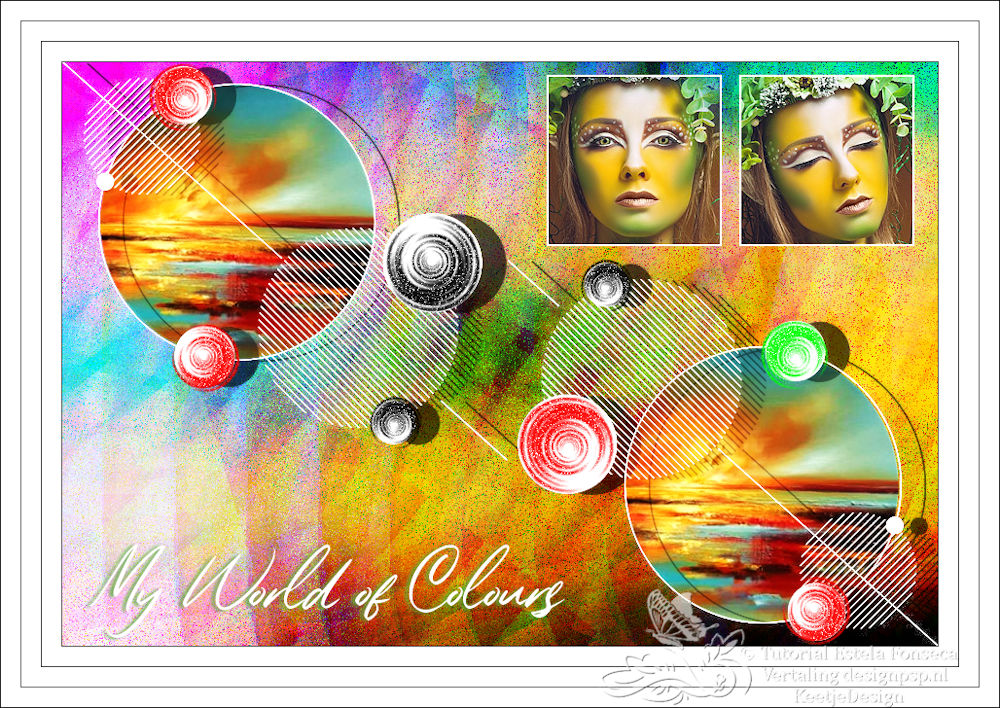
My World of Colors

Original tutorial Here
This tutorial was written by Estela Fonseca the © is from her.
It is not permitted to copy, link and/or place this or parts thereof elsewhere without her permission.
If you want to use the tutorials on your own Club or Group, you must ask permission from the author.
The translation is written with PSP 2020 but it can also be made with other versions.
If this tutorial resembles any other, it’s just a coincidence.
We have permission from Estela Fonseca to translate her tutorials into Dutch and English.
Estela Fonseca Thank you for letting us translate your tutorials.
Used for the tutorial
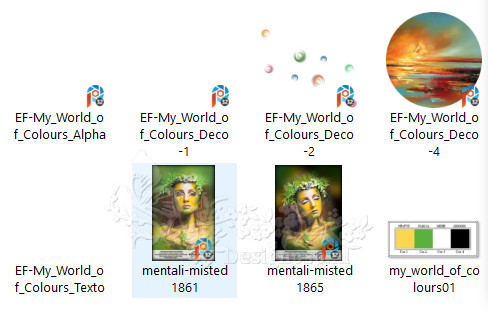
Open the tubes in PSP/Duplicate with Shift+D/Close the originals
Plugins:
Andrews Filter 25 – Mu Forever Or Colors Utd
Andrews Filter 2 – Tempest
Used colors:
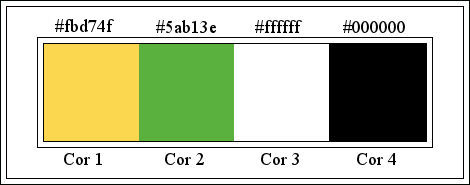
The tutorial is written with these colors and the supplied materials.
If you’re using your own materials, colors, or another version of PSP
you may need to play around with the Blend Mode and/or Layer Opacity.
1
Open EF-My_World_of_Colours_Alpha – Window – Duplicate (or use Shift+D) , Close the original we work on the copy
This is not an empty layer there are selections in the alpha channel
Fill with color 1 (fbd74f)
2
Selections – Select all
Open the tube mentali-misted1861 – Copy – Paste into selection
Selections – Select none
3
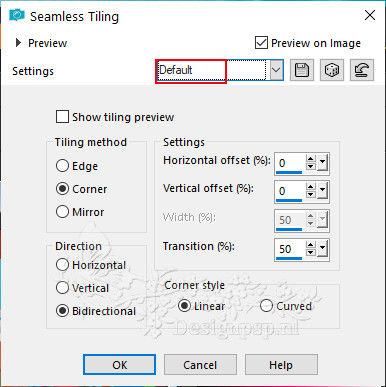
Effects – Image Effects – Seamless Tiling / Default
Adjust – Blur – Gaussian Blur / Range 45
4
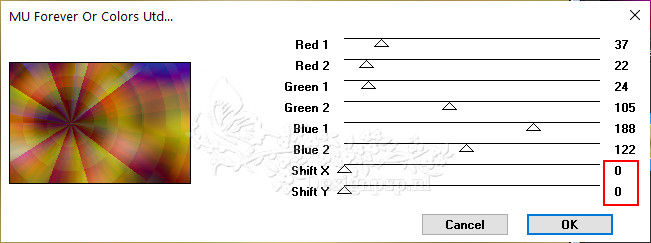
Effects – Plugin: Andrews Filter 25 – Mu Forever Or Colors Utd
Layers – Duplicate
5
Image – Flip (horizontal)
Image – Flip (Flip vertical)
Layers – Properties – Blend Mode Hard Light
Layers – Merge – Merge Down
6
Layers – Duplicate
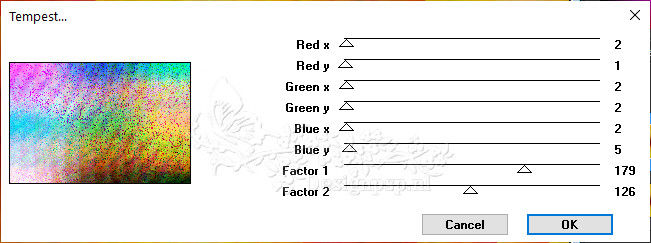
Effects – Plugin: Andrews Filter 2 – Tempest / Default
Layers – Properties – Blend Mode Hard Light
Layers – Merge – Merge Down
7
Open the tube EF-My_World_of_Colours_Deco-1 – Copy – Paste as new layer
Effects – 3D effects – Drop shadow / 1 / 25 / 30 / 1 / color 4
8
Open the tube EF-My_World_of_Colours_Deco-2 – Copy – Paste as new layer
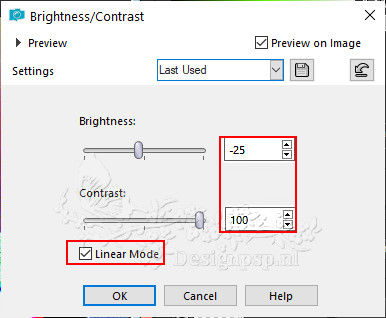
Adjust – Brightness and Contrast – Brightness/Contrast (Adjust the setting to your own colors)
Adjust – Noise – Add/Remove – Add Noise

Layers – Properties – Blend Mode Hard Light
9
Layer palette – Activate the layer Raster 1
Layers – New raster layer
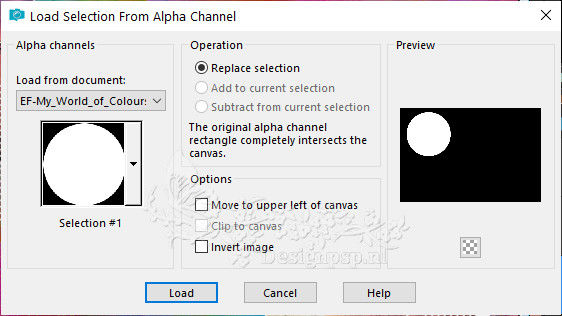
Selections – Load/Save selection – Load selection from alpha channel: Selection #1
10
Open the tube EF-My_World_of_Colours_Deco-4 – Copy – Paste into selection
Selections – Select none
11
Layers – Duplicate
Activate Selection Tool (K) / Position X 578 / Position Y 294

Type M to close the
Adjust tool – Hue and Saturation / Vibrance
12
Layer palette – Close the layers Raster 1 and Raster 3 (bottom and top layer)
Layers – Merge – Merge visible layers
Layer palette – Open the top and bottom layers
13
Layer palette – Activate the layer Merged
Layers – Duplicate
Layers – Properties – Blend mode Hard light
14
Layer palette – Activate the top layer
Layers – New raster layer
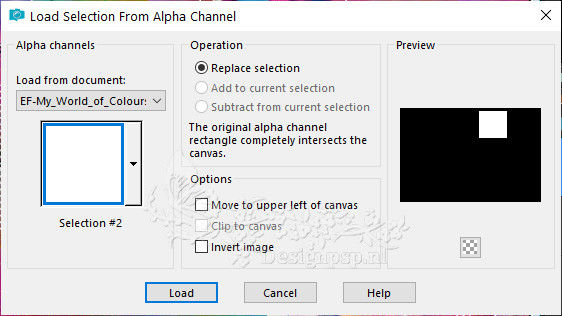
Selections – Load/Save selection – Load selection from alpha channel: Selection #2
Fill with the color # ffffff
Selections – Modify – Contract 2 pixels
Press Delete on the keyboard
Selection – Keep
15
Open the tube mentali-misted1861 – Copy – Paste as new layer
Image – Resize – Resize with 70% – Uncheck all layers
Place the tube in the selection
Selections – Invert
Press Delete on the keyboard
Selections – Select none
Adjust – Sharpness – Sharpen
Layers – Merge – Merge Down
16
Layers – New Raster Layer
Selections – Load/Save Selection – Load Selection from Alpha Channel: Selection #3

Fill with the color # ffffff
Selections – Modify – Contract 2 pixels
Press Delete on the keyboard
Selection – Keep
17
Open the tube mentali-misted1865 – Copy – Paste as new layer
Image – Resize – Resize with 70% – Uncheck all layers
Place the tube in the selection
Selections – Invert
Press Delete on the keyboard
Selections – Select none
Adjust – Sharpness – Sharpen
Layers – Merge – 2 x Merge Down
18
Open the tube EF-My_World_of_Colours_Texto – Copy – Paste as new layer
Place lower left corner
Effects – 3D effects – Drop shadow / 1 / minus 4 / 85 / 5 / color 2
Layers – Merge – Merge visible layers
19
1 pixel color # 000000
20 pixels color # ffffff
1 pixel color # 000000
20 pixels color # ffffff
1 pixel color # 000000
20 pixels color # ffffff
20
Sign your work
Image – Add borders – Symmetric 1 pixel color # 000000-
Image – Resize – Resize width to 1000 pixels
Save as Jpeg
We are done with Estela’s tutorial
This translation has been tested by Marianne. Thank you very much.
Translation DesignPSP KeetjeDesign 13-11-2022