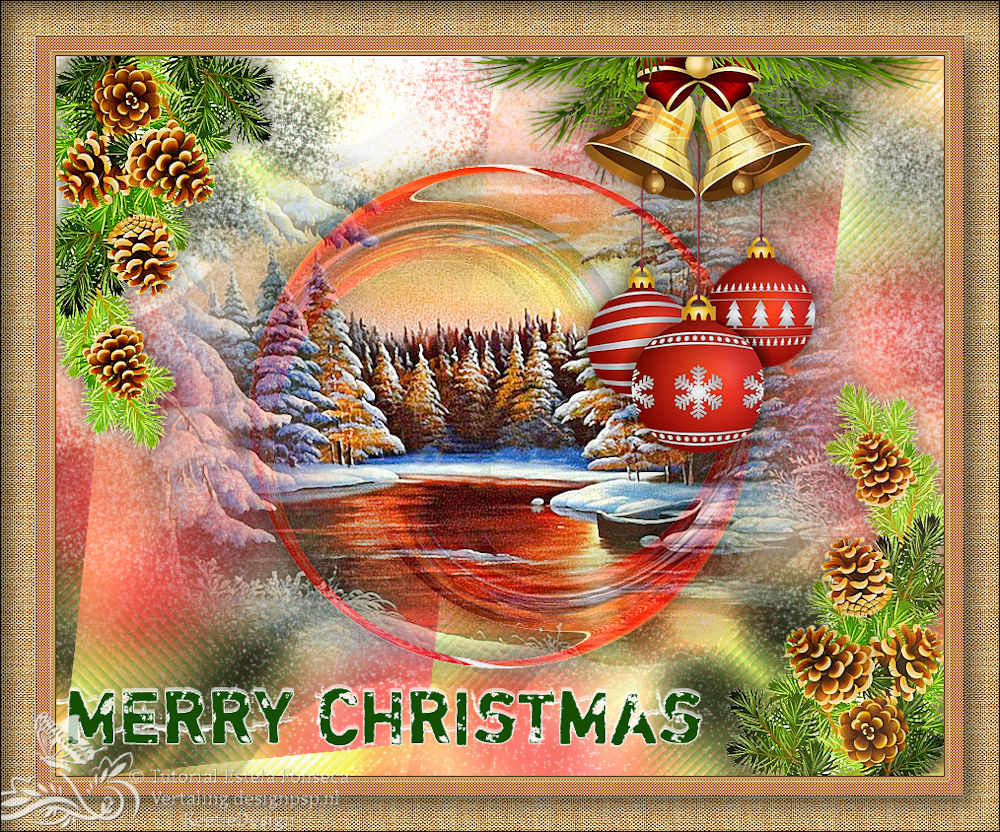
This tutorial is written by Estela Fonseca the © is from her.
It is not allowed to copy, link and / or place these or parts of it without her permission.
The © ️ of the materials wich are used is for the rightful owner.
If you want to use this tutorial on your own forum, club or group, you have to request permission from the writer herself.
We have permission to translate Estela Fonseca’s tutorials into English.
Thank you Estela for the permission to translate your tutorials.
Temos permissão para traduzir os tutoriais da Estela Fonseca para o inglês.
Obrigado Estela pela tradução dos tutriais.
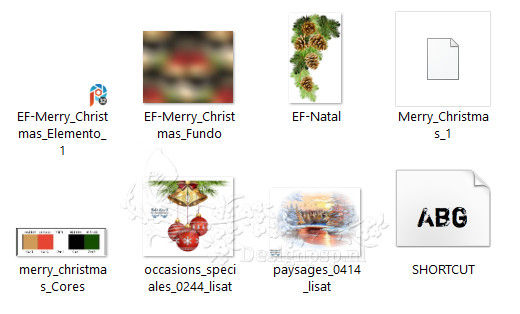
Materials Used:


Install font SHORTCUT
Place the selection Merry Christmas 1 in your PSP folder Selections
Open the other material in PSP / Duplicate with Shift+D / Close the originals
Plugins Used:
Simple – Pizza Slice Mirror
Simple – Diamonds
Alien Skin Eye Candy 5 – Nature / Small,First Flakes
Flaming Pear – Flexify 2
Unlimited 2.0 – Paper Textures – Canvas Fine
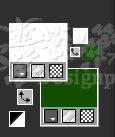
Colors Used:

The translation was made with PSP 2020 , but can also be done with other versions.
Note : When working with your own colors , play with the Blend Mode and/or Opacity at your own discretion
1
Open a new transparent image of 900 x 730 pixels
Selections – Select all
2
Open the image EF-Merry_Christmas_Fundo – Copy – Paste into selection
Selections – Select none
Layers – Duplicate
3
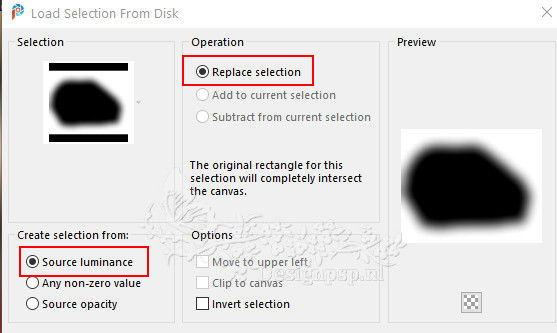
Selections – Load/save selection – Load selection from disk: Merry_Christmas_1

Click Delete on the keyboard
Selections – Select none
4
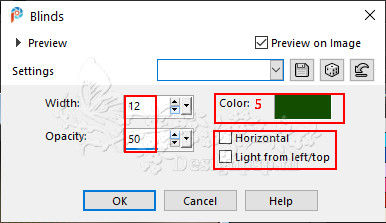
Effects – Texture Effects – Blinds / Color 5

Layers – Properties – Blend Mode Hard Light
Layers – merge – merge down
5
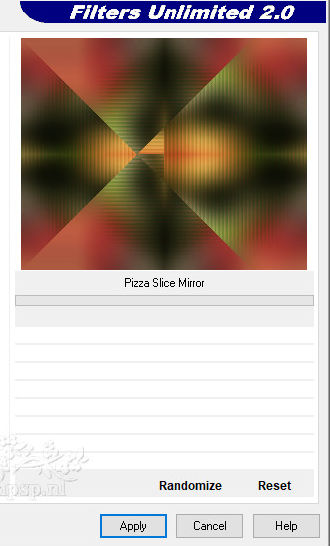
Effects – Plugin: Simple – Pizza Slice Mirror

Layers – Duplicate
Image – Flip (Horizontal)
Layers – Properties – Blend Mode Hard Light / Opacity 50
Layers – merge – merge down
6
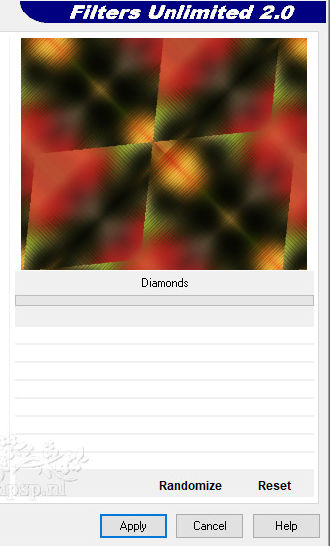
Effects – Plugin Simple – Diamonds

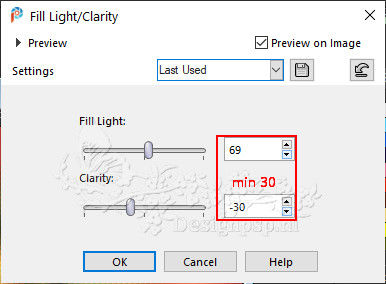
Adjust – Brightness and Contrast – Fill Light / Clarity

7
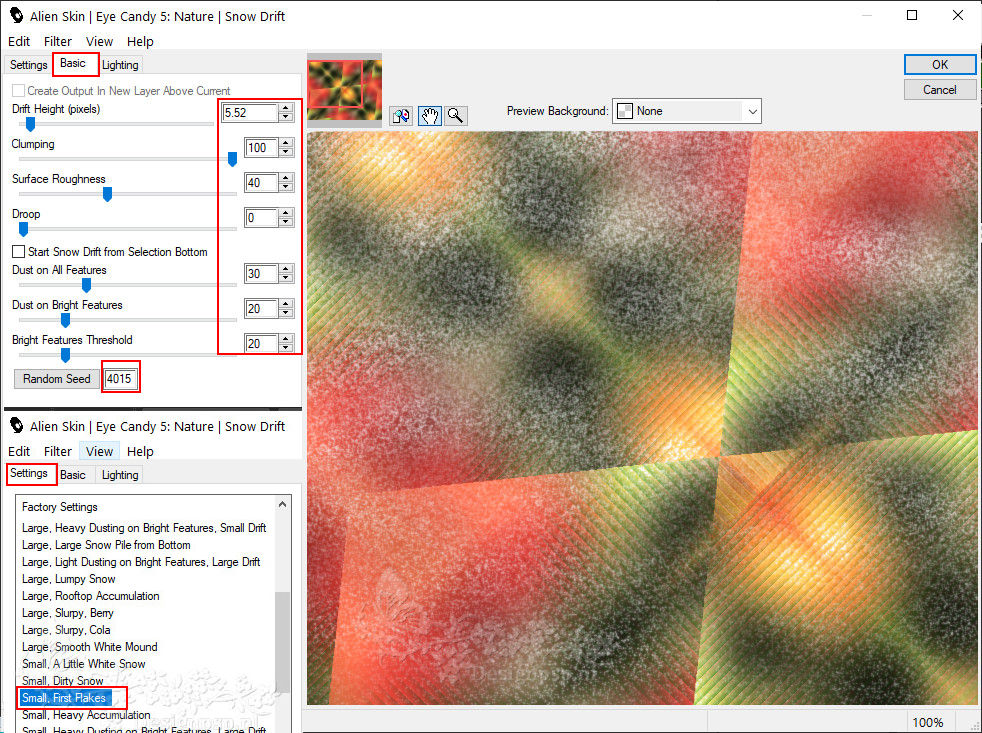
Effects – Plugin: Alien Skin Eye Candy 5 – Nature – Small,First Flakes

8
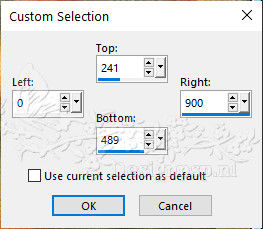
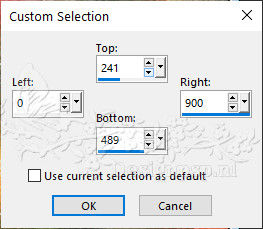
Activate Selection Tool (S) – Custom Selection

Selections – Make selection low
9
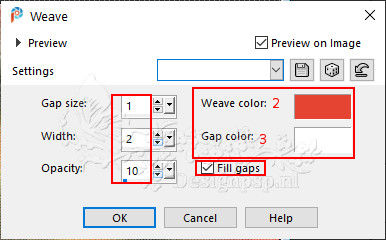
Effects – Texture Effects – Weave / Colors 2 and 3

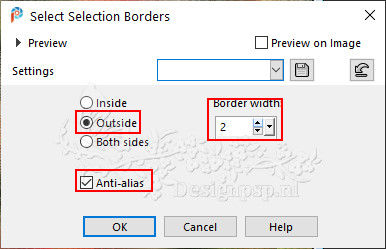
Selections – Modify – Select selection borders

Fill with color 3
Selections – Select none
10
Activate Selection Tool (S) – Custom Selection

Open the tube paysages_0414_lisat – Copy – Paste into selection
Adjust – Sharpness – Sharpen
Selections – Select none
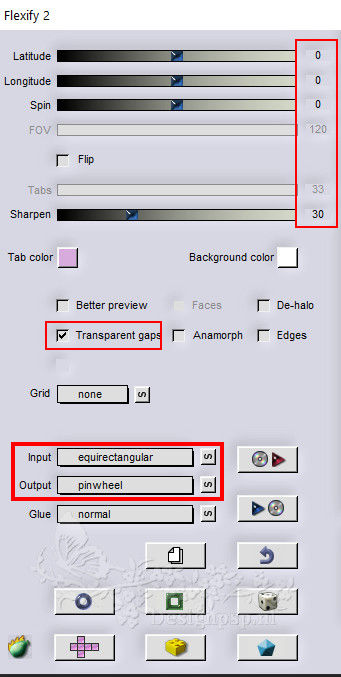
Effects – Plugin: Flaming Pear – Flexify 2 / Input equirectangular / Output pinwheel

11
Image – Resize – Resize with 70% – Uncheck all layers
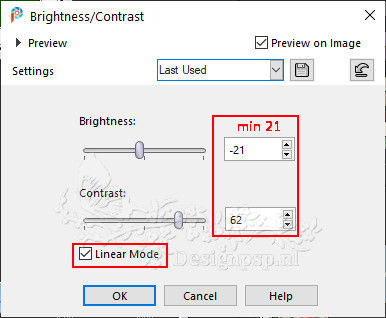
Adjust – Brightness and Contrast / Brightness/Contrast

Effects – 3D Effects – Drop Shadow / minus 3 / 0 / 60 / 30 / color # 000000
12
Paste as new layer (tube is still in memory)
Image – Resize – Resize with 70% – Uncheck all layers
Adjust – Sharpness – Even sharper
13
Open the tube EF-Natal – Copy – Paste as new layer
Activate Selection Tool (K) / Position X minus 23 / Position Y minus 31

Type M to close the tool
Adjust – Sharpness – Even sharper
14
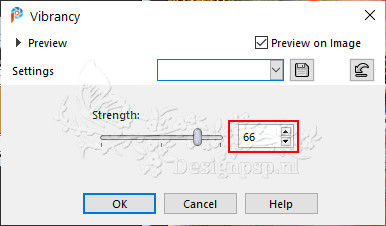
Adjust – Hue and Saturation – Vibrance

Effects – 3D Effects – Drop Shadow / minus 3 / 0 / 60 / 30 / color # 000000
15
Layers – Duplicate
Image – Flip (Horizontal)
Image – Flip (mirror vertically)
Layers – Properties – Opacity 83
16
Open the tube occasions_speciales_0244_lisat – Copy – Paste as new layer
Image – Resize – Resize with 50% – Uncheck all layers
Adjust – Sharpness – Sharpen
Activate Selection Tool (K) / Position X 407 / Position Y 0

Type M to close the tool
Effects – 3D Effects – Drop Shadow / minus 3 / 0 / 60 / 30 / color # 000000
17
Layer palette – Activate the Raster 1 layer
Open the tube EF-Merry_Christmas_Elemento_1 – Copy – Paste as new layer
Effects – Edge Effects – Enhance more
Layers – Properties – Blend Mode Overlay
18
Material palette – Foreground color 3 / Background color 5

Layer palette – Activate the top layer
Activate Text tool – Font SHORTCUT

Type the text MERRY CHRISTMAS
Layers – Convert to raster layer
Place of your choice
Effects – 3D Effects – Drop Shadow / minus 3 / 0 / 60 / 1 / color # ffffff
Layers – Merge – Merge visible layers
19
Image – Add Borders – Symmetrical
1 pixel color #000000
3 pixels color #ce9b59
1 pixel color #000000
15 pixels color #ce9b59
Activate Magic Wand tool / Tolerance and Feather 0 /
Select the border of 15 pixels
Effects – Texture Effects – Weave / Colors 2 and 3

Effects – Edge Effects – Enhance
Selections – Select none
20
1 pixel color #000000
35 pixel color #ce9b59
Activate Magic Wand tool / Tolerance and Feather 0 /
Select the border of 35 pixels
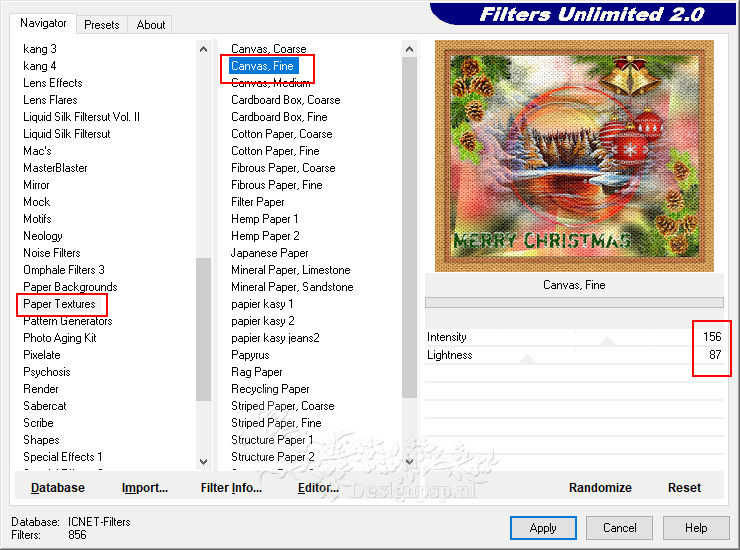
Effects – Plugin: Filters Unlimited 2.0 – Paper Textures – Canvas Fine / Default

Effects – Edge Effects – Enhance
Selection – Hold
21
Layers – New raster layer
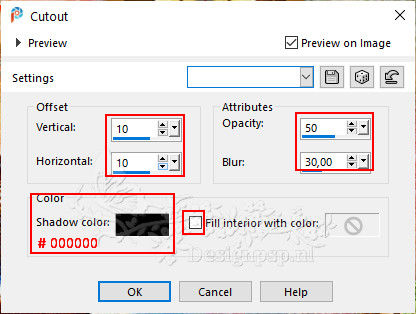
Effects – 3D Effects – Cutout / Shadow Color # 000000

Selections – Select none
22
Sign your work
Image – Add Borders – Symmetrical
1 pixel color #000000
Image – Resize – Resize the width to 1000 pixels
Save as Jpeg
We’re done with Estela’s tutorial
This translation has been tested by Marianne.
Marianne thank you
Translation DesignPSP KeetjeDesign 14-12-2022
