

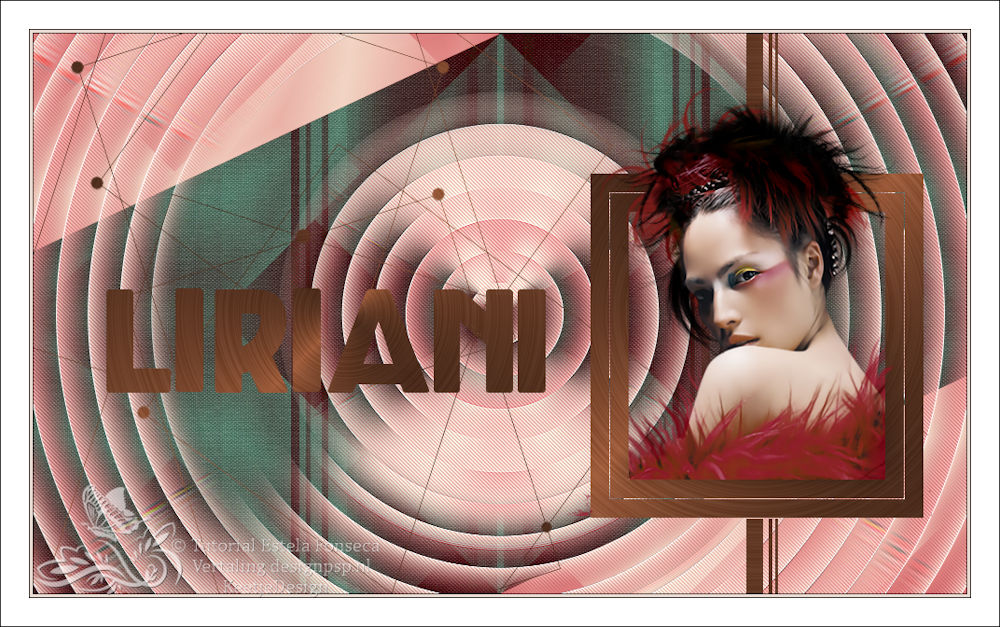
Liriani

Original Tutorial Here
This tutorial is written by Estela Fonseca and is copyrighted by her.
It is not permitted to copy, link and/or place this or parts of it elsewhere without its permission.
If you want to use the tutorials on your own Club or Group, you must ask permission from the author.
The translation was written with PSP 2020 but it can also be made with other versions.
If this tutorial resembles another, it is purely coincidental.
We have permission from Estela Fonseca to translate her tutorials into Dutch and English.
Estela Fonseca Thank you for letting us translate your tutorials.

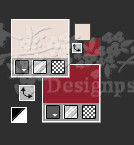
Materials used
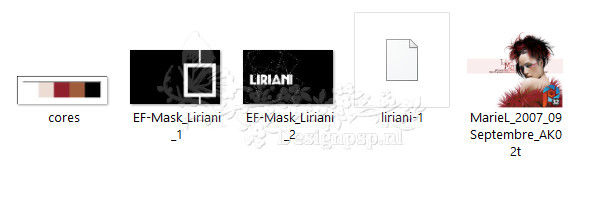
Place the Selection in your PSP folder Selections
Open the other material in PSP/Duplicate with Shift+D/Close the originals/Minimize masks
Plugins used:
FM Tile Tools – Collage Linear
Simple – Diamonds
Simple – Blintz
Graphics Plus – Vertical Mirror
Toadies-Weaver
L&K’s – L&K’s – Raisa
Mura’s Meister – Pole Transform
Penta.com – Jeans
Alien Skin Eye Candy 5 Impact – Glass
Filters Unlimited 2.0 – Paper Texture – Canvas Fine
Colors used:
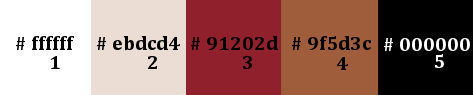
The tutorial is written with these colors and the materials provided.
If you use your own materials , colors or another version of PSP
you may need to play with the Blend Mode and/or Layer Opacity.
1
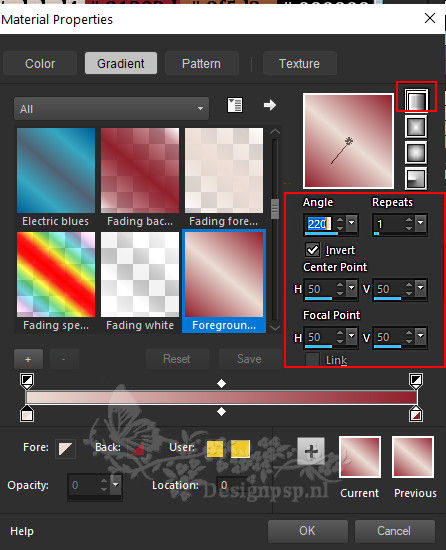
Material Palette – Foreground color 2 #ebdcd4 / Background color 3 #91202d
In the foreground Create the gradient Linear
2
Open a new transparent image of 1000 x 600 pixels
Fill with the gradient
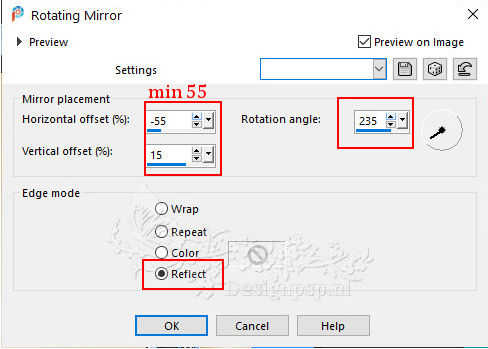
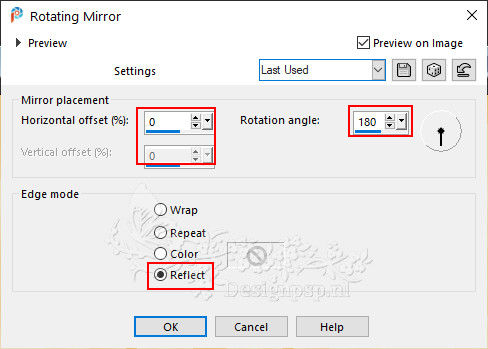
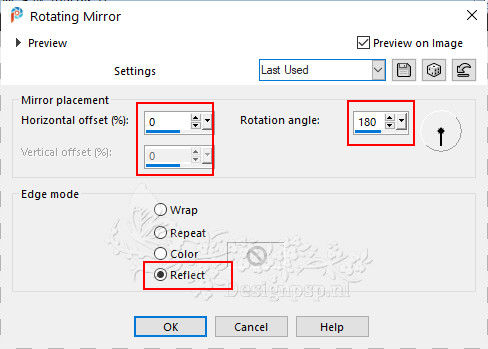
Effects – Reflection Effects – Rotating Mirror
3
Effects – Plugin: FM Tile Tools – Collage Linear / Default
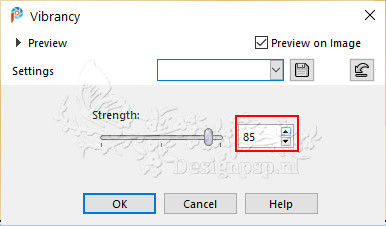
Adjust – Hue and Saturation – Vibrance
4
Effects – Plugin: Simple – Diamonds
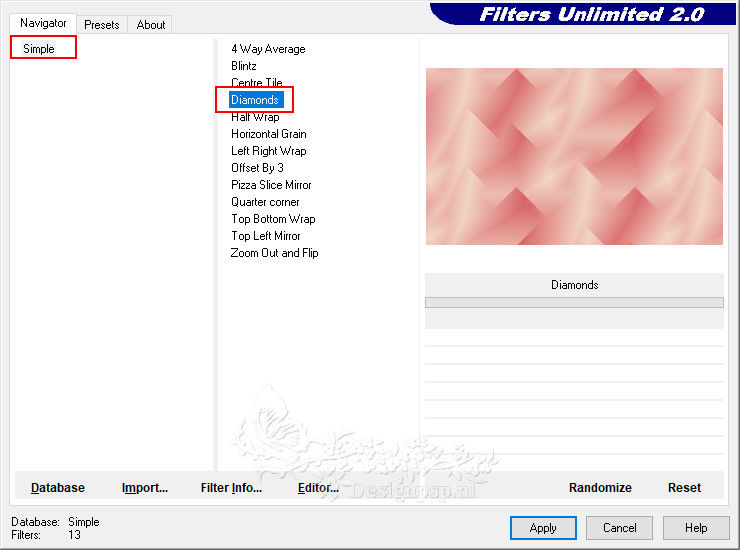
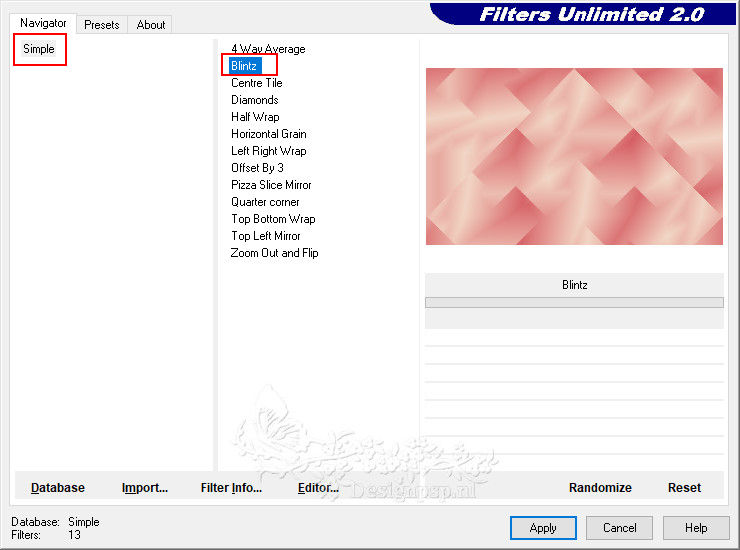
Effects – Plugin: Simple – Blintz 2x
5
Effects – Reflection Effects – Rotating Mirror
Effects – Plugin: Graphics Plus – Vertical Mirror / Default
6
Layers – Duplicate
Image – Resize – Resize with 45% – resize all layers unchecked
7
Adjust – Sharpness – Sharpen
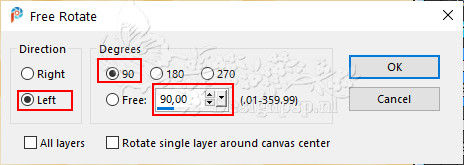
Image – Free Rotate
8
Effects – Image Effects – Seamless Tiling / Default
Adjust – Blur – Gaussian Blur / Range 15
9
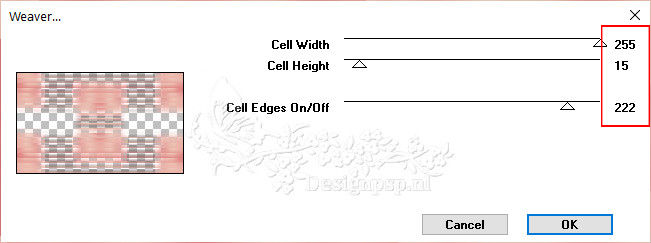
Effects – Plugin: Toadies – Weaver
Effects – Reflection Effects – Rotating Mirror
Effects – Edge Effects – Enhance
10
Layer palette – Activate the Raster 1 layer
Layers – Duplicate
Effects – Plugin: L&K’s – L&K’s Raisa / Default
Effects>Reflection Effects – Rotating Mirror
11
Effects – Geometric Effects – Skew

Effects – Plugin: Filters Unlimited 2.0 – Paper Texture – Canvas Fine / Default
Layers – Properties – Blend Mode Difference / Opacity 71
Effects – 3D Effects – Drop Shadow / 0 / 0 / 85 / 85 / color #000000
12
Layer palette – Activate the top layer(Copy of Raster 1)
Effects – Plugin: Mura’s Meister – Pole Transform / Default
Effects – Plugin: Penta.com – Jeans / Default
Layers – Merge – Visible layers
13
Layers – New raster layer
Fill with color 4 #9f5d3c
Layers – New Mask Layer – From Image: EF-Mask_Liriani_2

Layers – Merge – Merge group
14
Layers – New raster layer
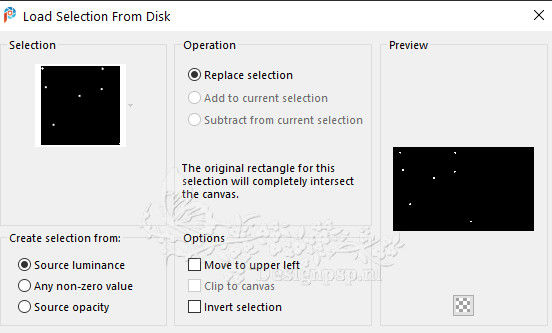
Selections – Load/save selection – Load selection from disk: Liriani_1
Fill with color 4 #9f5d3c
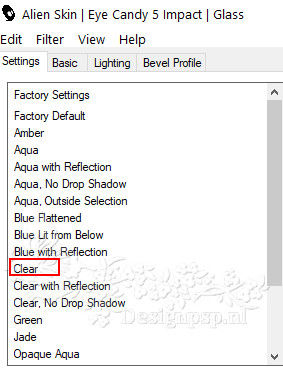
Effects – Filter: Alien Skin Eye Candy 5 Impact – Glass Clear
Selections – Select none
15
Layers – New raster layer
Fill with color 4
Layers – New Mask Layer – From Image: EF-Mask_Liriani_1
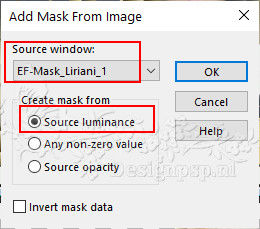
Layers – Merge – Merge group
16
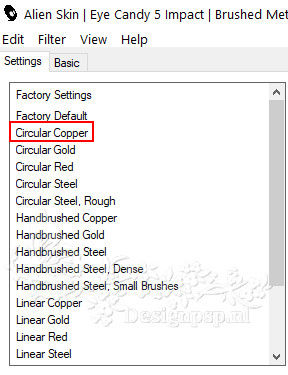
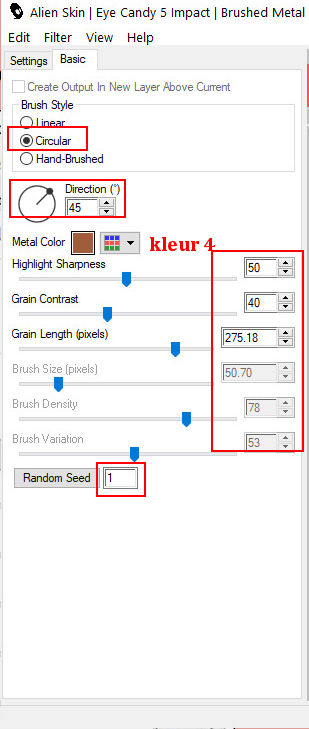
Effects – Plugin: Alien Skin Eye Candy 5 Impact – Brushed Metal / Circular Cooper / Metal Color #9f5d3c
17
Layer palette – Activate the Raster 1 layer
Effects – Filter: Alien Skin Eye Candy 5 Impact – Brushed Metal / Same setting
Effects – 3D Effects – Drop Shadow / 0 / 0 / 100 / 1 / color # 000000
Layer palette – Activate the layer Group Raster 1
Effects – Plugin: Alien Skin Eye Candy 5 Impact – Brushed Metal / Same setting
18
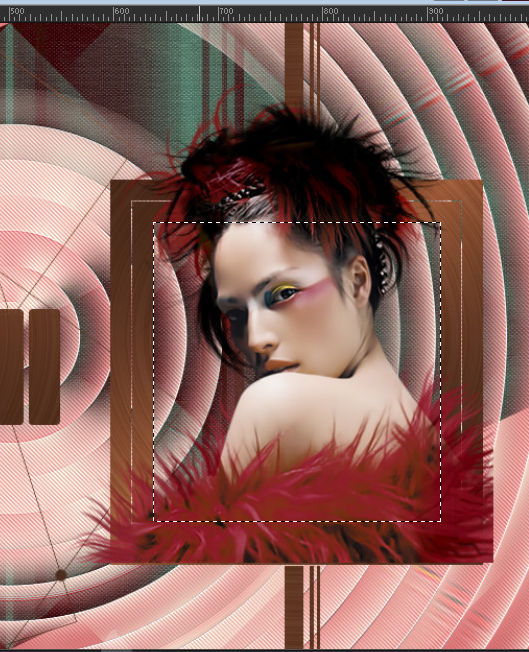
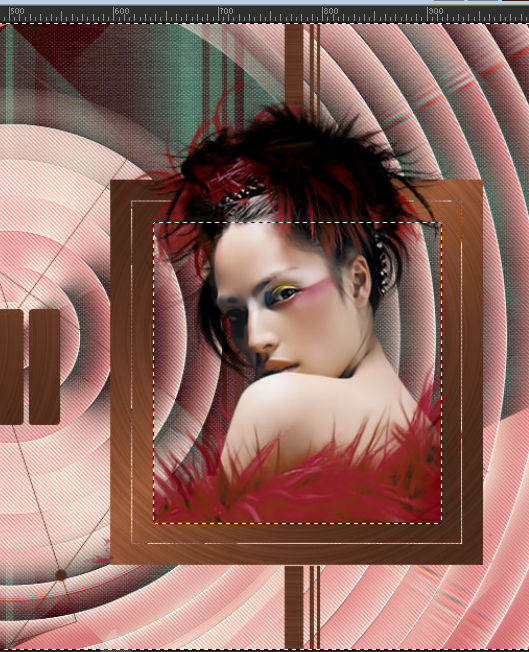
Layer palette – Activate the top layer
Activate the Magic Wand tool / Tolerance and Feather 0 / Select inside of the square
19
Open the tube MarieL_2007_09Septembre_AK02t – Copy – Paste as new layer
Place the tube in the selection
20
Selections – Invert
Activate eraser tool and erase the lower part of the tube as shown in the example

Selections – Select none
Effects – 3d Effects – Drop shadow of your choice
21
Image – Add Borders – Symmetrical
1 pixel color 5
3 pixels color 2
1 pixel color 5
30 pixels color 1
22
Place your Name/Watermark
Image – Add Borders – Symmetrical
1 pixel color 5
Image – Resize – Change to 1000 pixels width
Save as Jpeg
We are done with the tutorial of Estela
This translation has been tested by Marianne
Marianne thank you so much
creaVertaling DesignPSP KeetjeDesign 12-01-2023