Legolator
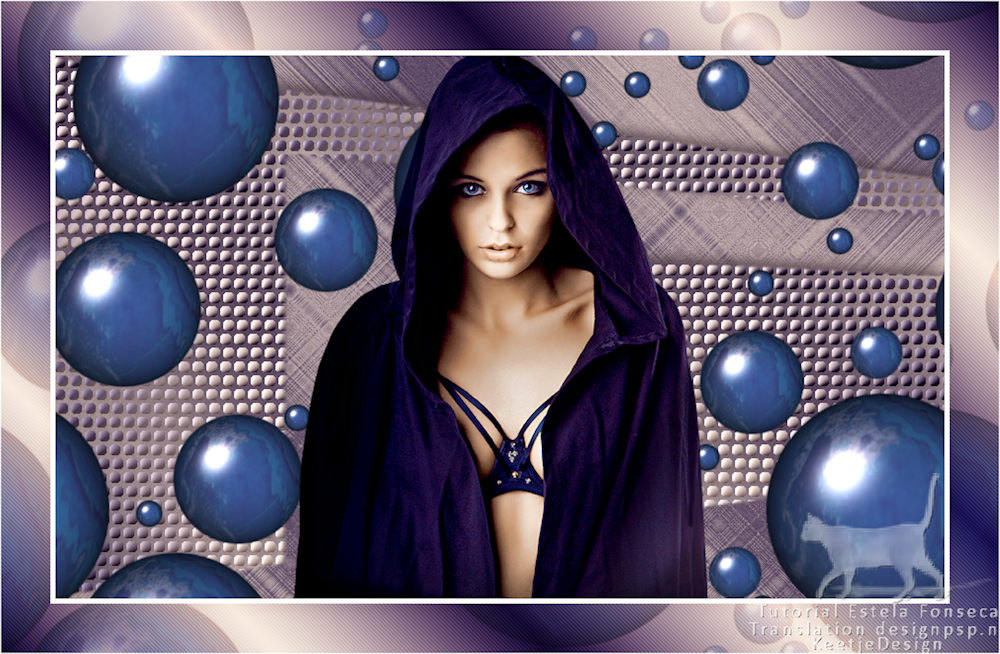
Originele tutorial Hier
This tutorial is written by Estela Fonseca the © is from her.
It is not allowed to copy, link and / or place these or parts of it without her permission.
The © ️ of the materials wich are used is for the rightful owner.
If you want to use this tutorial on your own forum, club or group, you have to request permission from the writer herself.
We have permission to translate Estela Fonseca’s tutorials into English.
Thank you Estela for the permission to translate your tutorials.
Temos permissão para traduzir os tutoriais da Estela Fonseca para o inglês.
Obrigado Estela pela tradução dos tutriais.
Materials Used: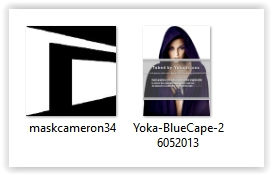
Open the other material in PSP/Duplicate with Shift+D/Close the originals/Minimize mask
Plugins Used:
Filter Factory Gallery D – Legolator
Funhouse – Xaggerate
Penta.com – Jeans
he tutorial is written with these colors and the supplied materials.
If you use your own materials, colors or another version of PSP
you may have to play around with the Blend Mode and/or Layer Opacity.
1
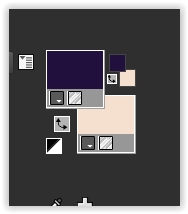
Materials palette Foreground color #22113e / Background color # f4dfce
Create the gradient Linear in the foreground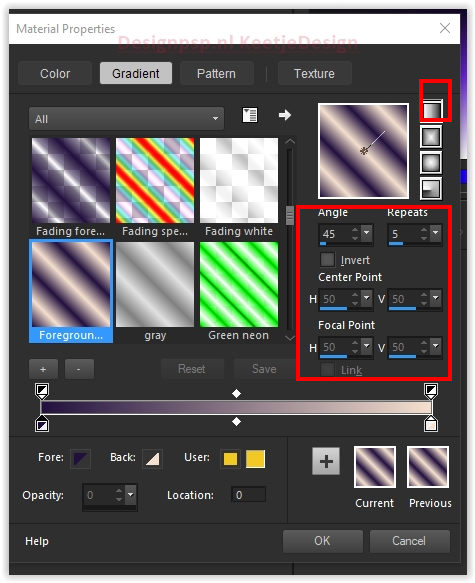
2
Open a new transparent image of 900 x 550 pixels
Fill with the gradient
3
Adjust – Blur – Gaussian Blur / Range 50
Effects – Plugin Filter Factory Gallery D – Legolator
4
Layers – New Mask Layer – From Image: Maskcameron34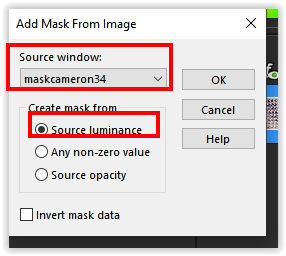
Layers – Merge – Merge Group
Effects – 3D Effects – Drop Shadow / Minus 5 / Minus 5 / 100 / 20 / # 000000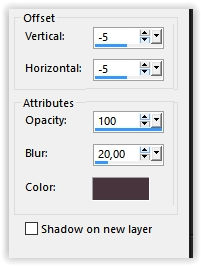
5
Layers – New Raster Layer
Layers – Arrange – Down
Fill with the gradient
Adjust – Blur – Gaussian Blur / Range 50 2 times
6
Effects – Plugin Filters Unlimited 2.0 – Funhouse – Xaggerate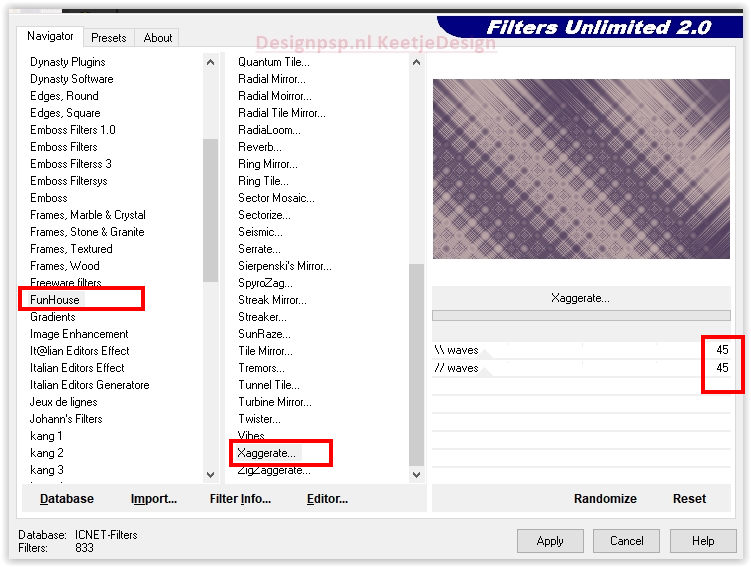
Adjust – Add/Remove Noise – Add Noise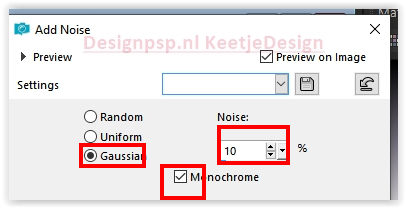
Layers – Merge – Merge Visible
7
Open the tube Yoka-BlueCape-26052013 – Copy – Paste as new layer
Image – Resize – Resize by 70% – All layers unchecked
Adjust – Sharpness – Sharpen
8
Layers – Duplicate.
Layer palette – Activate the lower of these two
Effects – Artistic Effects – Bubbles and Balls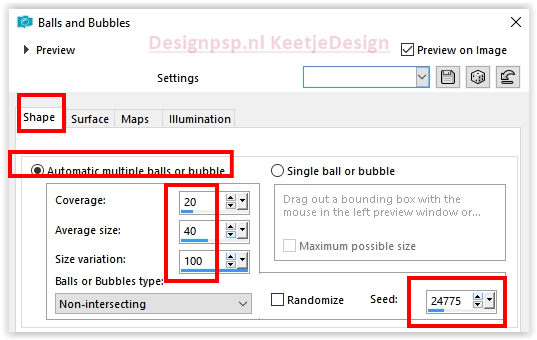
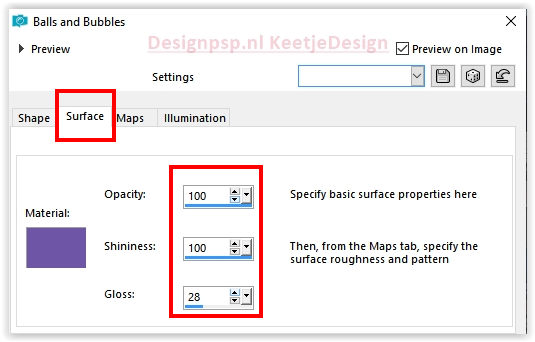
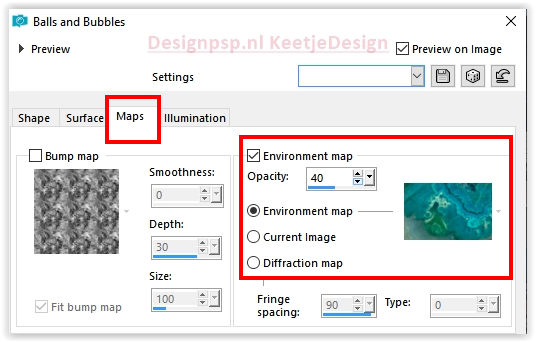
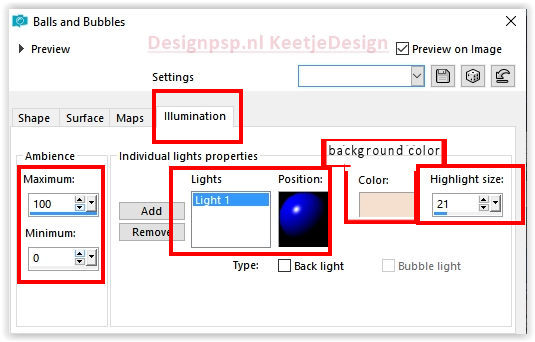
9
Image – Add Borders – Symmetric
5 pixels color #ffffff
50 pixels color #d0acac.
10
Activate the Magic Wand tool Select the border of 50 pixels
Fill with the gradient
Selections – Promote selection into layer
Selection – Hold
11
Effects – Artistic Effects – Bubbles and Balls with the same setting as point 8
Layers – Properties – Blend Mode Soft Light
Selections – Invert
Effects – 3D Effects – Drop Shadow / 0 / 0 / 70 / 30 / # 000000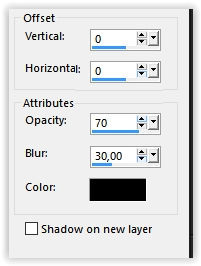
Selections – Select none
12
Effects – Filter Penta.com – Jeans, default.
Sign your work
Image Add Borders – Symmetric
1 pixel color # fffff
Image – Resize – Change the width to 1000 pixels
Save as Jpeg
We’re done with Estela’s tutorial
The translation has been tested by Marianne.
Marianne thank you very much
© Translation DesignPSP KeetjeDesign 2022


