

Inacia Neves

Original Tutorial Here
This tutorial is written by Estela Fonseca and is copyrighted by her.
It is not permitted to copy, link and/or place this or parts of it elsewhere without its permission.
If you want to use the tutorials on your own Club or Group, you must ask permission from the author.
The translation was written with PSP 2020 but it can also be made with other versions.
If this tutorial resembles another, it is purely coincidental.
We have permission from Estela Fonseca to translate her tutorials into Dutch and English.
Estela Fonseca Thank you for letting us translate your tutorials.

Used Materials

Open the tubes in PSP/Duplicate with Shift+D/Close the originals
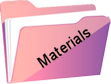
Used Plugins:
Filters Unlimited 2.0 – &<Background Designers IV> – @Night Shadow Pool
Mehdi – Sorting Tiles
Funhouse – Maelström
Toadies – What are you
Plugins AB 08 – WireMeshing Unlimited
AAA Frames – Texture Frame
Colors used:

The tutorial is written with these colors and the materials provided.
If you use your own materials , colors or another version of PSP
you may need to play with the Blend Mode and/or Layer Opacity.
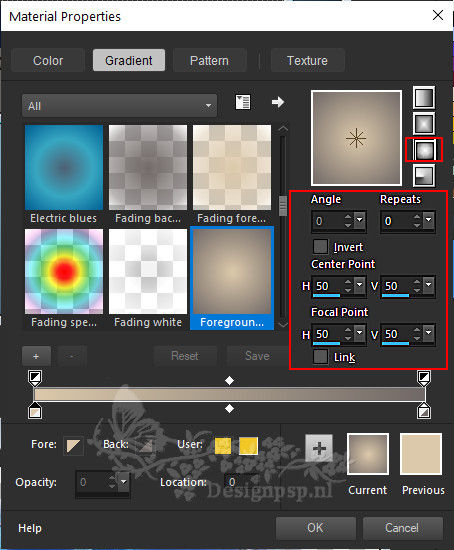
1
Material palette – Foreground color 1# dcc8ab / Background color 2 #706967
In the foreground, create the Sunburst gradient
2
Open EF-Inacia_Neves_Alpha – Window – Duplicate (or use Shift+D)shift+D – Close the original
We are working on the copy , this is not an empty layer there are selections in the alpha channel
Fill with the gradient
3
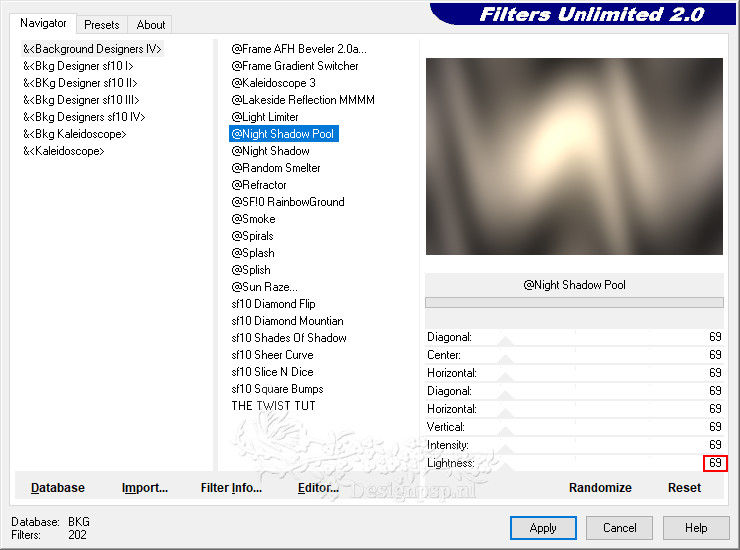
Effects – Plugin: Filters Unlimited 2.0 – &<Background Designers IV> – @Night Shadow Pool
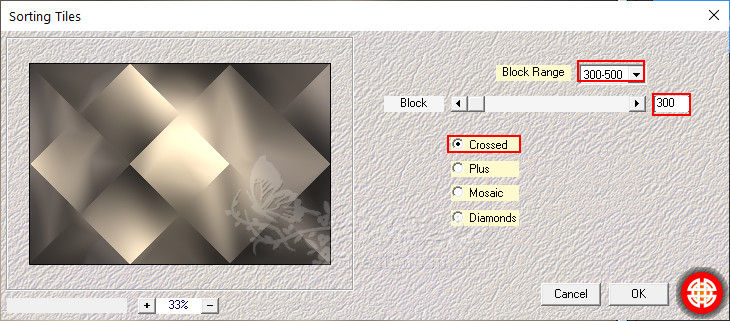
Effects – Plugin: Mehdi – Sorting Tiles
4
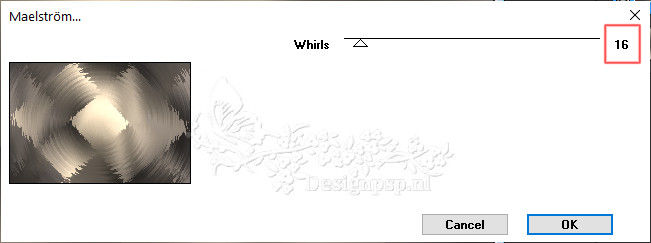
Layers – Duplicate
Effects – Plugin: Funhouse – Maelstrom…
5
Image – Invert (mirror vertically)
Layers – Properties – Blend Mode Hard Light / Opacity 79
6
Layers – merge – merge down
Effects – Plugin: Plugins AB 08 – WireMeshing Unlimited… / Default
Layers – Properties – Blend Mode Soft Light / Opacity 71
7
Open the tube 2274-woman-LB TUBES – Copy – Paste as new layer
Activate The Pick Tool (K) / Position X 554 / Position Y minus 37

Note : if necessary, you can adjust the position of the tube later
Type M to close the tool
Layers – Properties – Opacity 42
8
Open the tube EF-Inacia_Neves_Deco_1 – Copy – Paste as new layer
Looks good right away
9
Layer palette – Activate the Raster 2 layer
Selections – Load/save selection – Load selection from alpha channel: Selection #1
Press Delete on the keyboard
Selections – Select none
10
Layer palette – Activate the top layer (Raster 3)
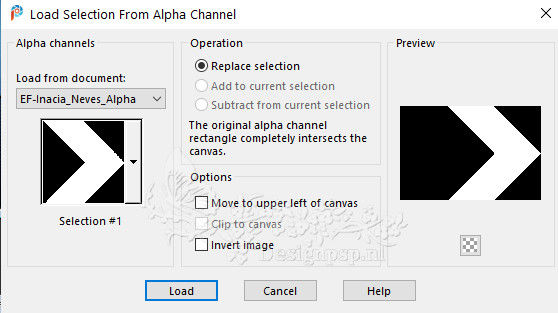
Selections – Load/save selection – Load selection from alpha channel: Selection #2

11
Open the tube Misted_Floral_EF – Copy – Paste as new layer
Place the tube in the selection
Selections – Invert
Press Delete on the keyboard
Nothing – Select
Layers – Properties – Opacity 48 / Adjust the opacity to your own tube
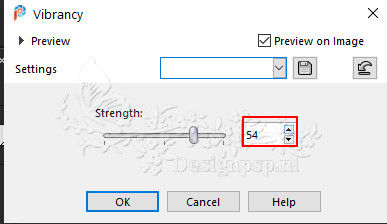
Adjust – Hue and Saturation – Vibrance
12
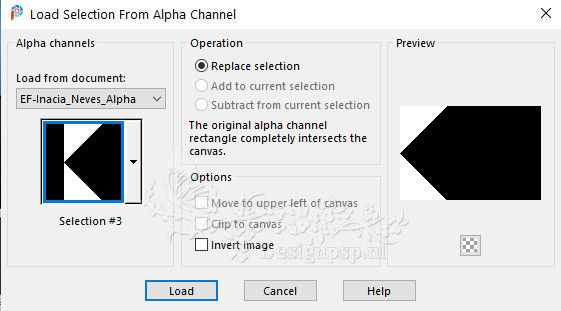
Layer palette – Activate the bottom layer
Selections – Load/save selection – Load selection from alpha channel: Selection #3
Selections – Make selection low
Layers – Arrange – Bring to Front
Selections – Select none
13
Image – Mirror (Horizontal)
Activate the Pick Tool (K) / Position X 383 / Position Y 0

Type M to close the tool
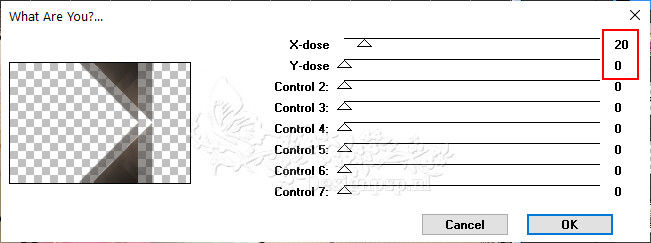
Effects – Filter: Toadies – What Are You???
14
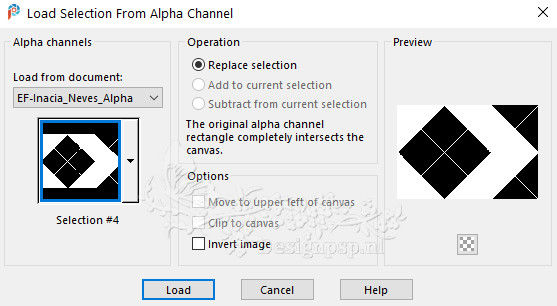
Layer palette – Activate the Raster 3 layer
Layers – Arrange – Bring to Front
Selections – Load/save selection – Load selection from alpha channel: Selection #4
Invert selection
Effects – 3D Effects – Drop Shadow / 0 / 0 / 50 / 30 / color # 000000.
Selections – Select none
15
Open the tube EF-Inacia_Neves_Texto – Copy – Paste as new layer
Place as on the example crea
Effects – 3D Effects – Drop Shadow / 0 / 2 / 100 / 1 / Color 1
Effects – 3D Effects – Drop Shadow / 0 / 2 / 100 / 1 / color 4
16
Image – Add Borders – Symmetrical
1 pixel color 4
3 pixel color 3
1 pixel color 4
17
Selections – Select all
Image – Add Borders – Symmetrical
45 pixels each color
Selections – Invert
18
Fill with the gradient
Effects – Artistic Effects – Halftone / Color 2 #706967
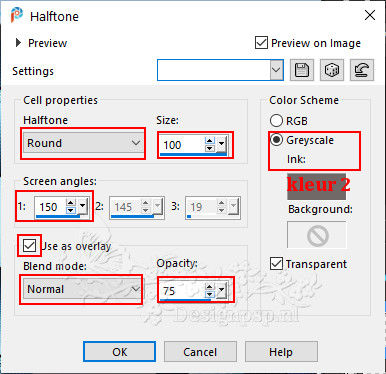
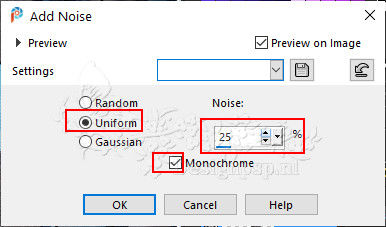
Adjust – Add/Remove Noise – Add Noise
Selections – Select none
19
Image – Add Borders – Symmetrical
1 pixel color 4
3 pixel color 3
1 pixel color 4
20
Open the tube 2274-woman-LB TUBES – Copy – Paste as new layer
Move to the left
Effects – 3D Effects – Drop Shadow / Your choice
21
Image – Add Borders – Symmetrical
20 pixel color 3
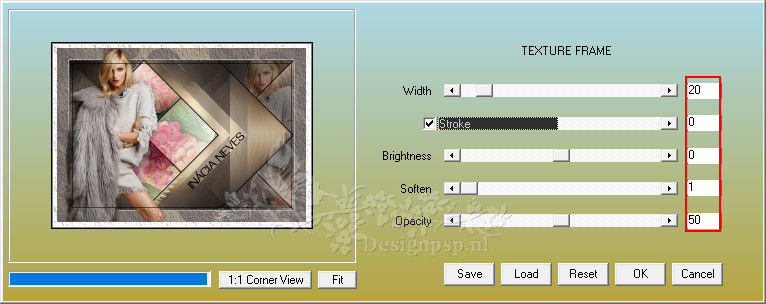
Effects – Plugin: AAA Frames – Texture Frame
22
Place your Name/Watermark
Layers – Merge – Merge all layers
Save as Jpeg
We’re done with Estela’s tutorial
This translation has been tested by Marianne. Marianne thank you so much
creaVertaling DesignPSP KeetjeDesign 12-01-2023