

Ilia

Original tutorial Here
This tutorial was written by Estela Fonseca the© is from her.
You’re not allowed to copy, link and / or place these or parts of it without her permission.
The © of the materials witch are used is for the rightful owner.
If you want to use this tutorial on your forum, club or group, you have to request permission from the writer herself.The translation is written with PSP 2020 but can also be made with other versions.
If this tutorial looks like another, it is just a coincidence.
We have permission from Estela Fonseca to translate her tutorials into Dutch and English.
Estela Fonseca Thank you for letting us translate your tutorials.
Estela Fonseca

Materials used:
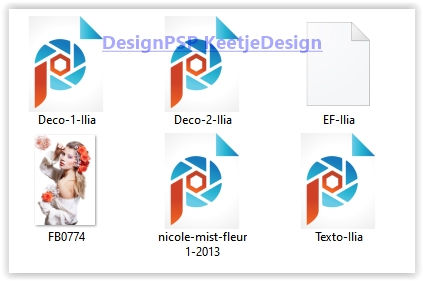
Place the selection in your PSP folder Selections
Open the material in PSP / Duplicate with Shift + D / Close the originals
Download Materials Here
Plugins used:
Alien Skin Rye Candy 5 – Texture – Swirl
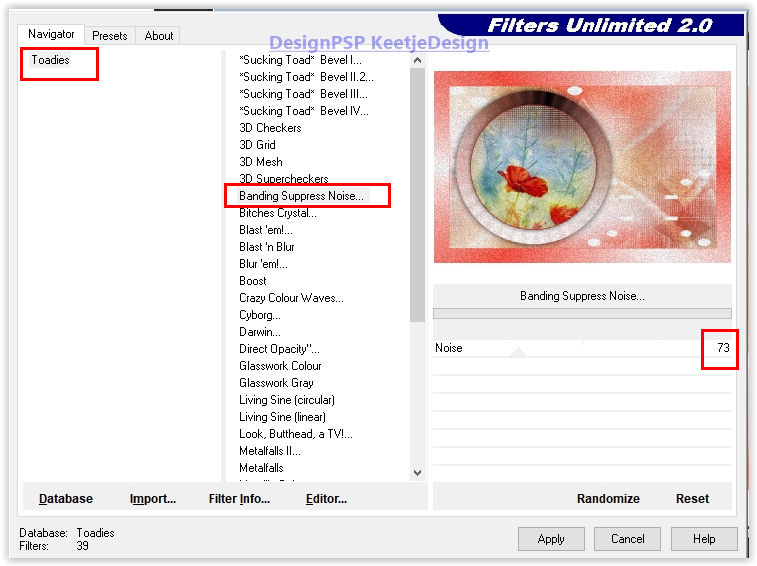
Unlimited 2.0 – Toadies – Sucking Toad Bevel III
Unlimited 2.0 – Toadies – Banding surpressing noise
AP [LINES] – Lines – SilverLining – Dotty Grid
FM Tile Tools – Mertallic Emboss
Note: When working with your own colors , play with the Blend Mode and/or Opacity at your own discretion
1
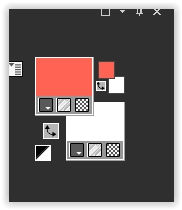
Materials palette – Foreground color # ff6354 / Background color # ffffff
Open a new transparent image of 900 x 550 pixels
Fill with the color # ff6354
2
Selections – Select all
Open the tube FB0074 – Remove the watermark – Copy – Paste into selection (don’t close the tube , we’ll use it again later)
Selections – Select none
3
Effects – Image Effects – Seamless Tiling / Default

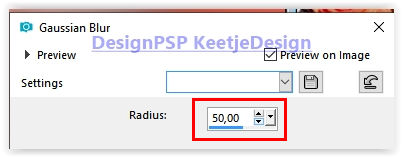
Adjust – Blur – Gaussian Blur / Range 50
4
Layers – Duplicate
Effects – Filter Alien Skin Rye Candy 5 – Texture – Swirl
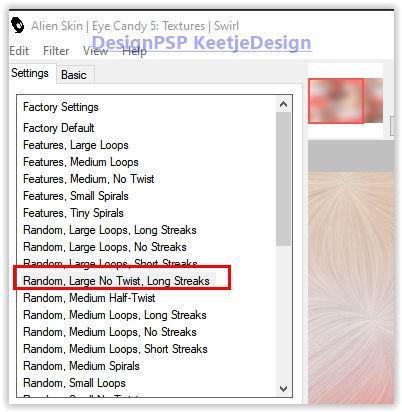
Effects – Edge Effects – Enhance
5
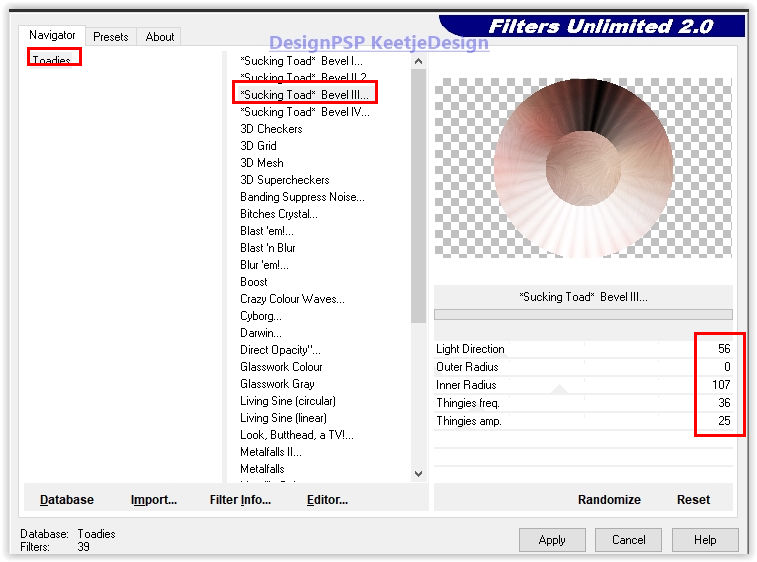
Layers – Duplicate
Effects – Filter Unlimited 2.0 – Toadies – Sucking Toad Bevel III
6
Selections – Select all
Selections – Float
Selections – Modify – Contract 50 pixels
Adjust – Blur – Gaussian Blur / Range 50
Selections – Hold
7
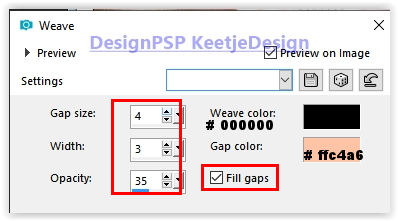
Effects – Texture Effects – Weave pattern / Weave color # 000000 / Fill spaces between color # ffc4a6
Layers – New raster layer
Fill with the color # ff6354
Selections – Modify – Contract 3 pixels
Press Delete on the keyboard
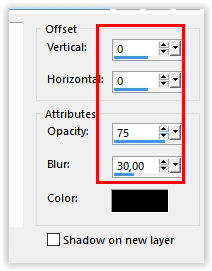
Effects – 3D Effects – Drop Shadow / 0/0/75/30 / # 000000
Selections – Select none
Layers – merge – merge down
8
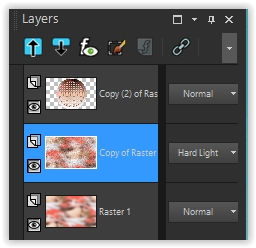
Layer palette – Activate the second layer from the top (Copy of Raster 1)
Layers – Properties – Blend mode Hard light
Open the tube Deco-1-Ilia – Copy – Paste as new layer
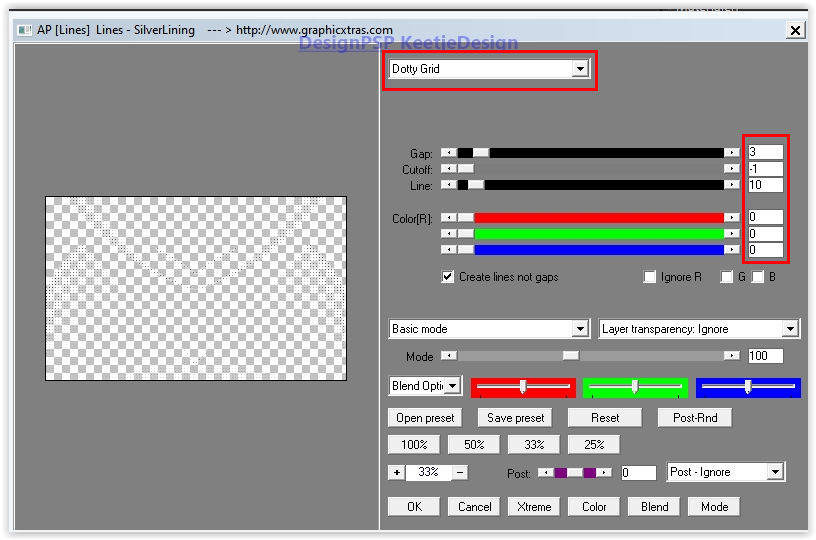
Effects – Plugins AP [LINES] – Lines – SilverLining – Dotty Grid
Layers – Properties – Blend Mode Normal
Layers – Duplicate
Image – Flip (Mirror vertical)
Layers – Properties – Blend Mode Overlay
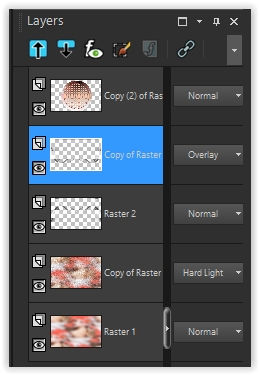
9
Open the tube Deco-2-Ilia – Copy – Paste as new layer
10
Layer palette – Activate the top layer
Selections – Load / Save – Load selection from disk load EF-Ilia

Selections – Modify – Contract 3 pixels
Open the tube nicole-mist-fleur1-2013- Copy – Paste as new layer
Image – Resize – Change with 70% – Uncheck all layers
Selections – Invert
Press Delete on the keyboard
Selections – Select none
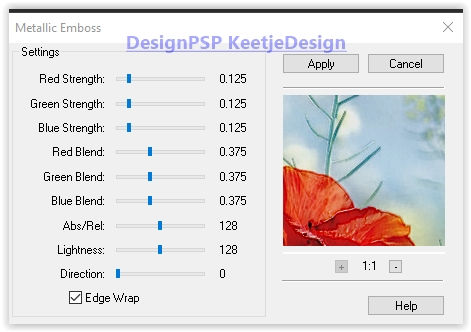
Effects – Plugins FM Tile Tools – Mertallic Emboss
11
Layers – merge – merge down
Objects – Align – Left (or move to the left)
Image – Resize – Change with 95% – Uncheck all layers
Effects – 3D Effects – Drop Shadow / 0/0/75/30 / # 000000
12
Image Add Borders – Symmetric
1 pixel color # ff6354
50 pixels color # ffffff
13
Materials palette / Make a gradient Radial in the foreground
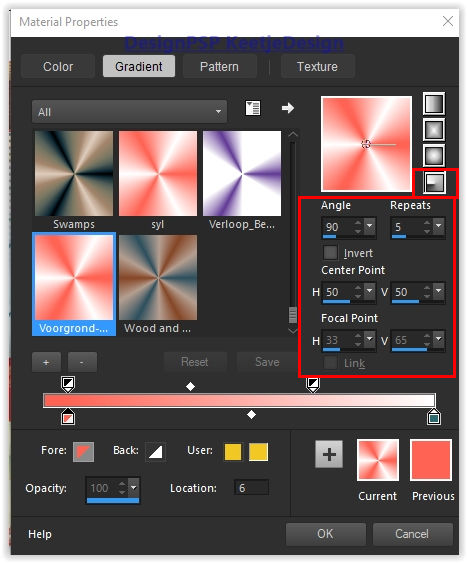
Activate Magic Wand / Tolerance and Feather tool 0
Select the border of 50 pixels
Fill with the gradient
Effects – Filter Unlimited 2.0 – Toadies – Banding surpressing noise
Selections – Invert
Effects – 3D Effects – Drop Shadow / 0/0/75/30 / # 000000
Selections – Select none
14
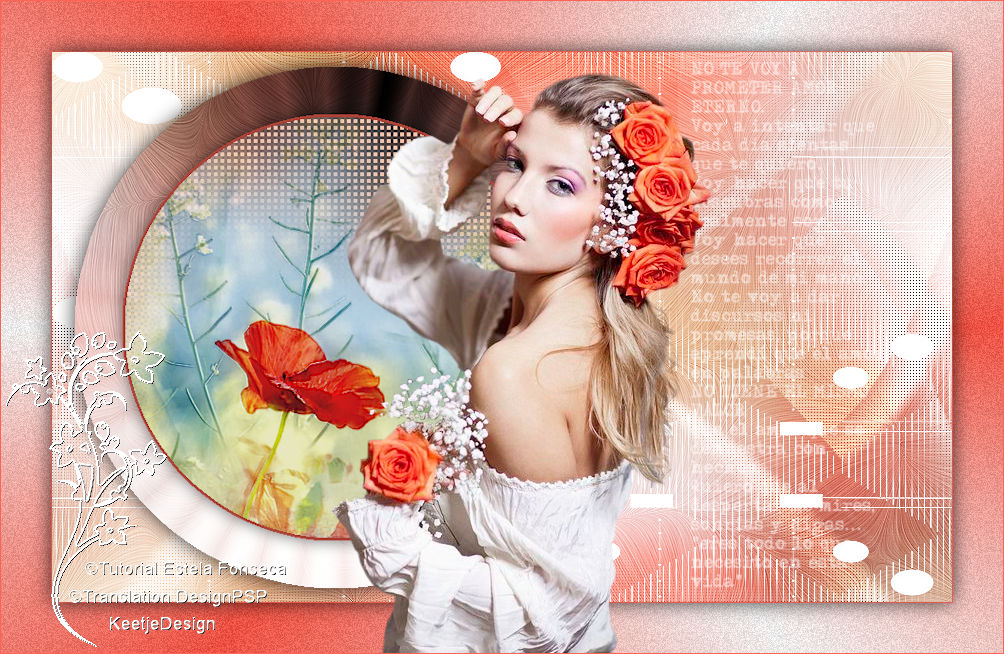
Open the tube Texto-Ilia- Copy – Paste as new layer
Move to the right – See example crea
Layers – Properties – Decrease opacity by choice
I have used 75 for the opacity
15
Activate again the tube FB0074 – Copy – Paste as new layer
Place as on the example crea
Sign your work
Image – Add Borders – Symmetric
1 pixel color # ff6354
Save as Jpeg
We have finished the tutorial from Estela
This translation has been tested by Marianne / Thank you Marianne
© Translation Ilia DesignPSP KeetjeDesign