Garances
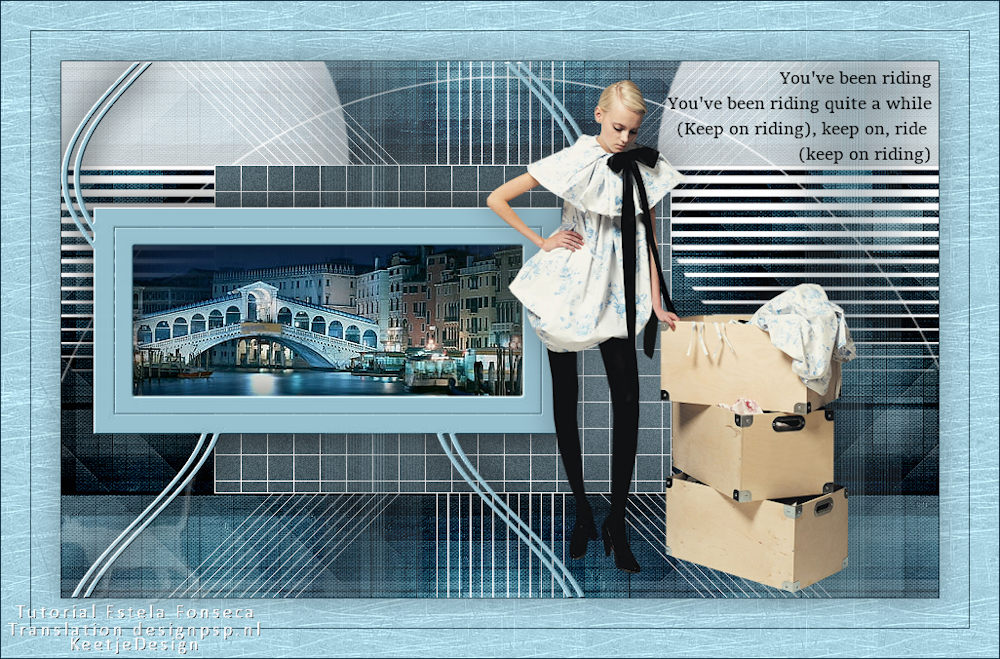
Originele tutorial Here
This tutorial is written by Estela Fonseca the © is from her.
It is not allowed to copy, link and / or place these or parts of it without her permission.
The © ️ of the materials wich are used is for the rightful owner.
If you want to use this tutorial on your own forum, club or group, you have to request permission from the writer herself.
We have permission to translate Estela Fonseca’s tutorials into Dutch and English.
Thank you Estela for the permission to translate your tutorials.
Temos permissão para traduzir os tutoriais de Estela Fonseca para holandês e inglês.
Obrigado Estela pela permissão para traduzir seus tutoriais.
Materials Used:
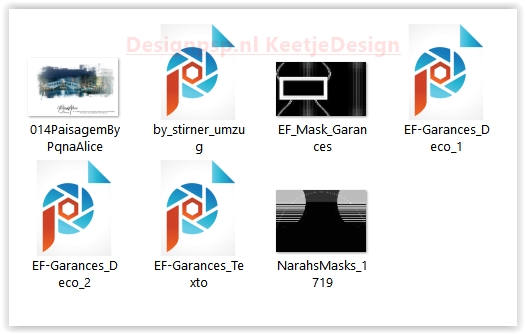
Plugin Used:
Unlimited 2.0 – &<Bkg Designer sf10IV> – Grid
Unlimited 2.0 – Paper Textures – Canvas Fine
Unlimited 2.0 – Paper Textures – paper kasy 1
Toadies – Plain Mosaic Blur
Toadies – What Are You??
Graphics Plus – Quick Tile II
MuRa’s Seamless – Emboss at Alpha
The translation was made with PSP 2020 , but can also be done with other versions.
Note : When working with your own colors , play with the Blend Mode and/or Opacity at your own discretion
1
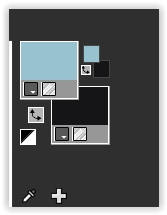
Materials Palette – Foreground color # 99c2d0 / Background color #161618
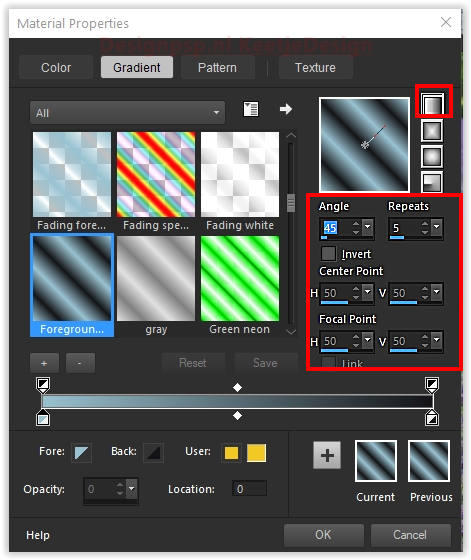
Make the gradient Linear in the Foreground
2
Open a new transparent image of 900 x 550 pixels
Fill with the gradient
3
Adjust – Blur – Gaussian Blur / Range 50
Effects – Reflection Effects – Kaleidoscope
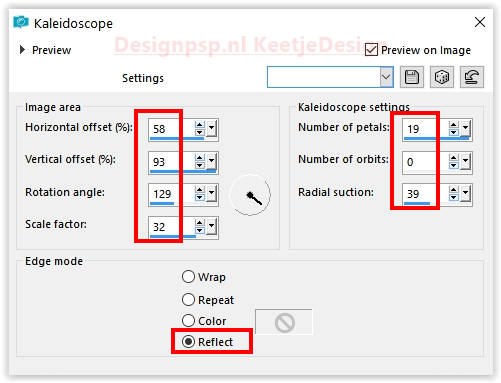
4
Effects – Image Effects – Seamless Tiling / Default
Effects – Plugin Toadies – Plain Mosaic Blur
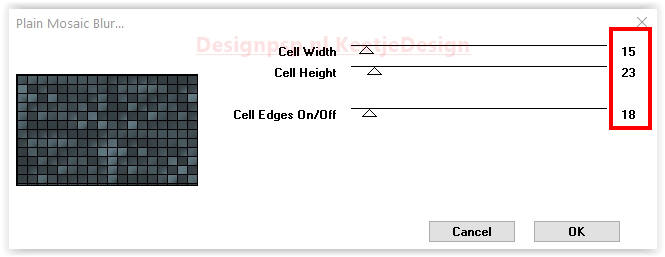
5
Layers – Duplicate
Effects – Plugin Toadies – What Are You??
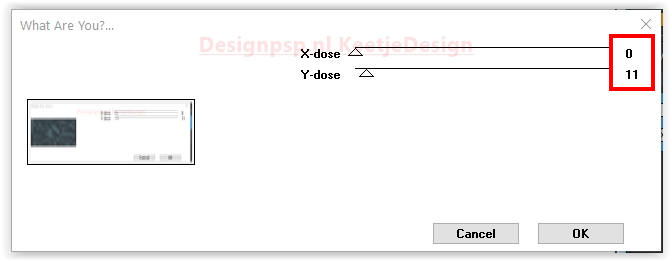
Layers – Properties – Blend Mode Screen
Layers – merge – merge down
Adjust – Sharpness – Sharpen
6
Layers – Duplicate
Effects – Reflection Effects – Rotating Mirror
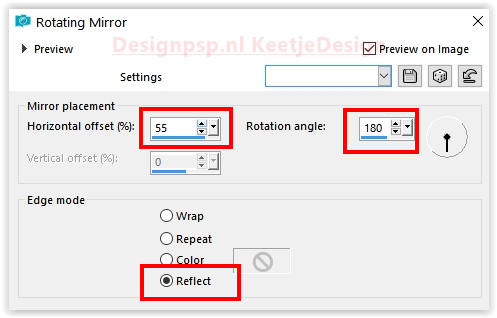
7
Image – Resize – Resize by 85% – All layers unchecked
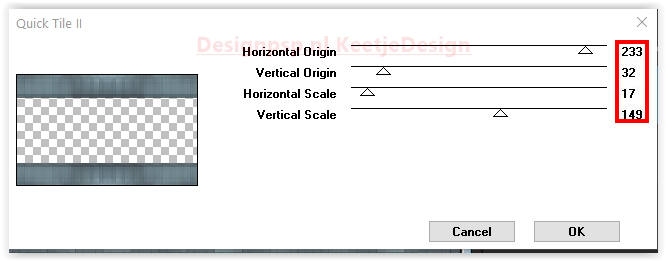
Effects – Plugin Graphics Plus – Quick Tile II
8
Layers – Duplicate
Effects – Art Effects – Brush Strokes
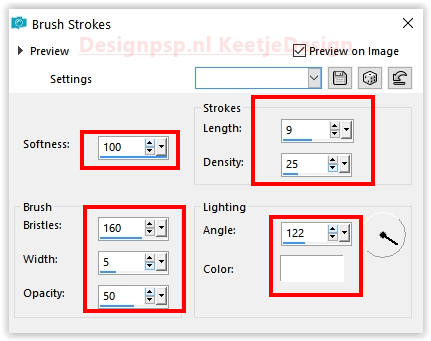
Layers – Properties – Blend Mode Overlay
Layers – Merge – Merge Visible
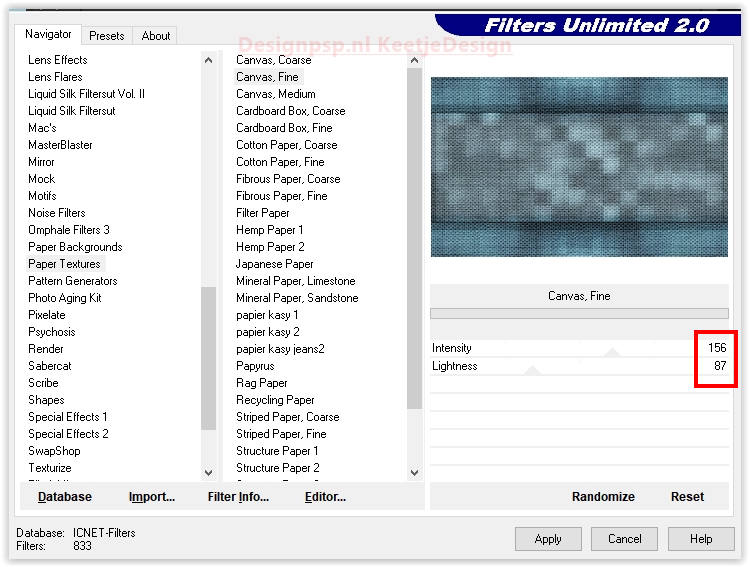
Effects – Plugin Unlimited 2.0 – Paper textures – Canvas, Fine / Standard
9
Open the tube EF-Garances_Deco_1 – Copy – Paste as new layer
Layers – Properties – Blend Mode Screen
10
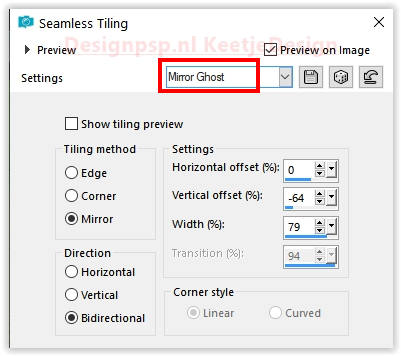
Effects – Image Effects – Seamless Tiling – Mirror Ghost
Layers – Duplicate
Layers – merge – merge down
11
Layers – New Raster Layer
Fill with the color #ffffff
Layers – New Mask Layer – From Image: NarahsMasks_1719
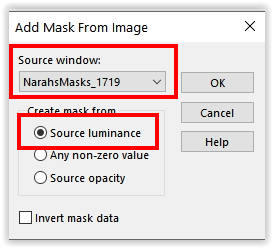
Layers – Merge – Merge Group
12
Layer palette – Activate the bottom layer
Activate Selection Tool (S) – Custom Selection
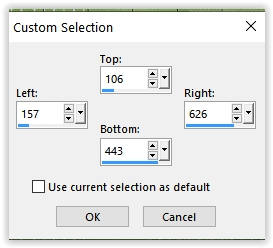
Selections – Promote selection to Layer
Layers – Arrange – Bring to top
Selection – Hold
13
Adjust – Blur – Gaussian Blur / Range 50
Effects – Plugin Unlimited 2.0 – &<Bkg Designer sf10IV> – Grid / Default
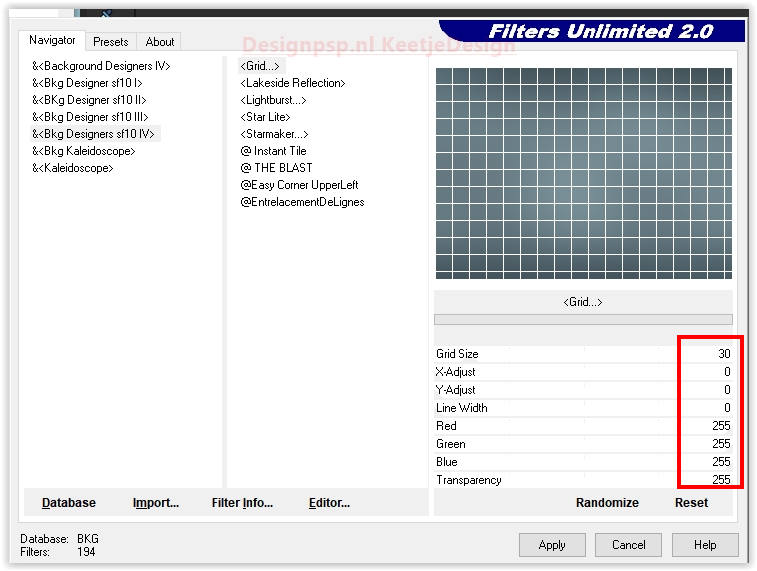
Selection – Hold
14
Layers – New Raster Layer
Fill the color #ffffff
Selections – Modify – Contract 1 pixel
Press Delete on the keyboard
Layers – merge – merge down
Adjust – Add/Remove Noise – Add Noise
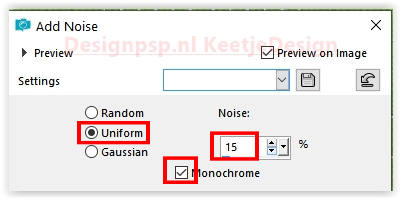
Selections – Select none
15
Layers – New Raster Layer
Fill with the color #99c2d0
Layers – New Mask Layer – From Image: EF_Mask_Garances
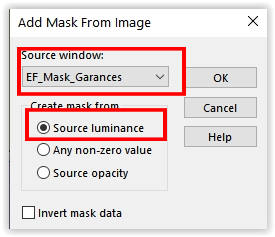
Layers – Merge – Merge Group
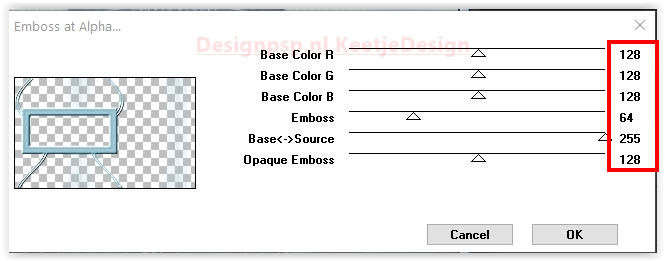
Effects – Plugin MuRa’s Seamless – Emboss at Alpha / Default
16
Activate Selection Tool(S) – Custom Selection
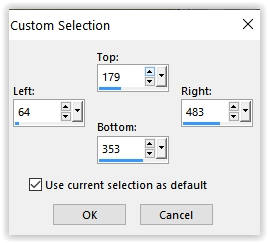
Open the tube 014PaisagemByPqnaAlice – Copy – Paste as new layer
Place the tube in the selection
Selections – Invert
Press Delete on the keyboard
Selections – Select none
Adjust – Sharpness – Sharpen
17
Layers – Arrange – Move Down
Layer palette – Activate the top layer
Effects – 3D Effects – Drop Shadow / 0 / 0 / 50 / 50 / Color # 000000
Layers – Merge – Merge down
Effects – 3D Effects – Drop Shadow / 0 / 0 / 50 / 50 / Color # 000000
18
Layer palette – Activate the bottom layer
Open the tube EF-Garances_Deco_2 – Copy – Paste as new layer
Layers – Properties – Blend Mode Burn
19
Layer palette – Activate the top layer
Open the tube EF-Garances_Texto – Copy – Paste as new layer
Move text to the top right.
20
Image – Add Borders – Symmetric
1 pixel color #02293a
30 pixels color # 99c2d0
1 pixel color #02293a
30 pixels color # 99c2d0
21
Selections – Select all
Selections – Modify – Contract 61 pixels
Selections – Invert
22
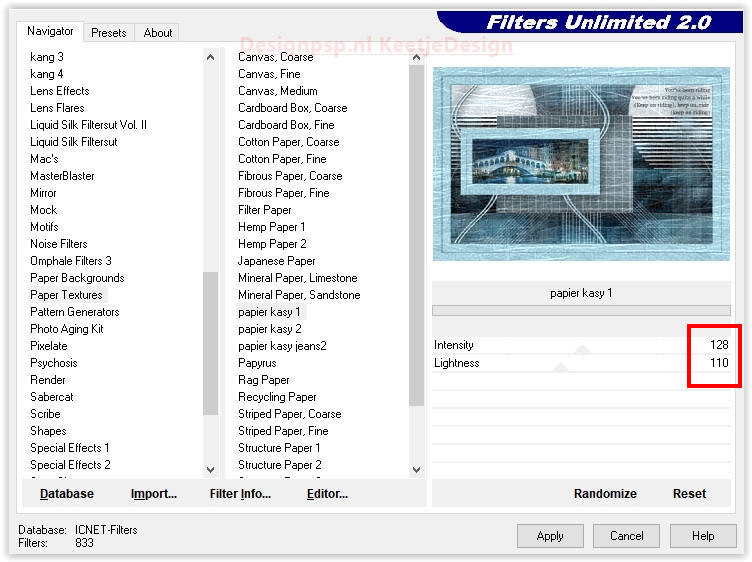
Effects – Plugin Unlimited 2.0 – Paper Textures – Paper Kasy 1
Selections – Invert
Effects – 3D Effects – Drop Shadow / 0 / 0 / 50 / 50 / Color #3c4a51
Selections – Select none
23
Open the tube by_stirner_umzug – Copy – Paste as new layer
Image – Resize – Resize by 90% – All layers unchecked
Move a little to the right (see example crea)
Effects – 3D Effects – Drop Shadow / 0 / 0 / 50 / 50 / Color #3c4a51
24
Sign your work
Image – Add Borders – Symmetric
1 pixel color #02293a
Image – Resize – Change to 1000 pixels width
Save as Jpeg
We are done with Estela’s tutorial
The translation has been tested by Marianne.
Marianne thank you very much
© Translation DesignPSP KeetjeDesign june2022


