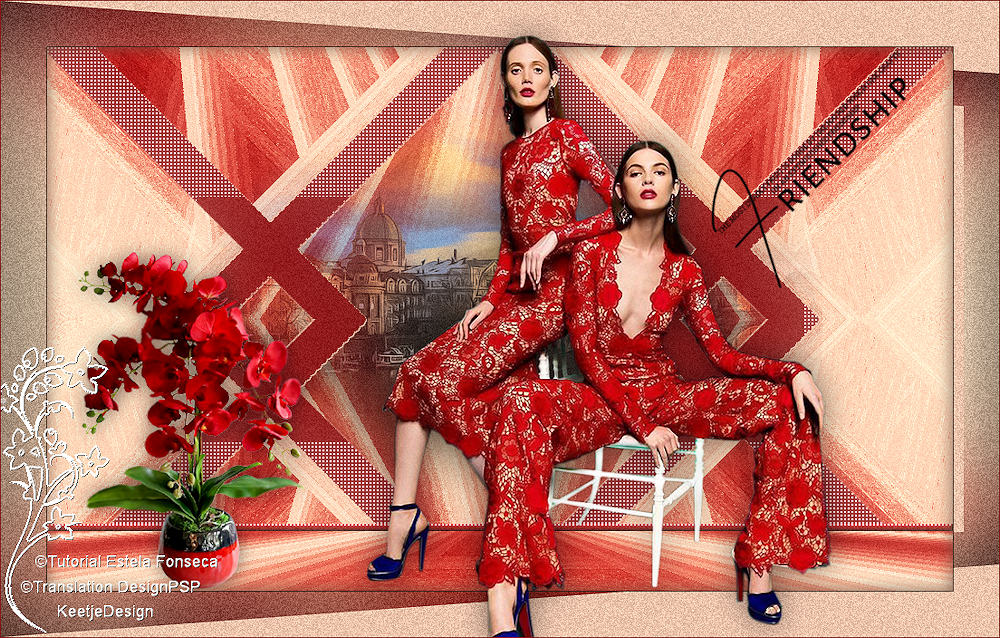
Friendship
Original tutorial Here
This tutorial is written by Estela Fonseca the © is from her.
It is not allowed to copy, link and / or place these or parts of it without her permission.
The © ️ of the materials wich are used is for the rightful owner.
If you want to use this tutorial on your own forum, club or group, you have to request permission from the writer herself.
We have permission to translate Estela Fonseca’s tutorials into English.
Thank you Estela for the permission to translate your tutorials.
Temos permissão para traduzir os tutoriais da Estela Fonseca para o inglês.
Obrigado Estela pela tradução dos tutriais.
Materials Used:
Open the materials in PSP / Duplicate with Shift + D / Close the originals
Plugins Used:
Unlimited 2.0 – Filter Factory Gallery F – Scrambler
Unlimited 2.0 – Filter Factory Gallery N – Wee Scratches
Unlimited 2.0 – Andrew’s Filters 24 – Diagonally Asunder
Unlimited 2.0 – Simple – Diamonds
Unlimited 2.0 – Simple – Top Left Mirror
Unlimited 2.0 – & <Bkg Designer sf10I> – Corner Half Wrap
Unlimited 2.0 – & <Bkg Designer sf10I> – Corner Right Wrap
AFS IMPORT – sqborder2
Mura’s Meister – Perspective Tiling
Nik Software – Color Efex Pro 3.0
The translation was made with PSP 2020 , but can also be done with other versions.
Note : When working with your own colors , play with the Blend Mode and/or Opacity at your own discretion
1
Materials Palette – Foreground Color # 861317/ Background Color # eec4ac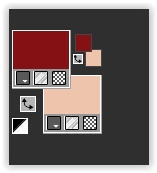
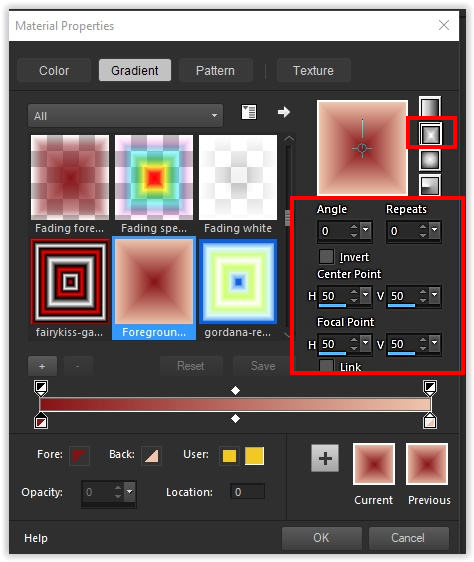
Make the gradient Rectangular in the foreground
2
Open EF_Alpha_Friendship – Window – Duplicate or use Shift+D
Close the original we work on the copy
This worksheet is not empty but contains the selections in the alpha channel
Fill with the gradient
3
Effects – Filter Unlimited 2.0 – Filter Factory Gallery F – Scrambler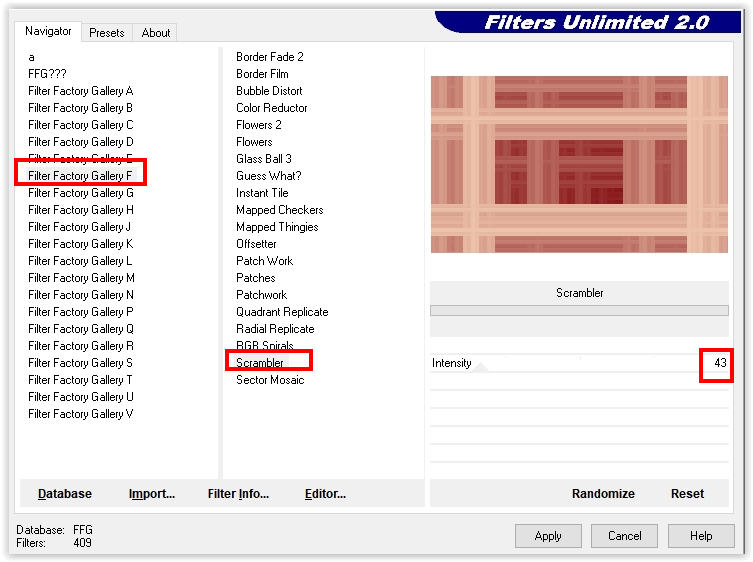
Effects – Edge Effects – Enhance
Effects – Reflection Effects – Rotating Mirror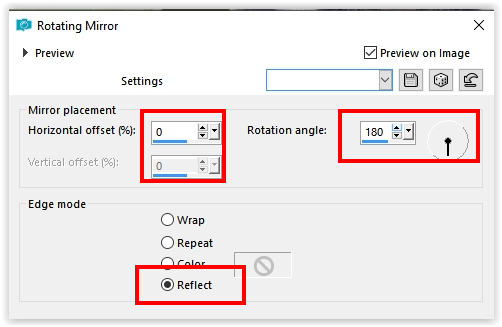
4
Layers – Duplicate
Effects – Filter Unlimited 2.0 – Filter Factory Gallery N – Wee Scratches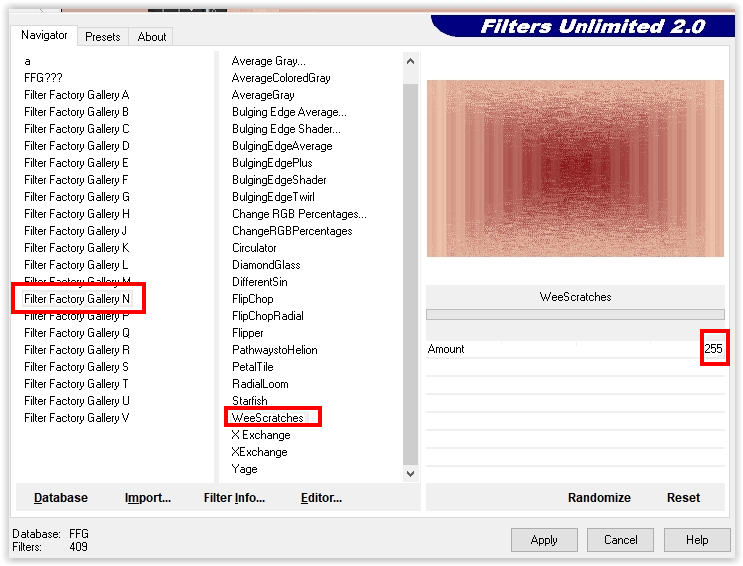
Layers – Properties – Blend Mode Hard Light
Layers – merge – merge down
5
Layers – Duplicate
Effects – Filter Unlimited 2.0 – Andrew’s Filter 24 – Diagonally Asunder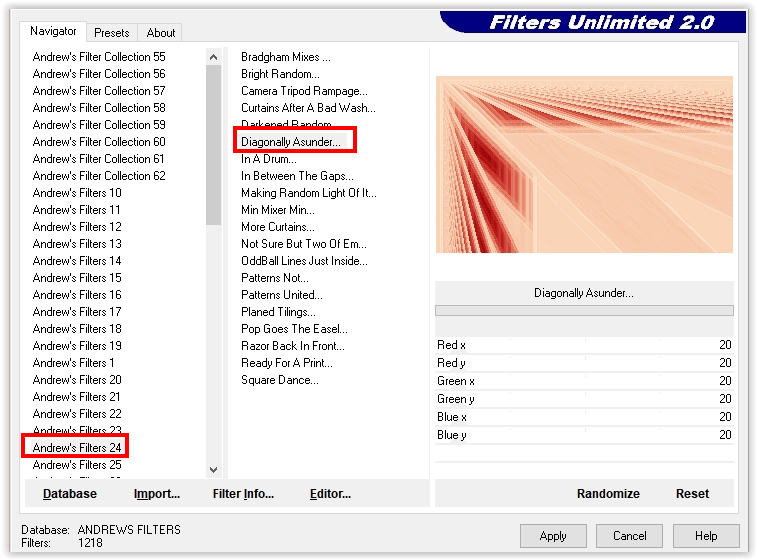
6
Effects – Filter Unlimited 2.0 – Simple – Diamonds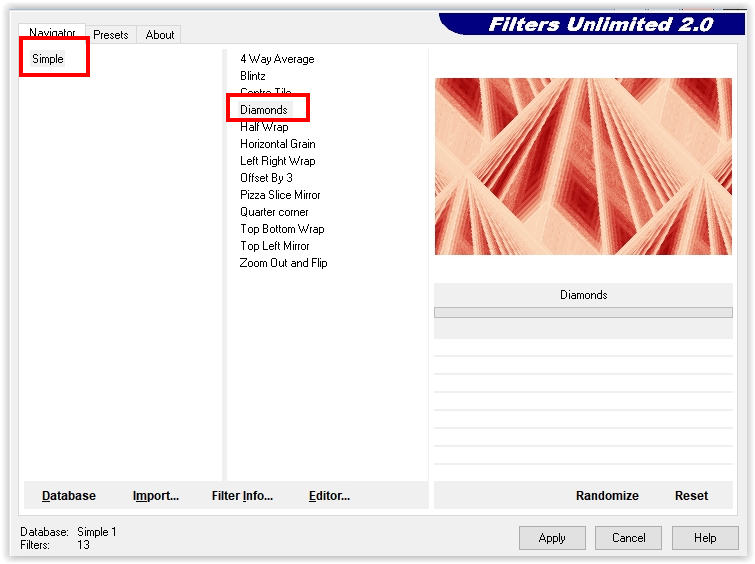
Effects – Filter Unlimited 2.0 – Simple – Top Left Mirror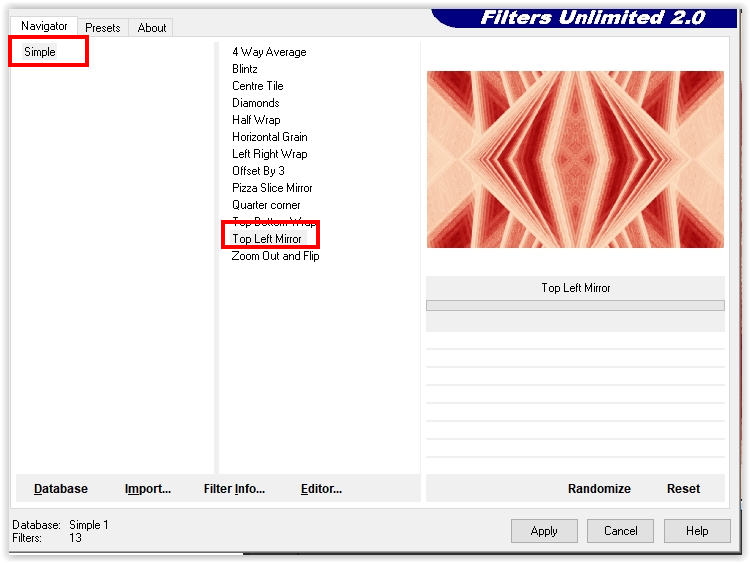
7
Layers – New Raster Layer
Selections – Load/Save Selection – Load Selection from Alpha Channel: Selection #1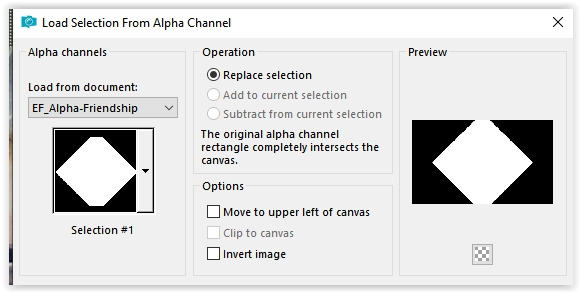
Fill with the foreground color # 861317
Selections – Hold
8
Effects – Filter Unlimited 2.0 – & <Bkg Designer sf10I> – Corner Half Wrap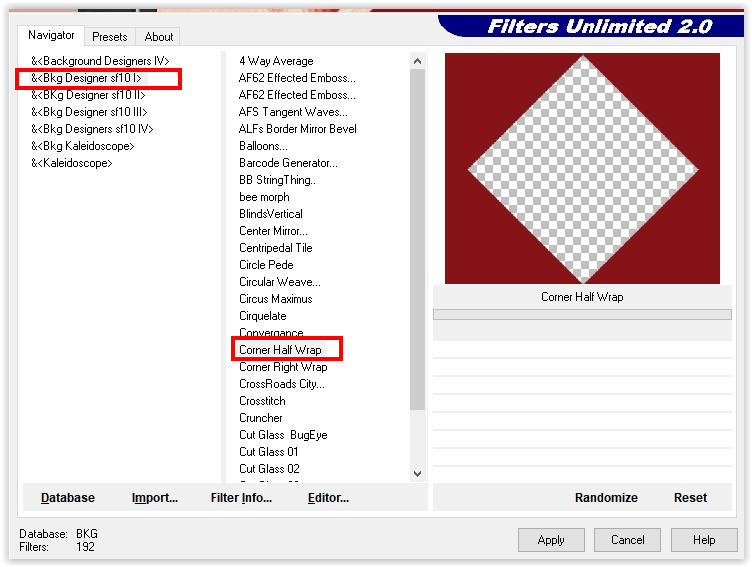
Layers – Duplicate
Selections – Select none
9
Effects – Filter Unlimited 2.0 – & <Bkg Designer sf10I> – Corner Right Wrap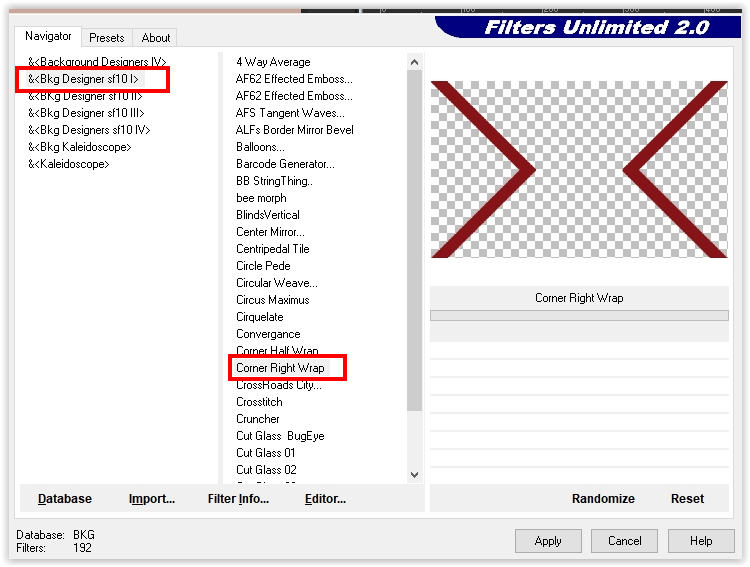
Layers – merge – merge down
10
Effects – Filter AFS IMPORT – sqborder2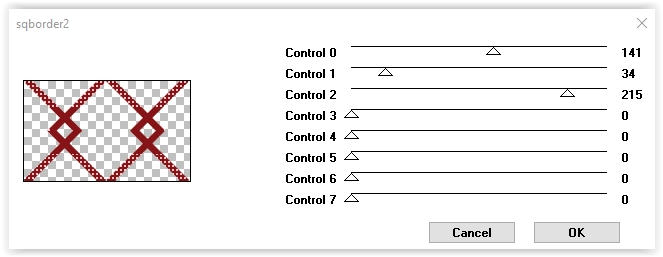
Effects – 3D Effects – Drop Shadow Color # eec4ac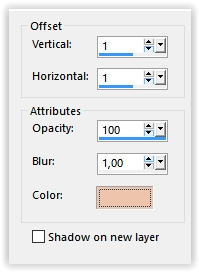
Effects – 3D Effects – Drop Shadow Color # eec4ac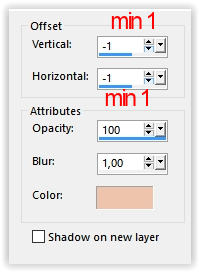
11
Layer palette – Activate the layer Raster 1
Layers – Arrange – Bring to Top
12
Selections – Load/Save Selection – Load Selection from Alpha Channel: Selection #2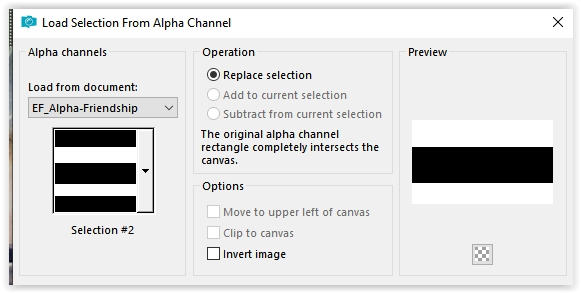
Press Delete on the keyboard
Selections – Select none
13
Effects – Filter – Mura’s Meister – Perspective Tiling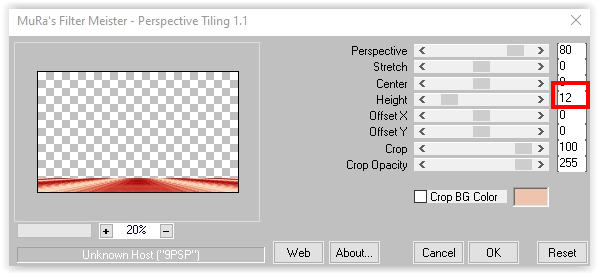
14
Selections – Load/Save Selection – Load Selection from Alpha Channel:Selection #3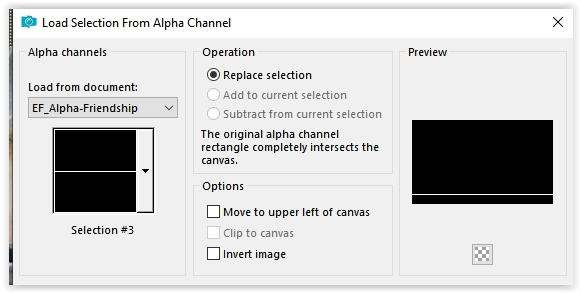
Fill with the foreground color
Effects – 3D Effects – Inner Bevel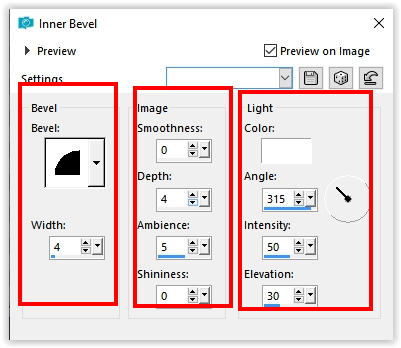
Selections – Hold
15
Effects – Filter AFS IMPORT – sqborder2, same setting
Selections – Select none
16
Layer palette – Activate the layer Copy of raster 1
Open the ag tube – Copy – Paste as new layer
Layers – Merge – Visible Layers
Effects – Filter Nik Software – Color Efex Pro 3 – Classical Soft Focus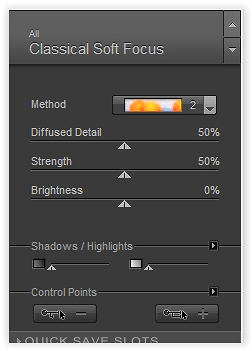
17
Open tube 6113-luzcristina – Copy – Paste as new layer
Image – Resize – Resize by 75% – All layers unchecked
Move the tube to the bottom left
Adjust – Sharpness – Sharpen
Effects – 3D Effects – Drop Shadow, Color #000000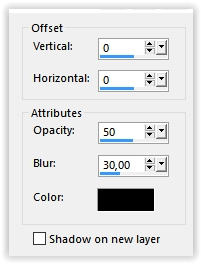
18
Image – Add Borders – Symmetric
1 pixel color # 000000
Edit – Copy
19
Selections – Select all
Image – Add Borders – Symmetric
50 pixels each color
Selections – Invert
20
Edit – Paste into selection.
Adjust – Blur – Gaussian Blur – Range 50
Selections – Hold
21
Effects – Geometric Effects – Horizontal Perspective – Background Color #eec4ac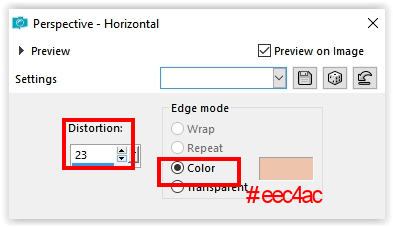
Adjust – Add/Remove Noise > Add Noise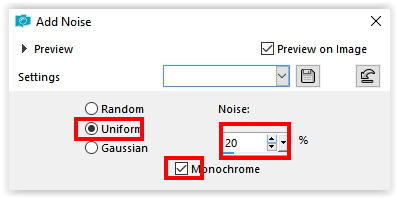
Selections > Invert
22
Layers – New Raster Layer
Effects – 3D Effects – Color Cut #745444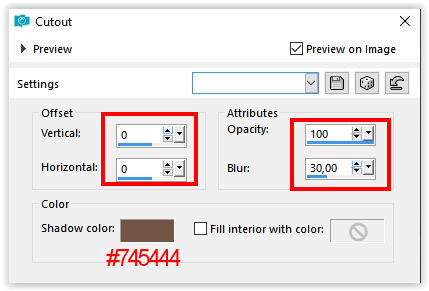
Selections – Select none
23
Open the tube Texto – Copy – Paste as new layer
Activate Tool Select (K) Position Horizontal : 777 / Position vertical: 53
Type M to close the tool
24
Open the tube 2594-Models-LBTUBES – Copy – Paste as new layer
Place to the right see example crea
Effects – 3D Effects – Drop Shadow Color # 000000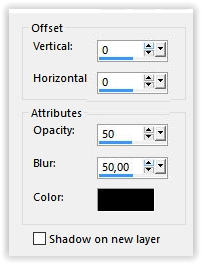
25
Image – Add Borders – Symmetric
1 pixel foreground color
Sign your work
Layers – Merge – Merge all layers
Image – Resize – Change the width to 1000 pixels
Save as Jpeg
We are done with Estela’s tutorial
This translation has been tested by Marianne.
Marianne thank you
The translation has been tested by Marianne.
Marianne thank you very much
©Translation DesignPSP KeetjeDesign 3-6-2021


