

Forever


Originele tutorial Hier
This tutorial is written by Estela Fonseca the © is from her.
It is not allowed to copy, link and / or place these or parts of it without her permission.
The © ️ of the materials wich are used is for the rightful owner.
If you want to use this tutorial on your own forum, club or group, you have to request permission from the writer herself.
We have permission to translate Estela Fonseca’s tutorials into English.
Thank you Estela for the permission to translate your tutorials.
Temos permissão para traduzir os tutoriais da Estela Fonseca para o inglês.
Obrigado Estela pela tradução dos tutriais.
Her site
Materials Used: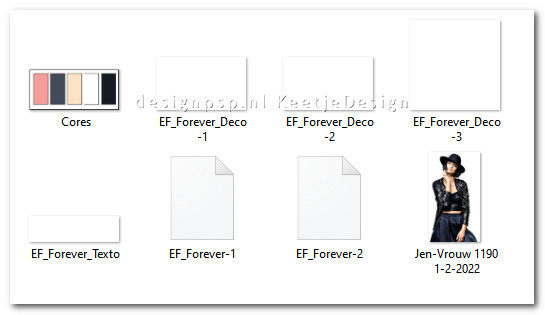
Open the other material in PSP/Duplicate with Shift+D/Close the originals
Plugins Used:
AFS [IMPORT] – sqborder2
Toadies – Weaver
Mehdi – Sorting Tiles
Graphics Plus – Quick Tile I
Flaming Pear – Flexify 2
Mura’s Seamless – Emboss at Alpha
Simple – Left Right Wrap
Colors Used:
The translation was made with PSP 2020 , but can also be done with other versions.
Note : When working with your own colors , play with the Blend Mode and/or Opacity at your own discretion
1
Materials Palette – Foreground color 1 # f59d9b / Background color # 444a58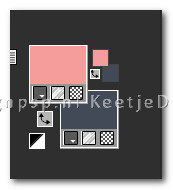
Create the Linear gradient in the foreground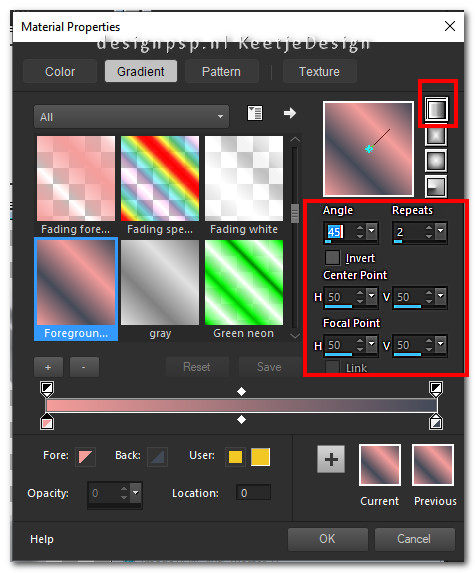
2
Open a new transparent image of 1000 x 600 pixels
Fill with the gradient
Effects – Reflection Effects – Rotating Mirror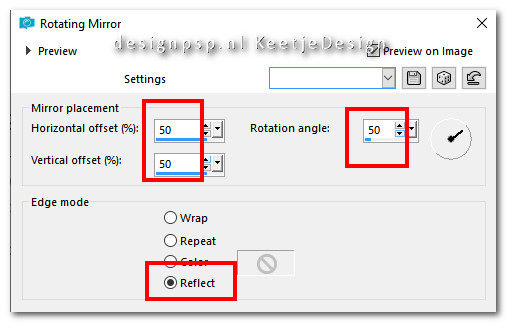
3
Layers – Duplicate
Adjust – Blur – Gaussian Blur – Radius 50
4
Effects – Plugin AFS [IMPORT] – sqborder2 / Default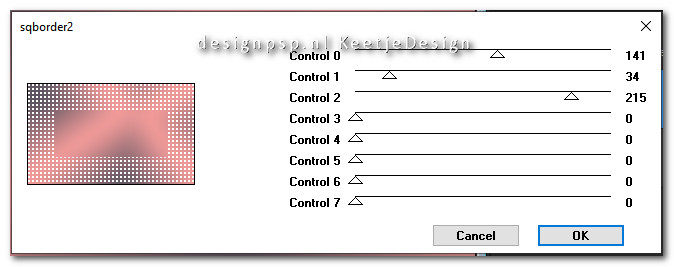
5
Layers – Properties – Blend Mode Soft Light
Layers – merge – merge down
6
Effects – Plugin Toadies – Weaver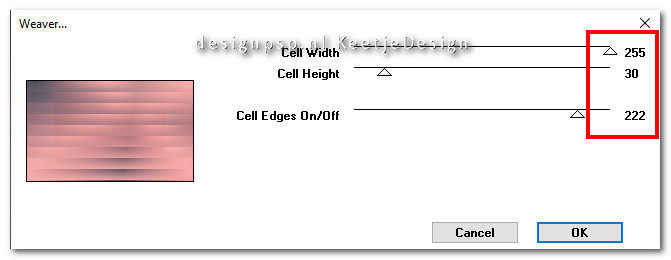
7
Effects – Plugin Mehdi – Sorting Tiles
8
Adjust – Sharpness – Sharpness
Effects – Plugin Graphics Plus – Quick Tile I / Standard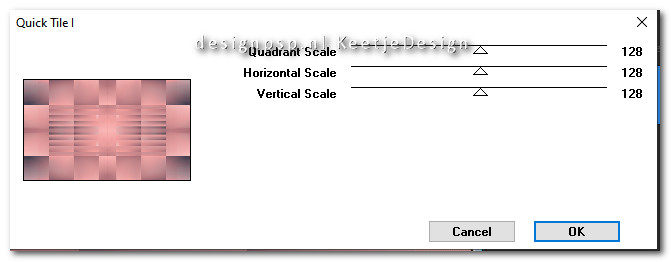
9
Effects – Plugin Flaming Pear – Flexify 2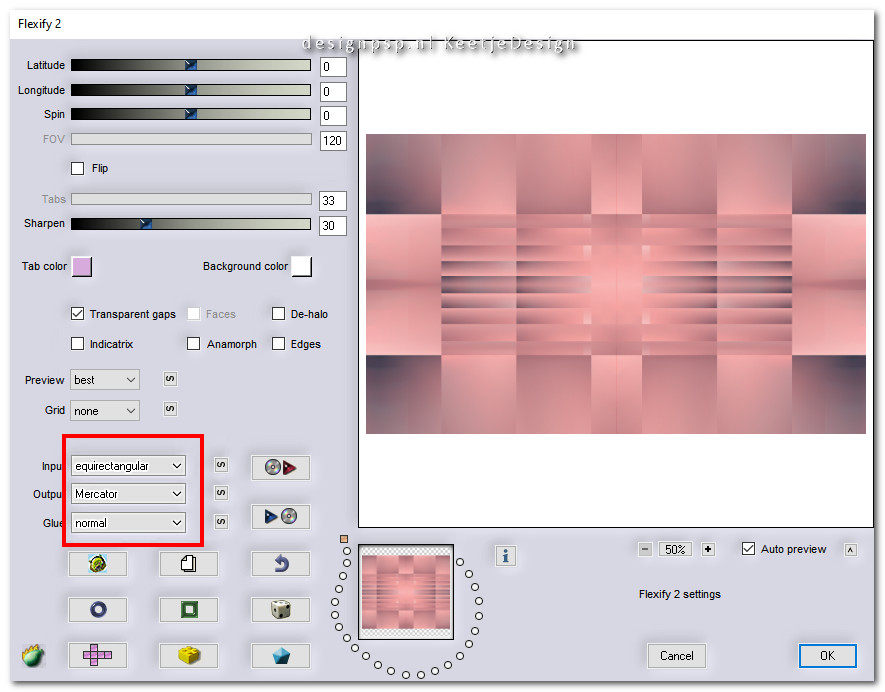
10
Adjust – Add/Remove Noise – Add Noise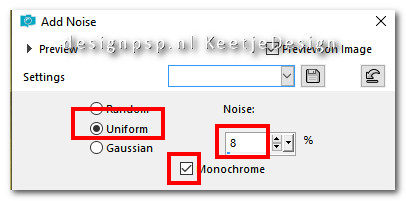
11
Activate SelectionTool (S) – Custom Selection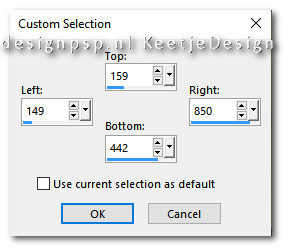
Selections – Layer selection
Effects – 3D Effects – Emboss / Color # 454a59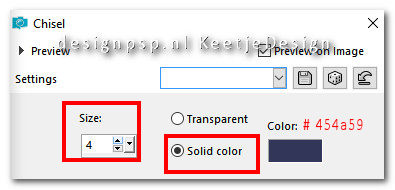
Selections – Select none
12
Effects – Distortion Effects – Polar Coordinates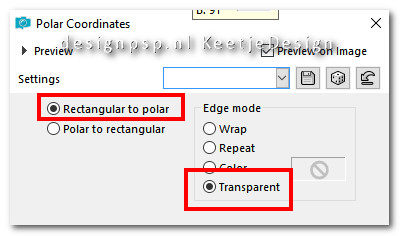
13
Image – Free Rotate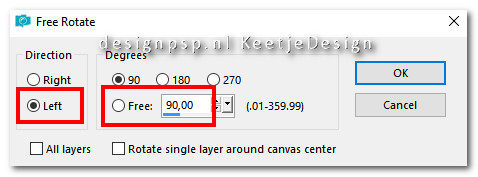
14
Image – Resize – Resize by 80% – All layers unchecked
Objects – Align – Center on canvas
Objects – Align – Right
15
Layers – Duplicate
Image – Flip (horizontal)
Layers – merge – merge down
Effects – 3D Effects – Drop Shadow / 0 / 0 / 50 / 30 / Color # 000000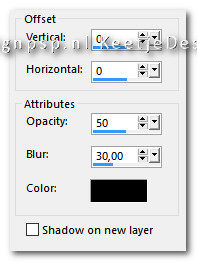
16
Activate Selection Tool (S) Custom Selection
Press Delete on the keyboard
Selections – Select none
17
Open the tube EF_Forever_deco_1 – Copy – Paste as new layer
Layers – Arrange – Down
18
Layer palette – Activate the top layer
Effects – Plugin Simple – Left Right Wrap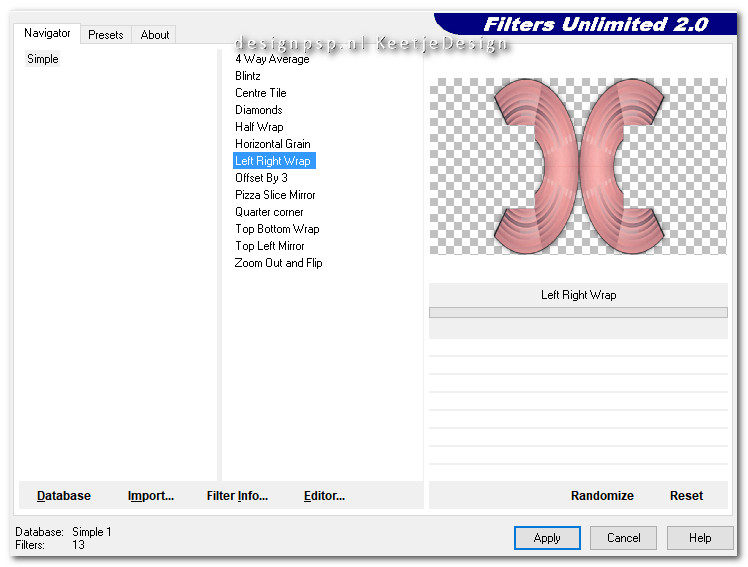
19
Open the tube EF_Forever_Deco-2 – Copy – Paste as new layer
20
Open the tube EF_Forever_Deco-3 – Copy – Paste as new layer
Objects – Align – Left
21
Selections – Load/Save – Load selection from disk: EF_Forever-1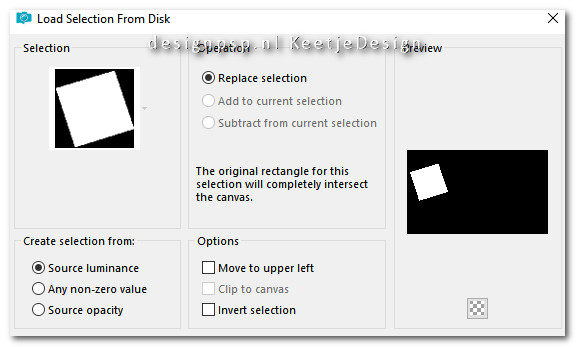
22
Layers – New Raster Layer
Layers – Arrange – Down
Fill with color 1
Selections – Select none
23
Open the tube Jen-Woman 1190 1-2-2022
Activate the Selection Tool (S) Rectangle
Create a selection as in the example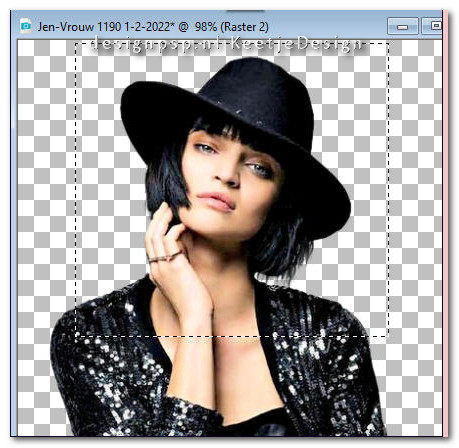
24
Edit – Copy (minimize the tube we will use again)
Activate the work your work
Edit – Paste as New Layer
25
Activate The Pick Tool (K) rotate the tube slightly to the left
See example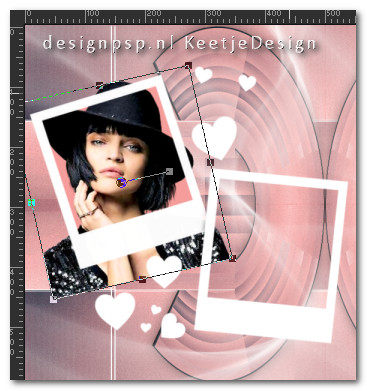
Type M to close the Pick Tool
26
Selections – Load/Save – Load selection from disk: again EF_Forever-1
Selections – Invert
Press Delete on the keyboard
Selections – Select none
Layers – merge – merge down
27
Selections – Load / Save – Load selection from disk: EF_Forever-2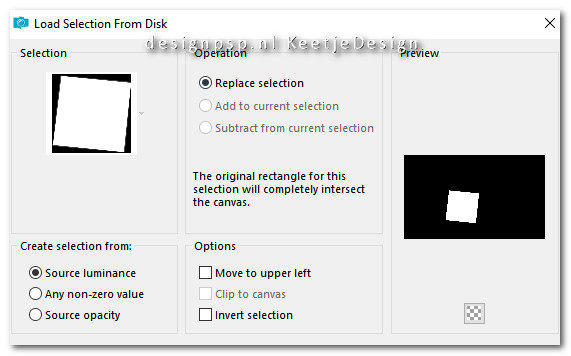
28
Layers – New Raster Layer
Fill with the foreground color
Edit – Paste as new layer (the tube is still in memory)
Place the tube on the selection See example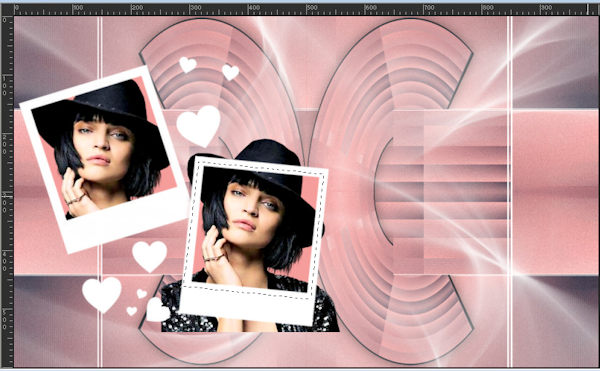
Selections – Invert
Press Delete on the keyboard
Selections – Select none
29
Layers – merge – merge down
Layer palette – Activate the top layer
Effects – Plugin Mura’s Seamless – Emboss on alpha / Default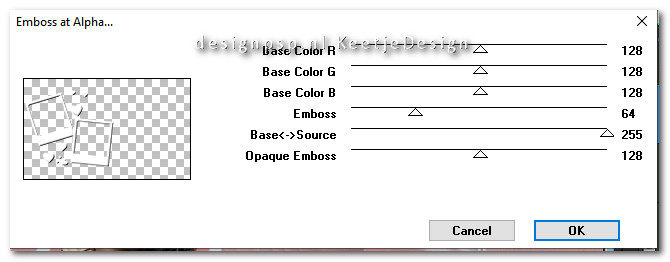
30
Effects – 3D – Effects – Drop Shadow / 0 / 0 / 50 / 30 / Color # 000000
Layers – Merge – Merge Down 2 times
31
Open the tube EF_Forever-Texto – Copy – Paste as new layer
Activate Selection Tool (K) / Position X 153 / Position Y 504
Effects – 3D Effects – Drop Shadow / 1 / 1 / 50 / 1 / kleur # 454a59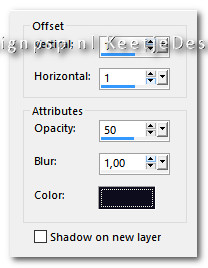
32
Image – Add Borders – Symmetric
2 pixels color #ffffff
3 pixels color # f49d9b
2 pixels color #ffffff
33
Edit – Copy
Selections – Select all
Image – Add Borders – Symmetric
45 pixels each color
34
Selections – Invert
Edit – Paste into Selection
Adjust – Blur – Gaussian Blur / Range 25
Effects – Texture Effects – Blinds / Color #fe3c6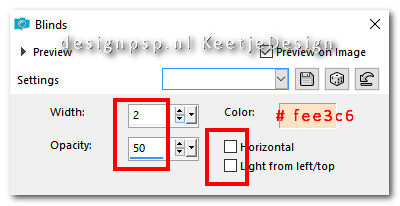
Selections – Invert
Effects – 3D Effects – Drop Shadow / 0 / 0 / 50 / 30 / Color #454a59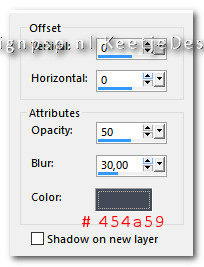
Selections – Select none
35
Reactivate the woman tube
Selections – Select none
Copy – Paste as New Layer (at work)
Image – Resize – Resize by 85% – All layers unchecked
Place to the right
Effects – 3D Effects – Drop Shadow / 0 / 0 / 30 / 30 / Color # 000000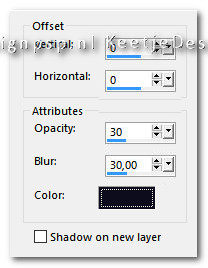
36
Sign your work
Image – Add Borders – Symmetric
1 pixel color # 000000
Image – Resize – Resize to 1000 pixels width
Save as Jpeg
We are done with Estela’s tutorial
The translation has been tested by Marianne.
Marianne thank you very much
© Translation DesignPSP KeetjeDesign 2022