Forever Autumn
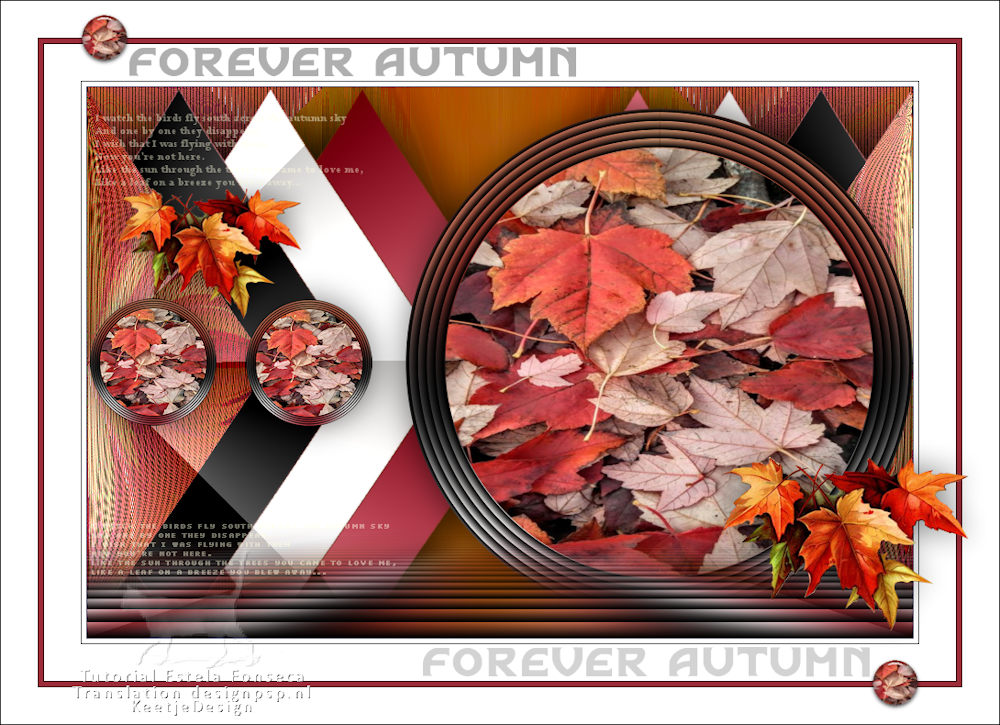
Originele tutorial Here
This tutorial is written by Estela Fonseca the © is from her.
It is not allowed to copy, link and / or place these or parts of it without her permission.
The © ️ of the materials wich are used is for the rightful owner.
If you want to use this tutorial on your own forum, club or group, you have to request permission from the writer herself.
We have permission to translate Estela Fonseca’s tutorials into Dutch and English.
Thank you Estela for the permission to translate your tutorials.
Temos permissão para traduzir os tutoriais de Estela Fonseca para holandês e inglês.
Obrigado Estela pela permissão para traduzir seus tutoriais.
Materials Used: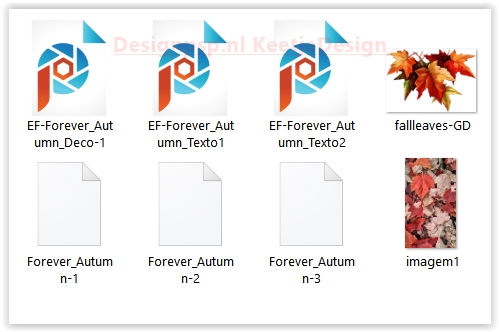
The translation was made with PSP 2020 , but can also be done with other versions.
Note : When working with your own colors , play with the Blend Mode and/or Opacity at your own discretion
1
Open a new transparent image of 900 x 600 pixels
Selections – Select all
2
Open imagem1 – Copy – Paste into selection
Selections – Select none
Adjust – Blur – Radial Blur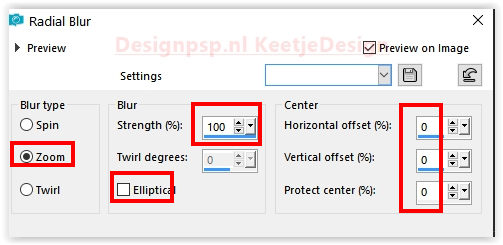
3
Layers – Duplicate
Effects – Plugin Andrew’s Filter 9 – Picture Flares…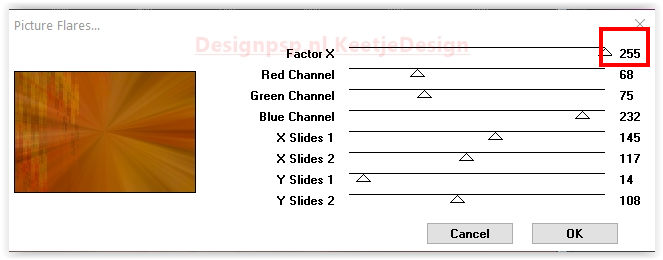
Effects – Edge Effects – Enhance
4
Effects – Reflection Effects – Rotating Mirror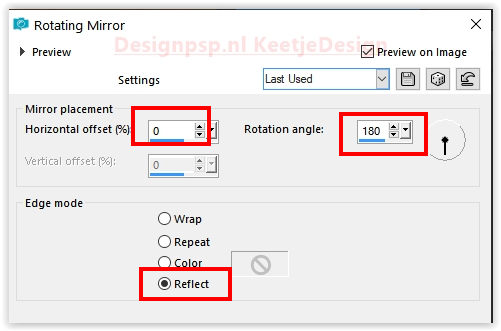
Layer palette – Close this layer
5
Layer palette – Activate the bottom layer (Raster 1)
Effects – Plugin Andrew’s Filter 8 -Tow the Line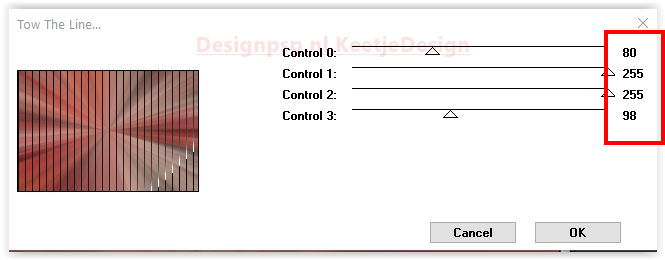
6
Layers – Duplicate
Image – Flip (horizontal)
Layers – Properties Blend Mode Hard Light
7
Layers – merge – merge down
Adjust – One Step Photo Fix
Effects – Plugin Andrew’s Filter 40 – Popping Up All Over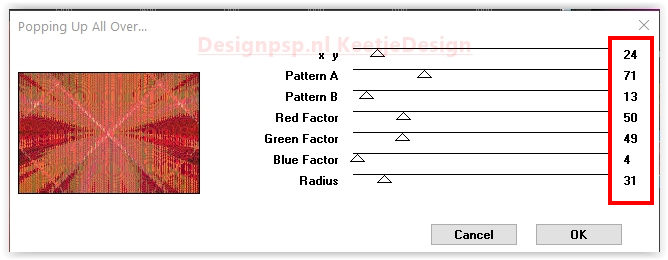
8
Selections – Load/Save Selection – Load Selection From Disk: Forever_Autumn-1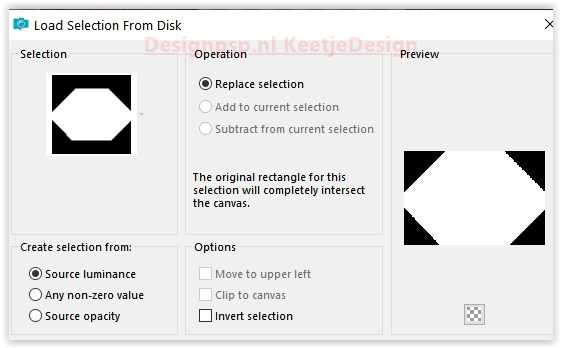
Edit – Cut (the image is in memory)
Selections – Select none
9
Edit – Paste as New Layer
Effects – Geometric Effects – Circle 2x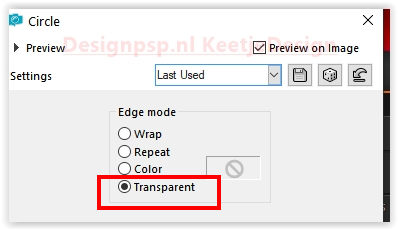
10
Effects – 3D Effects – Drop Shadow / 0 / Min 100 / 100 / 1 / Color # 000000
Effects – 3D Effects – Drop Shadow / 0 / 100 / 100 / 1 / Color # 000000
Effects – 3D Effects – Drop Shadow / 0 / Min 100 / 100 / 1 / Color # ffffff
Effects – 3D Effects – Drop Shadow / 0 / 100 / 100 / 1 / Color # ffffff
Effects – 3D Effects – Drop Shadow / 0 / Min 100 / 100 / 1 / Color #931c2c
Effects – 3D Effects – Drop Shadow / 0 / 100 / 100 / 1 / Color #931c2c
11
Effects – Plugin Krusty’s FX vol.1 – Radial Texturizer / Default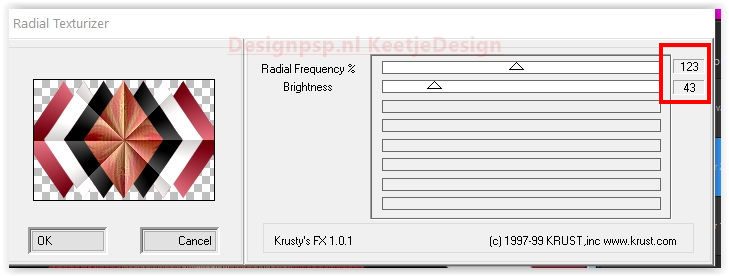
Effects – Plugin Simple – Left Right Wrap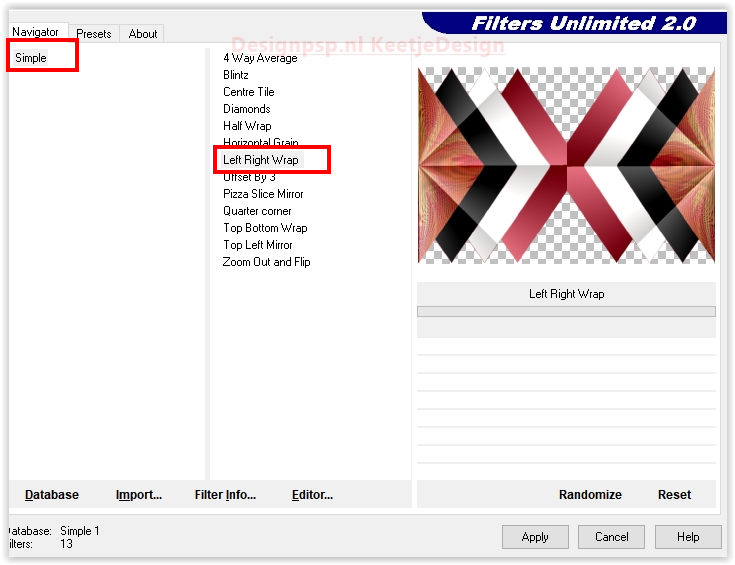
Effects – 3D Effects – Drop Shadow / 0 / 0 / 100 / 100 / Color # 000000
12
Layer palette – Open and Activate the top layer
Layers – Arrange – Send to Back
Layers – Merge – Merge Visible
13
Selections – Load/Save Selection – Load Selection From Disk: Forever_Autumn-3
Selections – Promote selection to layer
Adjust – Blur – Gaussian Blur / Range 25
Effects – Texture Effects – Blinds – Color # 000000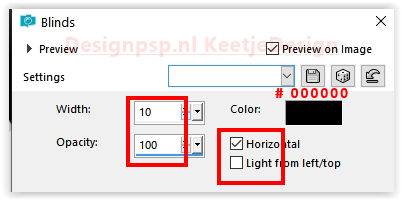
Selections – Select none
14
Effects – Plugin MuRa’s Meister – Pole Transform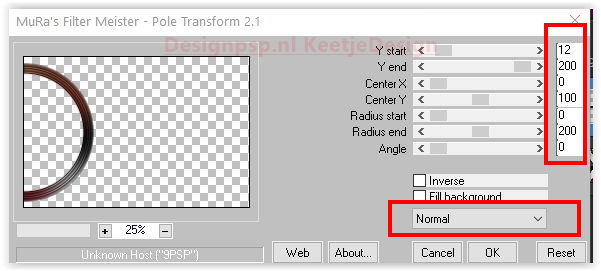
Objects – Align – Right
Layers – Duplicate
Image – Morror (horizontal)
Activate the Pick Tool (K) / Position X 347 / Position Y 23
Layers – merge – merge down
15
Layers – New Raster Layer
Selections – Load/Save Selection – Load Selection From Disk: Forever_Autumn-2
Activate the image imagem1 – Copy – Paste into selection
Selections – Select none
16
Layers – Arrange – Down
Layer palette – Activate the top layer
Layers – merge – merge down.
17
Layers – Duplicate
Image – Resize – Risize with 25% – All layers unchecked
Adjust – Sharpness – Sharpen
Activate the Pick Tool (K) / Position X 3 / Position Y 230
18
Layers – Duplicate
The PickTool (K) / Position X 173 / Position Y 231
Type M to close the tool
19
Layers – Merge – Merge Down 2x
Effects – 3D Effects – Drop Shadow / 0 / 0 / 50 / 50 / Color # 000000
20
Layer palette – Activate the bottom layer
Layers – Duplicate
Layers – Arrange – In Front
Effects – Image Effects – Seamless Tiling / Default.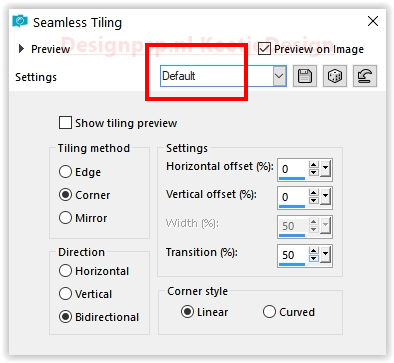
21
Adjust – Blur – Gaussian Blur / Range 50
Effects – Texture Effects – Blinds / Default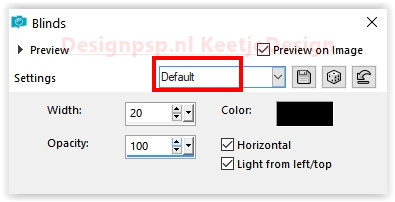
22
Effects – Plugin MuRa’s Meister – Perspective Tiling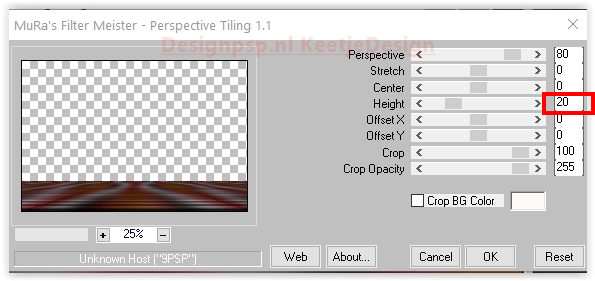
Activate the Magic Wand tool – Tolerance 0 – Feather 75
Click in the transparent part
Press 5x Delete on the keyboard
Selections – Select none
23
Open EF-Forever_Autumn_texto-1 – Copy – Paste as new layer
Activate the Pick Tool (K) / Position X 5 / Position Y 29
Type M to close the Pick tool
Leave the Opacity at 44
24
Image – Add Borders – Symmetric
1 pixel color # 000000
5 pixels color # ffffff
1 pixel color # 000000
40 pixels color #ffffff
1 pixel color # 000000
5 pixels color #9d2c3b
1 pixel color # 000000
40 pixels color #ffffff
25
Open the tube falleaves-GD – Copy – Paste as new layer
Image – Resize – Resize by 75% – All layers unchecked
Activate the Pick Tool (K) / Position X 784 / Position Y 497
Effects – 3D Effects – Drop Shadow / 0 / 0 / 50 / 50 / Color # 000000
26
Layers – Duplicate
Image – Resize, – Resize with at 75% – All layers unchecked
The PickTool (K) / Position X 104 / Position Y 181
27
Open the tube EF-Forever_autumn_texto2 – Copy – Paste as new layer
Open EF-Forever_Autumn_Deco – Copy – Paste as new layer
28
Sign your work
Image – Add Borders – Symmetric
1 pixel color # 000000
Image – Resize – Resize the width to 1000 pixels
Save as Jpeg
We are done with Estela’s tutorial
The translation has been tested by Marianne.
Marianne thank you very much
© Translation DesignPSP KeetjeDesign june 2022


