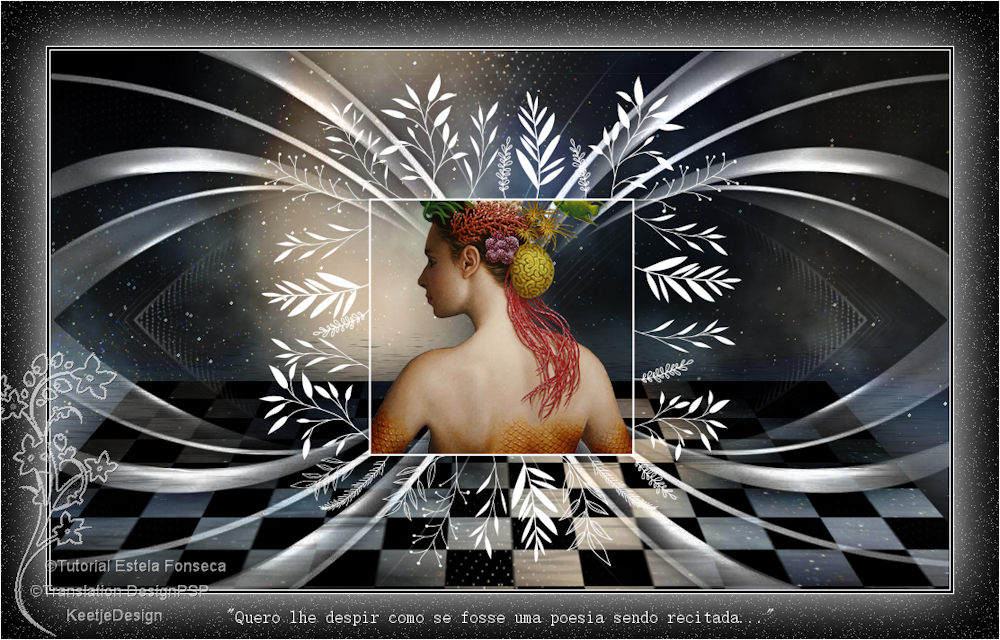
Desejo Secreto
Originele tutorial Hier
This tutorial is written by Estela Fonseca the © is from her.
It is not allowed to copy, link and / or place these or parts of it without her permission.
The © ️ of the materials wich are used is for the rightful owner.
If you want to use this tutorial on your own forum, club or group, you have to request permission from the writer herself.
We have permission to translate Estela Fonseca’s tutorials into English.
Thank you Estela for the permission to translate your tutorials.
Temos permissão para traduzir os tutoriais da Estela Fonseca para o inglês.
Obrigado Estela pela tradução dos tutriais.
Materials Used:
Open the other material in PSP/Duplicate with Shift+D/Close the originals/Minimize mask
Plugins Used:
Flaming Pear – Glitterato
Flaming Pear – Flood
L en K – Landksiteofwonders – L en K’s Pia
Andromeda – Perspective
The translation was made with PSP 2020 , but can also be done with other versions.
Note : When working with your own colors , play with the Blend Mode and/or Opacity at your own discretion
1
Open a new transparent image of 1000 x 600 pixels
2
Selections – Select all
Open EF_Fundo_Desejo_Secreto – Copy – Paste into selection.
Selections – Select none
3
Layers – Duplicate
Effects – Plugin Flaming Pear – Glitterato
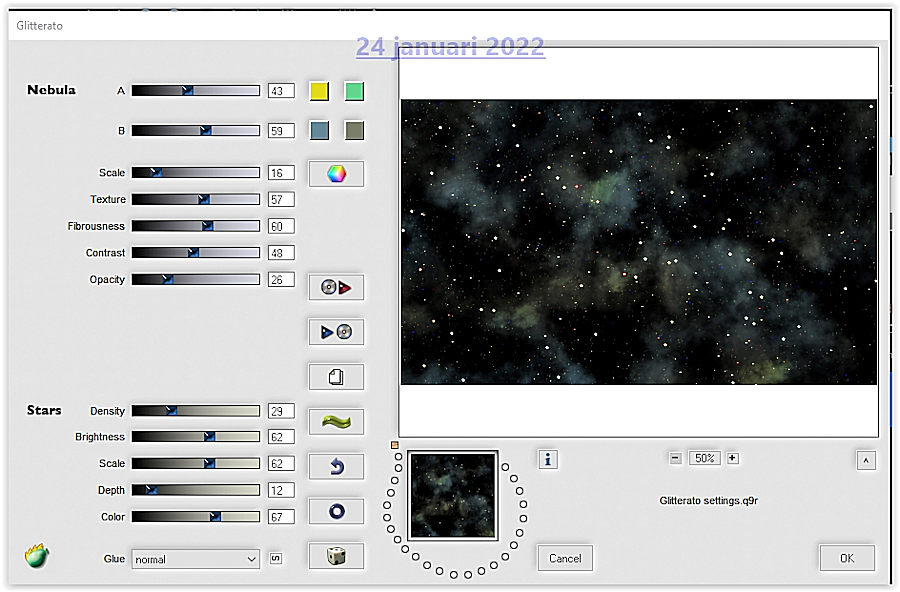
Layers – Properties – Blend Mode Overlay / Opacity 69
4
Layers – merge – merge down
Layers – Duplicate
5
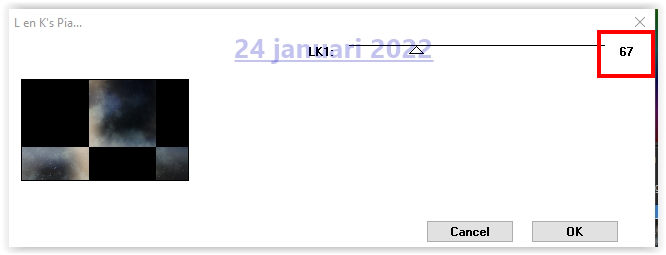
Effects – Plugin L and K Landksiteofwonders – L and K’s Pia
6
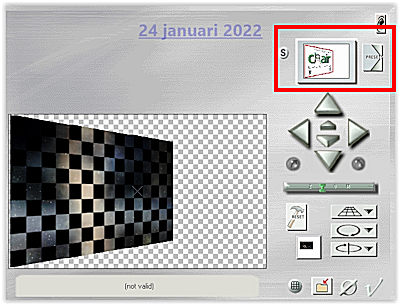
Effects – Plugin Andromeda – Perspective
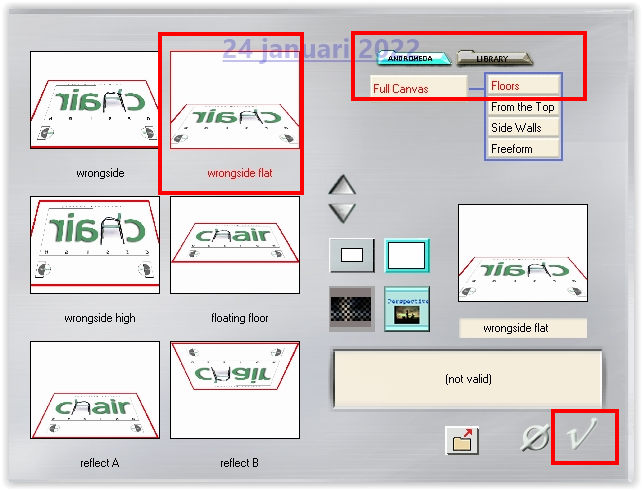
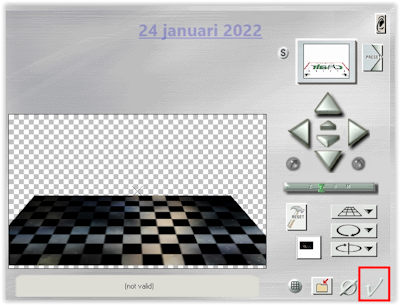
7
Activate Selection tool (K) Position horizontal minus 2.00 / Position vertical 368.00.
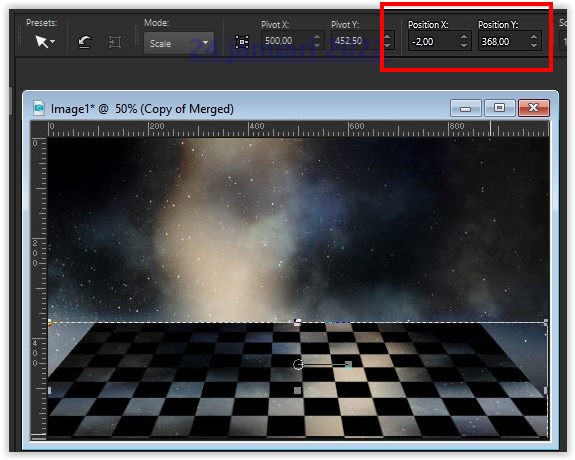
Type M to close the tool
Effects – 3D Effects – Drop Shadow / Color #000000.
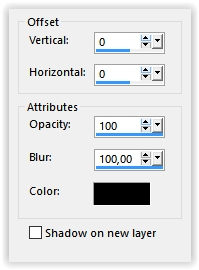
8
Activate Selection Tool (S) – Custom Selection
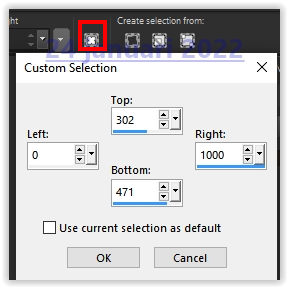
Selections – Layer selection
Selections – Select none
9
Effects – Plugin Flaming Pear – Flood
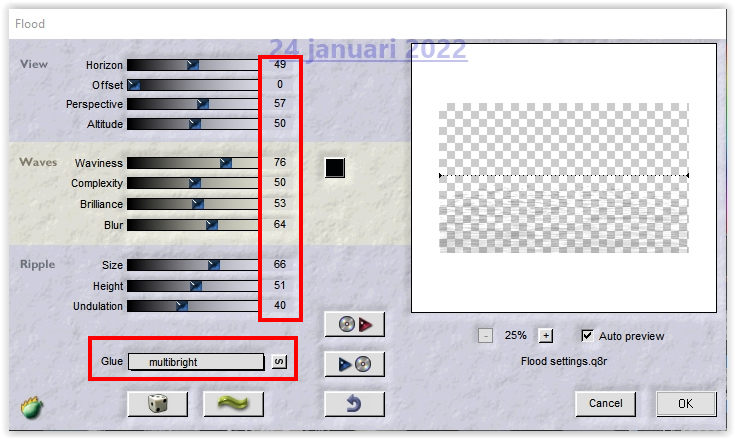
10
Layers – Duplicate
Layers – Properties – Blend Mode Multiply (Adjust to your own colors)
11
Open EF_Desejo_Secreto_Frame – Copy – Paste as new layer
12
Activate the Magic Wand tool

Click in the transparent center
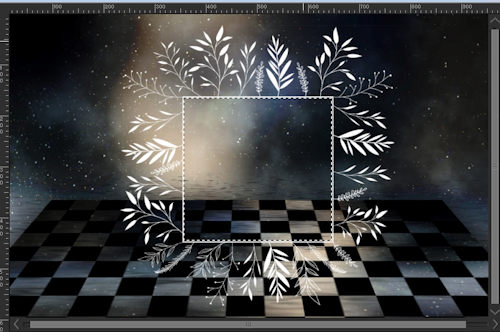
Selections – Modify – Expand 1 pixel
13
Open the tube Renee-TUBES-January-2022-27 – Copy – Paste as new layer
Image – Resize – Resize by 50% – All layers unchecked
Place the tube on the selection
14
Selections – Invert
Press Delete on the keyboard
Selections – Select none
15
Adjust – Sharpness – Sharpen
Layers – Arrange – Down
16
Layer palette – Activate the top layer
Layers – merge – merge down
17
Layer palette – Activate the layer Copy of Raster 1
Layers – New Raster Layer
Fill with the color #ffffff
18
Layers – New Mask Layer – From Image: EF_Mask_Desejo_Secreto
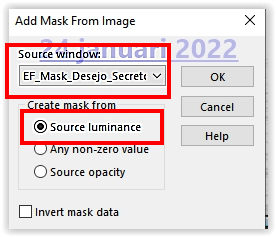
Layers – Duplicate
Layers – Merge – Merge Group
19
Layers – Properties – Blend Mode Luminance (Legacy)
Effects – 3D Effects – Drop Shadow / Color # 000000
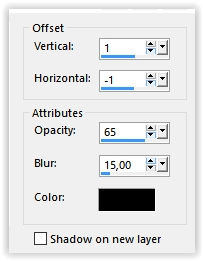
20
Image – Add Borders – Symmetric
1 pixel color # ffffff
3 pixels color # 000000
1 pixel color # fffffff
21
Selections – Select all
Image – Add Borders – Symmetric
50 pixels color # 000000
22
Selections – Invert
Adjust – Add/Remove Noise – Add Noise
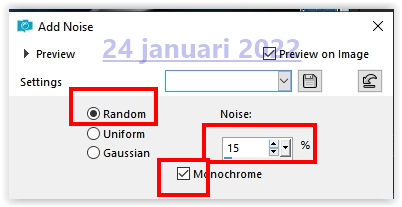
23
Selections – Invert
Effects – 3D Effects – Drop Shadow / Color # ffffff
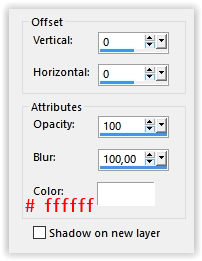
Selections – Select none
24
Open EF_Desejo_Secreto_Texto – Copy – Paste as new layer.
Place of your choice
25
Image – Add Borders – Symmetric
1 pixel color # fffff.
Place your Name/Watermark
Layers – Merge – Merge all layers
Sign your work
Layers – Merge – Merge all layers
Image – Resize – Resize to 1000 pixels width
Save as Jpeg
We are done with Estela’s tutorial
The translation has been tested by Marianne.
Marianne thank you very much
© Translation DesignPSP KeetjeDesign 2022


