

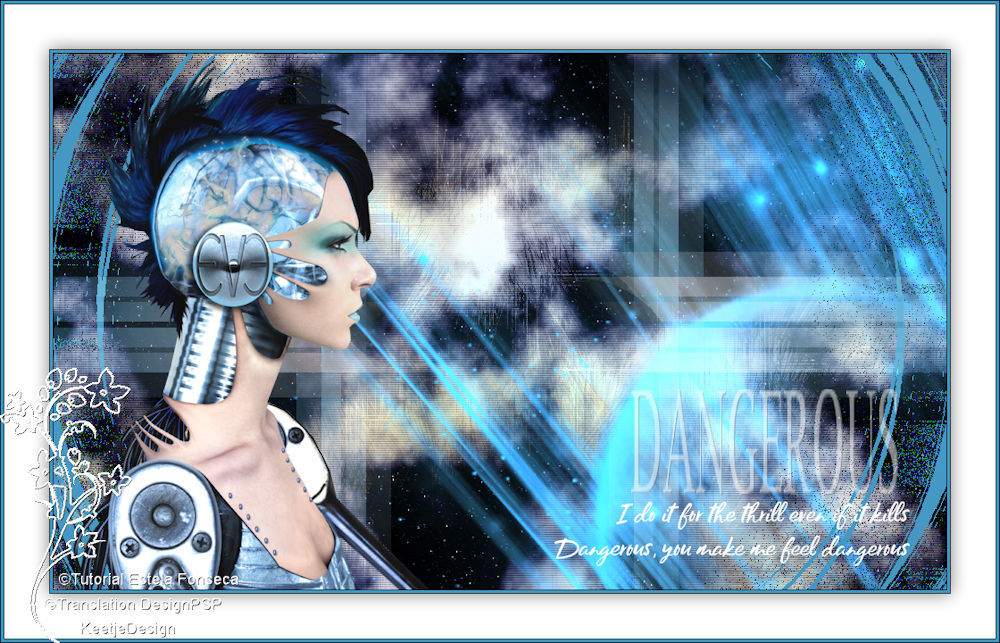
Dangerous
Original tutorial Here
This tutorial was written by Estela Fonseca and it’s © hers.
It is not permitted to copy, link and / or place this or parts thereof without her permission.
If you want to use the tutorials on your own Club or Group, you must ask permission from the writer yourself.
The tutorial is written with PSP but can also be made with other versions.
The translation is written with PSP
If this tutorial looks like any other it is just a coincidence.
We have permission from Estela Fonseca to translate her tutorials into Dutch and English.
Estela Fonseca Thank you for letting us translate your tutorials.
Estela Fonseca

Has been used for the tutorial
Place the selection in your PSP folder Selections
Open the other material in PSP / Duplicate with Shift + D / Close the originals Minimize mask
Filters:
Filters Unlimited 2.0 – & <Bkg Designer sf10IV> – @Entrelacement De Lignes
VanDerLee – Unplugged-X / Defocus / Pixel Distort / Radial Waves
Adjust – Variation
Flaming Pear – Glitterato
Simple – Top Left Mirror
The tutorial is written with these colors and the materials supplied.
If you use your own materials, colors or another version of PSP
you may have to play with Blend Mode and / or Opacity.
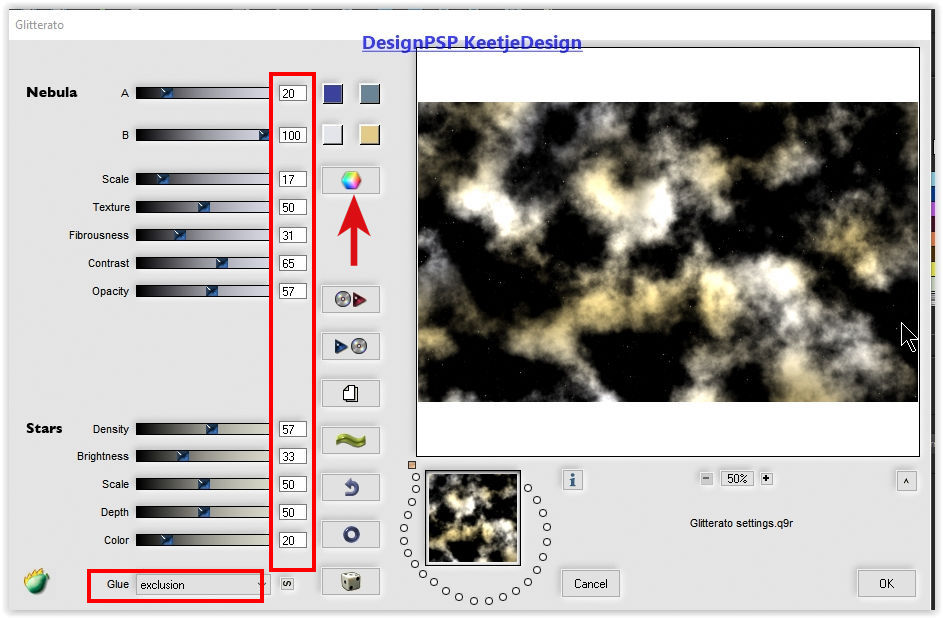
1
Open a new transparent image of 1000 x 600 pixels
Effects – Filter Flaming Pear – Glitterato
You can change the color at the button or at the 4 small squares
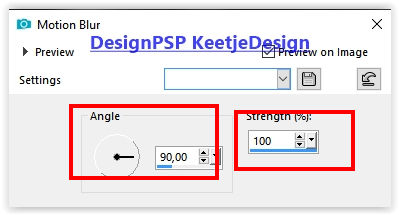
2
Layers – Duplicate
Adjust – Blur – Motion Blur 3x
Effects – Texture Effects – Fur
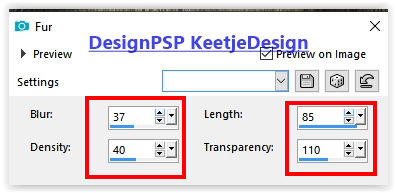
Layers – Properties – Blend Mode Hard Light / Opacity 44
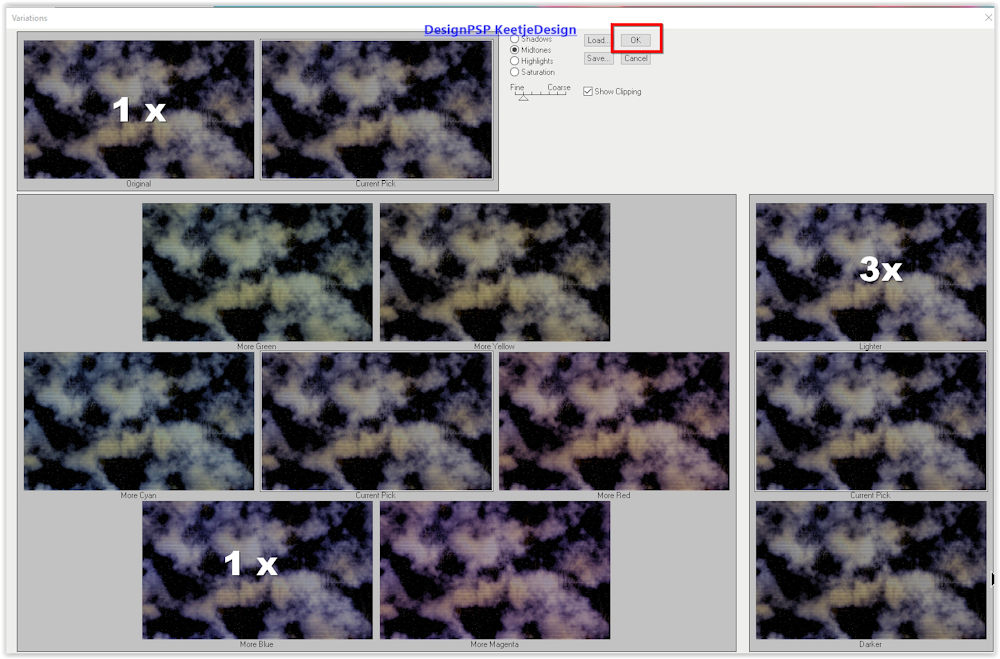
3
Layers – merge – merge down
Effects – Filter Adjust – Variation
Click 1x Original
Click 1x More Blue
Click 3x Lighter
Click Ok
4
Layers – Duplicate
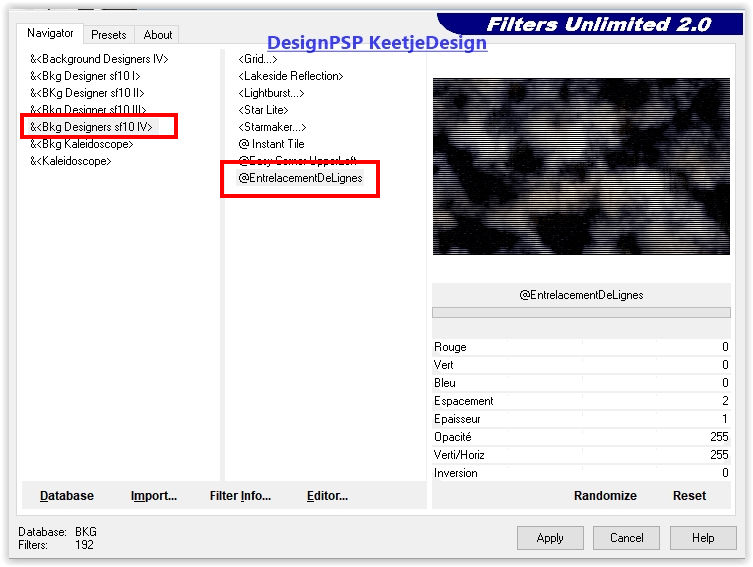
Effects – Filter Unlimited 2.0 – & <Bkg Designer sf10IV> – @Entrelacement De Lignes / Default
Layers – Properties – Blend mode Soft light
5
Layers – New raster layer
Fill with the color # 4598c3
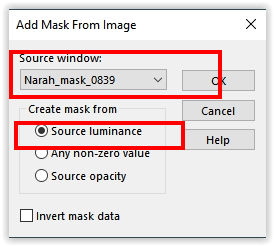
Layers – New Mask Layer – From Image : Narah_mask_0839
Layers – Merge – Merge group
Layers – Duplicate
Layers – Properties – Blend Mode Dodge – Opacity 69
6
Layers – New raster layer
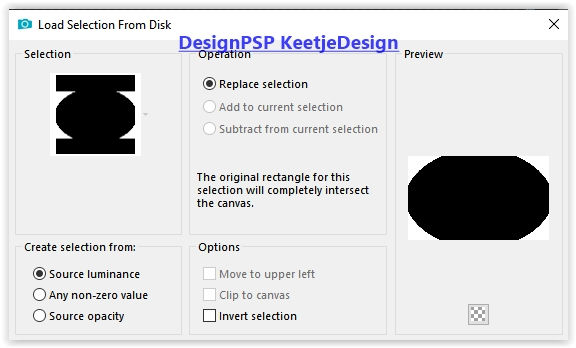
Selections – Load / Save – Load selection from disk : Dangerous-1
Fill with the color # 4598c3
Selections – Select none
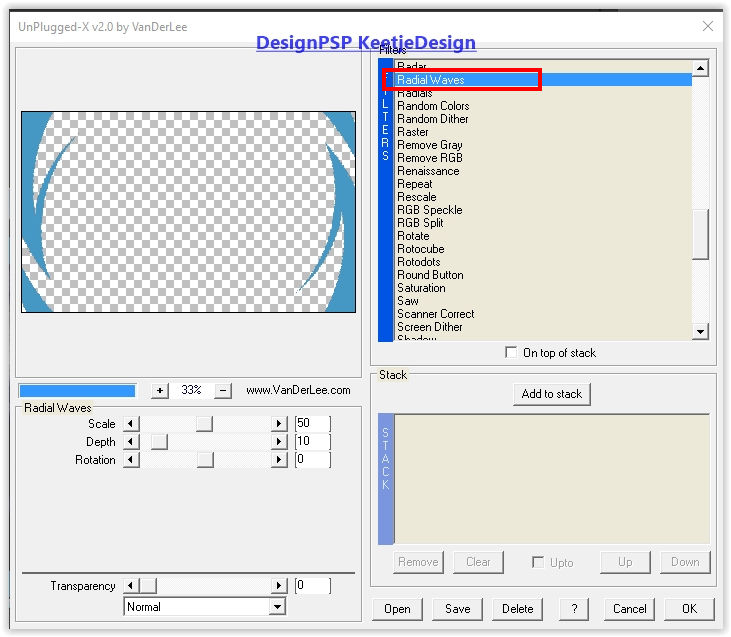
Effects – Plugins VanDerLee – Unplugged-X – Radial Waves 2x / Default
7
Layers – Duplicate
Layer palette – Activate the layer Raster 2
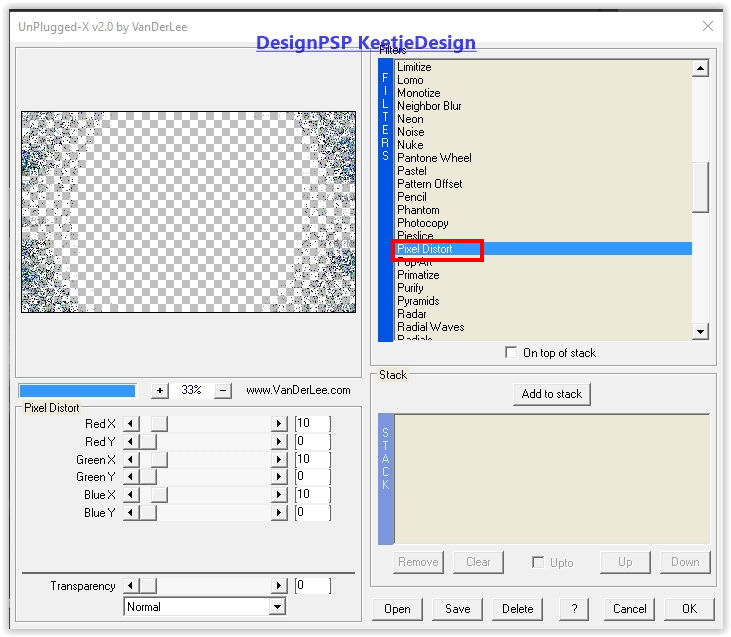
Effects – Plugins VanDerLee – Unplugged-X – Pixel Distort / Default
8
Layer palette – Activate the top layer
Open the tube GINATUBES FEMMES 1161 – Copy – Paste as new layer
Image – Resize – Change with 80% – Uncheck all layers
Place to the left / See example crea
9
Layers – Duplicate
Layer palette – Activate the layer below
Adjust – Blur – Radial Blur

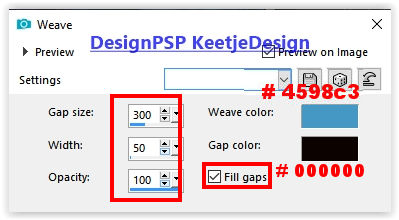
Effects – Texture Effects – Weave
weaving thread color # 4598c3 / Gap color # 000000
10
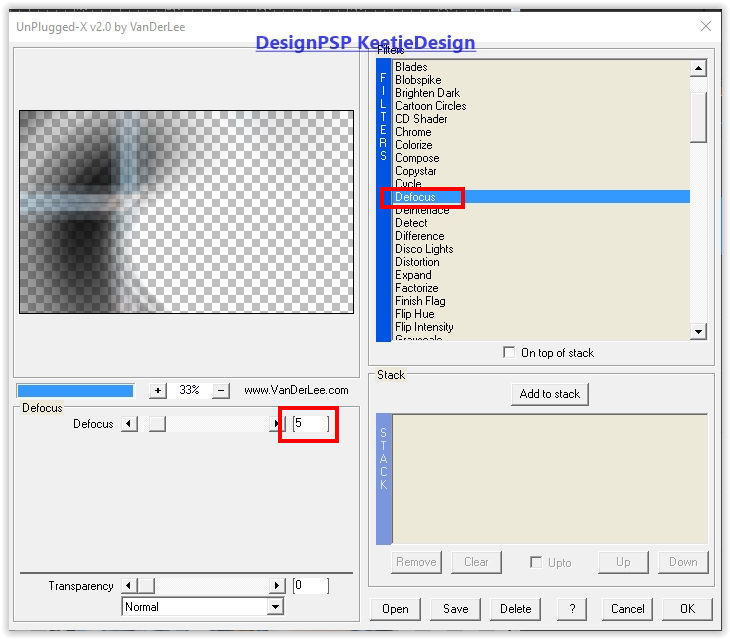
Effects – Plugins VanDerLee – Unplugged-X – Defocus
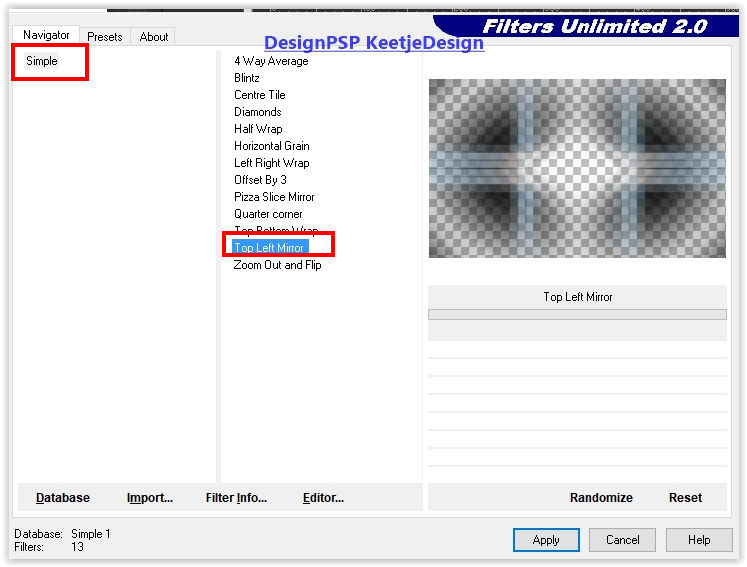
Effects – Filter Simple – Top Left Mirror
Layers – Properties – Blend Mode Bleach
11
Open the tube Texto – Copy – Paste as new layer
Place to the right – See example crea
12
Image – Add Borders – Symmetric
1 pixel color # 000000
3 pixels color # 91ecff
1 pixel color # 000000
Selections – Select all
13
Image – Add Borders – Symmetric
50 pixels color # ffffff
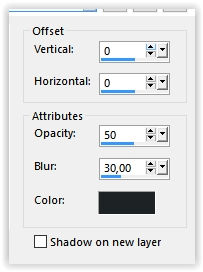
Effects – 3D Effects – Drop Shadow / 0/0/50/30 / # 000000
Selections – Select none
14
Image – Add Borders – Symmetric
1 pixel color # 000000
3 pixels color # 91ecff
1 pixel color # 000000
15
Place your Name / Watermark
Layers – Merge – Merge all layers
Image – Resize – Change to 1000 pixels width
Save as Jpeg
We have finished the tutorial from Estela
This translation has been tested by Marianne.
Marianne thank you
© Translation DesignPSP KeetjeDesign 03-02-2021