Crazy for You
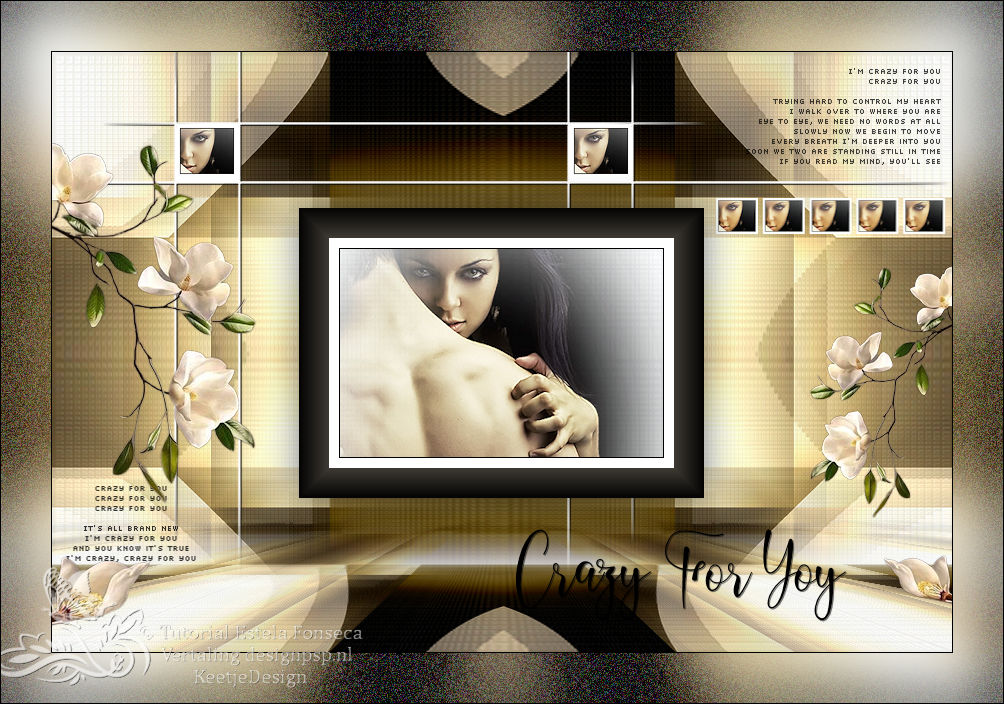
Originele tutorial Here
This tutorial is written by Estela Fonseca the © is from her.
It is not allowed to copy, link and / or place these or parts of it without her permission.
The ![]() ️ of the materials wich are used is for the rightful owner.
️ of the materials wich are used is for the rightful owner.
If you want to use this tutorial on your own forum, club or group, you have to request permission from the writer herself.
We have permission to translate Estela Fonseca’s tutorials into English.
Thank you Estela for the permission to translate your tutorials.
Temos permissão para traduzir os tutoriais da Estela Fonseca para o inglês.
Obrigado Estela pela tradução dos tutriais.
Materials Used: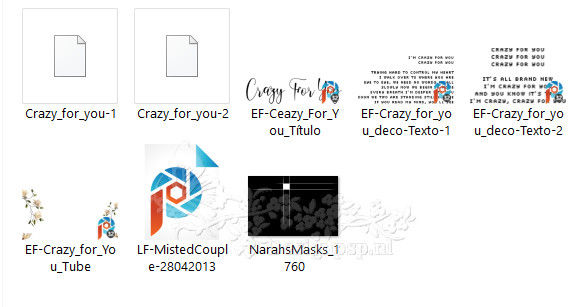
Place the selections in your PSP Folder Selections
Open the other material in PSP/Duplicate with Shift+D/Close the originals/Minimize mask
Plugins Used:
Filter Factory Gallery A – Mirror,Mirror, Zoom In
Unlimited 2.0 – Crescent Moon – Cut Glass
Mehdi – Sorting Tiles
Xero – Artgrain
Xero – Fritillary
Mura’s Meister – Perspective Tiling
Mura’s Meister – Copies
AAA Frames – Foto Frame
Colors Used:
The translation was made with PSP 2020 , but can also be done with other versions.
Note : When working with your own colors , play with the Blend Mode and/or Opacity at your own discretion
1
Material palette – Foreground color #f1e6c8 / Background color# 3f3a33
In the foreground, make the gradient Linear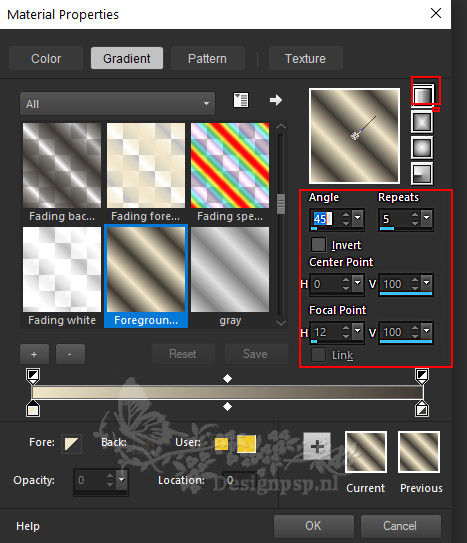
2
Open a new transparent image of 900 x 600 pixels
Fill with the gradient
Effects – Edge Effects – Enhance more
3
Layers – Duplicate
Image – Mirror (Horizontal)
Layers – Properties – Blend Mode Hard Light
Layers – merge – merge down
4
Effects – Plugin: Mehdi – Sorting Tiles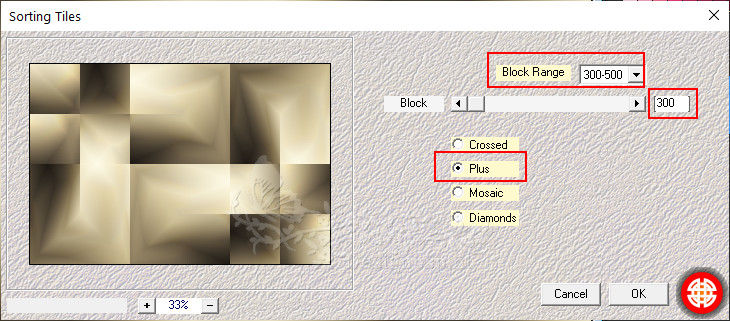
Effects – Plugin: Filters Unlimited 2.0 – Crescent Moon – Cut Glass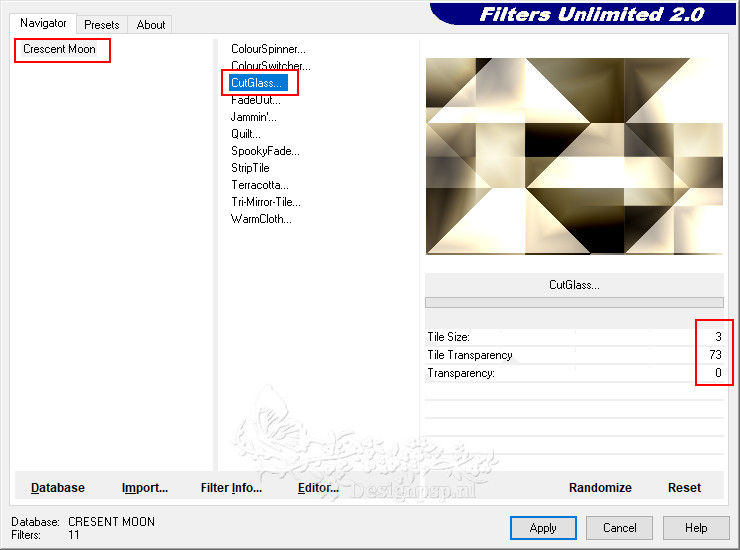
5
Effects – Plugin: Filter Factory Gallery A – Zoom In
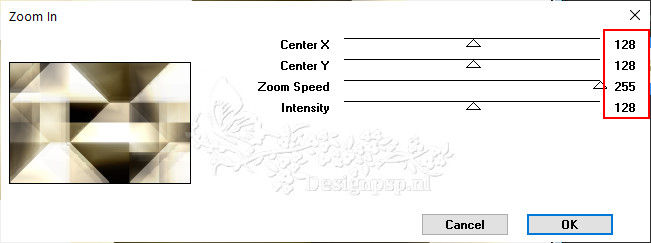
Effects – Plugin: Xero – Fritillary / Default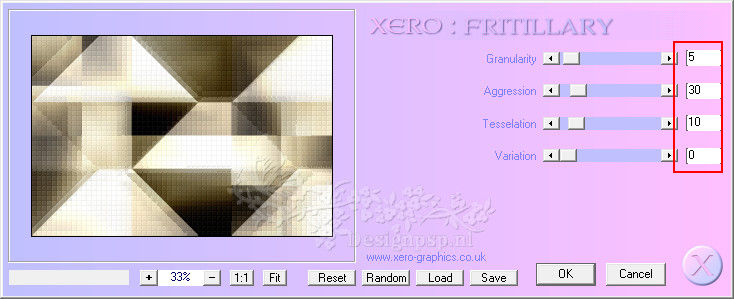
6
Effects – Plugin: Filter Factory Gallery A – Mirror,Mirror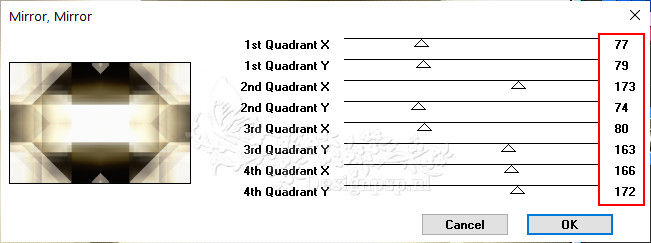
7
Effects – Distortion Effects – Pinch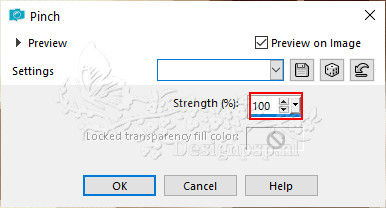
Effects – Distortion Effects – Impressions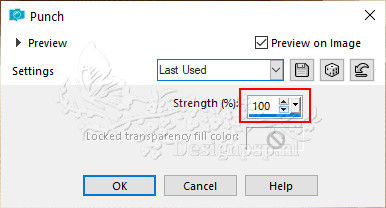
Optional: Adjust – Hue and Saturation – Vibrance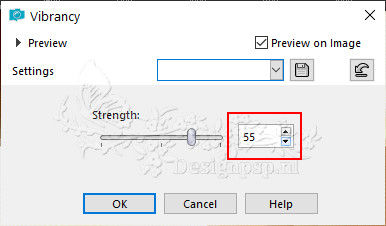
8
Selections – Load/save selection – Selection Load from disk: Crazy-for-you-1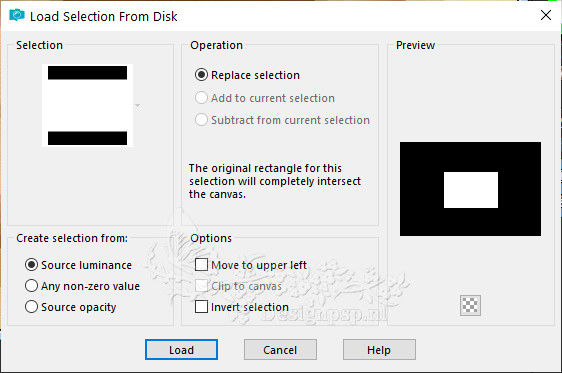
Selections – Make selection low
9
Effects – Plugin: AAA Frames – Photo Frame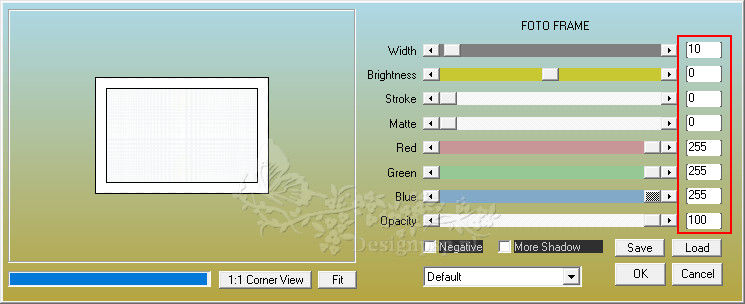
Effects – 3D Effects Chisel – Color # 3f3a33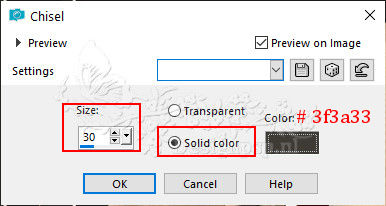
Selections – Modify – Contract – 11 pixels
10
Open the tube LF-MistedCouple-28042013 – Copy – Paste as new layer.
Image – Resize – Change with 85% – Uncheck all layers
Place the tube on the selection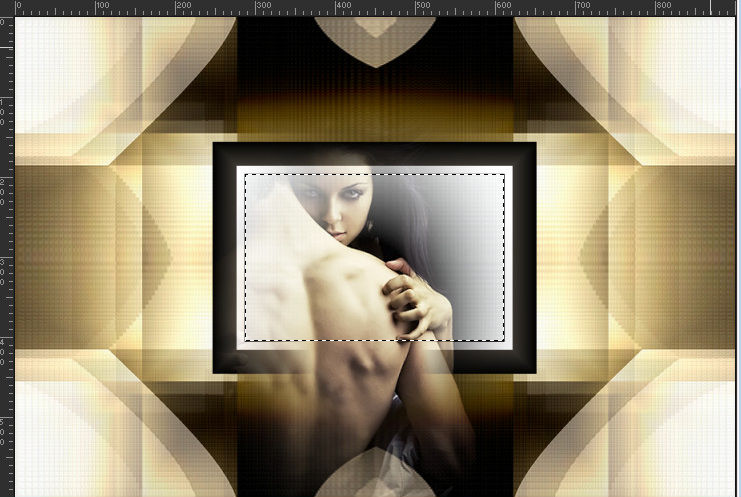
11
Selections – Invert
Press Delete on the keyboard
Selections – Invert
Adjust – Sharpness – Sharpen
Selections – Select none
12
Layers – Duplicate
Layers – Merge – Merge Down 2x
Effects – 3D Effects – Drop Shadow / 0 / 0 / 50 / 50 / color #000000
13
Layers – New raster layer
Fill with the color #ffffff
Layers – New Mask Layer – From Image: NarahsMasks_1760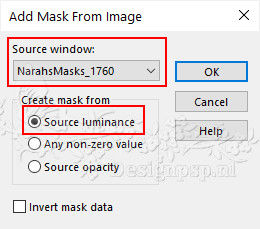
Layers – Merge – Merge group.
14
Activate the Pick Tool (K) – Position X minus 197 / Position Y minus 5
Type M to close the tool
15
Effects – Reflection Effects – Rotating Mirror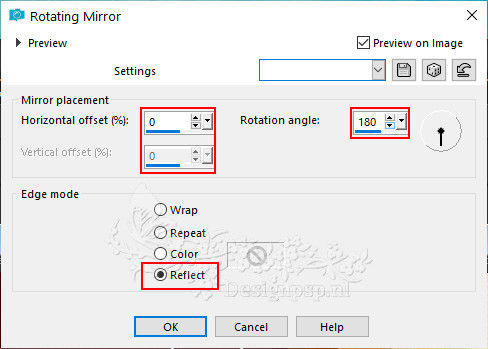
Layers – Arrange – Move Down
Effects – 3D Effects – Drop Shadow / 1 / 1 / 100 / 1 / color # 000000
16
Layer palette – Activate the bottom layer (Raster 1)
Layers – Duplicate
Effects – Filter: Mura’s Meister – Perspective Tiling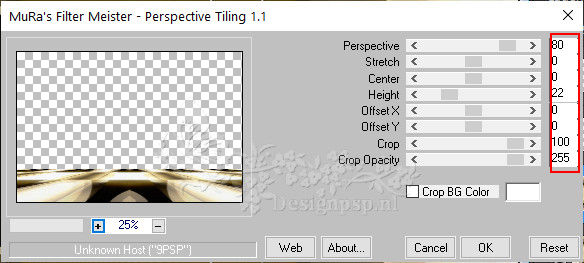
17
Activate Magic Wand tool – Tolerance 0 / Feather 60
Select the transparent part
Press Delete on the keyboard 5 times
Selections – Select none
Layers – Arrange – Up
18
Layer palette – Activate second layer from the bottom (Group Raster 2)
Selections – Load/save selection – Load selection from disk: Crazy-for-you-2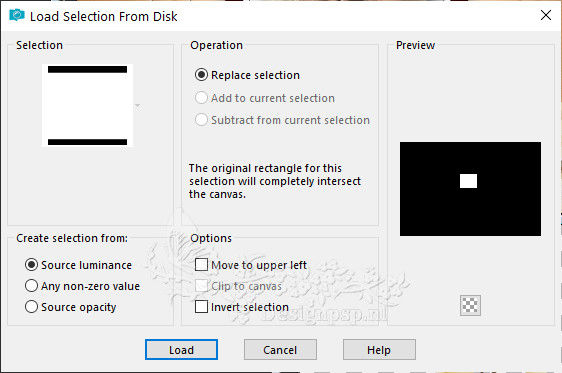
Edit – Copy special – Copy merged
Selections – Select none
Edit – Paste as new image
19
Effects – Plugin: AAA Frames – Photo Frame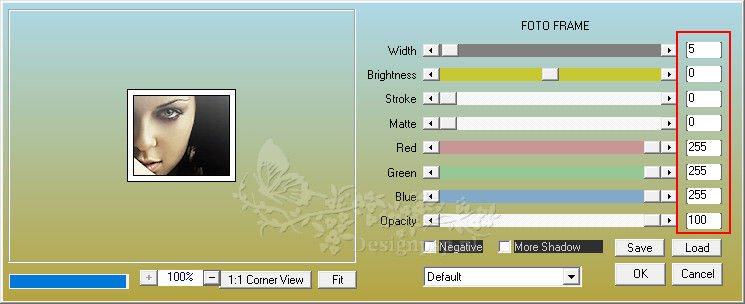
Edit – Copy
20
Activate the work
Layers – New raster layer
Activate Selection Tool (S) – Custom Selection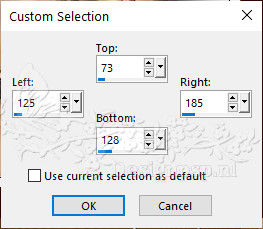
21
Edit – Paste into Selection (In Memory)
Selections – Select none
Adjust – Sharpness – Sharpen
22
Layers – Duplicate
Activate Selection Tool (K) / Position X 519 / Position Y 73
23
Layers – Duplicate
Image – Resize – Change with 70% – Uncheck all layers
Activate the Pick Tool (K) / Position X 664 / Position Y 146
Type M to close the tool
24
Effects – Filter|: Mura’s Meister – Copies
Adjust – Hue and Saturation – Vibrance
25
Layer palette – Activate the top layer
Open the tube EF-Crazy_for_you_deco-Texto-1 – Copy – Paste as new layer
Activate the Pick Tool (K) / Position X 694 / Position Y 16
Layers – Properties – Opacity 73
26
Open the tube EF-Crazy_for_you_deco-Texto-2 – Copy – Paste as new layer
Activate the Pick Tool (K) / Position X 14 / Position Y 434
Layers – Properties – Opacity 79
27
Open the tube EF-Crazy_for_you_tube – Copy – Paste as new layer
Activate the Pick Tool (K) / Position X 0 / Position Y 91
Type M to close the tool
28
Open the tube EF-Crazy_for_you_titulo – Copy – Paste as new layer
Place of your choice
Effects – 3D Effects – Drop Shadow / 1 / 1 / 60 / 1 / color # 000000
29
Image – Add Borders – Symmetric
1 pixel color #000000
Selections – Select all
Edit – Copy
30
Image – Add Borders – Symmetric
50 pixels each color
Selections – Invert
Edit – Paste into selection (in memory)
31
Adjust – Blur – Gaussian Blur – Range 30
Effects – Plugin: Xero – Artgrain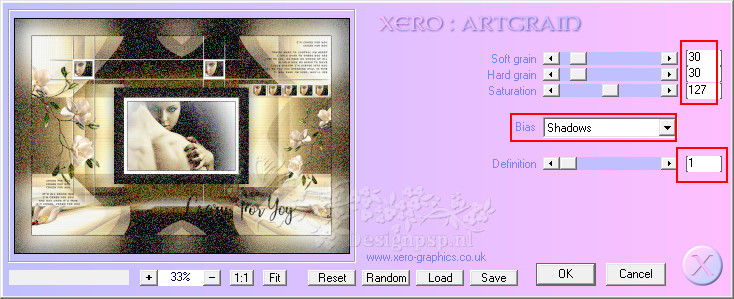
Selections – Select none
32
Sign your work
Image – Add Borders – Symmetrical
1 pixel color #000000
Save as Jpeg
The translation has been tested by Marianne.
Marianne thank you very much
© Translation DesignPSP KeetjeDesign 2023


