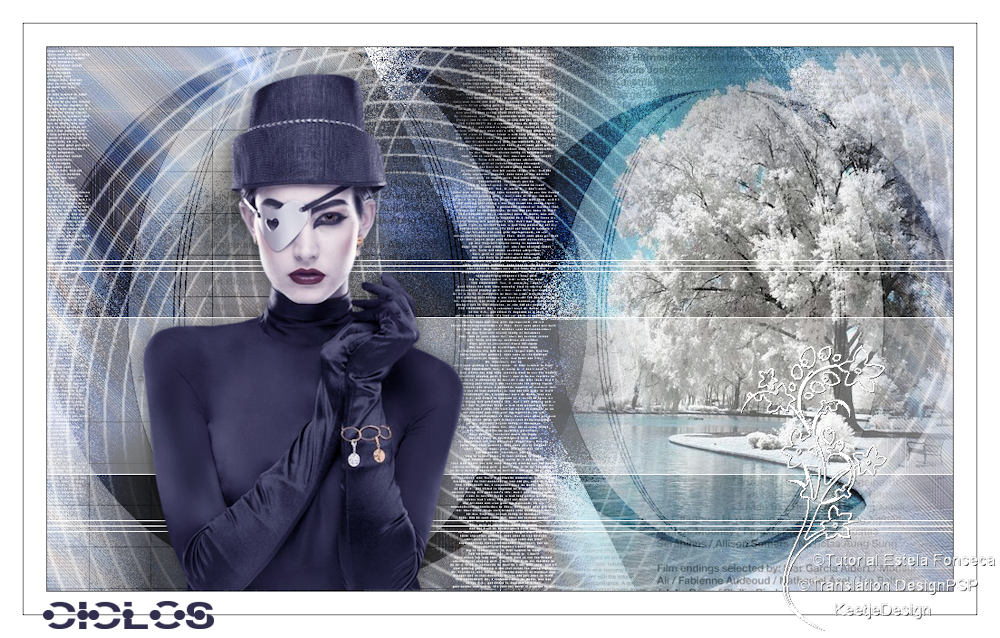
Ciclos
Original tutorial Here
This tutorial is written by Estela Fonseca the © is from her.
You’re not allowed to copy, link and / or place these or parts of it without her permission.
The © ️ of the materials wich are used is for the rightful owner.
If you want to use this tutorial on your own forum, club or group, you have to request permission from the writer herself.
This translation was made with PSP 2018 , but can also be done with other versions.
If this tutorial looks like another, it is just a coincidence.
We have permission from Estela Fonseca to translate her tutorials into Dutch and English.
Estela Fonseca Thank you for letting us translate your tutorials.
Materials used 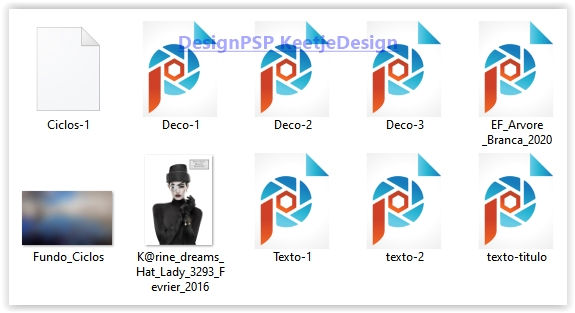
Place the selection in your PSP folder Selections
Open the other materials in PSP / Duplicate with Shift + D / Close the originals
Plugin used:
Unlimited 2.0 – VM Distortion – Tumbler …
Unlimited 2.0 – <Bkg Designer sf10 I> – Cruncher
Unlimited 2.0 – <Bkg Kaleidoscope> – 4QFlip ZBottomL
Unlimited 2.0 – Convultion Filters – Emboss (strong)
Unlimited 2.0 – Toadies – Blast ‘em!…
Unlimited 2.0 – Toadies – Ommadawn
Unlimited 2.0 – Two Moon – Paperfold …
VanDerLee – Unplugged X – Defocus
Adjust – Variation
Note: When working with your own colors , play with the Blend Mode and/or Opacity at your own discretion
1
Open a new transparent image of 1000 x 600 pixels
Selections – Select all
Open the image Fundo_Ciclos – Copy – Paste into selection
Selections – Select none
If you work with your own colors, you can now chance the color with the plugin: Adjust – Variations
Double-click on the color of your choice
Effects – Filter Unlimited 2.0 – VM Distortion – Tumbler …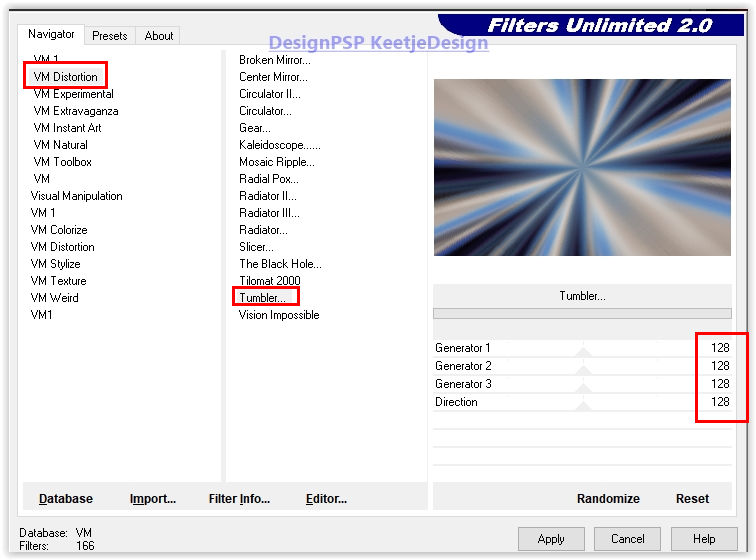
2
Effects – Edge Effects – Enhance more
Effects – Filter Unlimited 2.0 – <Bkg Designer sf10 I> – Cruncher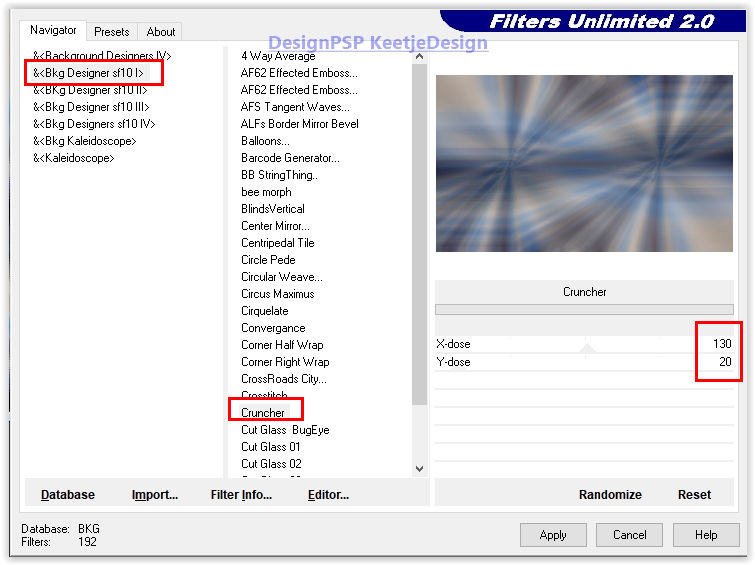
3
Effects – Filter Unlimited 2.0 – <Bkg Kaleidoscope> – 4QFlip ZBottomL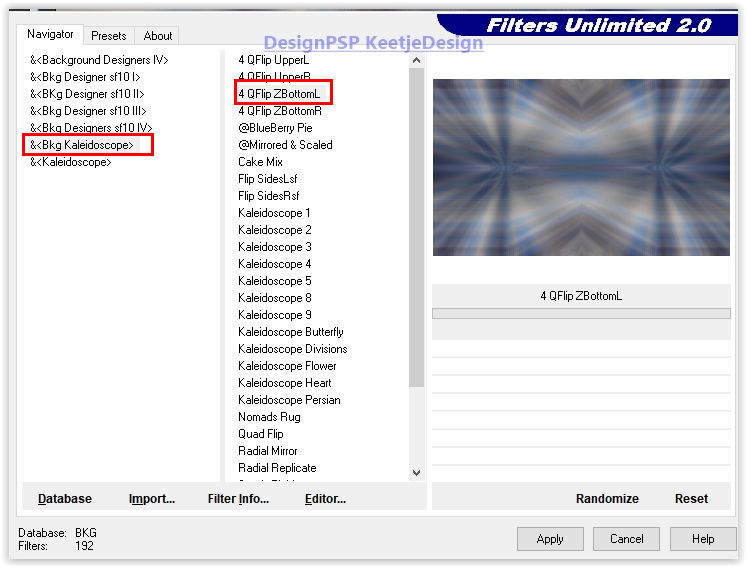
Effects – Filter Unlimited 2.0 – Convultion Filters – Emboss (strong)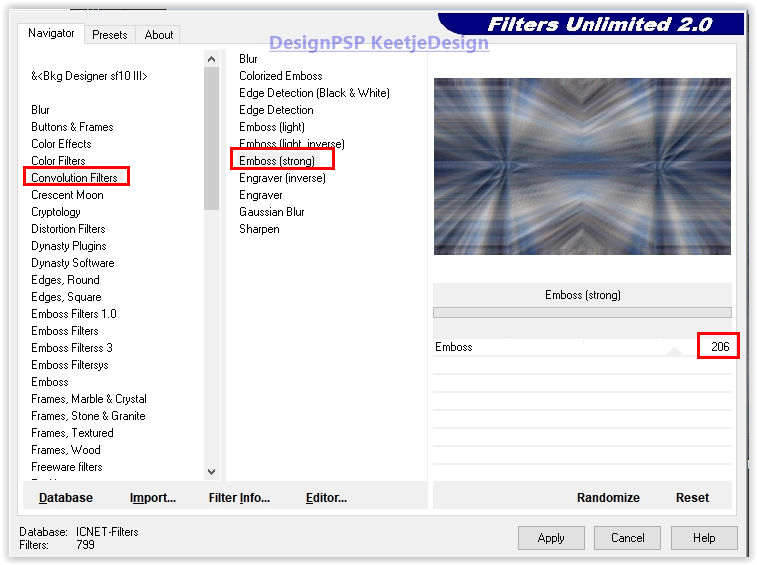
4
Effects – Filter Unlimited 2.0 – Two Moon – Paperfold …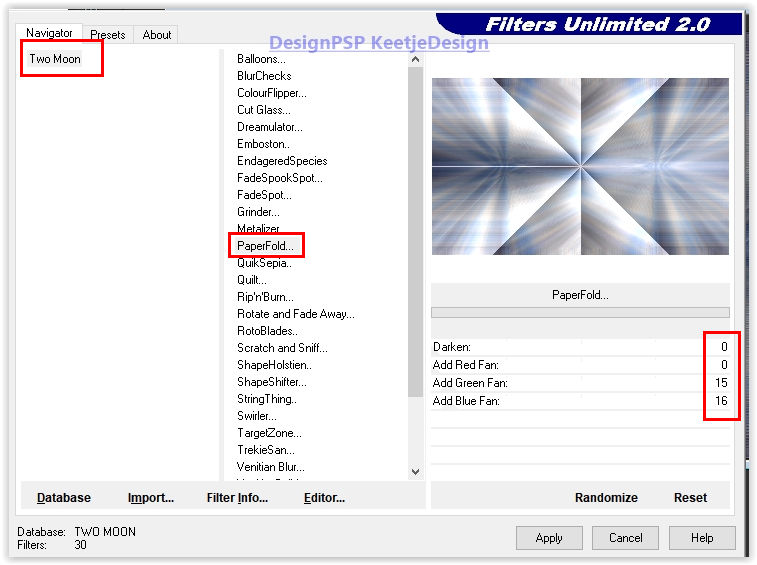
Effects – Reflection Effects – Rotating Mirror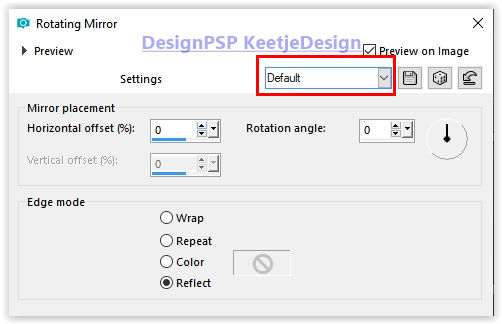
5
Layers – Duplicate
Effects – Plugins VanDerLee – Unplugged X – Defocus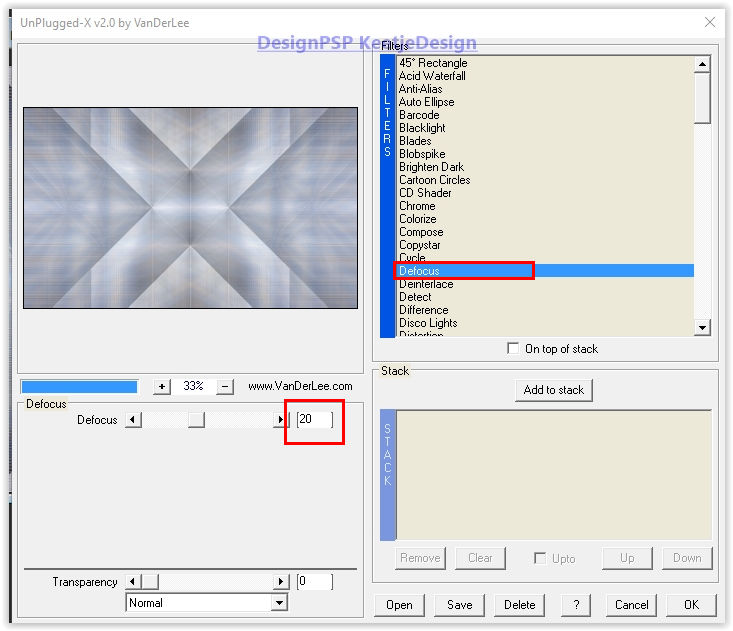
Layers – Properties – Blend mode Hard light
Layers – Merge – Merge down
6
Layers – Duplicate
Effects – Geometric Effects – Circle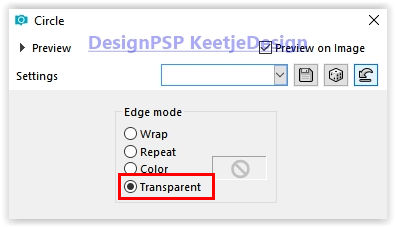
Activate the Pick tool (K) – Mode Scale / Position X 302 / Position Y minus 121
Type M to close the tool
7
Selections – Load / Save – Load selection from disk / Load Ciclos-1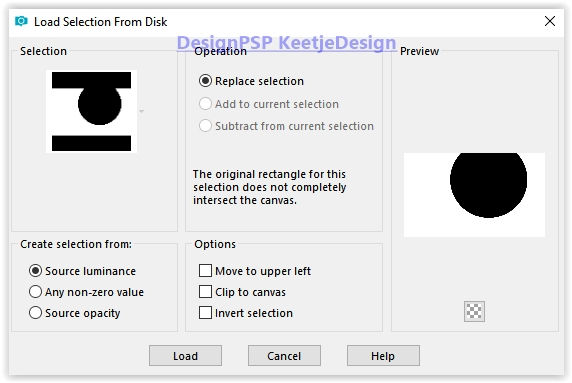
Press Delete on the keyboard
Selections – Select none
Layers – Properties – Blend Mode Multiply
8
Layers – Duplicate
Image – Mirror – Mirror vertical
Activate the Pick tool (K) – Mode Scale / Position X 29 / Position Y 140
Type M to close the tool
Effects – Filter Unlimited 2.0 – Toadies – Blast ‘em!…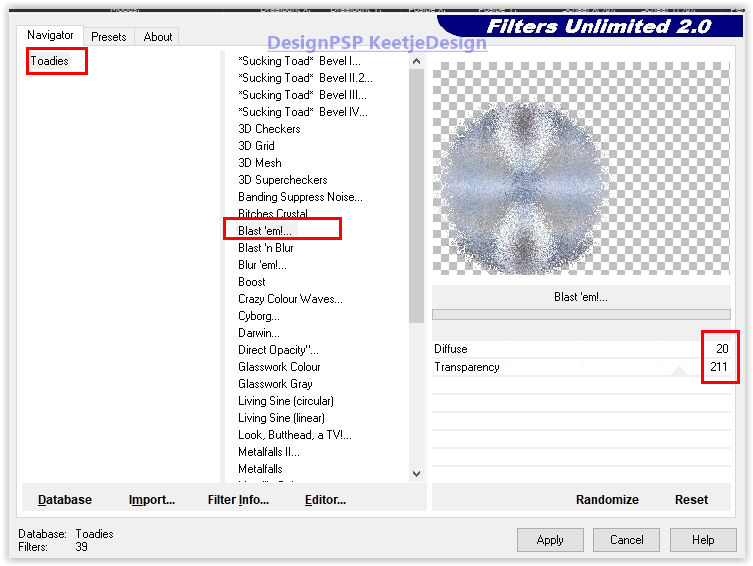
9
Layer palette – Activate the Copy of Raster 1 layer
Effects – Filter Unlimited 2.0 – Toadies – Blast … / Same setting
Layers – Duplicate
The layers palette now looks like this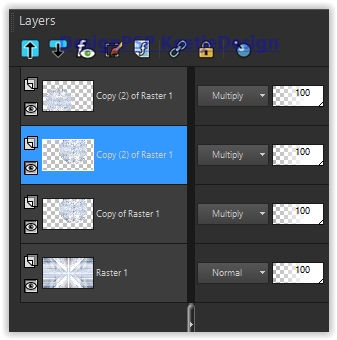
The work now looks like this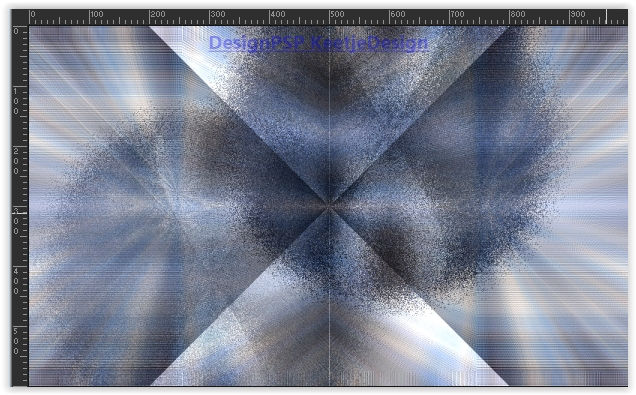
10
Layer palette – Activate the top layer
Open the tube Deco-1 – Copy – Paste as new layer
Layers – Properties – Opacity 55
11
Layer palette – Activate the bottom layer
Layers – Duplicate
Effects – Geometric Effects – Skew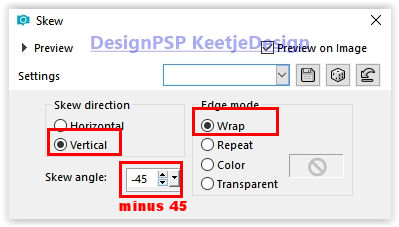
12
Layer palette – Activate the top layer
Open the tube EF_Arvore _Branca_2020 – Copy – Paste as new layer
Objects – Align – Right
13
Open the tube K @ rine_dreams_Hat_Lady_3293_Fevrier_2016 – Remove the watermark – Copy – Paste as new layer
Activate the Pick tool (K) – Mode Scale / Position X min 22 / Position Y min 1
Type M to close the tool
Layers – Duplicate
Adjust – Blur – Gaussian Blur / Range 25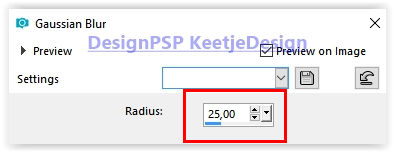
14
Layers – Arrange – Move Down
Effects Filter Unlimited 2.0 – Toadies – Ommadawn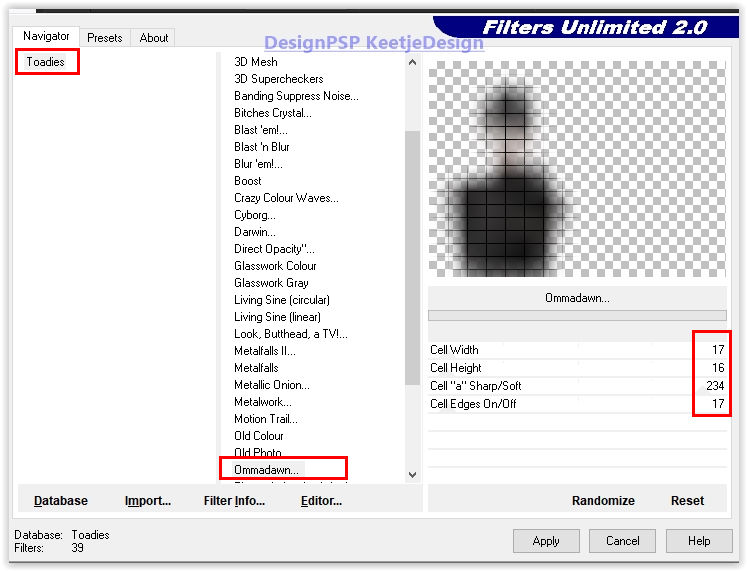
Optional: Layers – Properties – Opacity 69
15
Open the tube Texto-1 – Copy – Paste as new layer
Layers – Arrange – 2x Down
Layers – Properties – Blend Mode Dark / Opacity 61
16
Layer palette – Activate the top layer
Effects – 3D Effects – Drop shadow / 0/0/50/30 / # 000000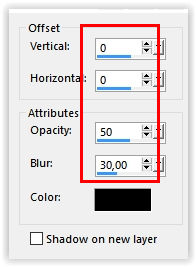
17
Open the tube texto-2 – Copy – Paste as new layer
Layers – Arrange – Move Down
18
Layer palette – Activate the top layer
Open the tube Deco-2 – Copy – Paste as new layer
19
Open the tube Deco-3 – Copy – Paste as new layer
Activate the Pick tool (K) – Mode Scale / Position X 0 / Position Y 235
Type M to close the tool
20
Layer palette – Activate the third layer from the top (Raster 4)
Layers – Arrange – Bring to Front
Image – Resize – Change with 85% – Uncheck all layers
Activate the Pick tool – Mode Scale / Position X 56 / Position Y min 35
Type M to close the tool
21
Effects – Filter Adjust – Variations
Click 1 x Original / Click 1 x More Blue / Click 1 x Lighter / Click Ok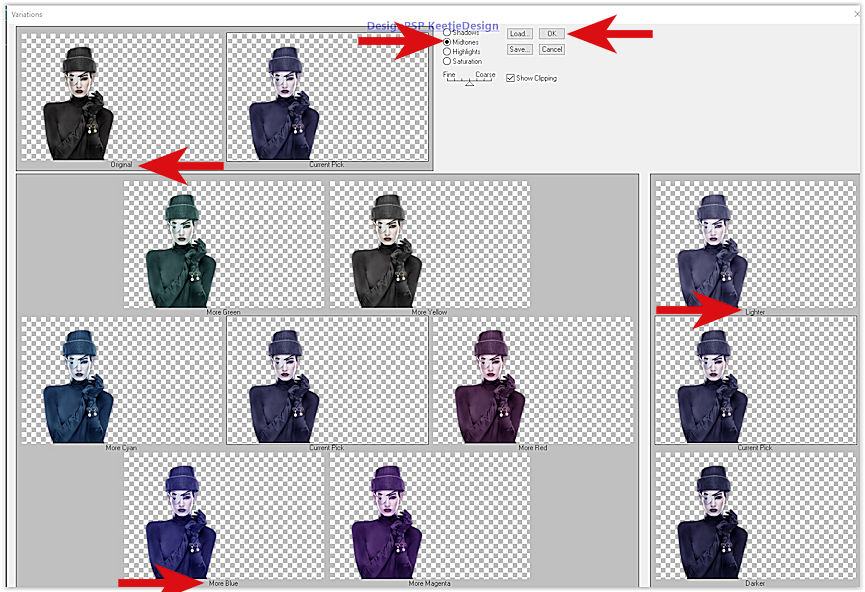
22
Image – Add Borders – Symmetric
1 pixel color # 000000
25 pixels color # ffffff
1 pixel color # 000000
25 pixels color # ffffff
23
Open the tube texto-titulo – Copy – Paste as new layer
Activate the Pick tool – Mode Scale / Position X 48 / Position Y 663
24
Place your Name / Watermark
Image – Add Borders – Symmetric
1 pixel color # 000000
25
Image – Resize – Resize the width to 1000 pixels – Check all layers
Save as Jpeg
We have finished the tutorial from Estela
This translation has been tested by Marianne.
Marianne thank you / Tubes of CiBi en LF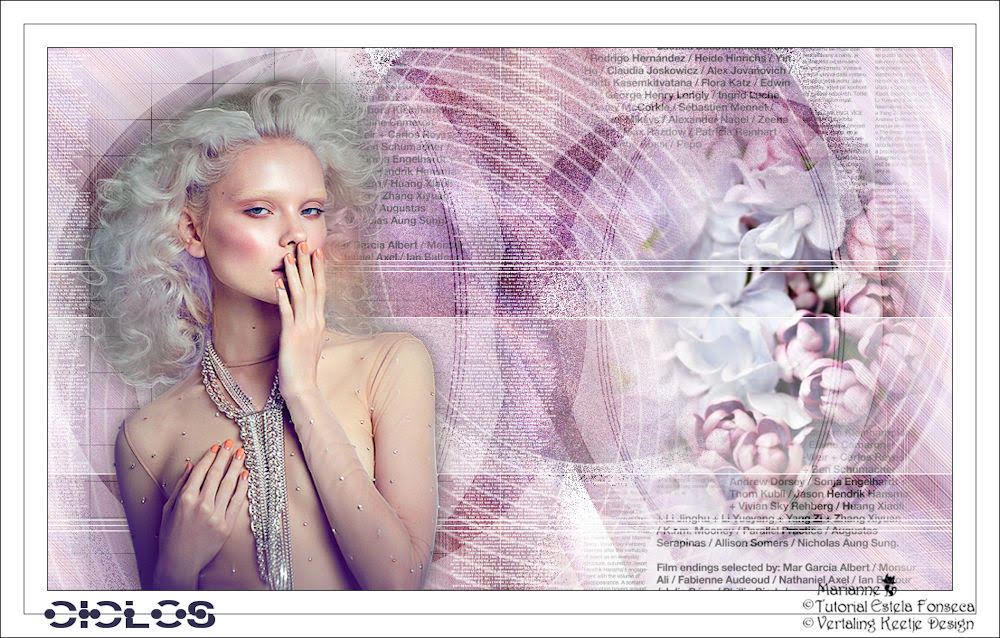
© Translation Ciclos DesignPSP KeetjeDesign


