Carine
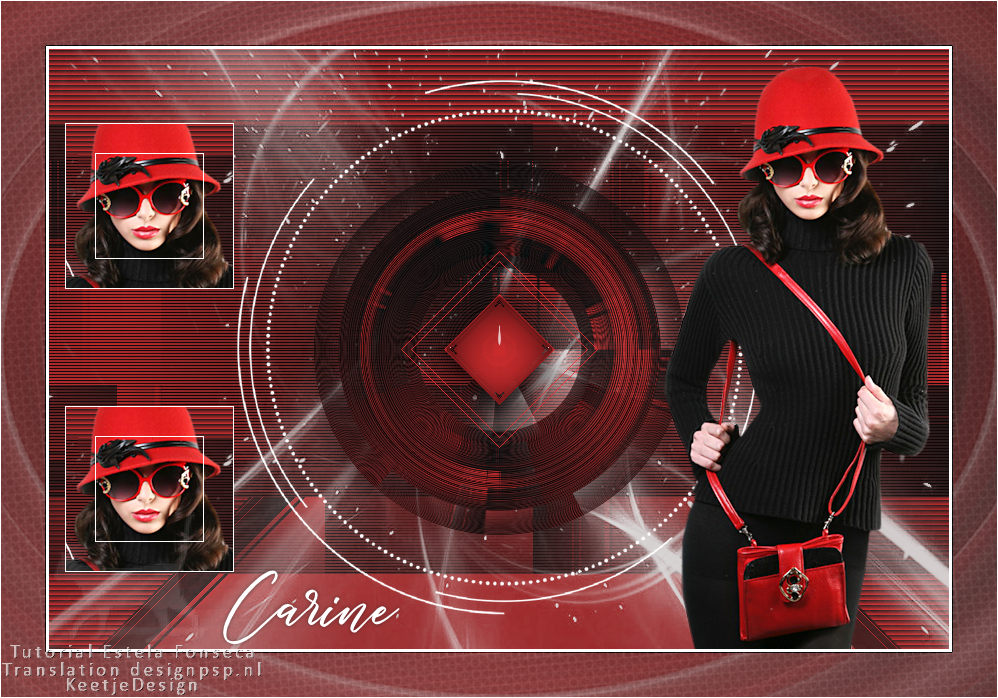
Originele tutorial Here
This tutorial is written by Estela Fonseca the © is from her.
It is not allowed to copy, link and / or place these or parts of it without her permission.
The © ️ of the materials wich are used is for the rightful owner.
If you want to use this tutorial on your own forum, club or group, you have to request permission from the writer herself.
We have permission to translate Estela Fonseca’s tutorials into Dutch and English.
Thank you Estela for the permission to translate your tutorials.
Temos permissão para traduzir os tutoriais de Estela Fonseca para holandês e inglês.
Obrigado Estela pela permissão para traduzir seus tutoriais.
Materials Used:

Plugines Used:
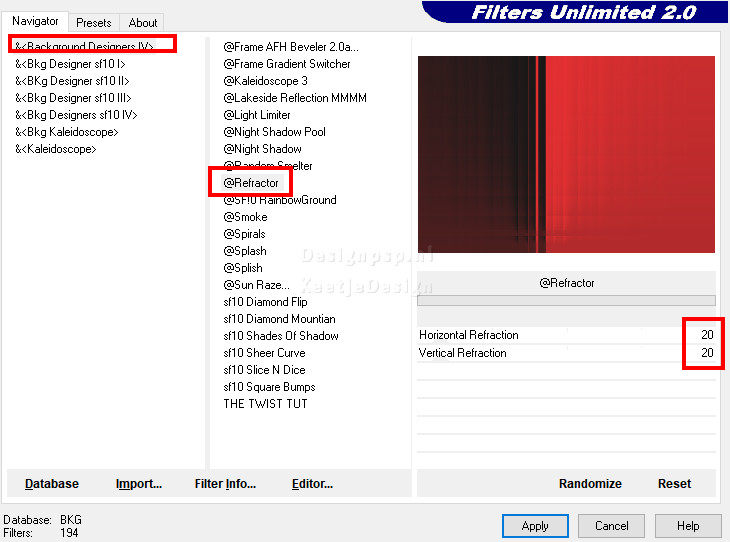
Unlimited 2.0 – &<Background Designers IV> – @Refractor
Unlimited 2.0 – &<Background Designers IV> – sf10 Diamond Flip
Unlimited 2.0 – Transparancy – Eliminate Black
Unlimited 2.0 – Tile&Mirror – Mirror (vertical)
Unlimited 2.0 – Toadies – Weaver
AP (01) Innovations / Lines – SilverLining
MuRa’s Meister – Pole Transform
Alien Skin Eye Candy 5 Impact – Glass
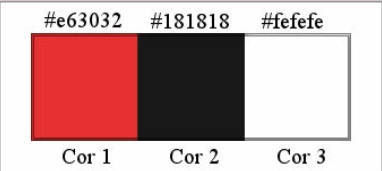
Colors Used:
The translation was made with PSP 2020 , but can also be done with other versions.
Note : When working with your own colors , play with the Blend Mode and/or Opacity at your own discretion
1
Materials Palette – Foreground color # e63032 / Background color #181818
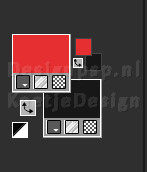
Create a Radial gradient in the foreground
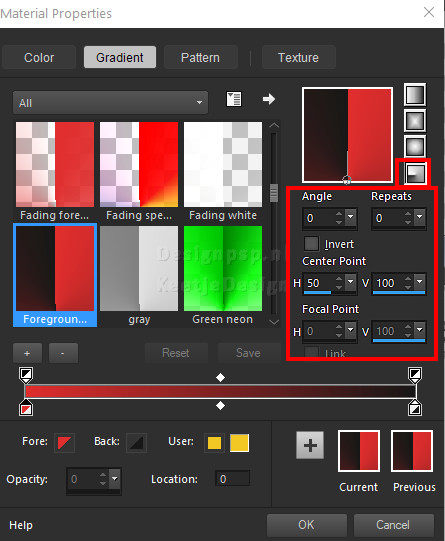
2
Open EF-Carine_Alpha – Window – Duplicate (or use Shift+D)
Close the original we work on the copy
This is not an empty layer there are selections in the Alpha channel
Fill with the gradient
3
Effects – Plugin Unlimited 2.0 – &<Background Designers IV> – @Refractor
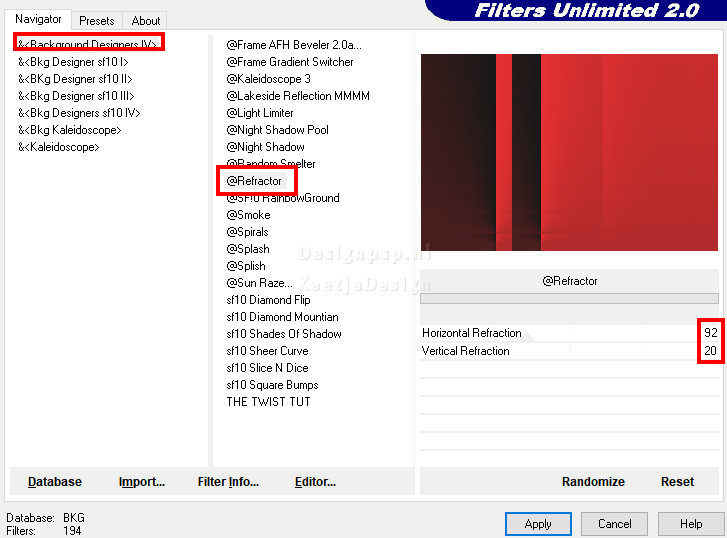
Effects – Plugin Unlimited 2.0 – &<Background Designers IV> – @Refractor / Default
4
Effects – Geometric Effects – Skew
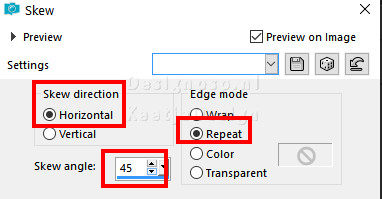
Effects – Edge Effects – Enhance
Layers – Duplicate
5
Image – Mirror (horizontal)
Layers – Duplicate
6
Effects – Plugin Unlimited 2.0 – &<Background Designers IV> – sf10 Diamond Flip / Default
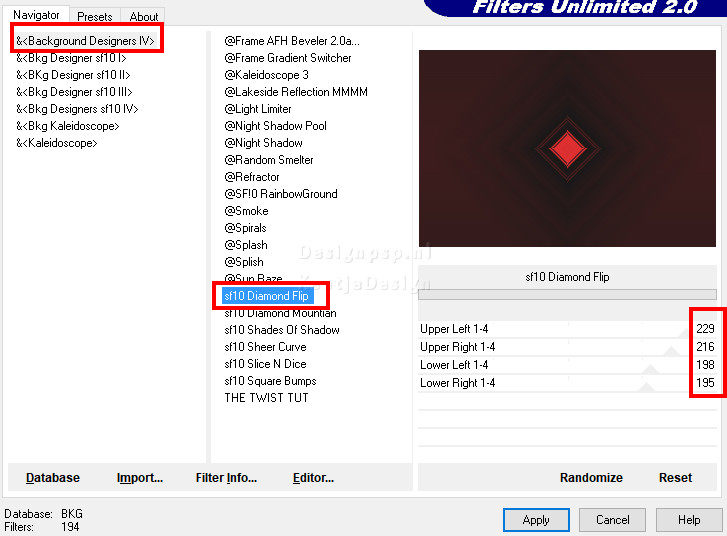
Effects – Plugin Unlimited 2.0 – Transparency – Eliminate Black
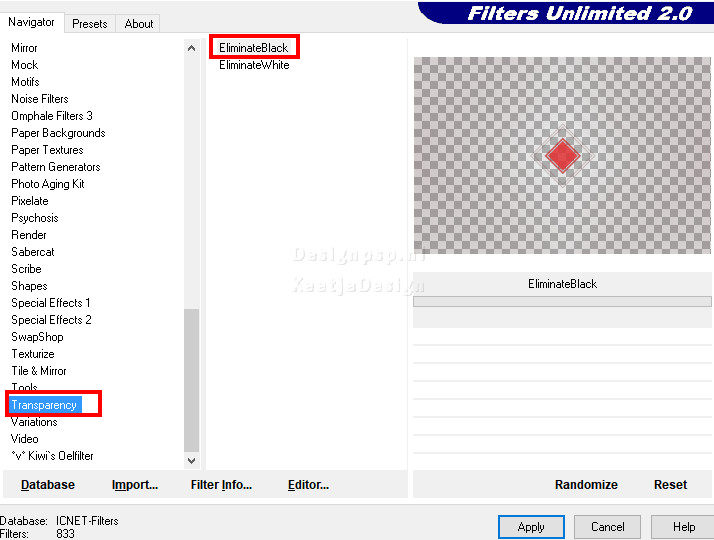
Layer palette – Close this layer (eye click)
7
Layer palette – Activate the layer Copy of Raster 1
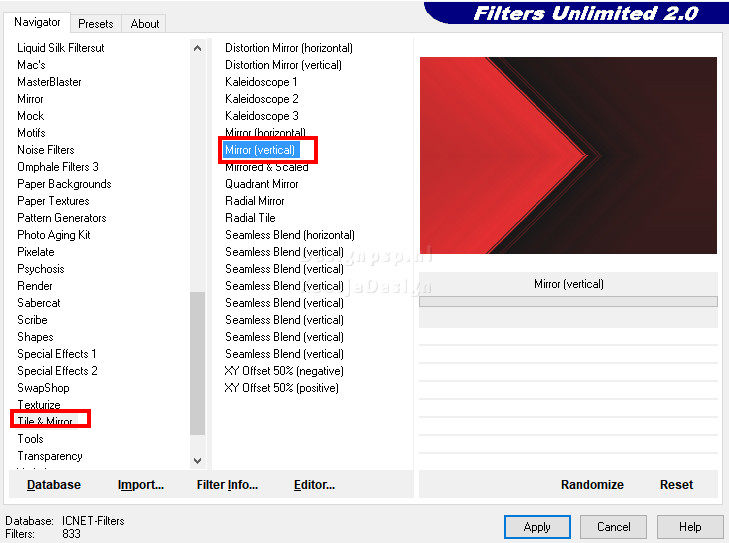
Effects – Filter Unlimited 2.0 – Tile&Mirror – Mirror (vertical)
8
Image – Resize – Resize by 75% – Uncheck all layers
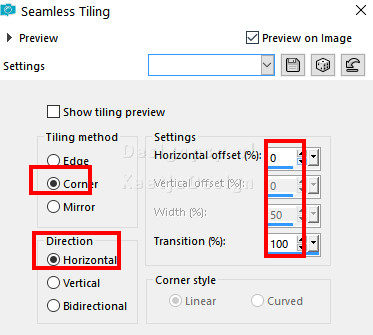
Effects – Image Effects – Seamless Tiling
9
Effects – Plugin Unlimited 2.0 – Toadies – Weaver / Default
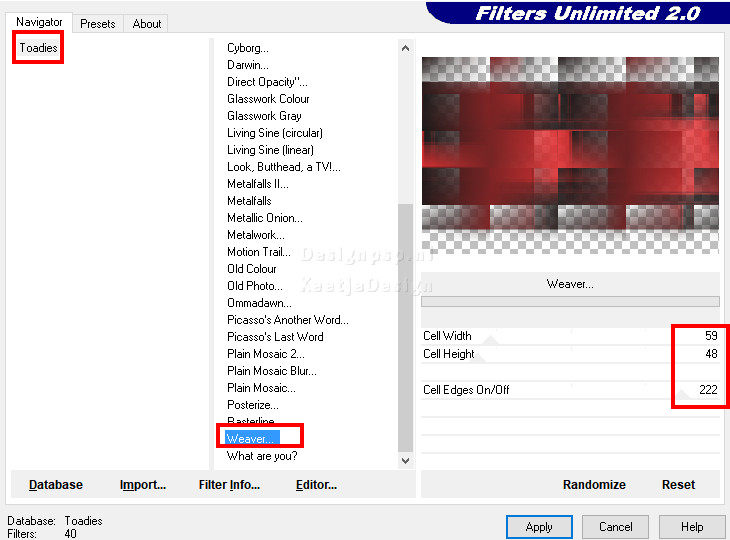
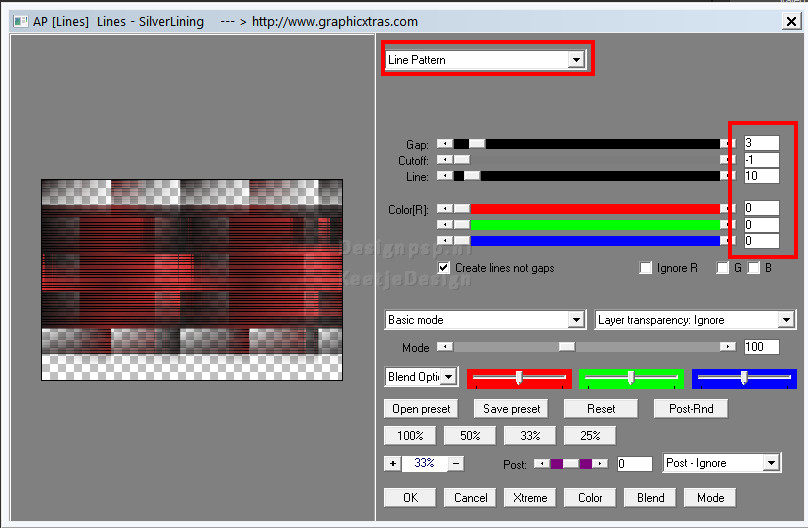
Effects – Plugin AP (01) Innovations / Lines – SilverLining
10
Layers – Duplicate
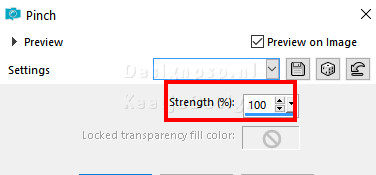
Effects – Distortion Effects – Pinch 2x
11
Objects – Align – Center on canvas
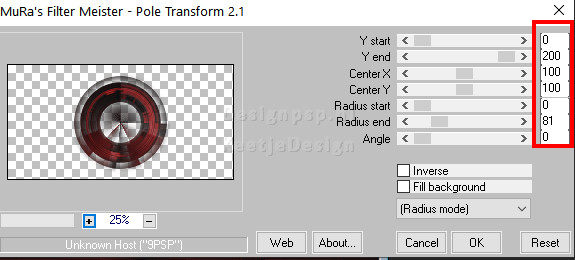
Effects – Plugin MuRa’s Meister – Pole Transform
12
Layer palette – Open and Activate the top layer
Layers – Duplicate
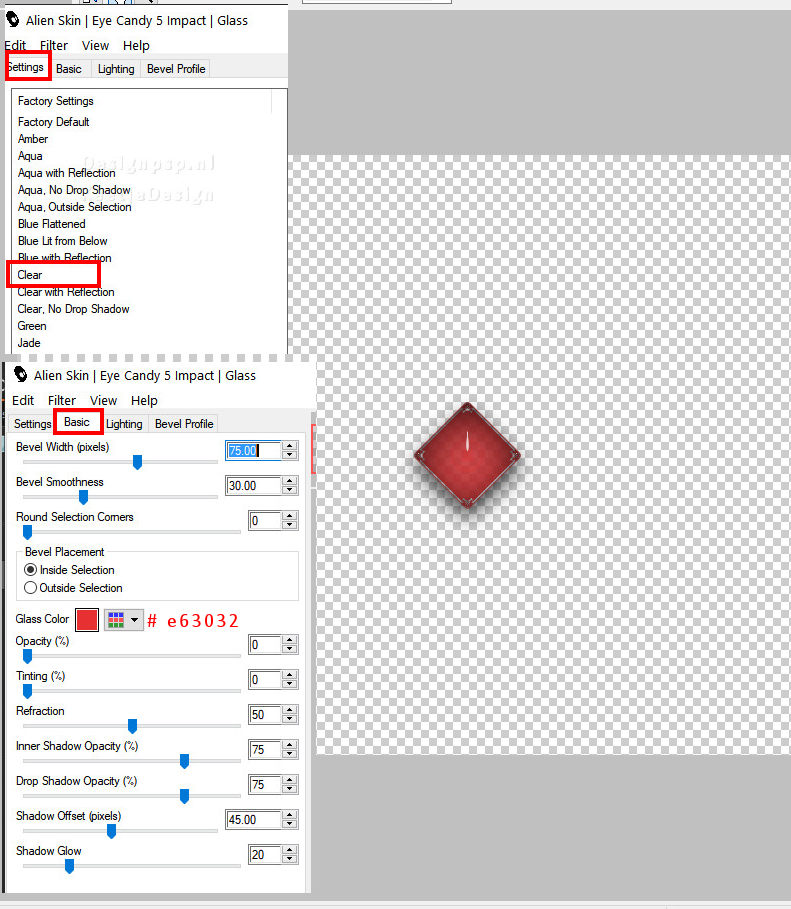
Effects – Plugin Alien Skin Eye Candy 5 Impact – Glass / Clear
At Tab Basic, change the color to the foreground color
Layers – merge – merge down
13
Layer palette – Activate the layer Raster 1
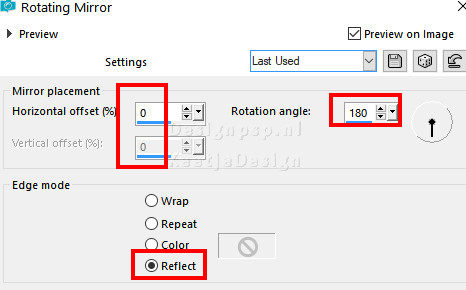
Effects – Reflection Effects – Rotating Mirror
14
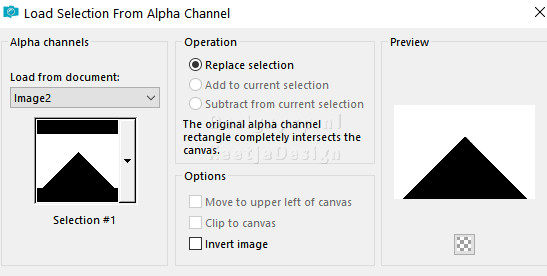
Selections – Load/Save Selection – Load Selection from Alpha Channel: Selection #1
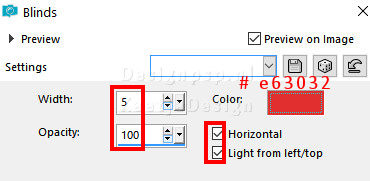
Effects – Texture Effects – Blinds / Foreground Color
Selections – Select none
15
Layer palette – Activate the layer Copy of Raster 1
Selections – Load/Save Selection – Load Selection from Alpha Channel: Selection #2
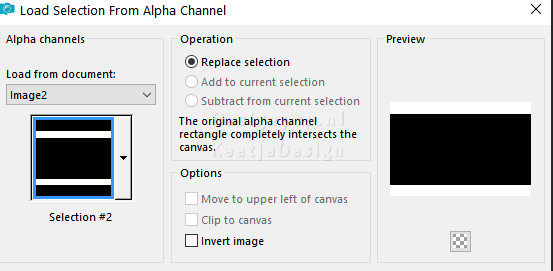
Press Delete on the keyboard
Selections – Select none
16
Image – Flip (horizontal)
Layers – Properties – Opacity 71
17
Layers – New Raster Layer
Fill with the color #fefefe
Layers – New Mask Layer – From Image: NarahsMasks_1725

Layers – Merge – Merge Group
Layers – Properties – Blend Mode Bleach
18
Layer palette – Activate the top layer
Open the tube EF-Carine_Deco-1 – Copy – Paste as new layer
19
Open the tube AnaRidzi1841 – Copy – Paste as new layer
Image – Resize – Resize by 66% – Uncheck all layers
Adjust – Sharpness – Unsharp Mask
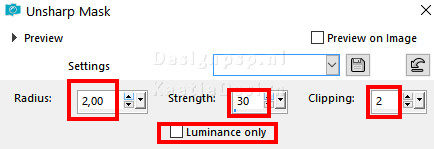
Place to the right
Effects – 3D Effects – Drop Shadow / 0 / 0 / 50 / 30 / Color #181818
20
Activate selection tool Rectangle / height and width +/_ 167 pixels
Make a selection as in the example
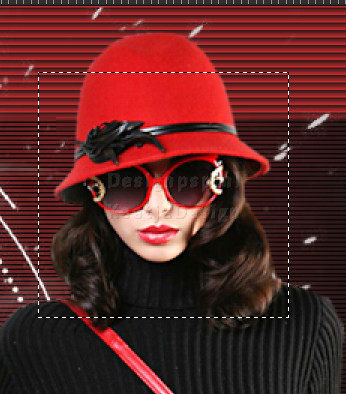
Edit – Copy Special – Copy Merged (Now in memory)
Selections – Select none
21
Edit – Paste as new image (we’ll work on this image for a while)
Image – Add Borders – Symmetric
1 pixel color # fefefe
22
Selections – Select all
Selections – Modify – Contract 30 pixels
23
Layers – New Raster Layer
Fill with the color #fefefe
Selections – Modify – Contract 1 pixel
Press Delete on the keyboard
Selections – Select none
24
Layers – Merge – Merge all layers
Edit – Copy
Activate your work
Edit – Paste as New Layer
Layers – Duplicate
Place them both as on the example crea
Layers – merge – merge down
25
Open the tube EF-Carine_Texto – Copy – Paste as new layer
Place to the left and down
Effects – 3D Effects – Drop Shadow / 0 / 0 / 50 / 6 / Color #181818
26
Image – Add Borders – Symmetric
3 pixels color # fefefe
Edit – Copy
Selections – Select all
27
Image – Add Borders – Symmetric
45 pixels color doesn’t matter
Selections – Invert
Edit – Paste into Selection
28
Adjust – Blur – Radial Blur
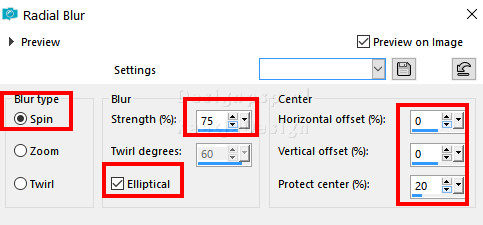
Effects – Edge Effects – Enhance
29
Effects – Artistic Effects – Halftone
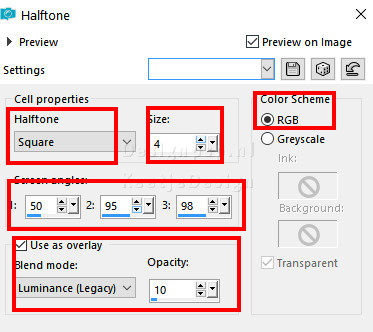
Selections – Select none
30
Place your Name/Watermark
Image – Add Borders – Symmetric
1 pixel color # fefefe
Sign your work
Layers – Merge – Merge all layers
Image – Resize – Change to 1000 pixels width
Save as Jpeg
We are done with Estela’s tutorial
The translation has been tested by Marianne.
Marianne thank you very much
© Translation DesignPSP KeetjeDesign 2022


