Camomila
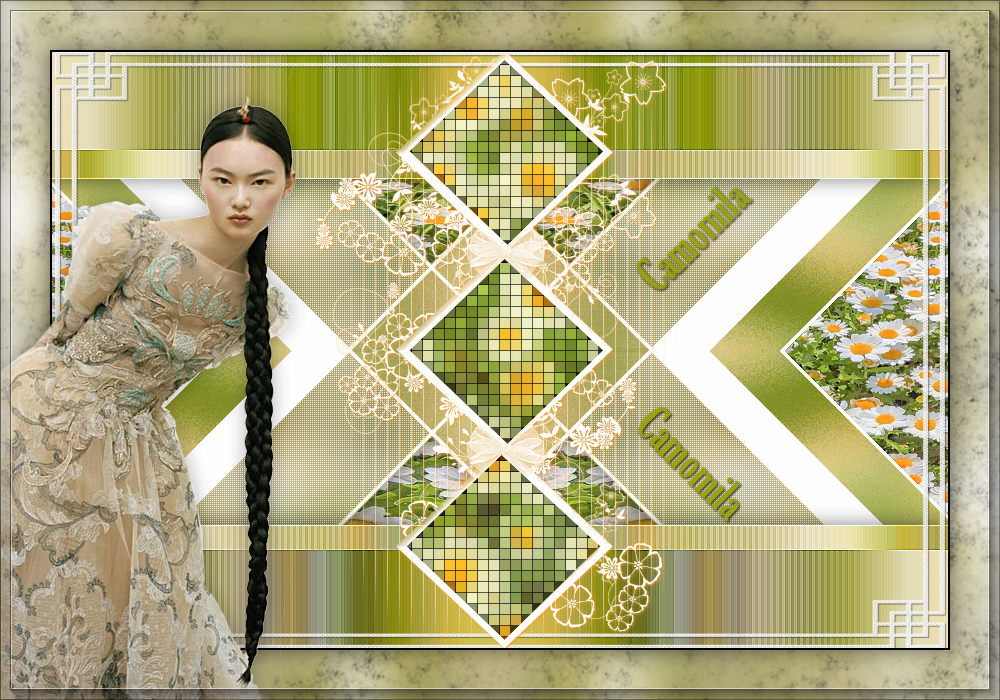
Originele tutorial Here
This tutorial is written by Estela Fonseca the © is from her.
It is not allowed to copy, link and / or place these or parts of it without her permission.
The © ️ of the materials wich are used is for the rightful owner.
If you want to use this tutorial on your own forum, club or group, you have to request permission from the writer herself.
We have permission to translate Estela Fonseca’s tutorials into English.
Thank you Estela for the permission to translate your tutorials.
Temos permissão para traduzir os tutoriais da Estela Fonseca para o inglês.
Obrigado Estela pela tradução dos tutriais.
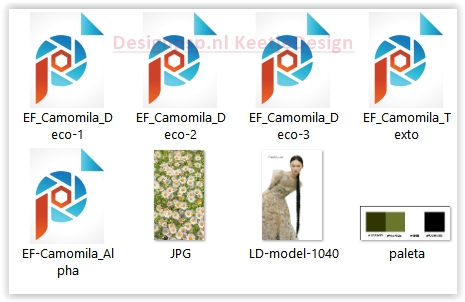
Materials Used:
Plugins Used:
Simple – Pizza Slice Mirror
Simple – Blintz,
Simple 4 Way Average
Simple – Left Right Wrap
Toadies – Blast’em!
Graphics Plus – Horizontal Mirror
Penta.com – Color Dot
Photo Aging Kit – Dirt_Dust
AAA Frames – Foto Frame
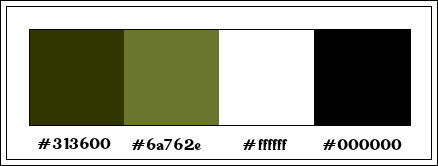
Colors Used:
The translation was made with PSP 2020 , but can also be done with other versions.
Note : When working with your own colors , play with the Blend Mode and/or Opacity at your own discretion
1
Open EF-Camomila_Alpha – Window – Duplicate (or use Shift+D) / Close the original.
We are working on the copy. This is not an empty layer, there are selections in the alpha channel.
2
Selections – Select all
Open the image jpg – Copy – Paste into selection
Selections – Select none
Adjust – Blur – Gaussian Blur / Range 25
3
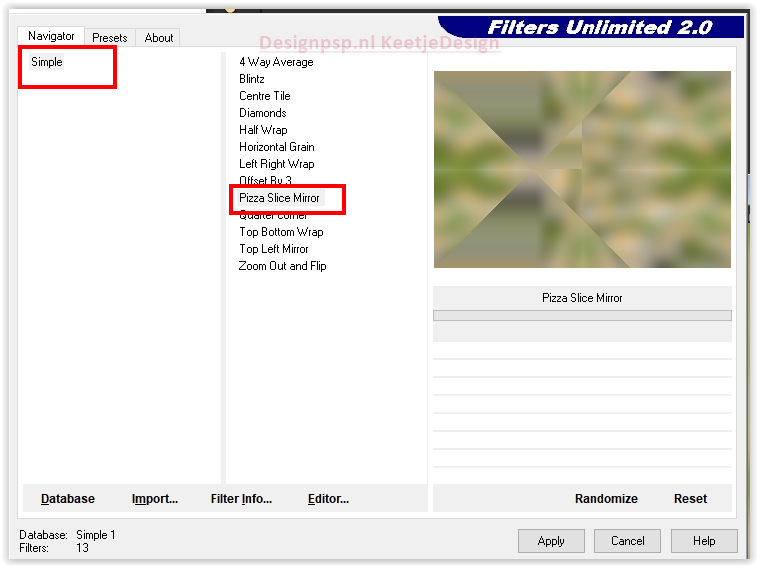
Effects – Plugin Unlimited 2.0 – Simple – Pizza Slice Mirror
4
Effects – Plugin Unlimited 2.0 – Simple – Left Right Wrap
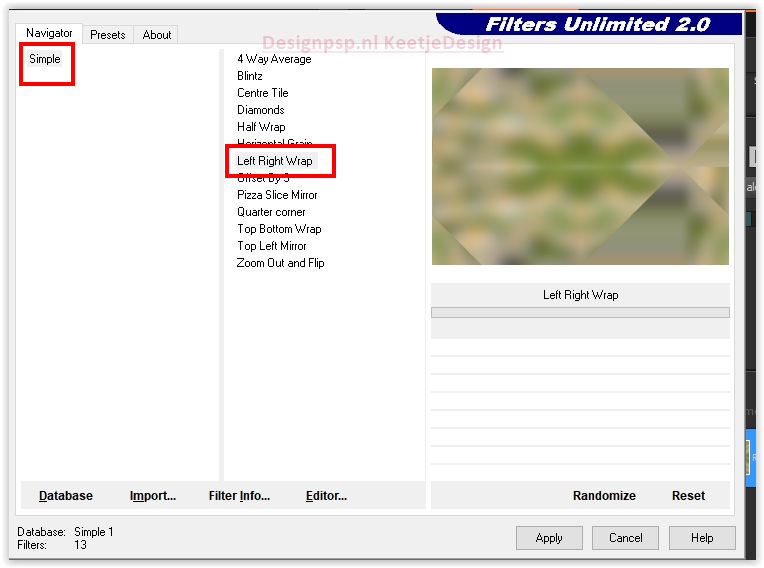
5
Effects – Plugin Graphic Plus – Horizontal Mirror / Standard
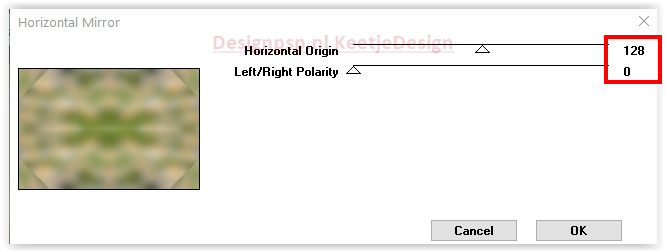
6
Selections – Load / Save Selection – Load from Alpha Channel: Selection #1
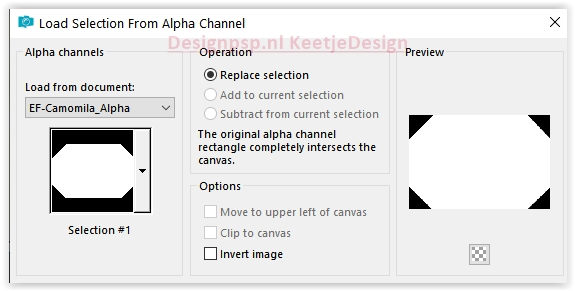
Selections – Promote selection to layer
Selections – Select none
7
Effects – Plugin Toadies – Blast ‘em! / Standaard
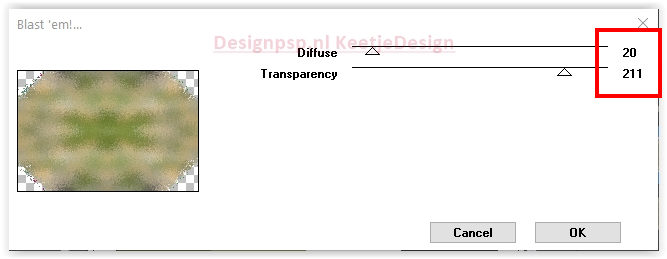
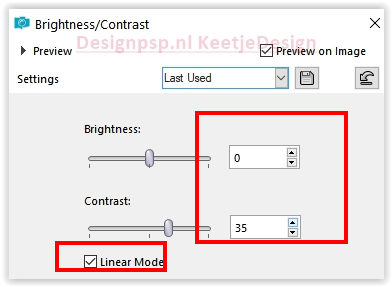
Adjust – Brightness and Contrast – Brightness / Contrast
8
Layer palette – Activate the bottom layer (Raster 1)
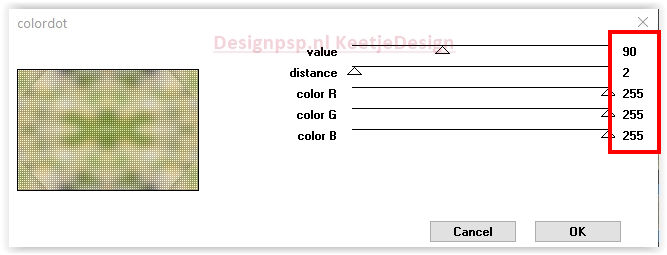
Effects – Filter Penta Com – Color Dot Default
9
Layer palette – Activate the top layer
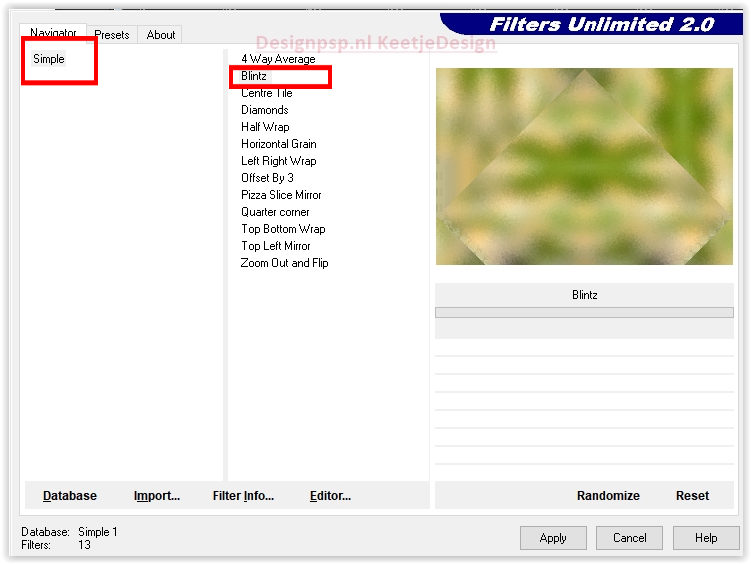
Effects – Filter Simple – Blintz 2x
10
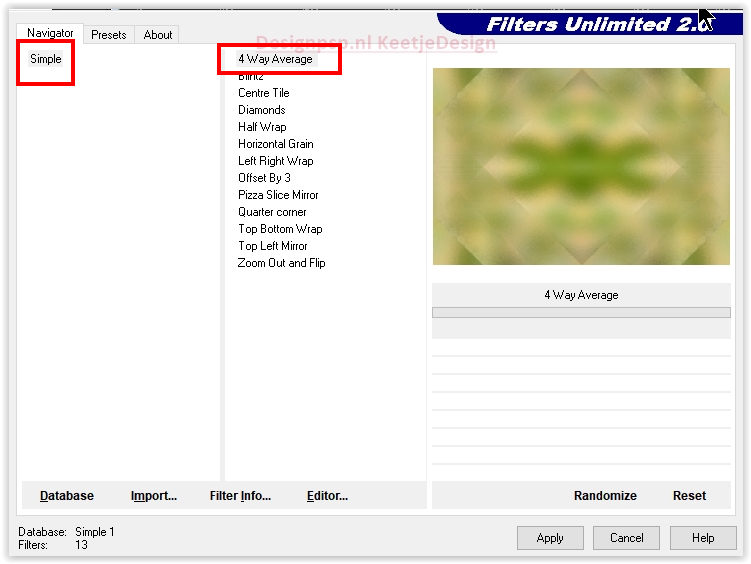
Effects – Filter Simple – 4Way Average
11
Open EF_Camomila_Deco_1 Copy – Paste as new layer
12
Layer palette – Activate the second layer from the top
Selections – Load / Save Selection – Load from Alpha Channel: Selection #2
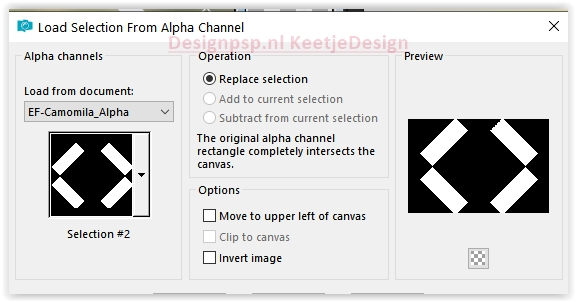
Press Delete on the keyboard
Selections – Select none
13
Layer palette – Activate the top layer
Layers – New Raster Layer
Selections – Load / Save Selection – Load from Alpha Channel: Selection #3
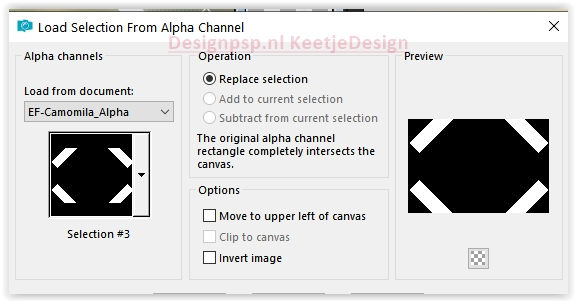
Reactivate the image jpg – Copy – Paste into selection
Adjust – Sharpness – Sharpen
Adjust – Add/Remove Noise – Add Noise
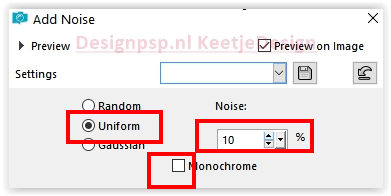
14
Layers – New Raster Layer
Effects – 3D Effects – Cutout
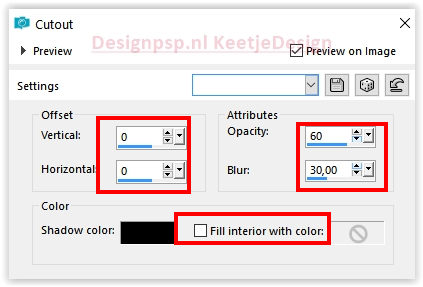
Selections – Select none
15
Selections – Load / Save Selection – Load from Alpha Channel: Selection #4
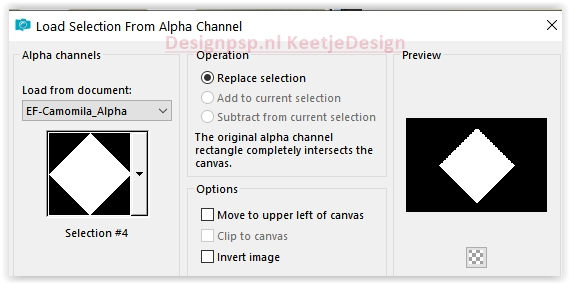
Selections – Modify – Contract 50 pixels
Fill with white color.
Selections – Modify – Contract 4 pixels
Reactivate the image jpg – Copy – Paste into selection
Selections – Select none
Adjust – Sharpness – Sharpen
16
Layers – Merge – Visible Layers
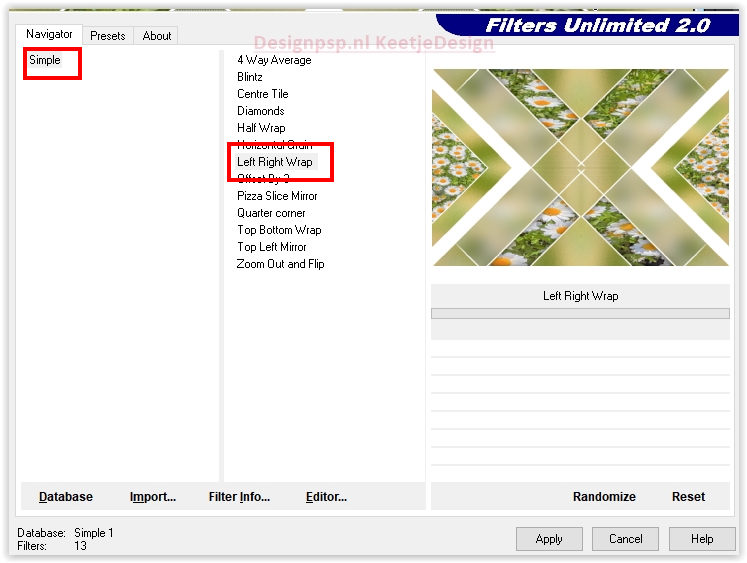
Effects – Filter Unlimited 2.0 – Simple – Left Right Wrap
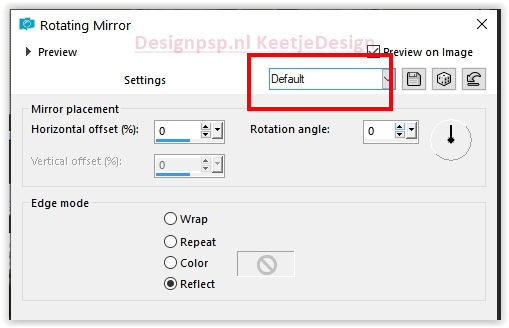
Effects – Reflection Effects – Rotating Mirror / Default
17
Selections – Load / Save Selection – Load from Alpha Channel.: Selection #5
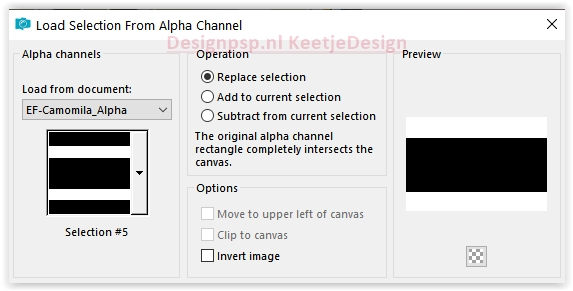
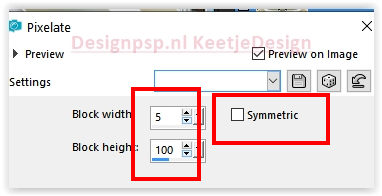
Effects – Distortion Effects – Pixelate
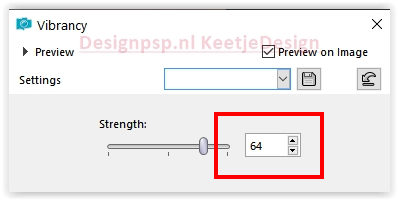
Adjust – Hue and Saturation – Vibrance
18
Selections – Layer selection
Selections – Select none
Effects – Edge Effects – Enhance
Effects – 3D Effects – Drop Shadow / 0 / 0 / 50 / 30 / Color #000000
19
Open EF-Camomila_Deco-2 Copy – Paste as new layer
20
Open EF-Camomila_Deco-3 Copy – Paste as new layer
21
Selections – Load / Save Selection – Load from Alpha Channel: Selection #6
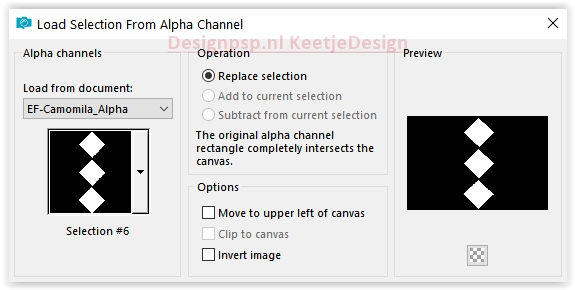
Activate again the image jpg – Copy – Paste as new layer
22
Selections – Invert.
Press Delete on the keyboard
Selections – Invert
Effects – Texture Effects – Tiles / Color #6a762e
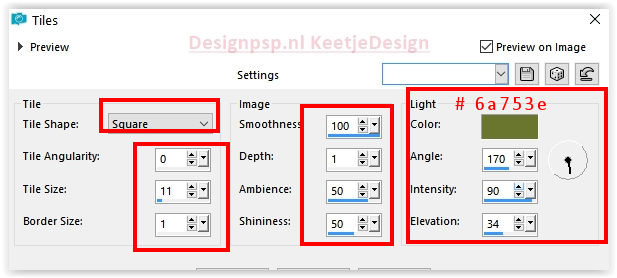
Selections – Select none
23
Layers – merge – merge down
Effects – 3D Effects – Drop Shadow / 1 / 1 / 85 / 3 / Color # fc981c
24
Open EF-Camomila_Texto – Copy – Paste as new layer
Activate Selection Tool (K) – Position X 686.00 / Position Y 135.00

Type M to close the tool
Effects- 3D Effects – Drop Shadow / 1 / 1 / 85 / 3 / Color # 000000
25
Selections – Select all
Image – Add Borders – Symmetric
50 pixels color # ffffff
Invert selection
26
Effects – Reflection Effects – Kaleidoscope
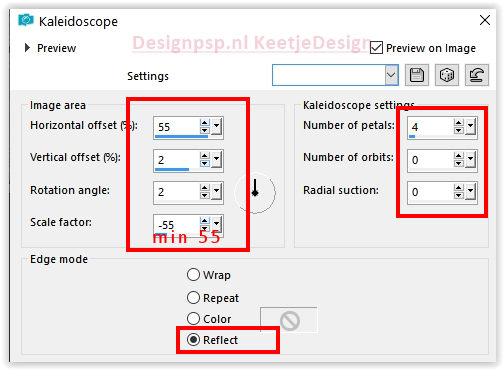
Adjust – Blur – Gaussian Blur / Range 25
27
Effects – Filter Unlimited 2.0 – Photo Aging Kit – Dirt_Dust, Default
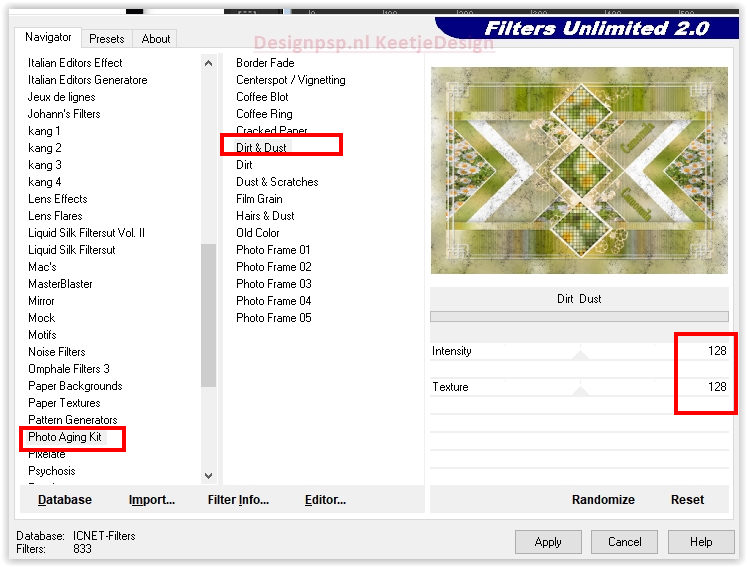
Selections – Invert
28
Effects – 3D Effects – As Button
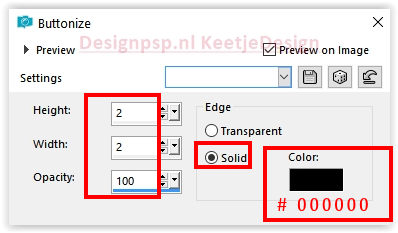
Effects – 3D Effects – Drop Shadow / 0 / 0 / 50 / 30 / Color # 313600
Selections – Select none
29
Open the tube LD-model-1040 – Copy – Paste as new layer
Image – Resize – Resize by 75% – All layers unchecked
Activate Selection Tool (K) – Position X 1.00 / Position Y 65.00

Type M to close the tool
Adjust – Sharpness – Unsharp Mask
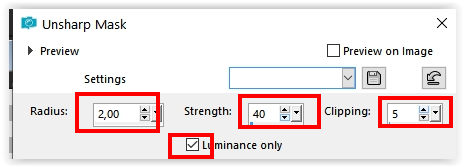
Effects – 3D Effects – Drop Shadow / 0 / 0 / 30 / 30 / Color #000000
Layers – Merge – Merge Visible
30
Effects – Filter AAA Frames – Photo Frame
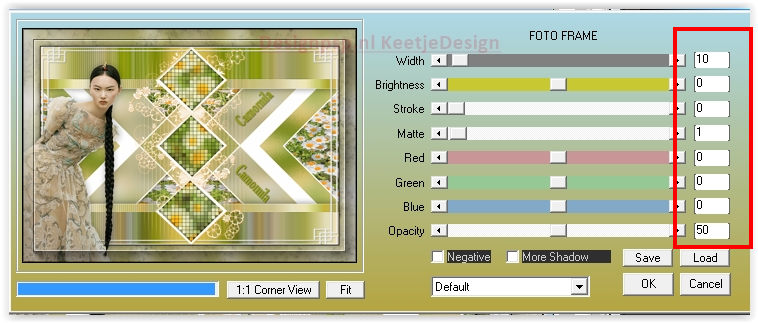
Sign your work
Layers – Merge – Merge all layers
Save as Jpeg
We are done with Estela’s tutorial
The translation has been tested by Marianne.
Marianne thank you very much
© Translation DesignPSP KeetjeDesign 23-05-2022


