Black and Yellow
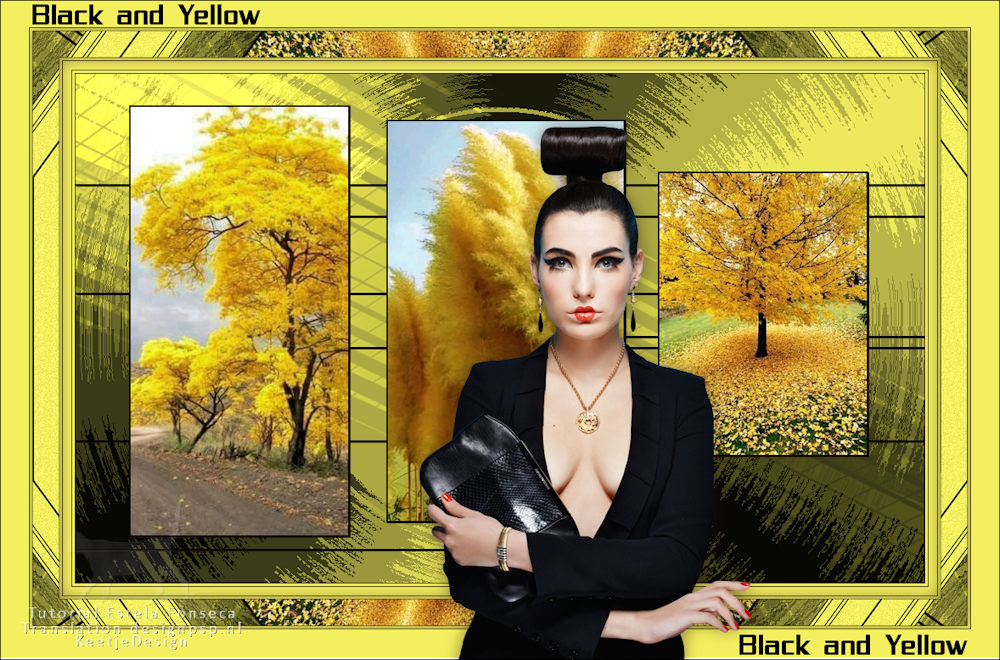
Originele tutorial Here
This tutorial is written by Estela Fonseca the © is from her.
It is not allowed to copy, link and / or place these or parts of it without her permission.
The © ️ of the materials wich are used is for the rightful owner.
If you want to use this tutorial on your own forum, club or group, you have to request permission from the writer herself.
We have permission to translate Estela Fonseca’s tutorials into Dutch and English.
Thank you Estela for the permission to translate your tutorials.
Temos permissão para traduzir os tutoriais de Estela Fonseca para holandês e inglês.
Obrigado Estela pela permissão para traduzir seus tutoriais.
Materials Used:
Plugins Used:
Unlimited 2.0 – &<Bkg Designer sf10II> – PIX Sector Mosaic
Unlimited 2.0 – &<Bkg Designer sf10II> – Maelstrom
Unlimited 2.0 – &<Bkg Designer sf10II> – Evanescence
Unlimited 2.0 – &<Bkg Designer sf10II> – MirrorChaos
Mura’s Meister – Cloud
The translation was made with PSP 2020 , but can also be done with other versions.
Note : When working with your own colors , play with the Blend Mode and/or Opacity at your own discretion
1
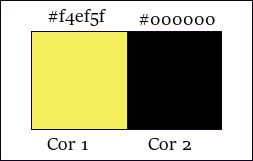
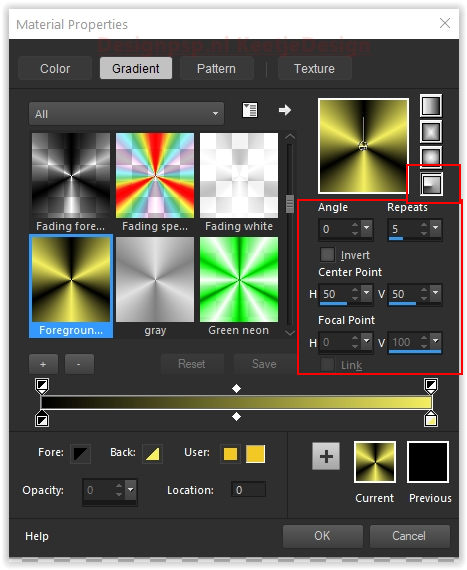
Materials palette – Foreground color # 000000 / Background color # f4ef5f
Create a Radial gradient in the foreground
2
Open EF-Black_and_Yellow_Alpha – Window – Duplicate (or use Shift+D)
Close the original we work on the copy
This is not an empty layer, the selections are in the alpha channel
3
Fill the copy with the gradient
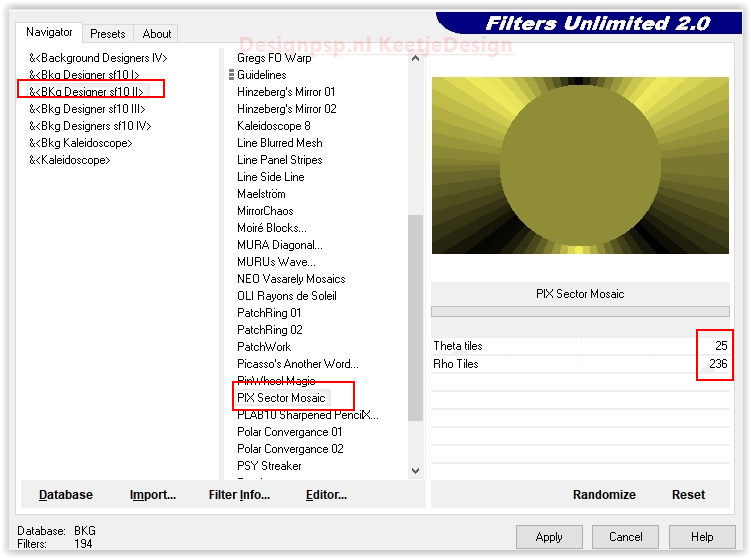
Effects – Plugin Unlimited 2.0 – &<Bkg Designer sf10II> – PIX Sector Mosaic
Effects>Reflection Effects>Rotating Mirror
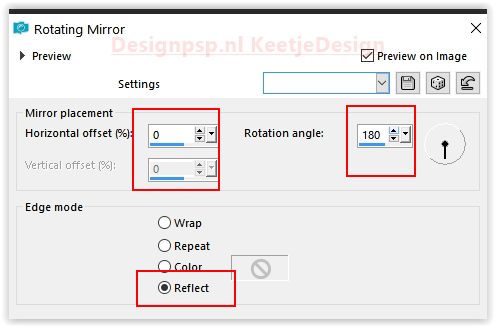
4
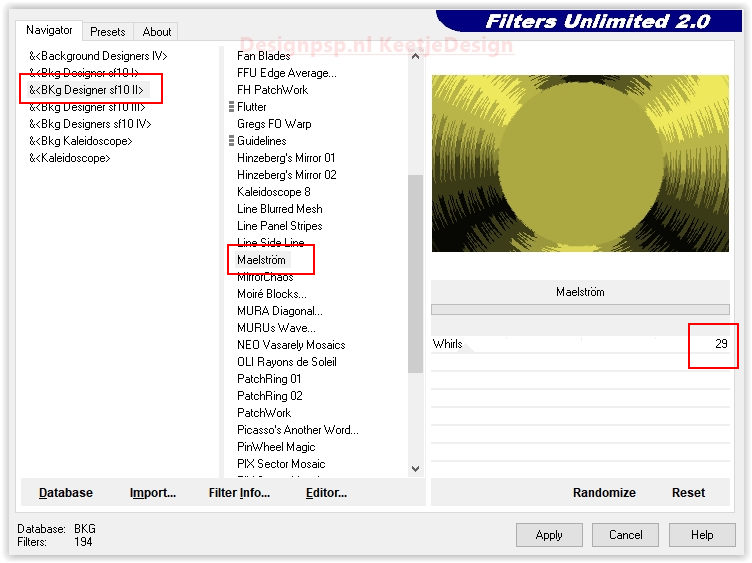
Effects – Plugin Unlimited 2.0 – &<Bkg Designer sf10II> – Maelstrom
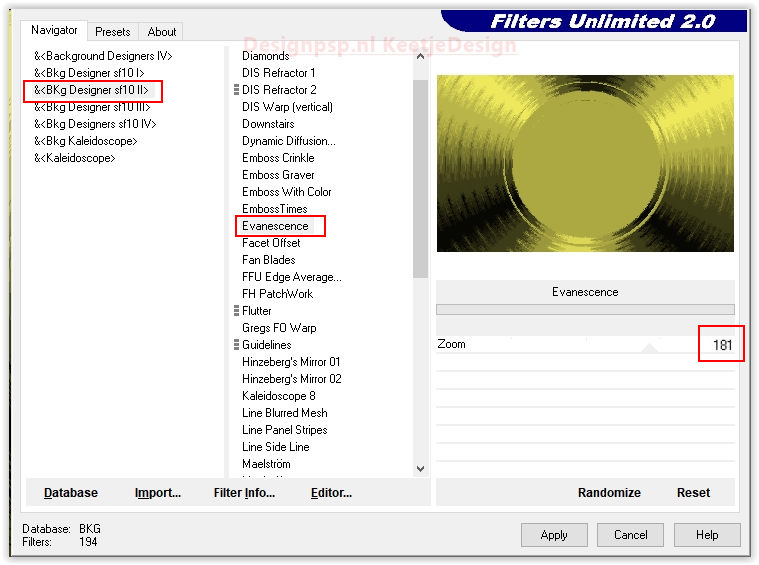
Effects – Plugin Unlimited 2.0 – &<Bkg Designer sf10II> – Evanescence
5
Layers – Duplicate
Effects – Plugin Unlimited 2.0 – &<Bkg Designer sf10II> – MirrorChaos
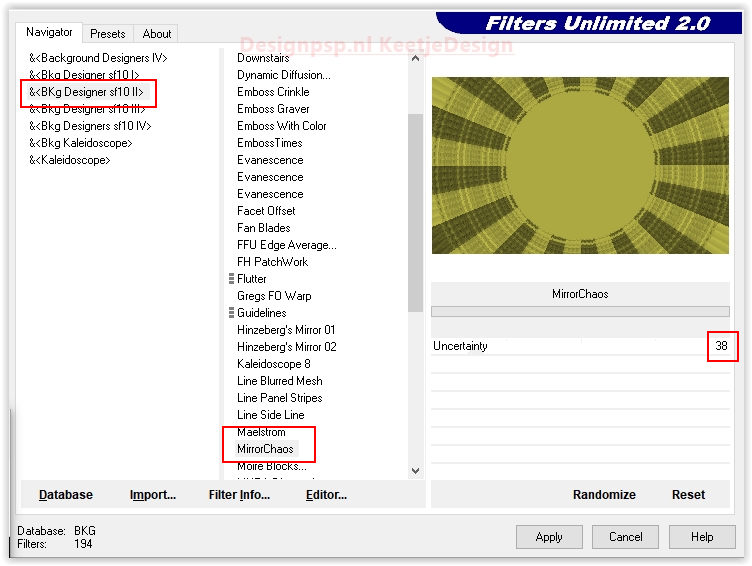
Layers – Properties – Blend Mode Dodge / Opacity 55
6
Open the tube EF_Black_and_Yellow_Deco_1 – Copy – Paste as new layer
7
Selections – Load/Save Selection – Load Selection from Alpha Channel: Selection #1
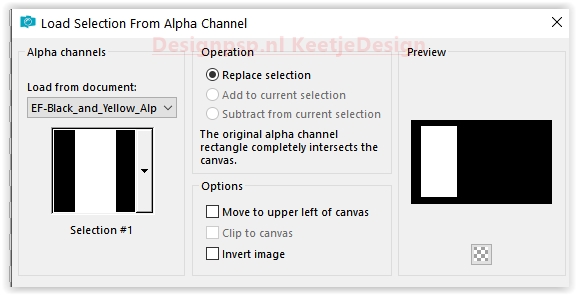
Layers – New Raster Layer
Open the image imagem -1 – Copy – Paste into selection
Adjust – One Step Photo Fix
Selections – Select none
8
Selections – Load/Save Selection – Load Selection from Alpha Channel: Selection #2
Layers – New Raster Layer
Open the image imagem-2 – Copy – Paste into selection
Adjust – One Step Photo Fix
Selections – Select none
9
Selections – Load/Save Selection – Load Selection from Alpha Channel: Selection #3
Layers – New Raster Layer
Open the image imagem-3 – Copy – Paste into selection
Adjust – One Step Photo Fix
Selections – Select none
Layers – Merge – 2 x Merge Down
10
Layer palette – Activate the layer Raster 2
Effects – 3D Effects – Drop Shadow / 1 / 1 / 100 / 1 / Color # 000000
11
Layer palette – Activate the layer Copy of Raster 1
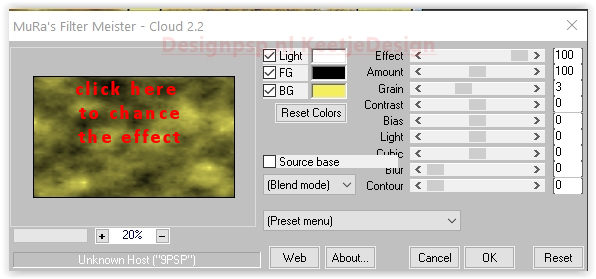
Effects – Plugin Mura’s Meister – Cloud / Standard
Note: Before using the plugin, click Reset to reset the color
The effect of the plugin is random / Click in the size window until you like it
12
Layers – Load/Save Mask – Load Mask from Disk: Astrid Mask 135
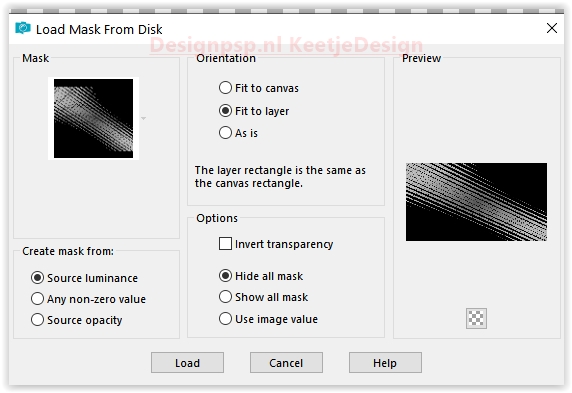
Layers – Merge – Merge Group
13
Image – Add Borders – Symmetric
1 pixel color # 000000
3 pixels color # f4ef5f
1 pixel color # 000000
10 pixels color # f4ef5f
1 pixel color # 000000
3 pixels color # f4ef5f
1 pixel color # 000000
30 pixels color # f4ef5f
1 pixel color # 000000
3 pixels color # f4ef5f
1 pixel color # 000000
14
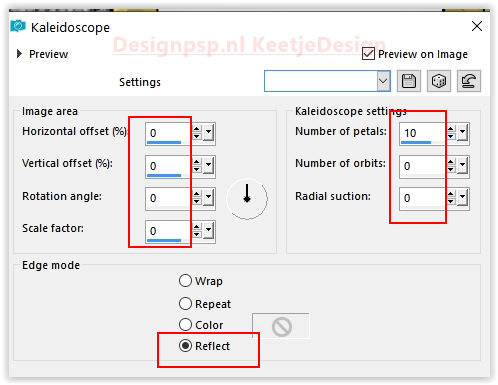
Activate Magic Wand tool select the border of 30 pixels
Effects – Reflection Effects – Kaleidoscope
15
Adjust – Add/Remove Noise – Add Noise
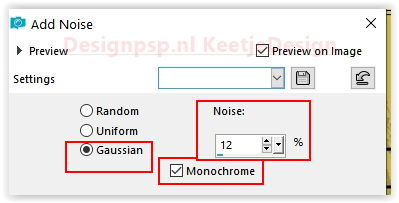
Effects – 3D Effects – Drop Shadow / 0 / 0 / 50 / 30 / Color #000000
Selections – Select none
16
Image – Add Borders – Symmetric
33 pixels color # f4ef5f
17
Open EF-Black_and_Yellow-Texto – Copy – Paste as new layer
18
Open the tube Red_lips_CibiBijoux – Copy – Paste as new layer
Place on the right.
Effects – 3D Effects / Drop Shadow / 0 / 0 / 35 / 35 / Color Black
19
Image – Add Borders – Symmetric
1 pixel color # 000000
20
Place your Name or Watermark
Image – Resize – Change the width to 1000 pixels
Save as Jpeg
Sign your work
Layers – Merge – Merge all layers
Image – Resize – Change to 1000 pixels width
Save as Jpeg
We are done with Estela’s tutorial
The translation has been tested by Marianne.
Marianne thank you very much
© Translation DesignPSP KeetjeDesign 2022


