

Keetje

Original tutorial Here
This tutorial is written by Valy Scrap Passion the © is from her.
You’re not allowed to copy, link and / or place these or parts of it without her permission.
The © ️ of the materials wich are used is for the rightful owner.
If you want to use this tutorial on your own forum, club or group, you have to request permission from the writer herself.
If this tutorial looks like another, it is purely coincidental.
We have permission to translate Valy Scrap Passion tutorials into English.
Thank you Valy for the permission to translate your tutorials.
Nous avons la permission de traduire les tutoriels de Valy Scrap Passion en anglais.
Merci Beaucoup Valy , que je pouvez traduire vos tutoriels en anglais.
Her site

Materials Used:
1 Font – EFPARASI
1 Font – Frnkvent
Install both fonts if you want to create your own text
1 Colorcode – Palette-Keetje-VSP
1 AlphaFile – Alpha-Keetje-VSP
1 Mask – Narah_Abstract035
1 Tube – Deco1-Keetje-VSP
1 Tube – Deco2-Keetje-VSP
1 Tube – Deco3-Keetje-VSP
1 Tube – Deco4-Keetje-VSP
1 Tube – Deco5-Keetje-VSP
1 Tube – mistedVSP150
1 tube – mistedVSP149
Open these materials in PSP / Minimize mask
Download Materials Here
Plugins Used:
Toadies – What Are You?
Toadies – Weaver
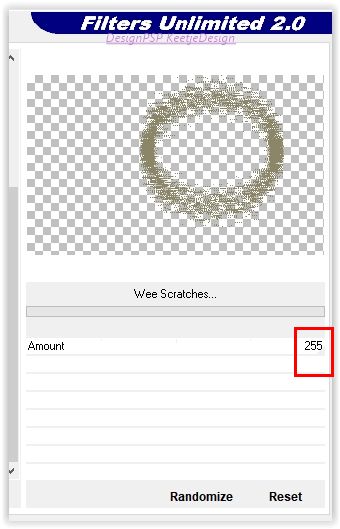
Unlimited 2.0 – Tramages – Wee Scratches
Unlimited 2.0 – Jeux de lignes – Entrelacement
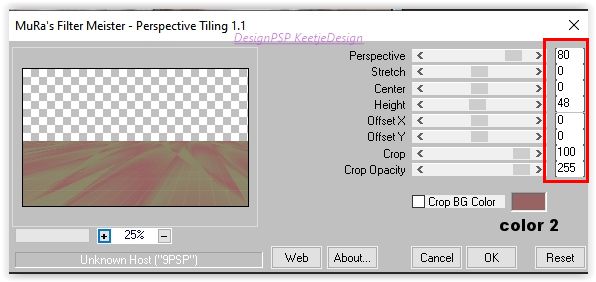
MuRa’s Meister – Perspective Tiling
Flaming Pear – Tachyon
Flaming Pear – Transline
AAA Frames – Foto Frame.
Eye Candy 5 : Impact – Perspective Shadow
VanDerLee – UnPlugged-X – Jalusi
You can find the plugins Here
The translation is written with PSP 2018, but can also be made with other versions.
Colors Used

Note : When working with your own colors , play with the Blend Mode and/or Opacity at your own discretion
1
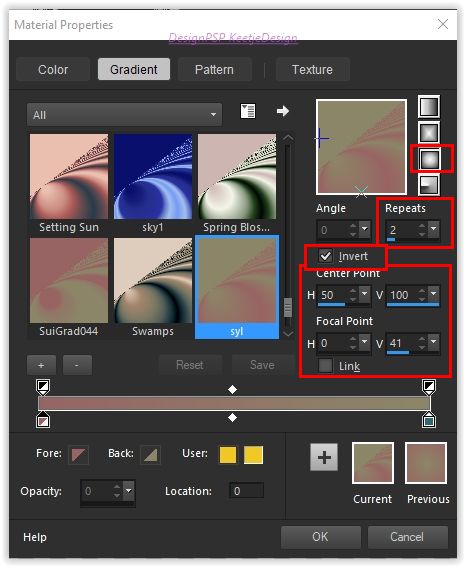
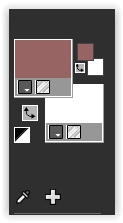
Materials palette – Foreground color 1 / Background color 2

Create a Sunburst gradient in the Foreground
Open the Alpha-Keetje-VSP / Windo – Duplicate (or use Shift+D shortcut) / Close the original file, we working on the duplicate.
Fill in the gradient
Layers – New raster layer
Fill in the color 3
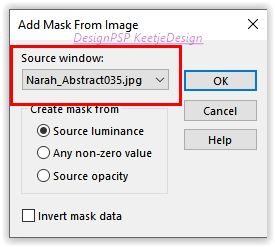
Open the mask Narah_Abstract035 / Minimize
Activate the work
Layers – New mask layer – From image
Effecten – Edge effecten – Enhance
Layers – Merge – Merge Group
2
Layers – New raster layer
Selections – Load/Save selection – Load selection from alpha channel
Load Sélection # 1

Selections – Modify – Select selection borders
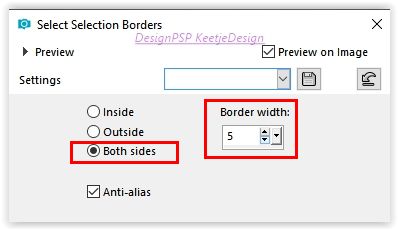
Fill in the color 3
Selections – Select None
3
Activate the Selection Rectangle tool (S) – Custom selection

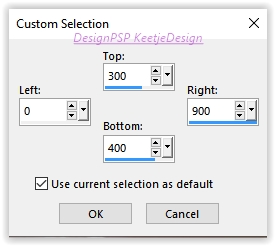
Layers – New raster layer
Fill in the color 3
Selections – Select None
Material palette – set the Background to color 3
Activate the work
Effects – Plugin Toadies – What Are You?

Image – Free rotate

Adjust – Sharpness – Sharpen
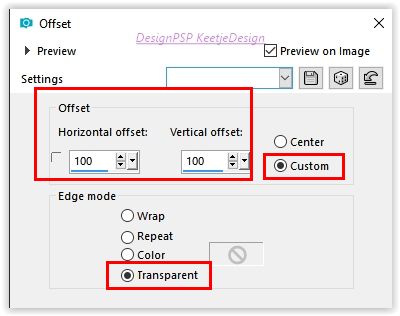
Effects – Image effects – Offset / 100 / 100
Layers – Merge – Merge Down
4
Layers – Duplicate
Effects – Plugin Toadies – What Are You?
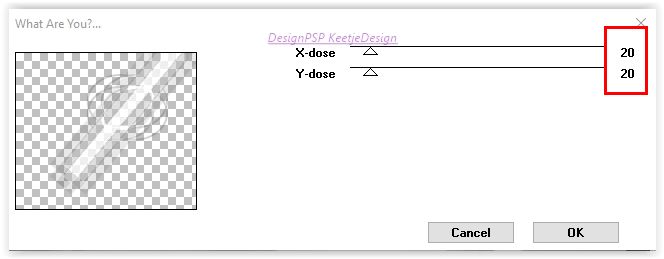
Image – Resize – Resize with 110% – Resize all layers not checked
Layers – Arrange – Move Down
Layer palette – Click the top layer
Layers – Properties – Opacity 79
Layers – Merge – Merge Down
Layers – Arrange – Move Down
Layer palette – Click the top layer
Selections – Load/Save selection – Load selection from alpha channel
Load again Sélection # 1
Edit – Clear
Selections – Select None
5
Layers – New raster layer
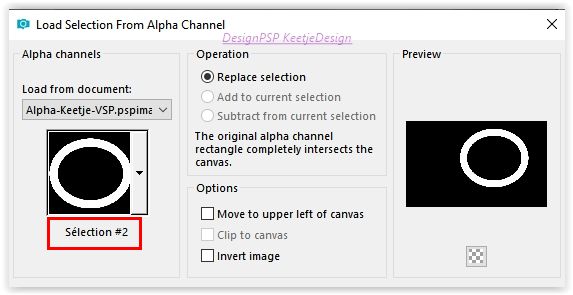
Selections – Load/Save selection – Load selection from alpha channel
Load Sélection # 2
Fill in the color 2
Selections – Select None
Effects – Plugin Unlimited – Tramages – Wee Scratches
Layers – Properties – Blend Mode Multiply
Layers – Duplicate
Effects – Distortion effects – Wind

Layers – Arrange – Move Down
Layerpalette – Click the top layer
Layers – Duplicate
Effects – Distortion effects – Wind

Layers – Arrange – Move Down’
Layer palette – Click the top layer
Layers – Merge – Merge Down 2 times
Layers – Arrange – Move Down 2 times
Your layer palette looks like this

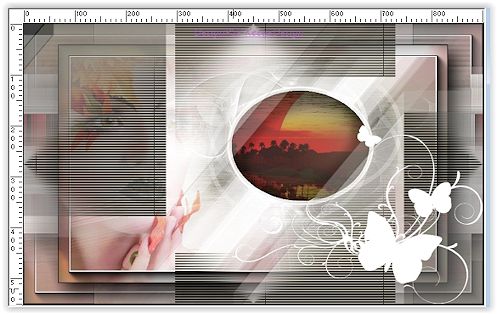
your work should now look like this

6
Layer palette – Click the bottom layer
Open the tube mistedVSP149 – Copy – Paste as new layer
Activate the Pick Tool (K) / Mode Scale / Position X minus 121 / Position Y minus 94

Type M to close the Pick Tool
7
Layer palette – Click the bottom layer
Layers – Duplicate
Effects – Plugin Unlimited 2.0 – Jeux de lignes – Entrelacement

Effects – Geometric effects – Skew

Effects – Geometric effects – Skew

Effects – Plugin Unlimited 2.0 – Jeux de lignes – Entrelacement
Effects – Plugin MuRa’s Meister – Perspective Tiling.
8
Layer palette – Click the top layer
Open the tube mistedVSP150 – Copy – Paste as new layer
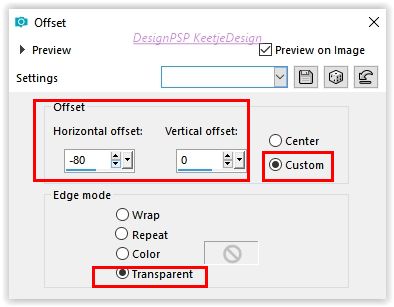
Effects – Image effects – Offset / minus 80 / 0
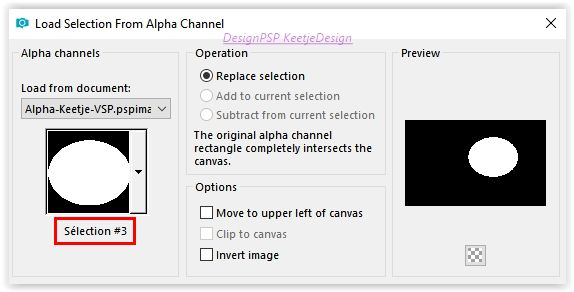
Selections – Load/Save selection – Load selection from alpha channel
Load Sélection # 3
Selections – Invert
Edit – Clear
Hold Selection
Layers – Properties – Opacity 60
Layers – Arrange – Move Down 3 times
Your layer palette looks like this
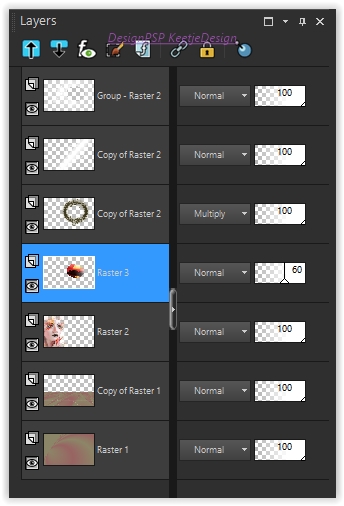
Your work look like this

9
Selections – Invert
Layers – New raster layer
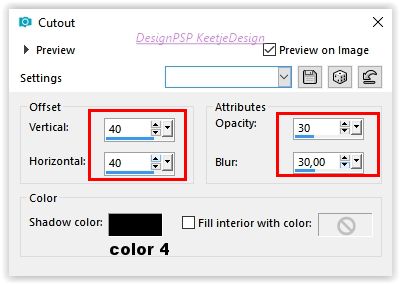
Effects – 3D Effects – Cutout
Layers – New raster layer
Effects – 3D Effects – Cutout

Layers – Merge – Merge Down
Hold Selection
Layer palette – Click the second layer at the top
Edit Clear
Selections – Select None
Layers – Merge – Merge Visible
10
Layers – Duplicate 2 times
Layer palette – Click the bottom layer
you don’t see anything happening on your work, but you do see it in the Layer palette
Adjust – Blur – Radial blur

Layer palette – Click the middle layer
Effects – Plugin Flaming Pear – Tachyon
Effects – Plugin Flaming Pear – Transline
Layers – Merge – Merge Down
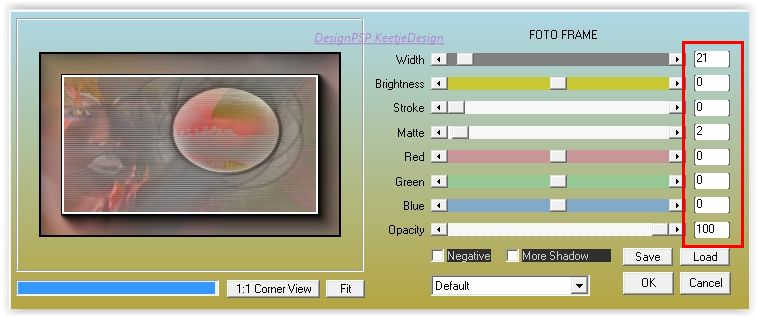
Effects – Plugin AAA Frames – Foto Frame
11
Layer palette – Click the top layer
Image – Resize – Resize with 85% – Resize all layers not checked
Adjust – Sharpness – Sharpen
Layers – Duplicate 2 times
Layer palette – Click the second layer at the bottom
Effects – Plugin Toadies – What Are You?

Effects – Edge effects – Enhance
12
Layer palette – Click the second layer at the top
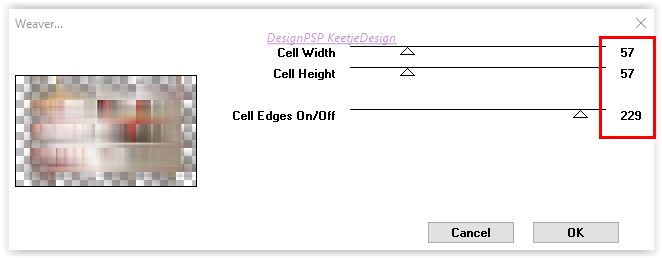
Effects – Plugin Toadies – Weaver
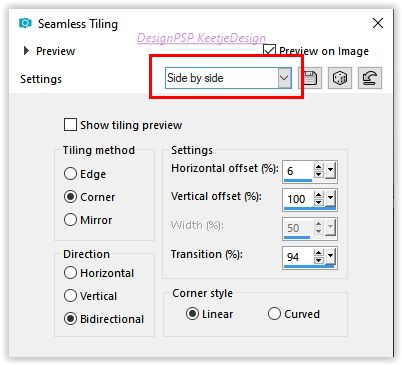
Effects – Image effects – Seamless tiling
Effects – Edge effects – Enhance
Activate the Pick Tool / Mode Scale
Slide the upper middle node down to 100 pixels
Slide the bottom middle node up to 450 pixels
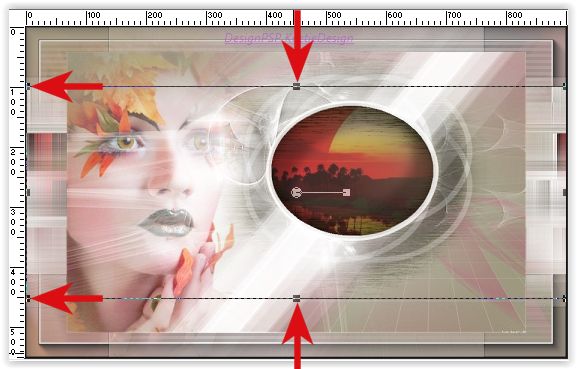
Type M to close the Pick Tool
Effects – Plugin Alien Skin – Eye Candy 5 – Impact – Perspective Shadow.

13
Layer palette – Click the top layer
Edit – Cut
Edit – Past as a new image
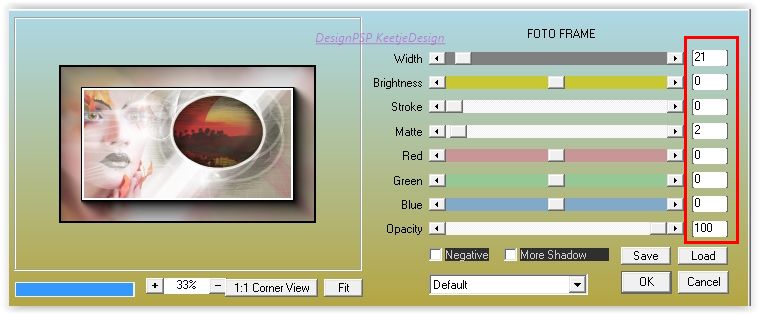
Apply the following plugin to this image
AAA Frames – Foto Frame / The settings are correct
Edit – Copy
Activate your work
Edit – Paste as new layer
Effects – Plugin Alien Skin – Eye Candy 5 – Impact – Perspective Shadow.
14
Layers – New raster layer
Selections – Load/Save selection – Load selection from alpha channel
Load Sélection # 4

Fill in the color 4
Selections Modify – Contract – Number of pixels 1
Fill in the color 3
Selections – Select None
Effects – Plugin Toadies – What Are You?

Layers – Duplicate
Image – Mirror (Mirror horizontal)
Image – Flip (Mirror vertical)
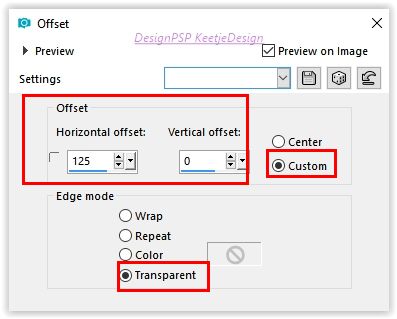
Effects – Image effects – Offset / 125 / 0
Layers – Merge – Merge Down
15
Layers – New raster layer
Selections – Load/Save selection – Load selection from alpha channel
Load Sélection # 5

Effects – Plugin VanDerLee – UnPlugged-X – Jalusi

Selections – Select None
Effects – Image effects – Seamless tiling / Default

Layers – Properties – Blend mode Multiply
16
Open the tube Deco1-Keetje-VSP – Copy – Paste as new layer
Objects – Align – Bottom
Objects – Align – Right
If it does not work with “Objects” then place the element as in the example
17
Open the tube Deco2-Keetje-VSP – Copy – Paste as new layer
Is in the right place
18
Open the tube Deco3-Keetje-VSP – Copy – Paste as new layer
Is in the right place
19
Open the tube Deco4-Keetje-VSP – Copy – Paste as new layer
Activate the Pick Tool (K) / Mode Scale / Position X 25 / Position Y 44

Type M to close the Pick Tool
20
Selections – Select All
Image – Add Borders – Symmetric checked
70 pixels color 3
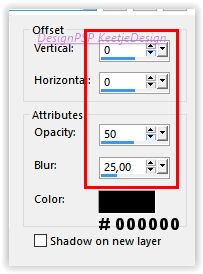
Effects – 3D Effects – Drop Shadow / 0 / 0 / 50 / 25 / 000000
Selections – Select None
21
Open the tube Deco5-Keetje-VSP – Copy – Paste as new layer
Is in the right place
Layers – Merge – Merge Visible
22
Image – Resize – Resize to 800 pixels in the width
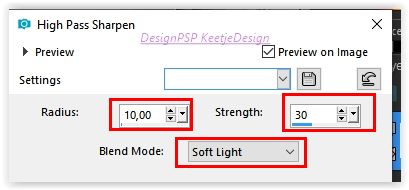
Adjust – Sharpness – High Pass Sharpen
23
Layer – New rasterlayer
Sign your work
Merge All
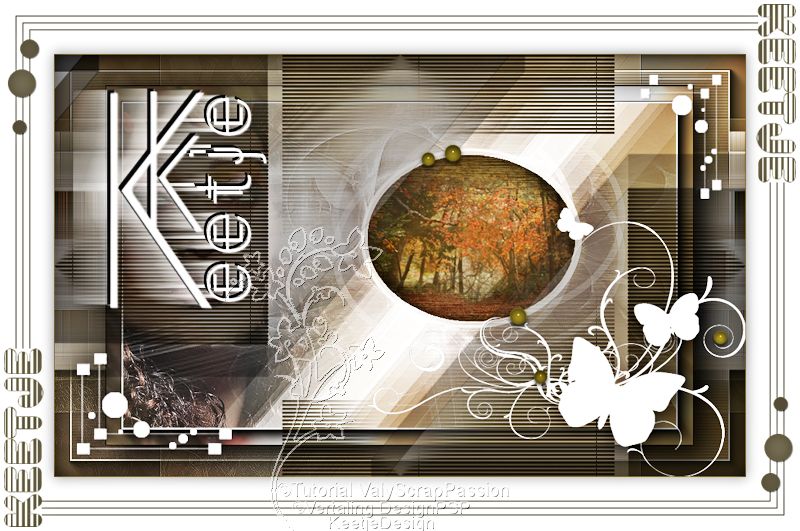
Save as Jpeg.
The translation is tested by Marianne.
Marianne thank you very much / Tubes off Leny / Kjkildiko

Another version / Tubes off K@rine Dreams
© Translation Keetje DesignPSP KeetjeDesign 17-10-2016
This translation is registered with LSBene