

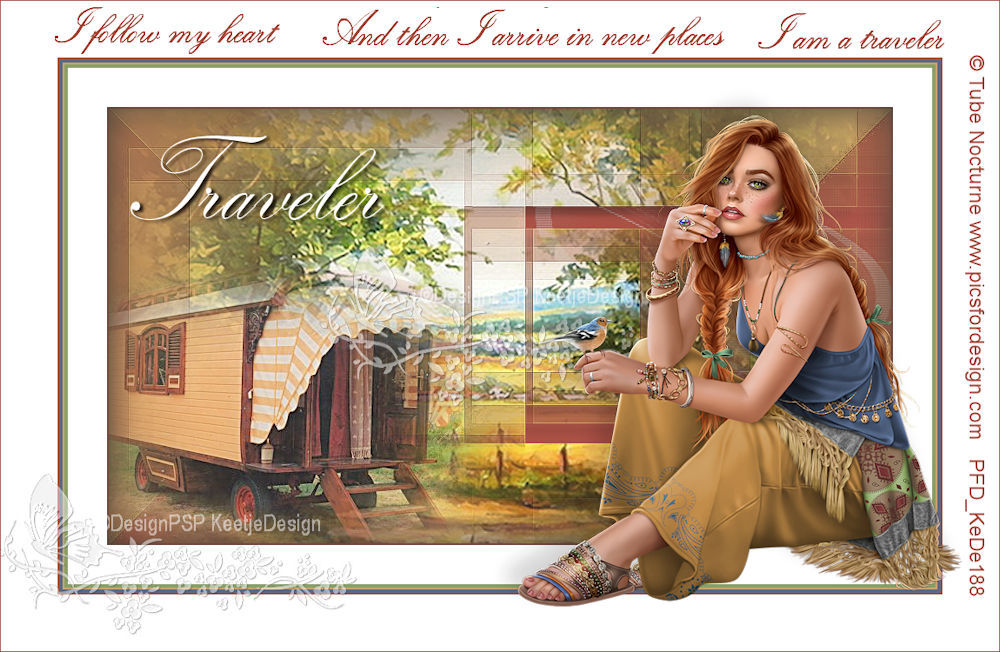
Traveler

This tutorial was created , written and translated by KeetjeDesign 18-03-2021, the © is mine.
It is not allowed to copy, link and / or place these or parts thereof without my permission.
If you want to use this tutorial on your own forum, club or group , please ask me for permission admin@designpsp.nl
The tutorial is written with PSP 2020 but can also be made with other versions.
If this tutorial resembles another tutorial, it is purely coincidental
The © of the materials used is for the rightful owner and the tube maker.
I thank the tube maker Leny for the background tube and Aditacreations for the maske
Leny
Unfortunately, Adita’s site no longer exists
Materials used:
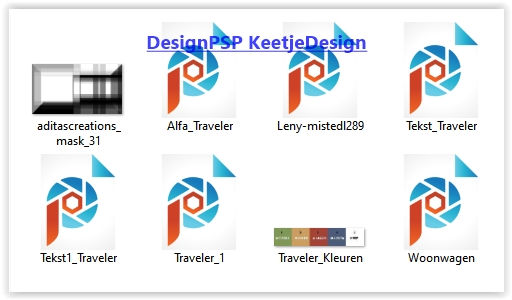
You need 1 Main tube of your choice my tube is from Nocturne PFD
Plugins used: none
The tutorial is written with these colors and materials.
If you use your own colors and / or materials, you may have to play with the settings of Blend Mode and/or Opacity.
1
Open Alfa_Traveler – Window -Duplicate (or use Shift + D)
Close the original we are working on the copy
Fill with color 3
Layers – New raster layer
Fill with color 2
2
Layers – New Mask Layer – From Image aditascreations_mask_31
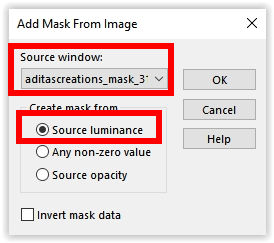
Effects – Edge Effects – Enhance more
Layers – Merge – Merge group
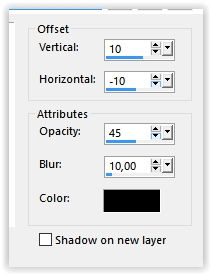
Effects – 3D Effects – Drop Shadow / 10 / min 10/45/10 / # 000000
3
Open the tube Leny-mistedl289 – Copy – Paste as new layer
Selections – Load / Save – Load selection from alpha channel: Selection1
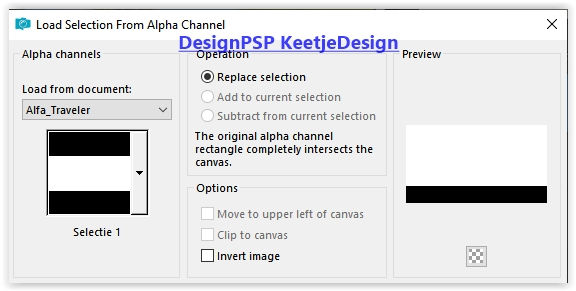
Press Delete on the keyboard
Selections – Select none
4
Paste tube again as a new layer (Is in memory)
Selections – Load / Save – Load selection from alpha channel: Selection 2
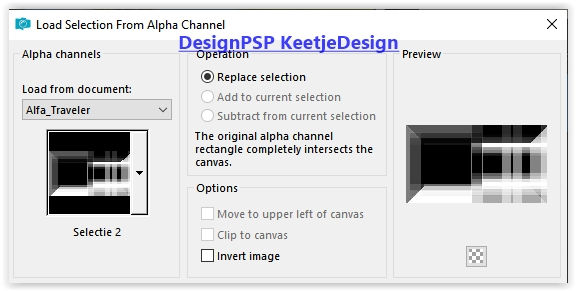
Press Delete on the keyboard
Selections – Invert
Adjust – Sharpness – Sharpen
Selections – Select none
5
Open the tube Woonwagen – Copy – Paste as new layer
Place on the left
Adjust – One Step Photo Correction (Depending on the tube otherwise Sharpen – Sharpness)
6
Layer palette – Activate the bottom layer
Open the tube Traveler_1 – Copy – Paste as new layer
Objects – Align – Right
Layers – Properties – Opacity 85
7
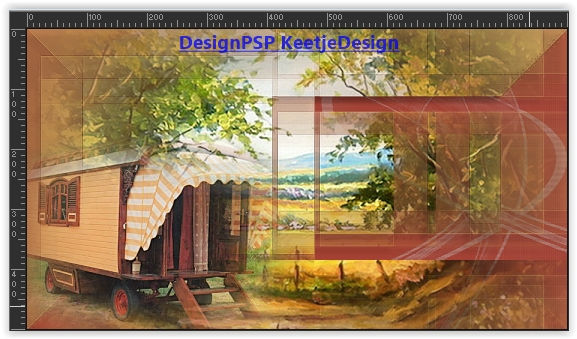
The layers palette now looks like this

We now have this
8
Image – Add Borders – Symmetric
1 pixel color 3
Selections – Select all
45 pixels color 5
Effects – 3D Effects – Cutout
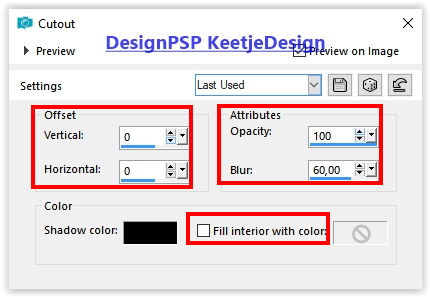
Selections – Select none
Image – Add Borders – Symmetric
4 pixels color 1
2 pixels color 2
4 pixels color 4
2 pixels color 3
65 pixels color 5
9
Open the tube Tekst1_Traveler – Copy – Paste as new layer
Effects – Image Effects – Offset 0 / 343
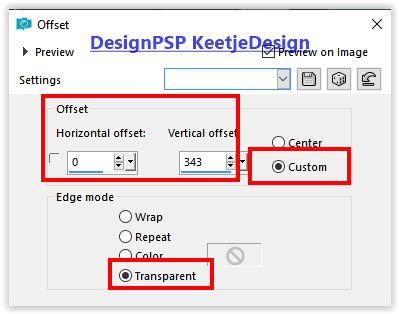
Layers – Duplicate
Layers – merge – merge down
10
Open the tube Tekst_Traveler – Copy – Paste as new layer
Effects – Image Effects – Offset / minus 285 / 170
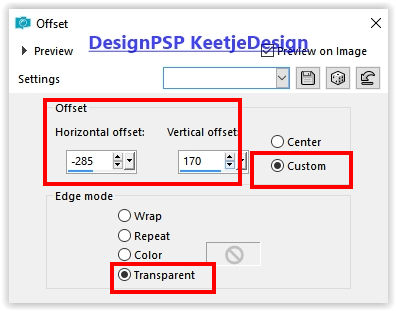
Effects – 3D Effects – Drop shadow of your choice
11
Open your main tube – Copy – Paste as new layer
Change format if necessary
Adjust – Sharpness – Sharpen
Place to the right
Effects – 3D Effects – Drop shadow of your choice
12
Place your Name / Watermark
Image – Add Borders – Symmetric 1 pixel color 3
Image – Resize – Change to 1000 pixels width
Save as Jpeg
The tutorial has been tested by Marianne
Marianne thank you
© DesignPSP KeetjeDesign 18-03-2021