

Selena

This tutorial was created , written and translated by KeetjeDesign 13 -02-2021, the © is mine.
It is not allowed to copy, link and / or place these or parts thereof without my permission.
The tutorial is written with PSP 2020 but can also be made with other versions.
If this tutorial resembles another tutorial, it is purely coincidental
The © of the materials used is for the rightful owner and the tube maker.
I thank the tube maker Jewel for the tube and Narah and Ildiko for the masks
Materials used: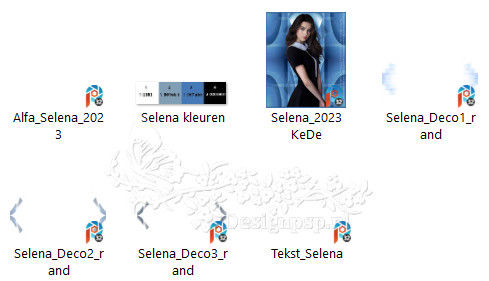
Plugins used:
Kang 1 – Ben-wah Airlines
Toadies – What Are You
Italian Editors Generatore – Pattern Piramide
Transparency – Eliminate Black
Simple – Top Left Mirror
Simple – Left Right Wrap
Simple Diamonds
Carolain and Sensibility – CS-HLines
AP [Lines] – Lines SilverLing – Dotty Grid
Colors used:
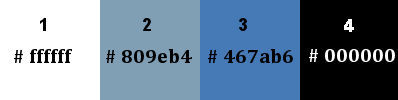
The tutorial is written with these colors and materials.
If you use your own colors and / or materials, you may have to play with the settings of Blend Mode and/or Opacity.
1
Material palette – Foreground color #ffffff / Background color #809eb4
Create the Rectangle gradient in the foreground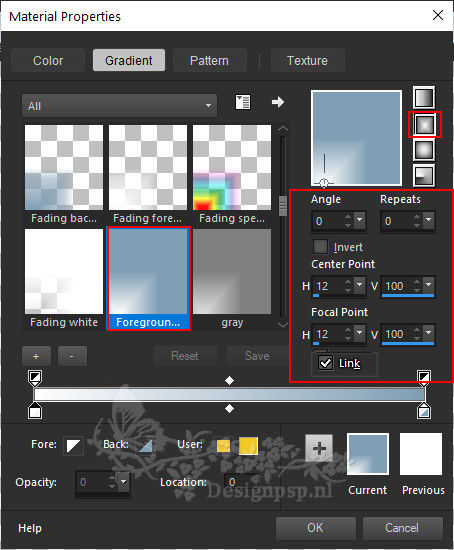
2
Open Alfa_Selena_2023 – Window -Duplicate (or use Shift+D) / Close the original we are working on the copy.
This is not an empty layer, there are selections in the alpha channel.
Fill with the gradient
3
Effects – Plugin: Kang 1 – Ben-wah Airlines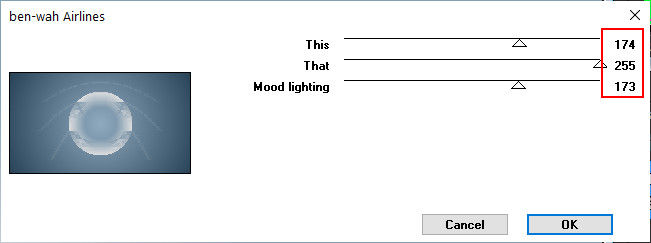
Effects – Plugin: Toadies – What Are You
4
Layers – Duplicate
Effects – Plugin: Italian Editors Generator – Pattern Pyramid
Note: You can set your own color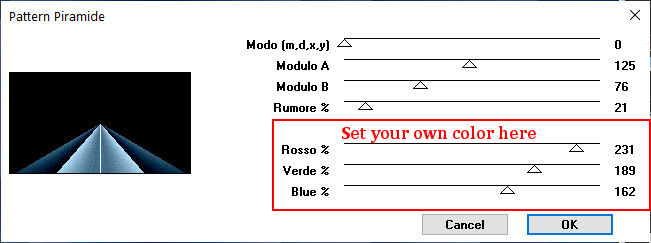
Effects – Plugin: Transperancy – Eliminate Black
5
Layers – Duplicate
Layers – Properties – Blend Mode Screen (adjust to your own colors)
6
Layerpalette – Close the bottom layer(eye click)
Layers – Merge – Merge visible layers
7
Layer palette – Open and activate the bottom layer (eye click)
Adjust – One-step photo fix
Note:If you are not satisfied / Undo One-step photo fix and do the following:
Layers – Duplicate
Layers – Properties – Blend mode of your choice / Adjust Opacity if necessary
Layers – Merge down
8
Layer palette – Activate the top layer
Effects – Plugin: Simple – Top Left Mirror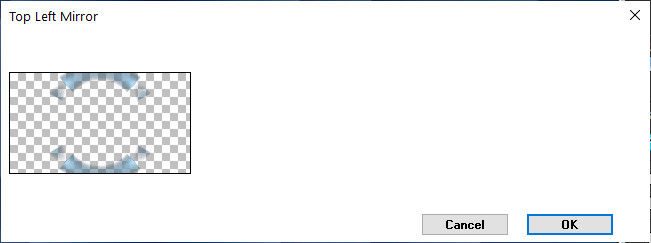
9
Layer palette – Activate the bottom layer
Selections – Load/Save Selection – Load selection from alpha channel: Selection 1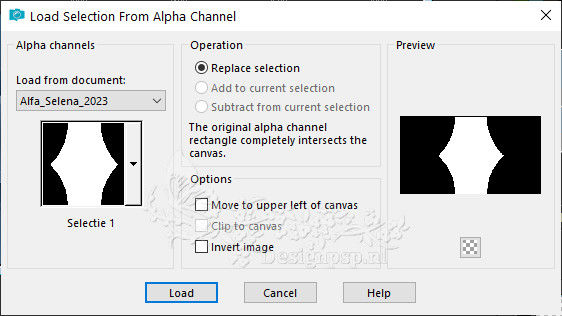
Selections – Promote selection to layer
Selections – Select none
10
Effects – Edge Effects – Enhance more
Effects – Plugin: Caroline and Sensibility – CS-HLines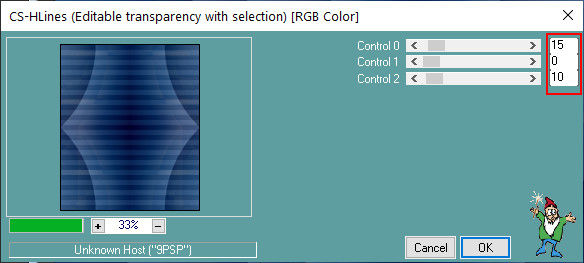
Effects – 3D Effects – Drop Shadow / minus 10 / 0 / 65 / 15 / color # 000000
11
Layer palette – Activate the bottom layer
Selections – Load/Save Selection – Load selection from alpha channel: Selection 2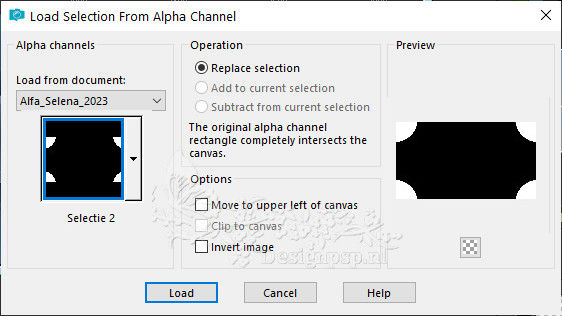
Selections – Promote selection to layer
Selections – Select none
12
Effects – Plugin: AP [Lines] – Lines SilverLing – Dotty Grid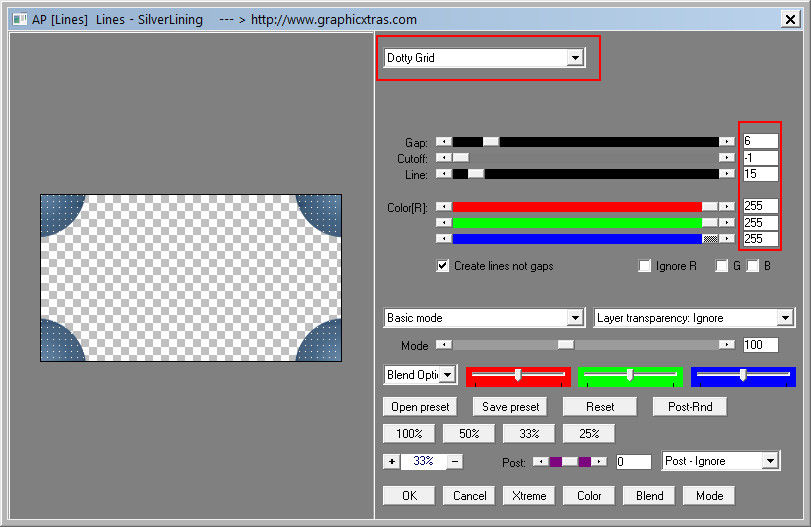
Effects – 3D Effects – Drop Shadow / 0 / 0 / 65 / 15 / color # 000000
13
Layer palette – Activate the top layer
Layers – New raster layer
Fill with the color #809eb4
Layers – Properties – Blend Mode Overlay
Layers – Merge – Merge visible layers
14
Image – Add Borders – Symmetrical
1 pixel color #000000
5 pixels color #467ab6
Edit – Copy
Edit – Paste as new image
minimize we use it later
15
activate your work
Image – Add Borders – Symmetrical
30 pixel color #000000
16
You can colorize the deco to your own color
Open the tube Selena_Deco1_rand – Copy – Paste as new layer
17
You can colorize the deco to your own color
Open the tube Selena_Deco2_rand – Copy – Paste as new layer
18
You can colorize the deco to your own color
Open the tube Selena_Deco3_rand – Copy – Paste as new layer
19
Selections – Select all
30px color #467ab6
Selections – Invert
20
Activate the new image from point 14
Copy – Paste into selection (is still in memory)
Adjust – Blur – Gaussian Blur / Range 15
21
Layers – New raster layer
Edit – Paste into selection (
Effects – Plugin: Simple – Left Right Wrap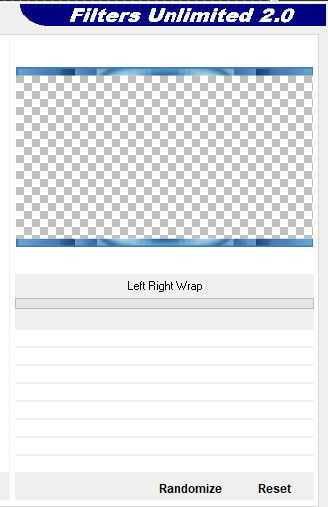
Effects – Plugin: Simple Diamonds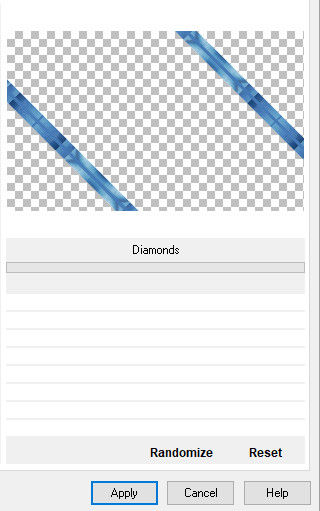
Selections – Select none
22
Layers – Duplicate
Layers – Properties – Blend Mode Screen
Layers – merge – merge down
Layers – Duplicate
Image – Mirror (Horizontal)
23
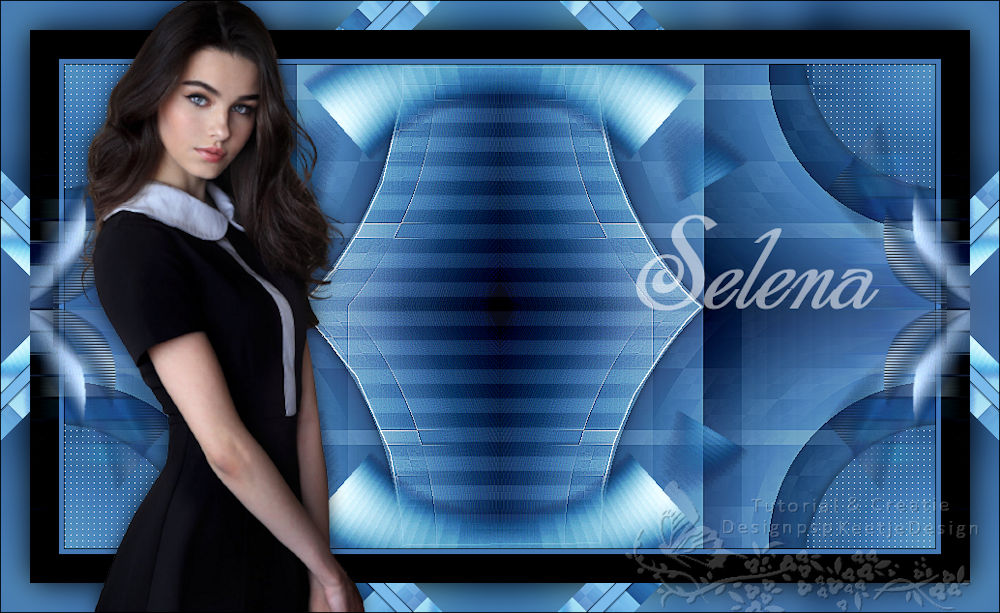
Open the tube Selena_2023KeDe – Copy – Paste as new layer
Place of your choice
Effects – 3D Effects – Drop shadow of your choice
24
Open the tube Tekst_Selena – Copy – Paste as new layer
Place of your choice
I only changed the layer opacity to 55
Optionally, you can colorize the text with the Color Changer tool
Effects – 3D Effects – Drop shadow of your choice
25
Sign your work
Image – Add Borders – Symmetric
1 pixel color # 000000
Image – Resize – Resize the width to 1000 pixels – Check all layers
Save as Jpeg
The tutorial has been tested by Marianne
Marianne thank you
© DesignPSP KeetjeDesign 28-01-2023