

Jorinde

This tutorial was created , written and translated by KeetjeDesign 10-11-2021, the © is mine.
It is not allowed to copy, link and / or place these or parts thereof without my permission.
If you want to use this tutorial on your own forum, club or group , please ask me for permission.
The tutorial is written with PSP 2020 but can also be made with other versions.
If this tutorial resembles another tutorial, it is purely coincidental
The © of the materials used is for the rightful owner and the tube maker.
I thank the tube maker Jewel for the tube and Narah and Ildiko for the masks
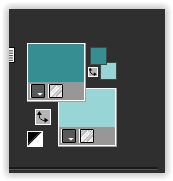
Materials used:
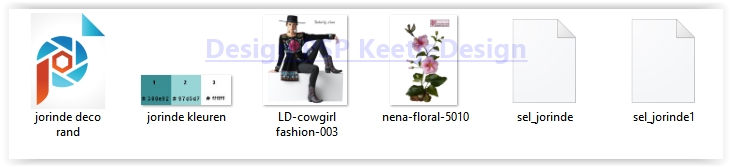
Place the Selections in your PSP folder Selections
Open the other materials in PSP / Duplicate with Shift+D / close the originals
Plugins used:
[AFS IMPORT] – sqborder2
VanDerLee – Unplugged X
MuRa’s Meister – Perspective Tiling
VM Natural – Weave Distortion
Simple – Quick (Tile If you don’t have the plugin : Seamless repeating gives almost the same effect)
Colors:
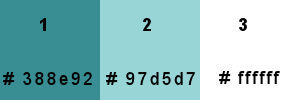
The tutorial is written with these colors and materials.
If you use your own colors and / or materials, you may have to play with the settings of Blend Mode and/or Opacity.
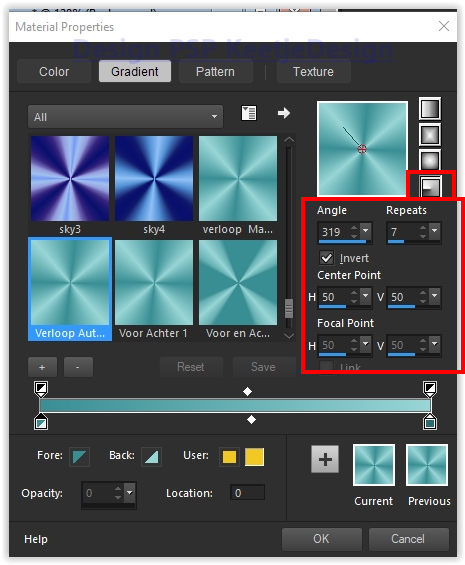
1
Materials palette – Foreground color 1 / Background color 2
Create a Radial gradient in the Foreground
2
Open a new transparent image of 900 x 500 pixels
Fill with the gradient
Adjust – Blur – Gaussian Blur / Range 45
Image – Mirror (horizontal)
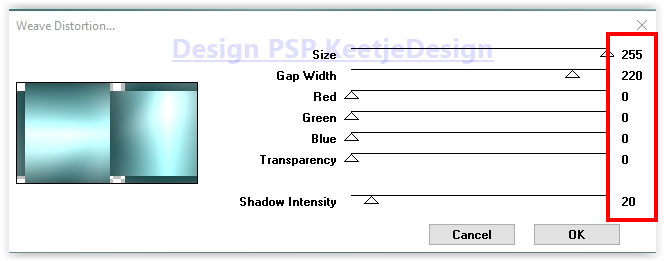
Effects – Plugin VM Natural – Weave Distortion
3
Effects – Edge Effects – Enhance Stronger
Layers – Duplicate
Image – Mirror (horizontal)
Layers – Properties – Blend Mode Multiply
Layers – merge – merge down
4
Layers – Duplicate
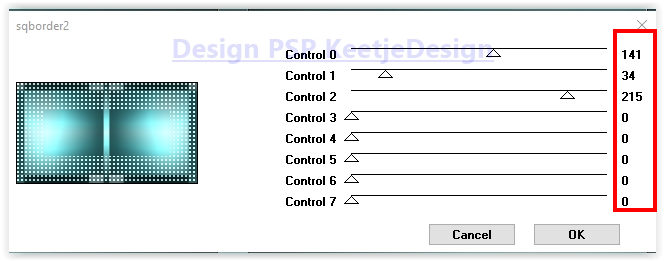
Effects – Plugin [AFS IMPORT] – sqborder2
Adjust – Sharpness – Sharpen
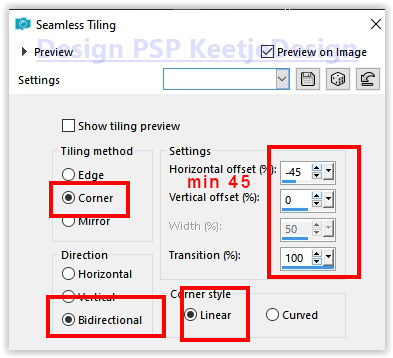
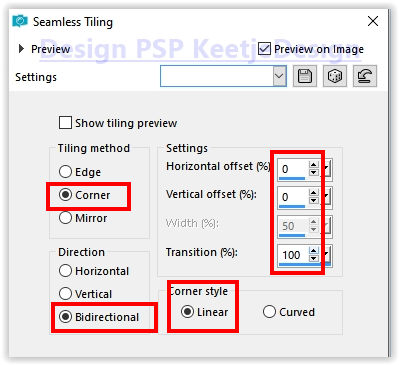
Effects – Image Effects – Seamless Tiling
Layers – Properties – Opacity 65
Sharpness – Sharpen
5
Layers – Duplicate
Image – Mirror (horizontal)
Layers – Properties – Blend Mode Multiply – Opacity 45
Layers – merge – merge down
6
Layer palette – Activate the bottom layer
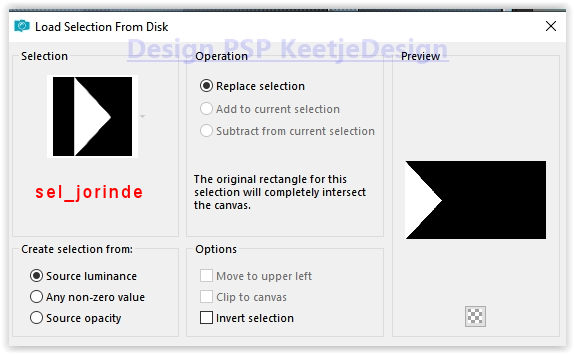
Selection – Load/Save – Load selection from disk: sel_jorinde
Selections -Promote selection to layer
Selections – Select none
Layers – Arrange – Top
7
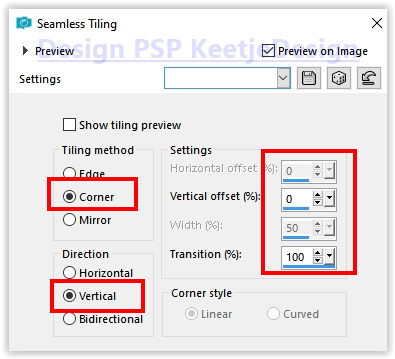
Effects – Image Effects – Seamless Tiling
Layers – Duplicate
Image – Mirror (horizontal)
Layers – Merge – merge down
Effects – 3D Effects – Drop Shadow/ 0 / 0 / 100 / 45 / # 284645

8
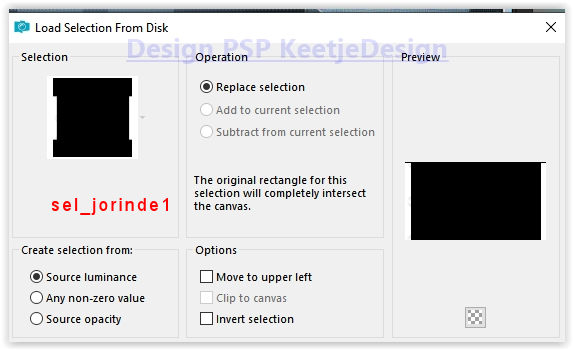
Selections – Load/Save – Load selection from disk: sel_jorinde1
Press Delete on the keyboard
Selections – Select none
Layers – Duplicate
Layers – Merge – Merge Down
Layers – Duplicate
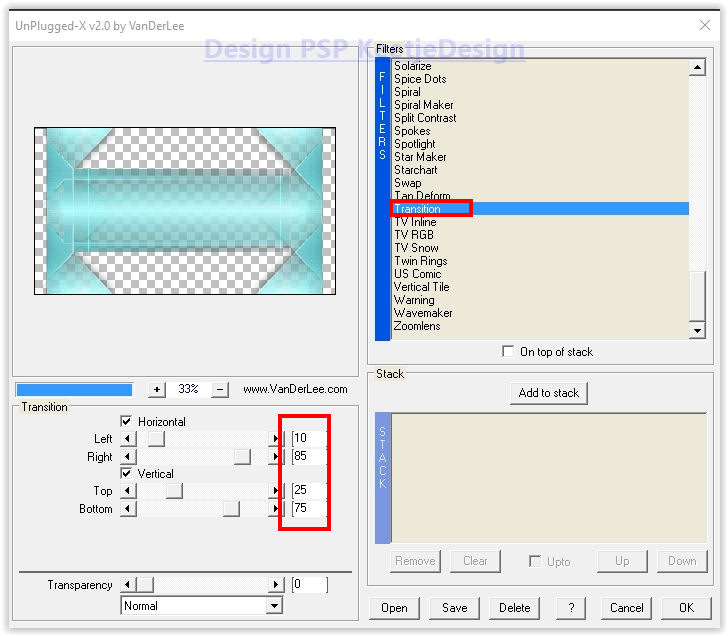
Effects – Filter VanDerLee – Unplugged X – Transition
Adjust – Sharpeness- Sharpen
Layers – Properties – Blend Mode Multiply / Opacity 85
Layer palette – Activate the second layer from the top
Layers – Properties – Blend Mode Overlay
Effects – Edge Effects – Enhance More
9
Layer palette – Activate the bottom layer
Layers – Duplicate
Layers – Arrange – Top
Effects – Filter Simple – Quick Tile
If you don’t have this filter, you can also do the following This gives almost the same result
Effects – Image Effects – Seamless Tiling
10
Effects – Edge Effects – Enhance
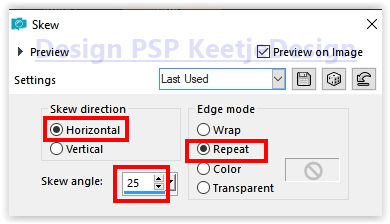
Effects – Geometric Effects – Skew
Layers – Duplicate
Image – Mirror (horizontal)
Layers – Properties – Blend Mode Soft Light
Layers – Merge – Merge down
11
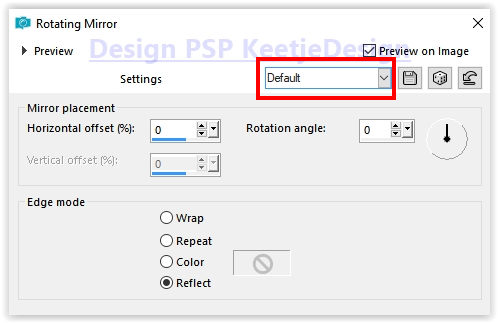
Effects – Reflection Effects – Rotating Mirror (default)
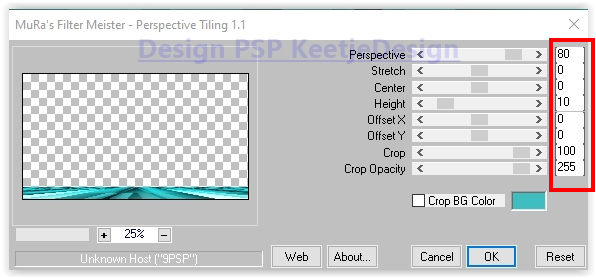
Effects – Plugin MuRa’s Meister – Perspective Tiling
Layers – Arrange – 2x Down
Effects – 3D Effects – Drop Shadow – 0 / 0 / 100 / 45 / # 284645
Layers – Duplicate
Layers – Properties – Blend Mode Multiply (adjust the blend mode to your own color)
12
Layer palette – Activate the top layer
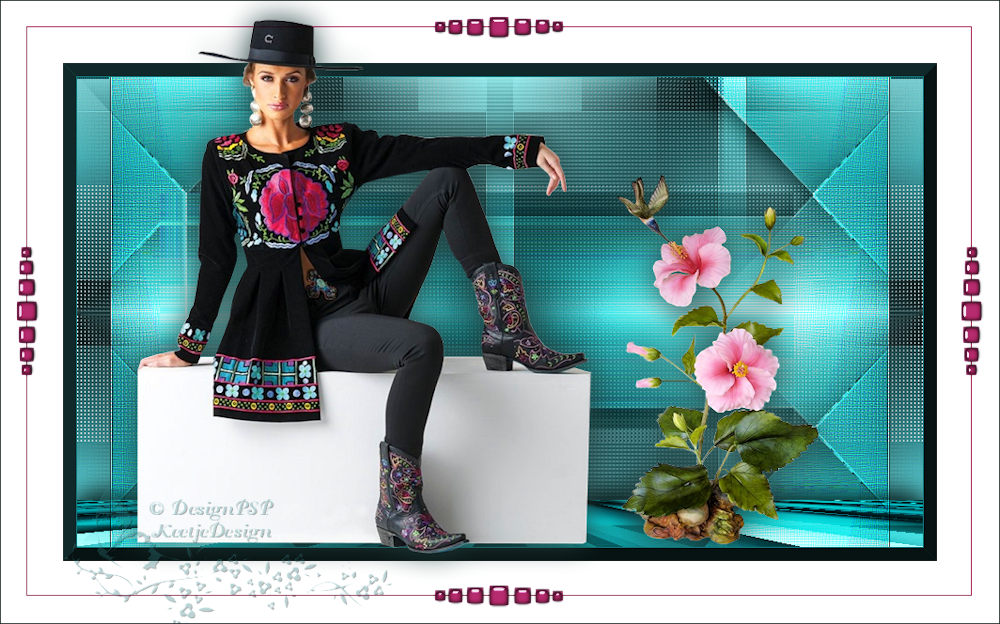
Open nena-floral-5010 – Remove the watermark – Copy – Paste as new layer
Image – Resize – Resize with 60% – Uncheck all layers
Place of your own choice
I have with this tube:
Adjust – One step photo correction (this depends on your tube otherwise only Sharpness – Sharpen)
Effects – 3D Effects – Drop shadow of your choice
13
Image – Add Borders – Symmetric
1 pixel color # 147a7f ( take a dark color from your work)
Selections – Select all
Image – Add Borders – Symmetric
80 pixels color # ffffff
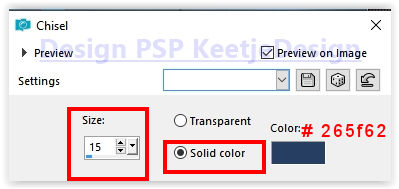
Effects – 3D Effects – Chisel / Color #265f62
Selections – Select none
14
Open LD-cowgirl fashion-003 – Remove the watermark – Copy – Paste as new layer
Image – Resize – Resize by 65% - Uncheck all layers
Adjust – Sharpness – Sharpen
Effects – 3D Effects – Drop Shadow / Optional
Place of your own choice
15
Open jorinde deco rand – Copy – Paste as new layer
(you can colorize it to your own color)
16
Place your Name/Watermark
Image – Add Borders – Symmetrical 1 pixel dark color from your work
Image – Resize – Resize the width to 1000 pixels
Save as Jpeg
The tutorial has been tested by Marianne
Marianne thank you
© DesignPSP KeetjeDesign 10-11-2021