

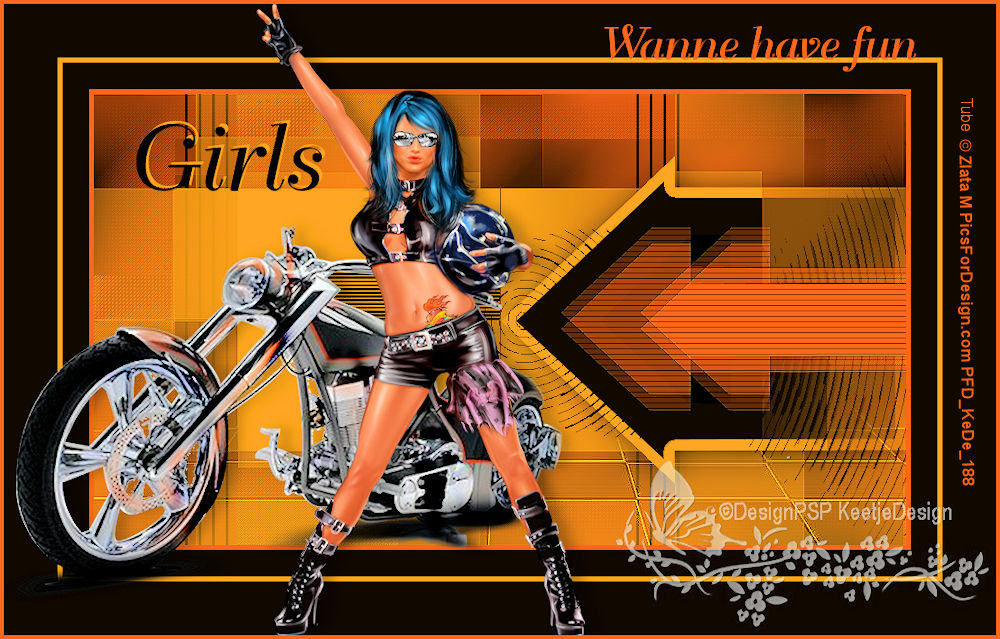
Girls wanne have Fun
![]()
This tutorial was created , written and translated by KeetjeDesign 26-10-2020, the © is mine.
It is not allowed to copy, link and / or place these or parts thereof without my permission.
If you want to use this tutorial on your own forum, club or group , please ask me for permission.
The tutorial is written with PSP 2020 but can also be made with other versions.
If this tutorial resembles another tutorial, it is purely coincidental
The © of the materials used is for the rightful owner and the tube maker.
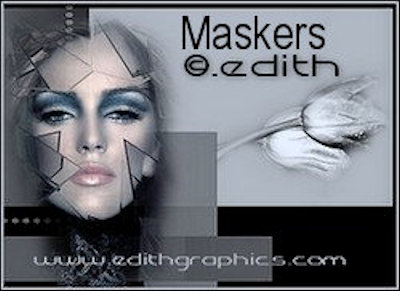
I thank Narah and Edith for the masks
Narah

Edith
Materials used:

You only need your own main tube
The tube I used (woman + motorbike) is from Zlata M
Open the material in PSP / Duplicate with Shift + D / Close the originals.

Plugins used:
Alien Skin Eye Candy 5 – Impact / Perspective Shadow
Simple – Top Bottom Wrap
Unlimited 2.0 – &<Bkg Kaleidoscope> – xTile Maker 1.0
AP [Lines] – Lines / SilverLining
Toadies – What Are You???
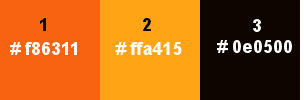
The tutorial is written with these colors and materials.
If you use your own colors and / or materials you may have to play with the settings of Filters / Effects / Blend Mode / Opacity.
1
Open Alfa_Girlswannehavefun_2021 – Window- Duplicate (or use Shift + D) / Close the original we are working on the copy
Fill with color 1
2
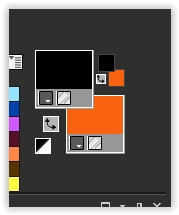
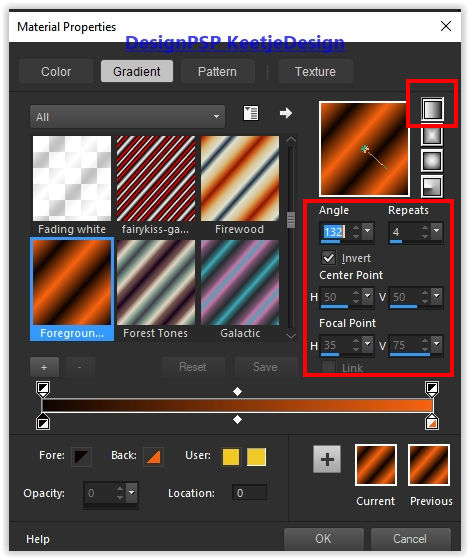
Material palette – Foreground color 3 / Background color 1
Create a Linear gradient on the Foreground
3
Layers – New raster layer
Fill with the gradient
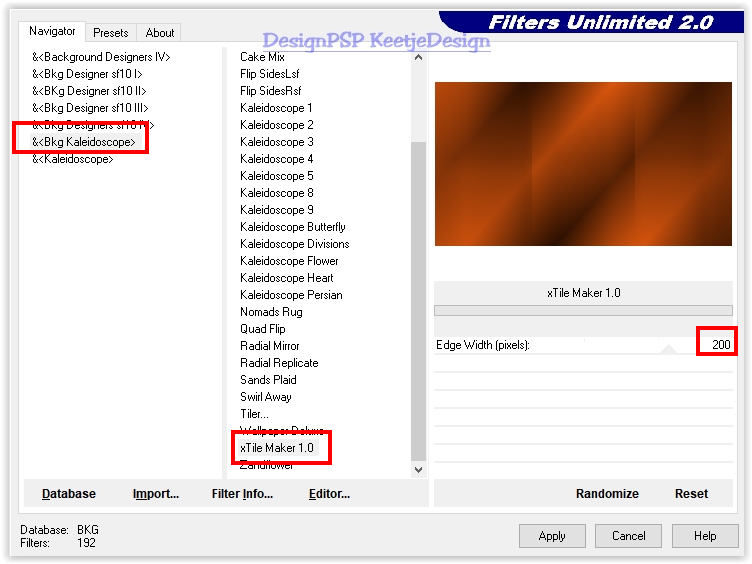
Effects – Filter Unlimited 2.0 – & <Bkg Kaleidoscope – xTile Maker 1.0
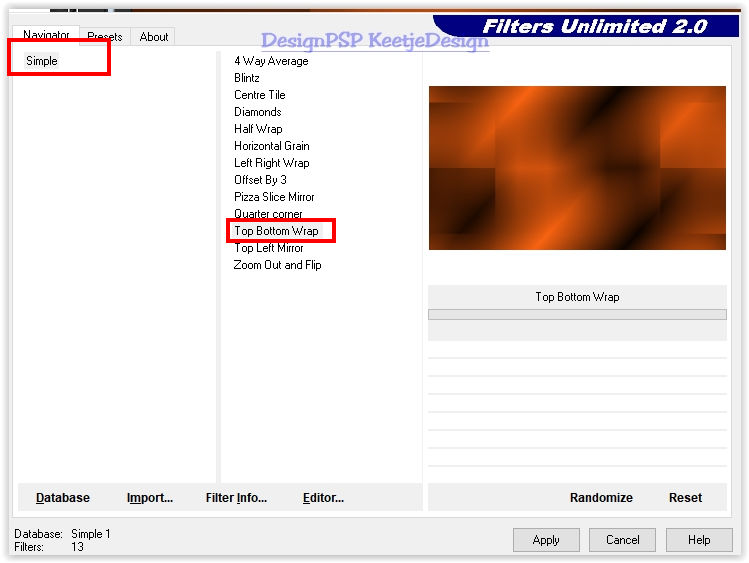
Effects – Filter Simple – Top Bottom Wrap
Effects – Edge Effects – Enhance
4
Image – Resize – Rezise with 80% – Uncheck all layers
Layer palette – Activate the bottom layer
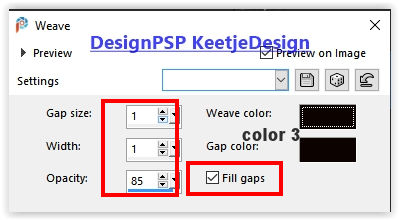
Effects – Texture Effects – Weave / Both colors color 3
Layers – Merge – Merge visible layers
5
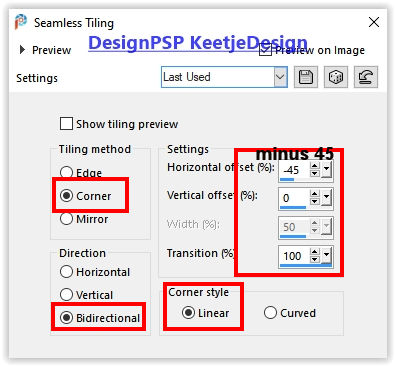
Effects – Image Effects – Seamless Tiling
Adjust – Sharpness – Sharpen
6
Layers – Newer raster layer
Fill with color 2
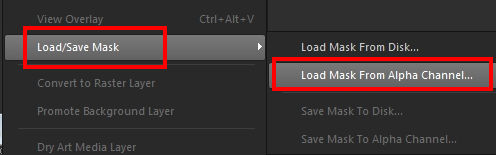
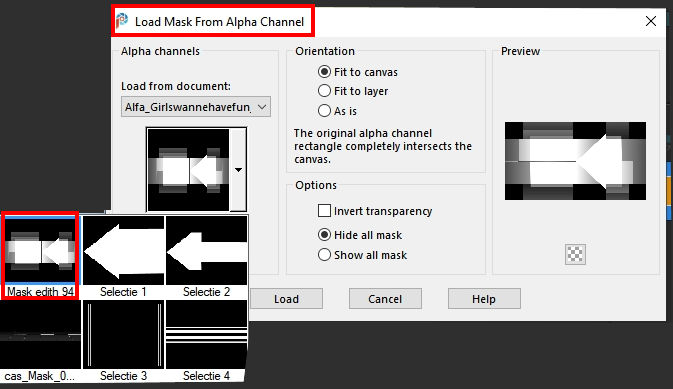
Layers – Load / Save Mask – Load mask from alpha channel: mask edith 94
Effects – Edge Effects – Enhance
Layers – Merge – Merge group
7
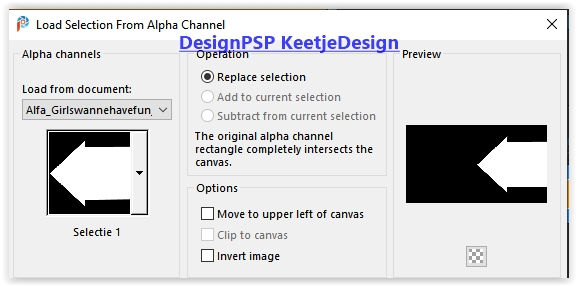
Selections – Load / Save – Load Selection from Alpha Channel: Selection 1
Selections – Modify – Contract 12 pixels
Selections – Promote selection to layer
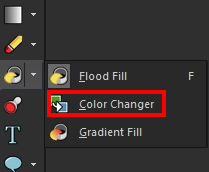
Activate Color Changer tool
Change the color with color 3
Selections – Select none
8
Layer palette – Activate the second layer from the top (Group Raster 1)
Selections – Load / Save – Load Selection from Alpha Channel reload : Selection 1
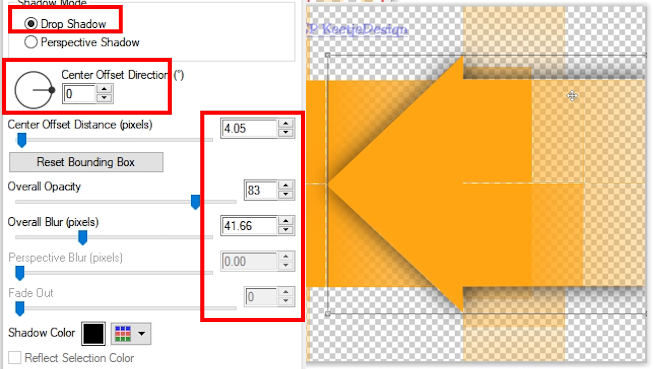
Effects – Plugins Alien Skin Eye Candy 5 – Impact – Perspective Shadow
Selections – Select none
9
Layer palette – Activate the top layer
Layers – New raster layer
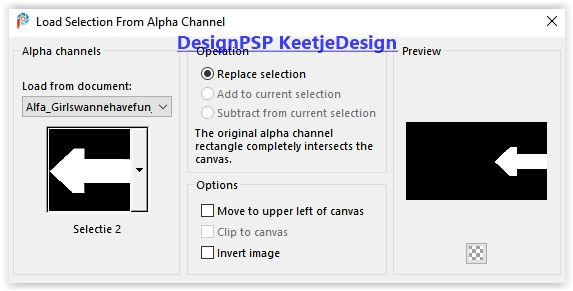
Selections – Load / Save – Load selection from alpha channel: Selection 2
Fill with color 1
Selections – Select none
10
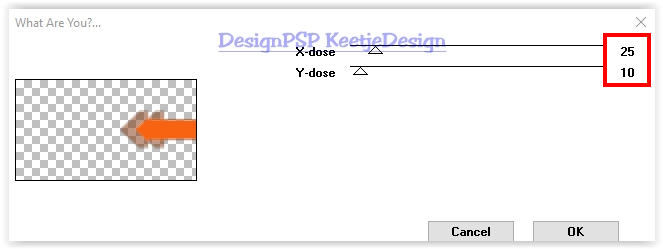
Effects – Plugins Toadies – What Are You ???
Effects – Edge Effects – Enhance
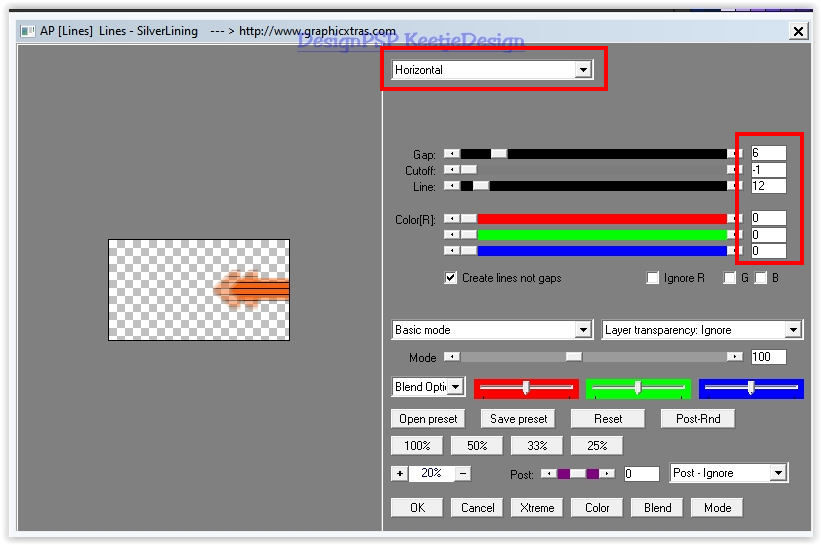
Effects – Filter AP [Lines] – Lines – SilverLining / Horizontal
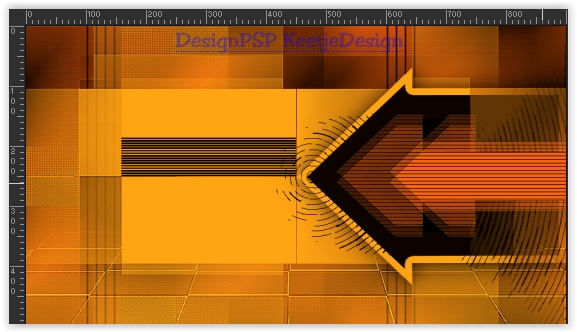
11
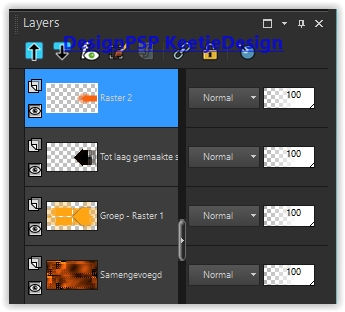
The layer palette looks now like this
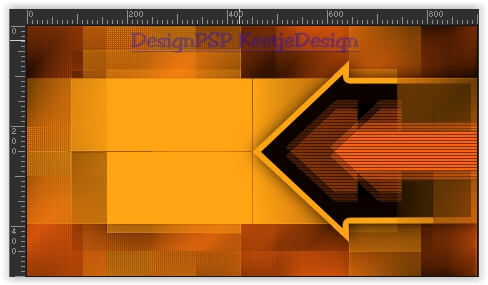
We now have this
12
Layer palette – Activate the bottom layer
Layers – New Raster Layer
Fill with color 2
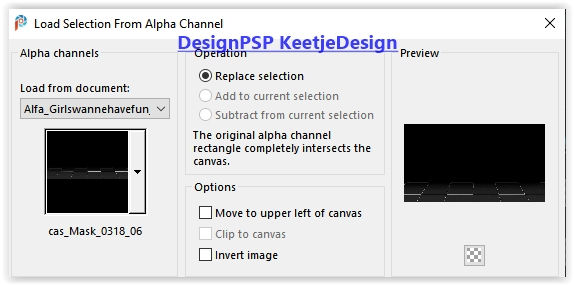
Layers – Load / Save Mask – Load Mask from Alpha Channel: cas_Mask_0318_06
Effects – Edge Effects – Enhance
Layers – Merge – Merge group
Layers – Duplicate
Layers – Properties – Blend Mode Burn
13
Layer palette – Activate the third layer from the top
Open the tube Girlswannehavefun_1 – Copy – Paste as new layer
You can color it to your own color
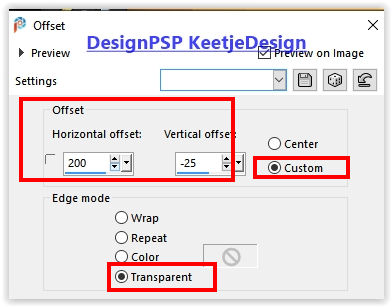
Effects – Image Effects – Offset / 200 / minus 25
14
Layer palette – Activate the bottom layer
Layers – New raster layer
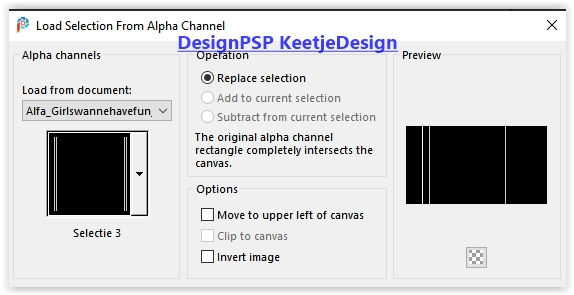
Selections – Load / Save – Load selection from alpha channel: Selection 3
Fill with color 3
Selections – Select none
Layers – Duplicate
Layers – Merge – Merge Down
15
Layer palette – Activate the top layer
Layers – New raster layer
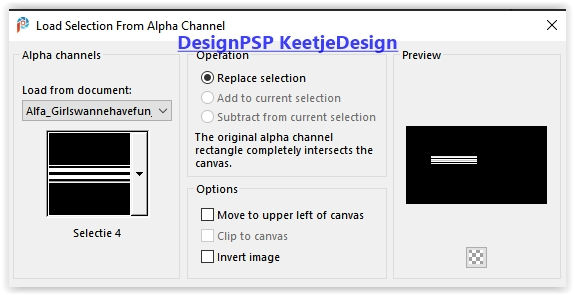
Selections – Load / Save – Load selection from alpha channel: Selection 4
Fill with color 3
Selections – Select none
16
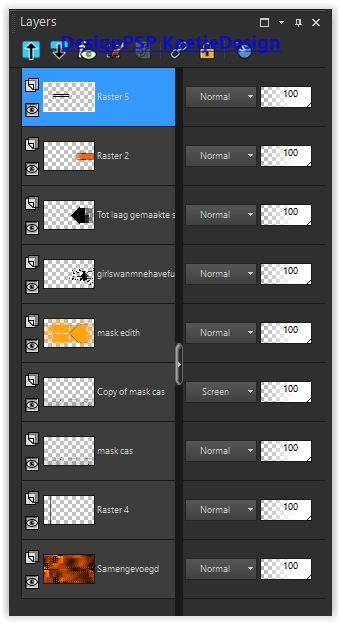
The layer palette looks now like this / Name of the layers has been changed
And this we have now
17
Image – Add Borders – Symmetric
4 pixels color 1
25 pixels color 3
4 pixels color 2
50 pixels color 3
18
Open your main tube – Copy – Paste as new layer
Resize if necessary
Effects – 3D Effects – Drop shadow of your choice
19
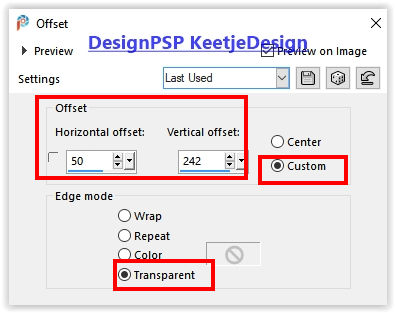
Open the tube Girlswannehavefun_2 – Copy – Paste as new layer
Effects – Image Effects – Offset / 50 / 242
20
Place your name / Watermark
Image – Add Borders – Symmetric
4 pixels color 1
Image – Resize – Change to 1000 pixels width
Adjust – Sharpness – Sharpen
Save as Jpeg
We are ready
The tutorial has been tested by Marianne
Marianne thank you
© DesignPSP KeetjeDesign 24-01-2021