

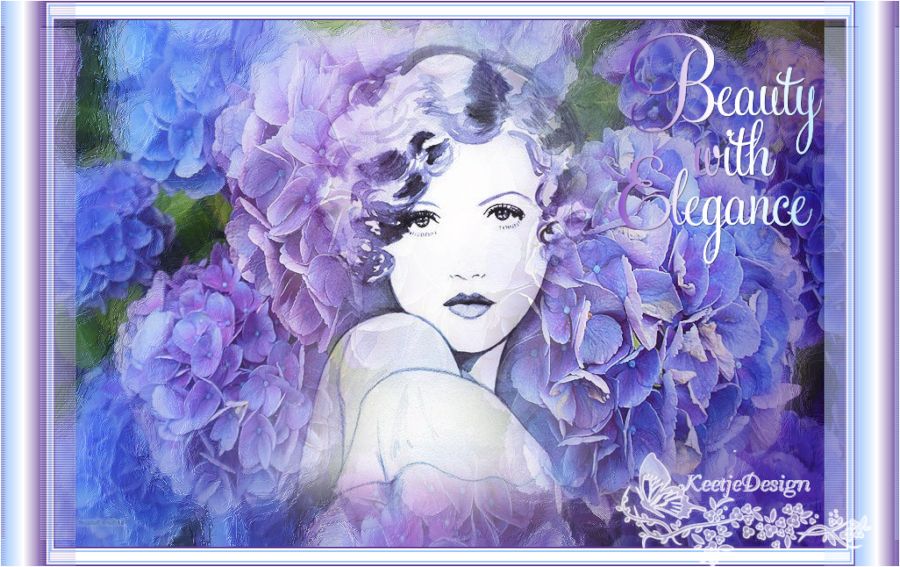
Beauty with Elegance
![]()
the tutorial is written by KeetjeDesign 06-02-2018, the © is mine.
You’re not allowed to copy, link and / or place it elsewhere without my permission.
If you want to use this tutorial on your own forum, club or group , please ask me for permission.
The tutorial was written with PSP X9 but can also be made with other versions.
If this lesson looks like another lesson, it is only coincidence.
The © of the used materials is for the rightful owner .
Thanks to the tube maker Yoka for the beautiful tube
and HD Wallpaper for the Wallpaper the site you will find Here
I used:
1 gradient – Gradient_beauty_with_elegance – Place in your PSP folder Gradients
Materials Used
1 Mask – 20-20
1 Wallpaper – HDwallpaper blue purple hydrangea flower
1 Tube – WA_BeautywithElegance
1 Tube – Yoka-MISTED Pastel-Lady-2218
Download Materials Here
Plugins Used
Unlimited 2.0 – Toadies – What Are You?
Colors Used
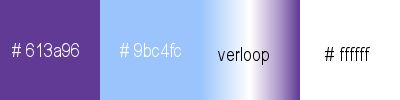
The tutorial is written with these colors and materials.
Note: When working with your own colors play with the Blend Mode and/or Opacity.
1
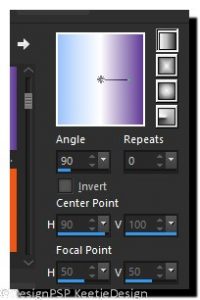
Materials Palette – Foreground Color on Gradient
Style Linear Gradient_BeautywithElegance
90/0 / Invert checked
Open a new transparent image 900 X 600 pixels
Fill with the Gradient
Selection – Select All
Layers – New Raster Layer
Open – HDwallpaper blue purple hydrangea flower
Image – Mirror (Horizontal)
Edit – Copy – Paste into selection on your work
Selections – Select None
2
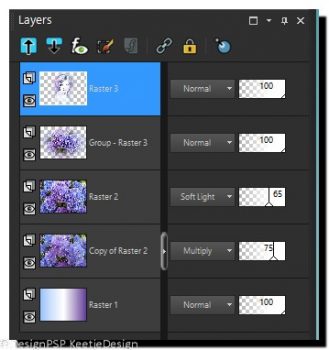
Layers – Duplicate
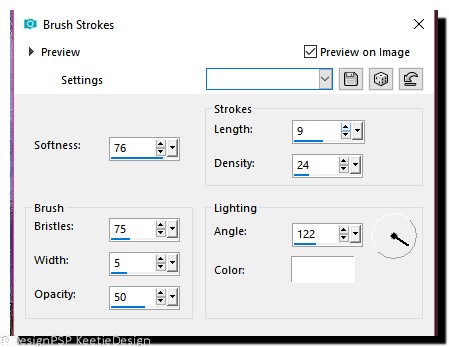
Effects – Art Media effects – Brush strokes / Color # ffffff
3
Layers – Arrange – Move Down
Layers – Properties / Blend Mode Multiply / Opacity 75
Layer Palette – Click on the Top layer
Layers – Properties / Blend Mode Soft light / Opacity 65
4
Selections – Select All
Layers – New Raster Layer
Open again HDwallpaper blue purple hydrangea flower – Copy – Paste into selection
Selections – Select None
5
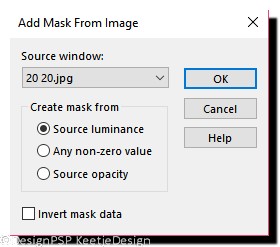
Open the mask 20 20 – Minimize
Layers – New Mask Layer – From image 20 20
Layers – Merge – Merge Group
Effects – Edge Effects – Enhance
6
Open the tube Yoka-MISTED Pastel-Lady-2218 – Copy – Paste as new layer
Do not move
Example of your layers
7
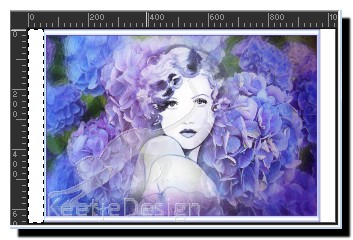
Open WA_BeautywithElegance – Copy – Paste as new layer
position to your own choice
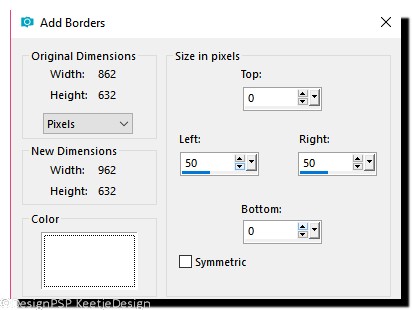
Image – Add Borders – Symmetric checked
2 pixels color # 613a96
2 pixel color # ffffff
2 pixel color # 9bc4fc
8
Image – Add borders – Symmetric not checked / color ffffff

9
Image – Add Borders – Symmetric checked
two pixel color 9bc4fc #
2 pixel color # ffffff
2 pixel color # 613a96
10
Image – Add borders – Symmetric not checked / color #ffffff
11
Activate the Magic Wand tool – Select the white border to the left
Layers – New Raster Layer
Fill with the gradient Linear (FG) Gradient_BeautywithElegance 90/0 / Invert checked
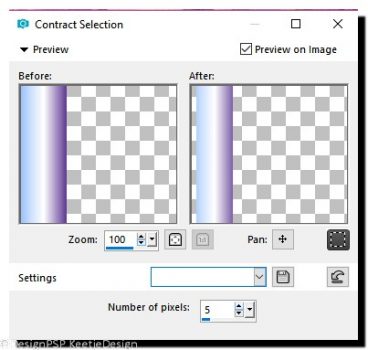
Selections – Modify – Contract – Number of pixels 5
Selections – Promote Selection to Layer
Selections – Select None
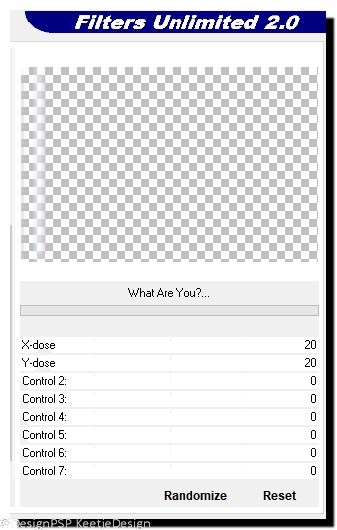
Effects – Filter Unlimited – Toadies – What Are You – Default
Effects – Edge Effects – Enhance
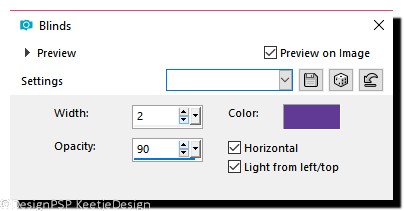
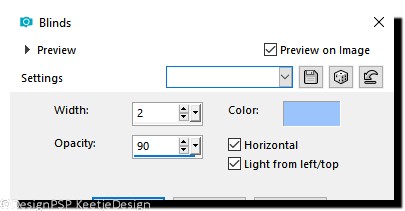
Effects – Texture Effects – Blinds / Color # 613a96
12
Layer palette – Click on the Bottom layer
Activate Magic Wand tool – Select the white border on the right
Layers – New Raster Layer
Fill with the gradient Linear (FG) Gradient_BeautywithElegance 90/0 / Invert checked
Selections – Modify – Contract – Number of pixels 5
Selections – Promote Selection to Layer
Selections – Select None
Effects – Filter Unlimited – Toadies – What Are You – Default
Effects – Edge Effects – Enhance
Effects – Texture Effects – Blinds / Color # 9bc4fc
Sign your work
Image – Add Borders – Symmetric 1 pixel color # ffffff
Save as JPEG
The Tutorial has been tested by Marianne
Marianne thank you
© Beauty with Elegance Keetje Design 06-02-2018
The Tutorial is registered with LSBENE