

Anlilou
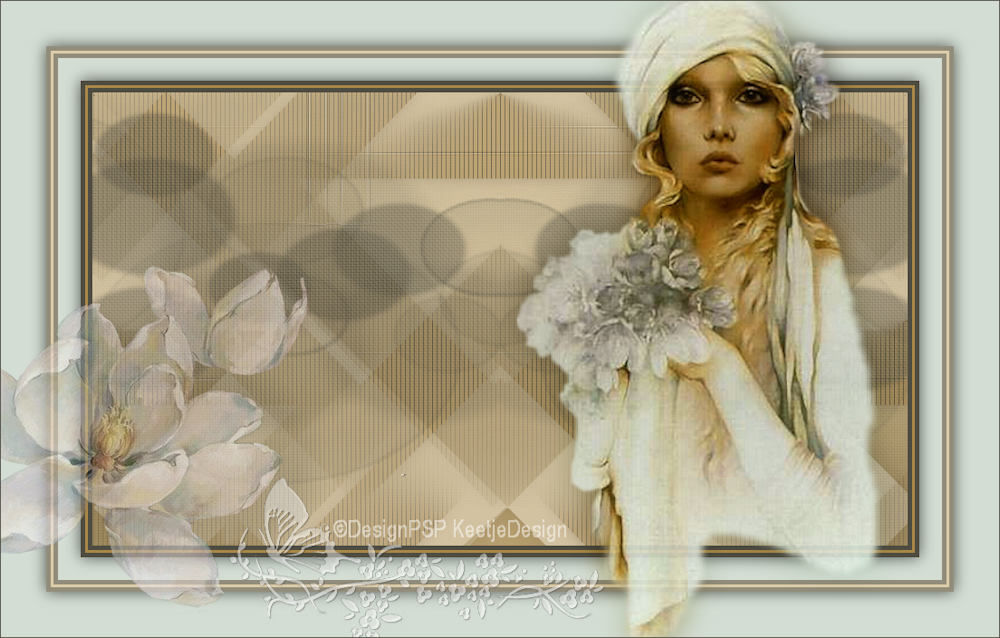

This tutorial was created , written and translated by KeetjeDesign 03-03-2021, the © is mine.
It is not allowed to copy, link and / or place any parts thereof without my permission.
The tutorial is written with PSP 2020 but can also be made with other versions.
If it resembles any other lesson, it is purely coincidental.
If you want to use this tutorial on your own site, group or club, mail me at admin@designpsp.nl
The © of the materials used is for the rightful owner and the tube maker.
I thank the tube maker Anlilou for the tubes and Tine and Carinne Vicare for the masks.
Materials used:
Plugins Used:
Unlimited 2.0 – Filter Factory Gallery T – Tripolis
AP [Lines] – Lines SilverLining
Colors Used:
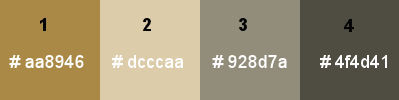
The tutorial is written with these colors and materials.
If you use your own colors and / or materials you may have to play with Blend Mode and / or Opacity.
1
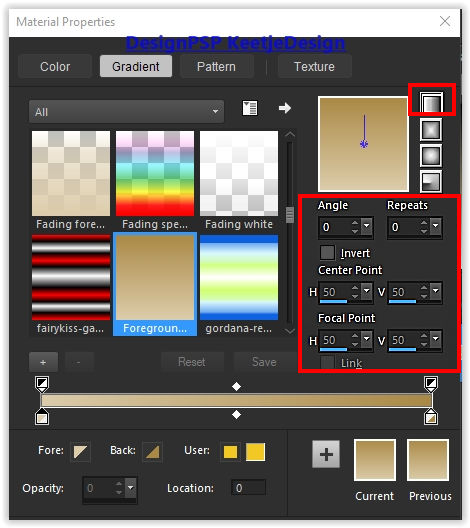
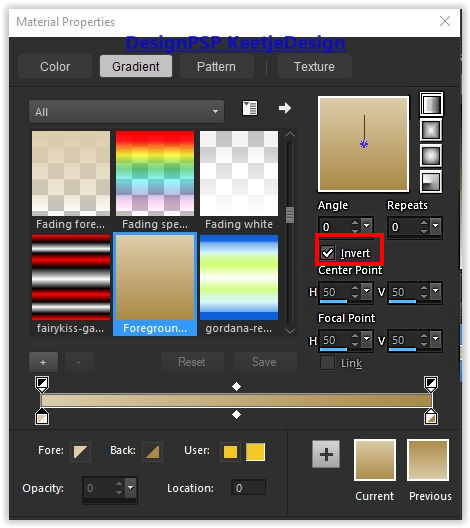
Material palette – Foreground color 2 / Background color 1
Create the gradient Linear In the foreground
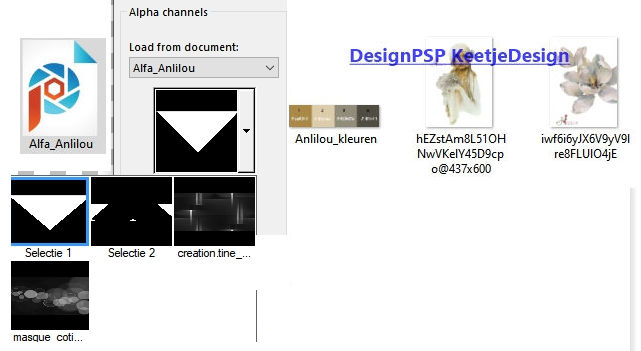
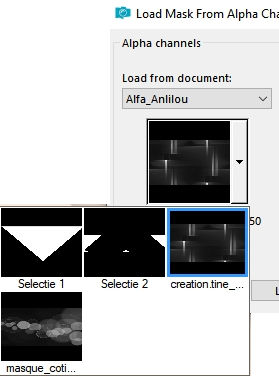
Open Alfa_Anlilou / Window – Duplicate (or use Shift + D) / Close the original we are working on the copy.
The Alpha file contains the selections and the masks
Fill with the gradient
2
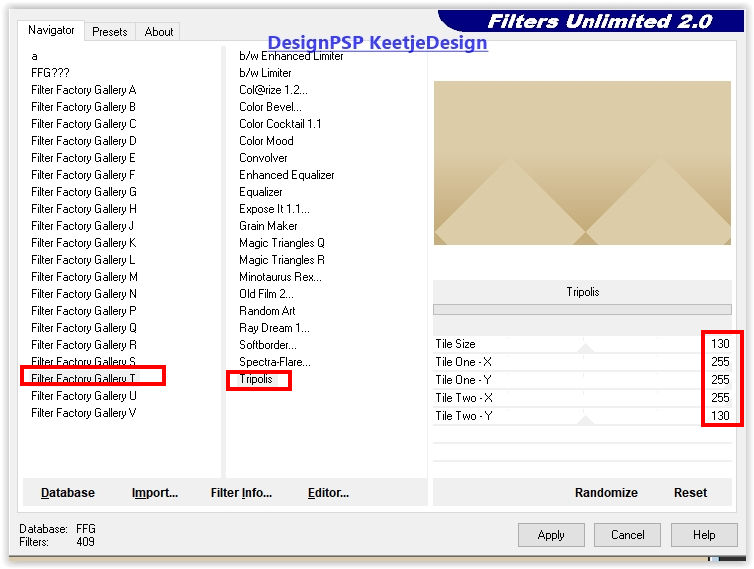
Effects – Plugin Unlimited 2.0 – Filter Factory Gallery T – Tripolis
Note: If you have problems with the plugin you can also use the plugin VM-Instant Art – Tripolis with the same setting
3
Layers – Duplicate
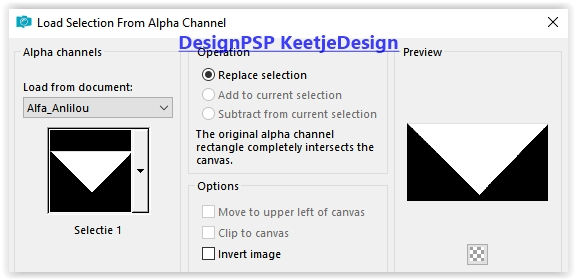
Selections – Load / Save – Load selection from alpha channel: Selection 1
Press Delete on the keyboard
Selections – Select none
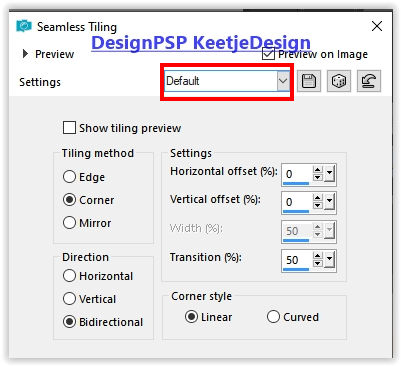
Effects – Image Effects – Seamless Tiling
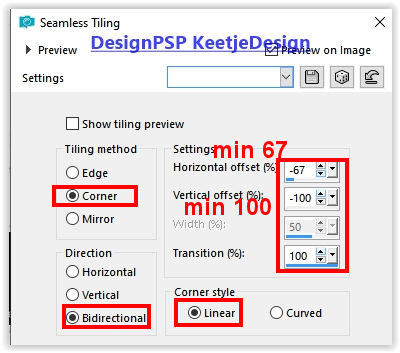
4
Selections – Load / Save – Load selection from alpha channel: Selection 2
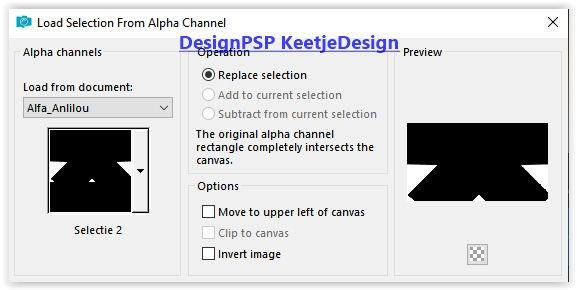
Press Delete on the keyboard
Selections – Select none
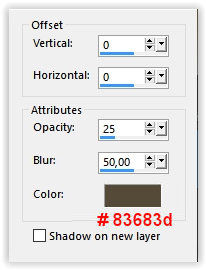
Effects – 3D Effects – Drop Shadow / 0/0/25/50 / # 83683d
5
Material palette – Invert at the gradient Check
Layer palette – Activate the bottom layer
Layers – New raster layer
Fill with the gradient
6
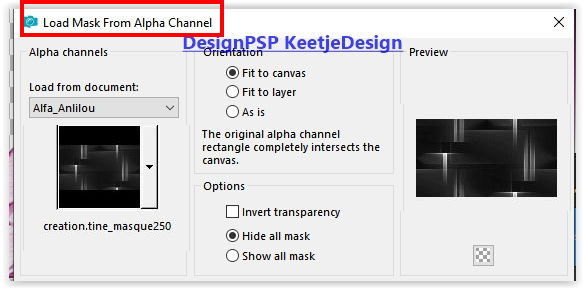
Layers – Load / Save Mask – Load Mask from Alpha Channel: creation.tine_masque250
Layers – Merge – Merge group
Effects – Edge Effects – Enhance
Layers – Properties – Blend mode Luminance (adjust this to your own colors)
7
Layer palette – Activate the top layer
Layers – New raster layer
Selections – Load / Save – Load selection from alpha channel again : Selection 1
Fill with color 1
Selections – Modify – Contract 95 pixels
Press Delete on the keyboard
Selections – Select none
8
Effects – Image Effects – Seamless Tiling
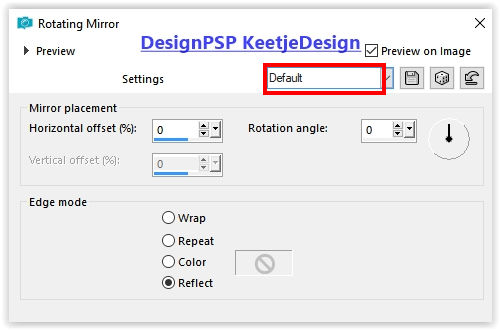
Effects – Reflection Effects – Rotating Mirror / Default
9
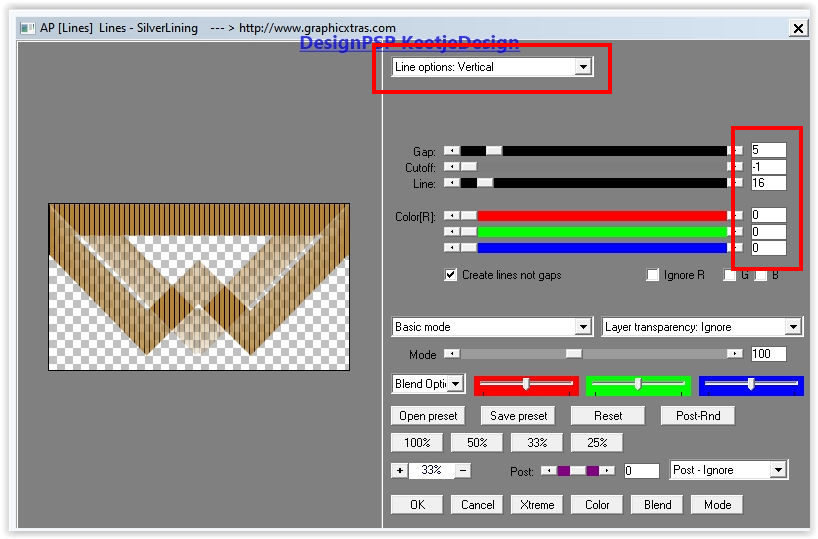
Effects – Filter AP [Lines] – Lines SilverLining / Vertical
Effects – Image Effects – Seamless Tiling / Default
10
Effects – 3D Effects – Drop shadow / 0/0/65 / 24,35 / # 554b37
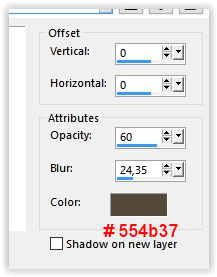
Layers – Properties – Opacity 45
11
Layers – New raster layer
Fill with color 4
Layers – Load / Save Mask – Load Mask from Alpha Channel: masque_corinne_vicaire_020_2014

Layers – Merge – Merge group
12
Effects – Reflection Effects – Rotating Mirror / Default
Image – Flip (flip vertically)
Effects – Edge Effects – Enhance
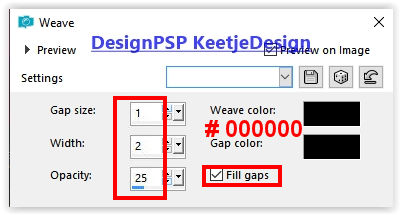
Effects – Texture Effects – Weave / Both Colors # 000000
13
Image – Add Borders – Symmetric
5 pixels color 4
3 pixels color 1
5 pixels color 4
Selections – Select all
Image – Add Borders – Symmetric
25 pixels color # d3ddd3
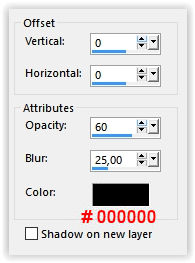
Effects – 3D Effects – Drop shadow / 0/0/60/25 / # 000000
Selections – Select none
14
Image – Add Borders – Symmetric
5 pixels color 3
3 pixels color 1
5 pixels color 3
Selections – Select all
Image – Add Borders – Symmetric
45 pixels color # d3ddd3
Effects – 3D Effects – Drop shadow / 0/0/60/25 / # 000000
Selections – Select none
15
Open the tube hEZstAm8L51OHNwVKelY45D9cpo @ 437×600 – Remove the watermark
Copy – Paste as a new layer
Image – Resize – Change with 2 x 115% – Uncheck all layers
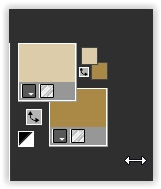
Place to the right – See example crea
16
Adjust – Sharpness – Sharpen
Layers – Duplicate
Adjust – Blur – Gaussian Blur / Range 15
Layers – Arrange – Move Down
Layers – Properties – Blend Mode Multiply
17
Open the tube iwf6i6yJX6V9yV9lre8FLUlO4jE – Remove the watermark
Copy – Paste as a new layer
Image – Mirror (horizontal
Place left down against the side
Layers – Properties – Opacity 55
18
Place your Name / Watermark
Image – Add Borders – Symmetric
1 pixel color 4
Image – Resize – Resize to 1000 pixels width – Check all layers
Save as Jpeg
The tutorial has been tested by Marianne
Marianne thank you
© DesignPSP KeetjeDesign 03-03-2021