

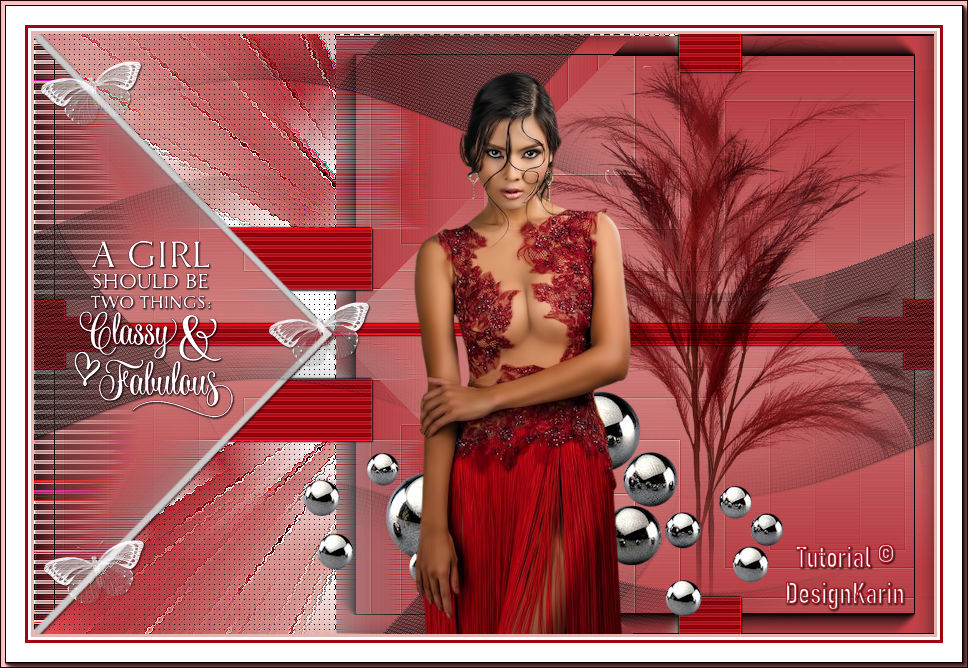
Classy and Fabulous
This tutorial was conceived and written by me Karin 06-07-2021, the © is mine.
It is not permitted to copy, link and/or place these or parts thereof elsewhere without my permission.
The tutorial is written with PSP19 (X9) but can also be made with other versions.
If this lesson resembles any other lesson, it is pure coincidence.
The © of the materials used is for the rightful owners and the tube makers.
I thank the tube makers Yoka, Azyzam and Isa for the tubes
The mask is from Animabelle
Butterfly and flower made by myself.
Open the material in PSP / Duplicate with Shift+D / Close the originals.
First check if you have all the filters below.
Otherwise you have to install this before you start the lesson.
Filters used:
Mura’s Seamless – Get 1 tile
Mura’s Meister – Copies
AAA Frames – Photo Frame
Filters Unlimited – & BKG Designer sf10IV – Blueperry Pie
Carolaine and Sensibility – CS HLines
Medhi – Sorting tiles
Filters Unlimited – & BKG Designer sf10III – Splash!
AAA Filters – Good Vibrations
AP1 Lines – Silverlining
Cybia – Screenworks
———-
If you use your own colors and/or materials you may have to play around with the Blend Mode and/or Layer Opacity.
———-
Download your materials here:

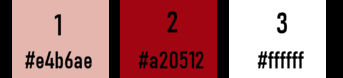
Colorpalet:
Point 1.
Open a new 900 x 600 transparent image
Set your foreground color to color 1 and background color to color 2.
Make the following gradient Linear from your foreground color.
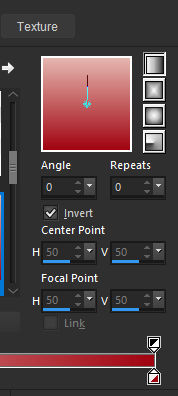
Flood Fill your image with this gradient.
Point 2.
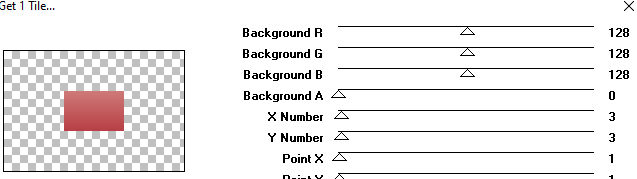
Effects – Plugins – Mura’s Seamless – Get 1 tile with the following setting:
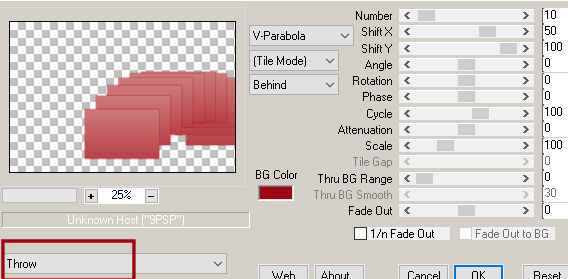
Effects – Plugins – Mura’s Meister – Copies with the following setting.
Point 3.
Layers – Duplicate.
Image – Mirror – Mirror Horizontal.
Layers – merge – merge down.
Effects – Edge Effects – Enhance More.
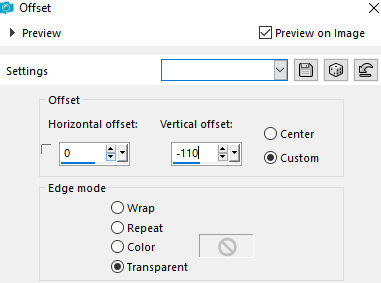
Effects – Image Effects – Offset:
Point 4.
Layers – Duplicate.
Image – Mirror – Mirror vertically.
Activate the bottom layer (Raster 1) in your layer palette.
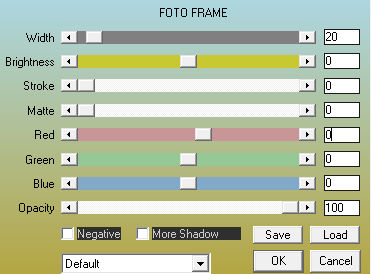
Effects – Plugins – AAA Frames – Photo Frame:
Activate the top layer (copy of Raster 1) in your layer palette.
Repeat again.
Effects – Plugins – AAA Frames – Photo frame setting is still correct.
Point 5.
Layers – Merge – Merge down.
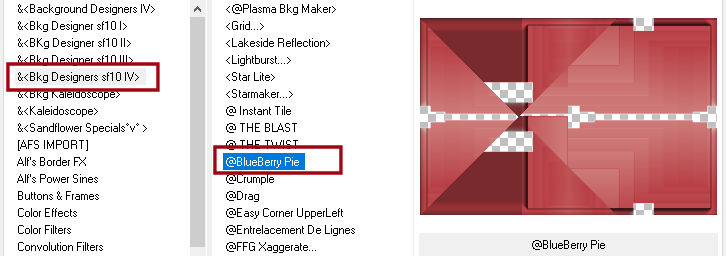
Effects – Plugins – Filters Unlimited – & BKG Designer sf10IV – Blueperry Pie:
Point 6.
Activate your magic wand and select all transparent areas.
Selections – Modify – Expand – Number of pixels 1.
Layers – New raster layer.
Fill your selection with color 2.
Selections – Select none.
Point 7.
Effects – 3D Effects – Drop shadow, color black.
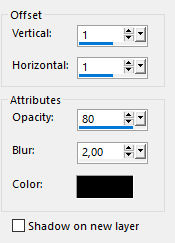
Repeat again and set Horizontal and Vertical to -1.
Effects – Plugins – Carolaine and Sensibility – CS HLines.

Effects – Edge Effects – Enhance More.
Point 8.
Foreground color on color 1 and Background color on color 2 are still correct.
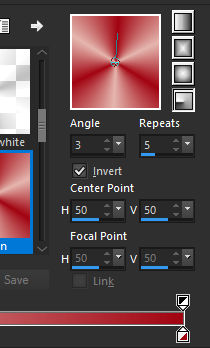
Make the following gradient Radial from your foreground color.
Activate the bottom layer of your layer palette (Raster 1).
Activate your magic wand.
Select all black areas by clicking in them with your magic wand.

Fill the selection with your gradient.
Point 9.
Selections – Promote selection to layer.
Selections – Select none.
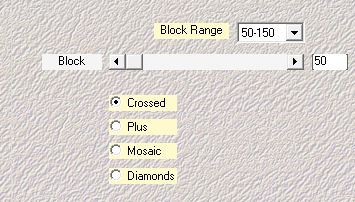
Effects – Plugins – Medhi – Sorting tiles:
Effects – Edge Effects – Enhance More.
Point 10.
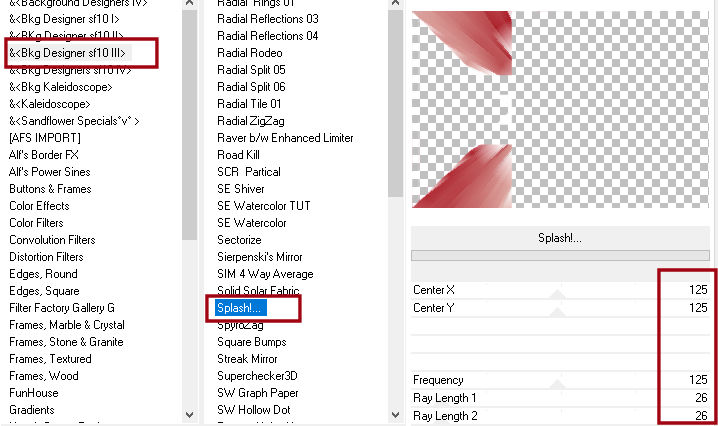
Effects – Plugins – Filters Unlimited – & BKG Designer sf10III – Splash!:
Effects – Edge Effects – Enhance.
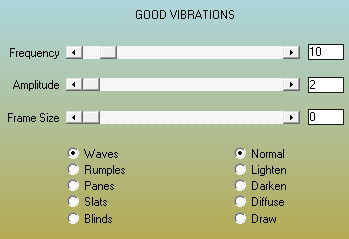
Effects – Plugins – AAA Filters – Good Vibrations.
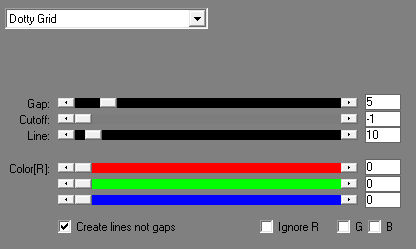
Effects – Plugins – AP1 Lines – Silverlining:
Point 11.
Layers – Duplicate
Effects – Distortion Effects – Wind – From Left – 100
Effects – Distortion Effects – Wind – From Right – 100
Layers – Arrange – Move Down.
Effects – Edge Effects – Enhance.
Point 12.
Open your butterfly frame tube and paste as new layer
Layers – Arrange – Bring to top
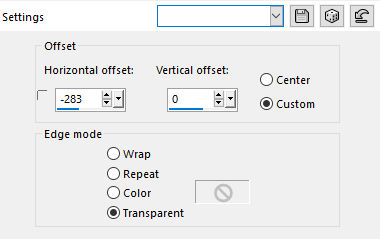
Effects – Image Effects – Offset.
Effects – 3D Effects – Drop shadow, color black.
Point 13.
Layers – New Raster Layer
Set your background color to black.
Flood fill tool (fill bucket) and set the opacity to 50 in the toolbar.

Fill your image with your background color.
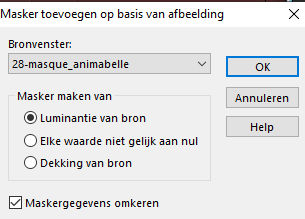
Layers – New Mask Layer – From Image ( 28 masque animabelle).
Layers – Merge – Merge Group.
Point 14.
Effects – Plugins – Cybia – Screenworks

Effects – Edge Effects – Enhance
Point 15.
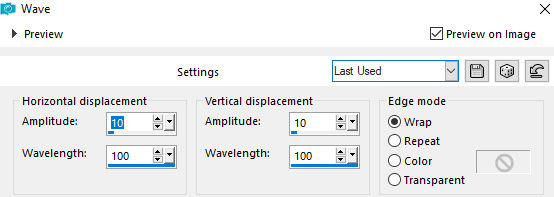
Effects – Distortion Effects – Wave with the following setting.
Effects – 3D Effects – Drop shadow, color black.
Layers – Merge – Merge visible.
Point 16.
Open the attached women’s tube or your own tube.
Remove the watermark.
Image – Resize by 80%
Edit – Copy
Edit – Paste as new layer.
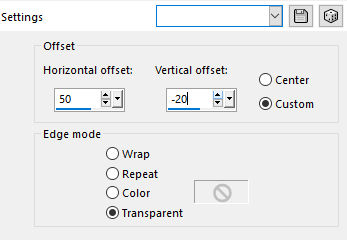
Effects – Image Effects – Offset:
Point 17.
Open your Flower_DK
Edit – Copy
Edit – Paste as new layer.
Put a little to the right.
Layers – Properties – Blend Mode on Multiply, Opacity on 80
Layers – Arrange – Down.
Point 18.
Open your Balls Azyzam tube
Edit – Copy
Edit – Paste as new layer.
Image – Resize by 85%. Resize all layers unchecked.
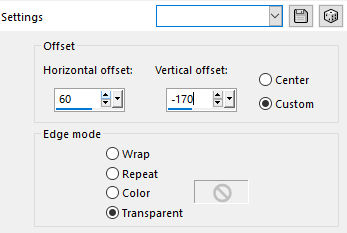
Effects – Image Effects – Offset:
Point 19.
Open your Yoka text.
Delete the top layer.
Image – Resize by 40%. Resize all layers unchecked.
Give your text the desired color.
You do this by this way
Selections – Select all.
Selections – Floating.
Selection – Not Floating.
Fill with white (my color).
Edit – Copy
Edit – Paste as new layer.
Layers – Arrange – In Front
Put it in a place to the left of your image or as my example.
Effects – 3D Effects – Drop shadow, color black.
Point 20.
Put your watermark and any copyrights.
Point 21.
Image – Add Borders – Symmetric – 3 pixels color 1
Image – Add Borders – Symmetric – 3 pixels white
Image – Add Borders – Symmetric – 3 pixels color 3
Image – Add borders – Symmetric – 25 pixels color white
Effects – Plugins – AAA Frames – Photo Frame.

Your image is ready.
Save as jpg.
© DesignKarin