

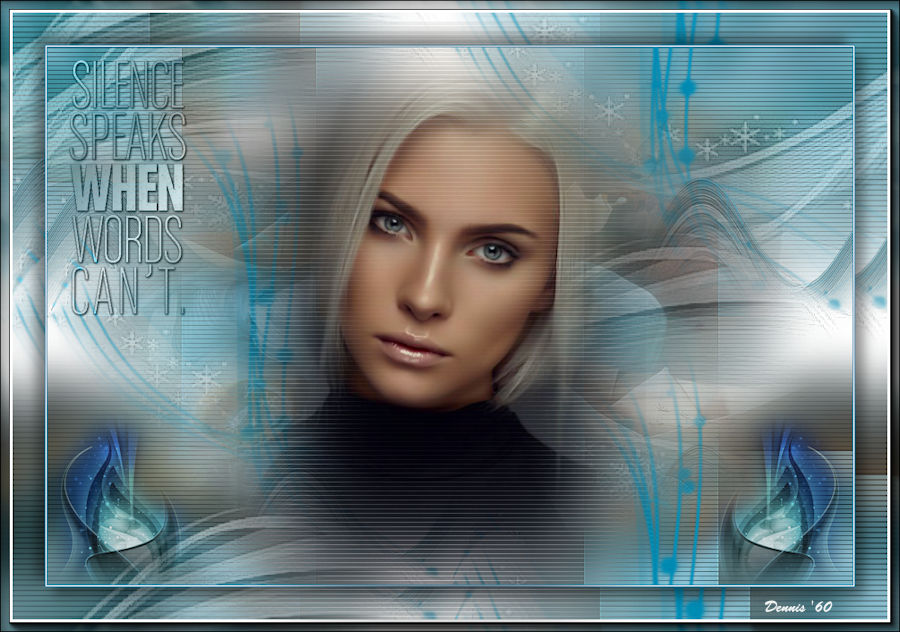
Silence Speak
Translated by Dennis and this is his version of the tutorial
Required Filters:
Mehdi Sorting Tiles
AP01 Silverlining
AAA Frames Foto Frame
MuRa’s Meister Perspective Tiling
The beautiful tubes are from: Alessandra, Nicole and MR
The masks are from: MD and Narah
The text is from Yoka
Download the Materials  here
here
Open a New Image 900 × 600
Foreground Color White / Background Color #43919b

Fill your Layer with White
Layers / New Raster Layer
Selections / Select All
Copy the tube MR paper boats
Edit / Paste into Selection
Selections / Select None
Effects / Image Effects / Seamless Tiling (default)
Adjust / Blur / Gaussian Blur / Radius 15
Layers / Duplicate
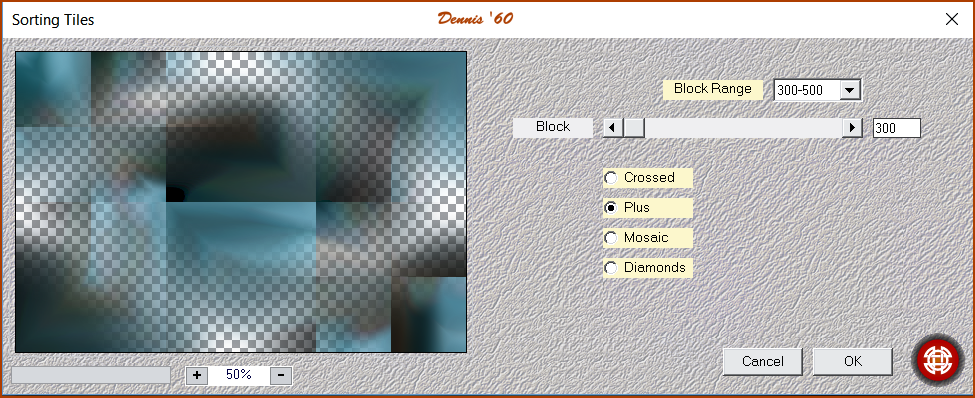
Effects / Mehdi / Sorting Tiles (see example)
Layers / Properties set the Opacity to 50
Effects / Edge Effects / Enhance
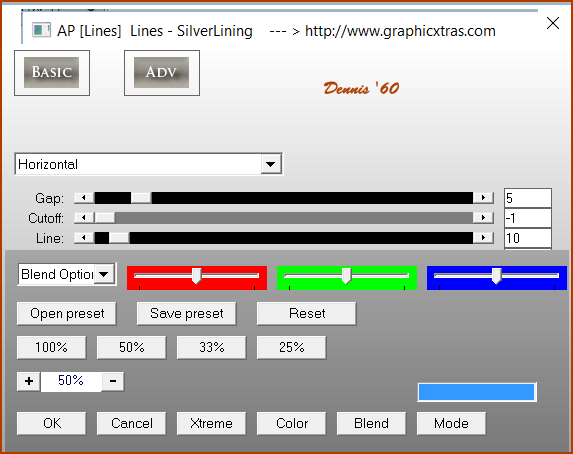
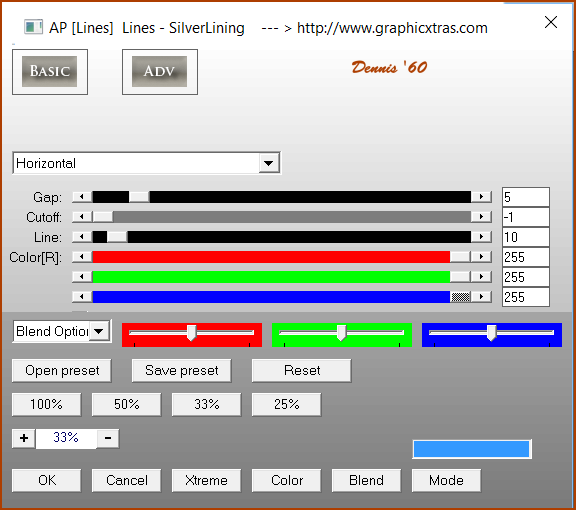
Effects / Plugins AP01 / Silverlining (see example)
Layers / New Raster Layer / Fill it with White
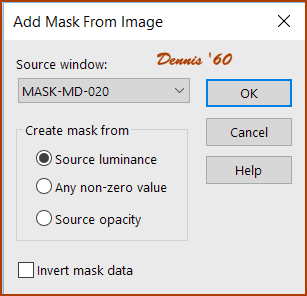
Layers / New Mask Layer / Add Mask from Image / Mask MD020
(see example)
Layers / Merge / Merge Group
Layers / Properties / Opacity 50 and Blend Mode / Luminance Legacy
Effects / Image Effects / Seamless Tiling (default)
Effects / Edge Effects / Enhance
Layers / Merge / Merge Down
Repeat 1 x now you have only 2 Layers left
Layers / New Raster Layer and fill it with the Background Color
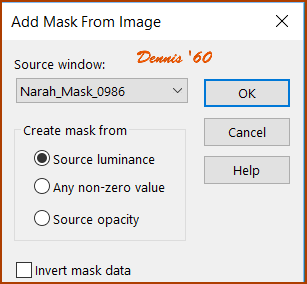
Layers / New Mask Layer / from Image and find Narah Mask (see example)
Layers / Merge / Merge Group
Effects / Image Effects / Seamless Tiling (default)
Adjust / Sharpness / Sharpen
Layers / Merge / Merge Down
Layers / Duplicate
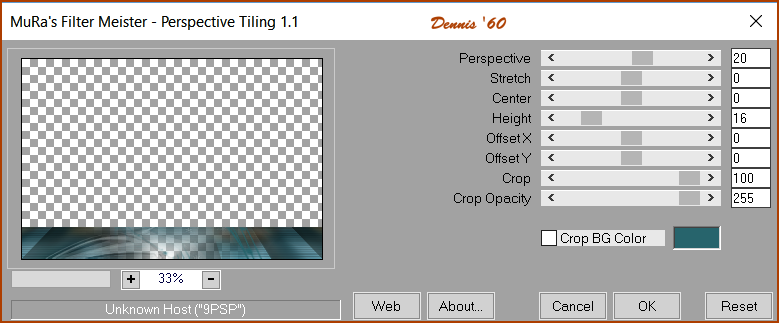
Effects / MuRa’s Meister / Perspective Tiling (with the following settings)
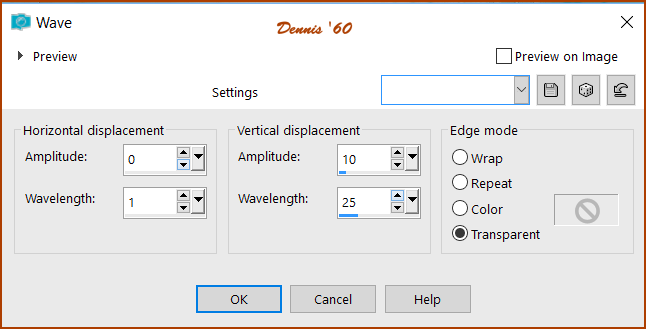
Effects / Distortion Effects / Wave (with the following settings)
Effects / Image Effects / Seamless Tiling (default)
Effects / Edge Effects / Enhance More
Layers / Merge / Merge Down
Copy your tube MR paper boats
Edit / Paste as New Layer
Layers / Properties / Opacity 30
Edit / Copy Special / Copy Merged
Image / Add Borders 1 pixel / Background Color
Image / Add Borders 1 pixel / Foreground Color
Image / Add Borders 1 pixel / Background Color
Selections / Select All
Image / Add Borders 50 pixels Foreground Color
Selections / Invert
Edit / Paste Into Selection
Selections / Invert
Effects / 3d Effects / Drop Shadow (with the following settings)
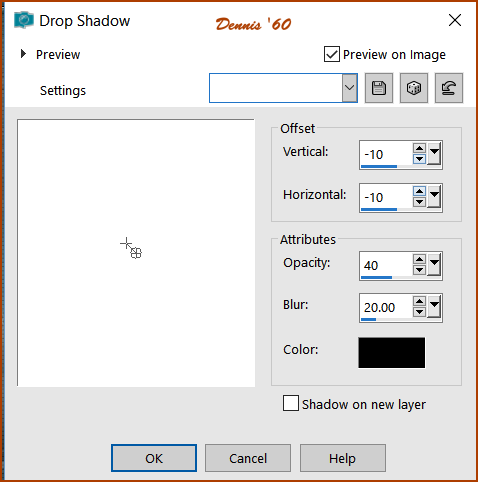
Repeat Drop Shadow with 10 in Vertical and Horizontal
Selection / Invert
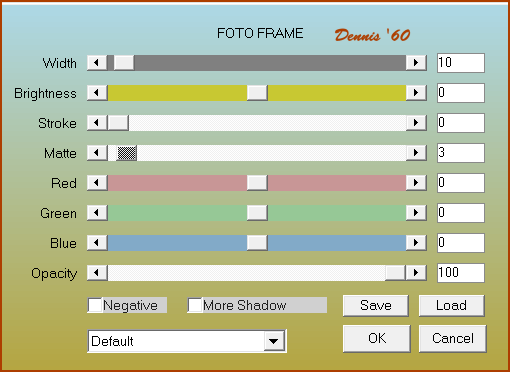
Effects / Plugins / AAA Frames / Photo Frame (with the follow settings)
Selections / Select None
Open your women tube
Edit Copy / Edit Paste as New Layer
Position is correct
Duplicate this Layer in your Layers Palette
Adjust / Blur / Gaussian Blur Radius 50
Effects / Plugins AP01 / Silverlining (see example)
Layers / Arrange / Move Down
Layers / Merge / Merge Visible
Open your Nicole mist tube
Image / Resize 30%
Copy and Paste as a New Layer
Move left into the corner (see example above)
Layers Duplicate
Image Mirror (Mirror Horizontal)
Layers / Merge / Merge Down
Layers / Properties / Opacity 75
Layers / Merge / Merge Visible
Open the WordArt and Resize by 60%
Copy and paste as a New Layer
Move to the upper left corner (see example above)
Layers / Properties / Blend Mode / Luminance Legacy
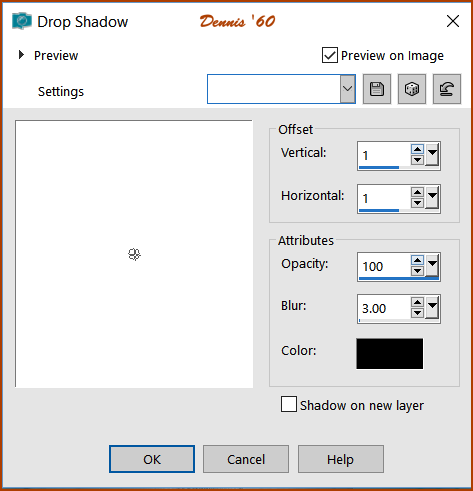
Effects / 3d Effects / Drop Shadow (see example)
Layers / Merge / Merge Visible
Add your watermark.
I hope you enjoyed doing this Tutorial
Tutorial © DesignKarin 12/09/2017