

Beautiful Heart

The tutorial is written with PSP 19 (X9) but can also be made with other versions.
If this lesson resembles another lesson, it is purely coincidental.
The © of the materials used is for the rightful owners and the tube makers.
I thank the tube maker Yokalicious for the tube.
The masks are from Narah and Vix.
————–
Open the material in PSP / Duplicate with Shift + D / Close the originals.
————–
Filters used:
AP Innovations [Lines] Lines – SilverLining
AAA Frames / Foto Frame & Texture Frame
Filters Unlimited 2.0 / & Bkg Kaleidoscope
Alien Skin Eye Candy 5 / Impact Glass
MuRa’s Meister / Perspective Tiling
Toadies / Living Sine Linear
————–
The tutorial is written with these colors and materials.
If you use the own colors and / or materials you may have to play with the Blend Mode and / or Opacity.
————–
Download the materials here:

You only need the own female tube. My tube is from Fiodorova Maria.
Step 1
Open the Alpha file Alfa_Beautiful heart / Window / Duplicate (or use Shift + D).
Close the original we are working on the copy.
In the Materials Palette set the Foreground Color to a bright Red color and the Background to White
In the Foreground make a Linear Gradient / 45 / 3 / Invert checked
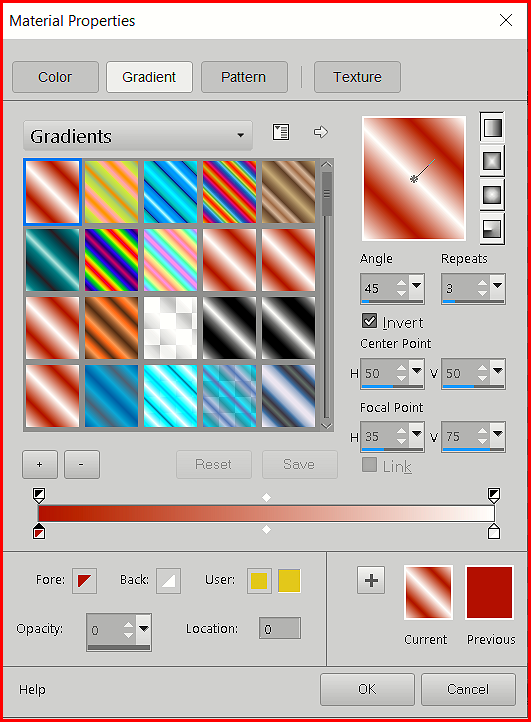
Flood Fill the Image with the Gradient
Step 2
Layers / Duplicate
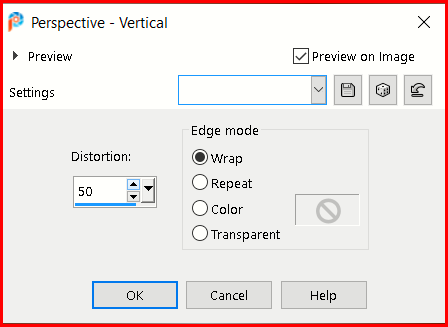
Effects / Geometric Effects / Perspective Vertical
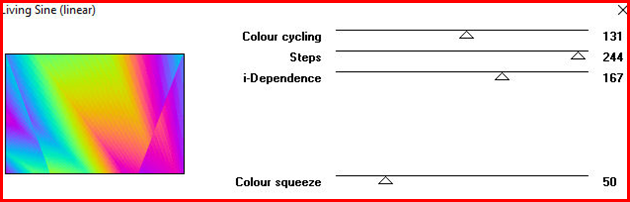
Effects / Toadies / Living Sine (Linear) (default)
Layers / Properties / Blend Mode on Luminance Legacy
Layers / Merge / Merge Visible
Effects / Edge Effects / Enhance
Step 3
Layers / Duplicate
Image / Mirror / Mirror Vertical
Layers / Properties / Blend Mode Multiply / Opacity 50
Layers / Merge / Merge Down
Step 4
Layers / New Raster Layer
Flood Fill with White
Open the Narah_Mask 1010
Layers / New Mask Layer / From Image
Locate Narah_Mask 1010
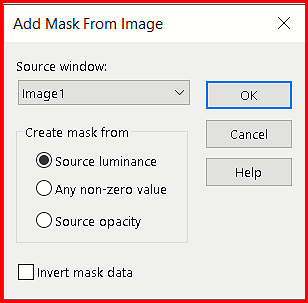
Layers / Merge / Merge Group
Step 5
Layers / Duplicate
Image / Mirror / Mirror Horizontal
Image / Mirror / Mirror Vertical
Layers / Merge / Merge Down
Layers / Properties / Blend Mode on Soft Light
Step 6
Copy the list tube and Paste as a New Layer
Do not move
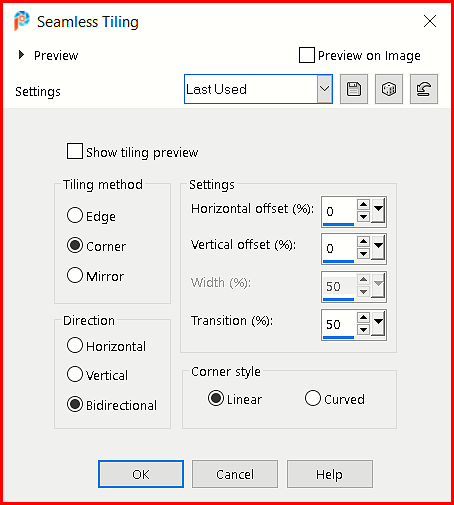
Effects / Image Effects / Seamless Tiling
Layers / Properties / Opacity 50
Layers / Merge / Merge Visible
Step 7
Layers / Duplicate
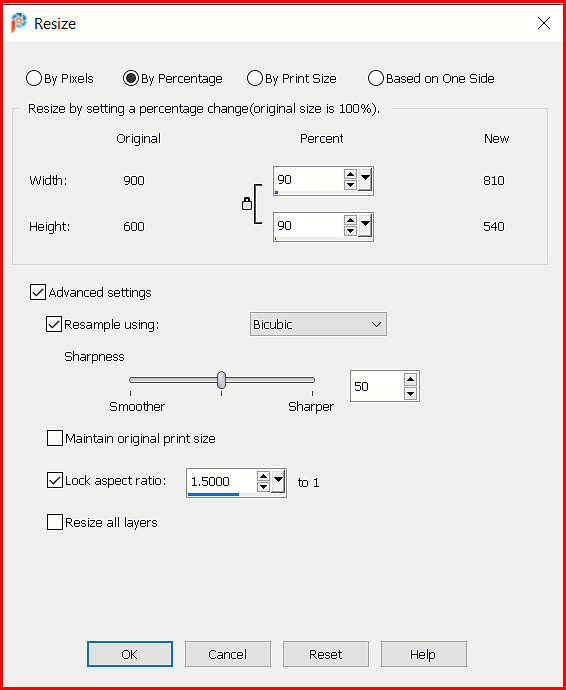
Image / Resize 90%
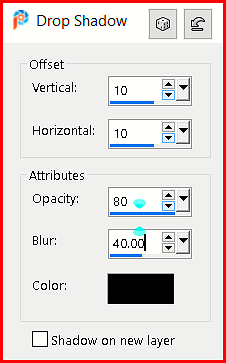
Effects / 3D Effects / Drop Shadow
Step 8
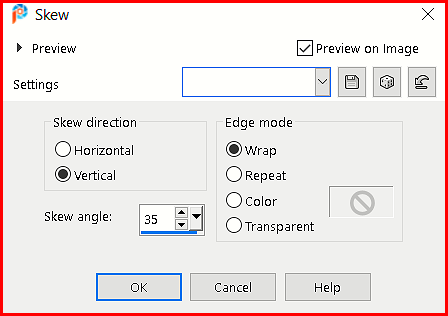
Effects / Geometric Effects / Skew
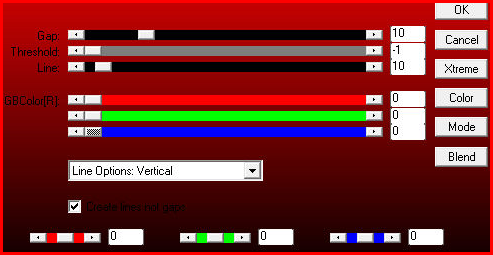
Effects / Plugins / AP [Lines] Lines – SilverLining
Effects / 3D Effects / Drop Shadow
.png)
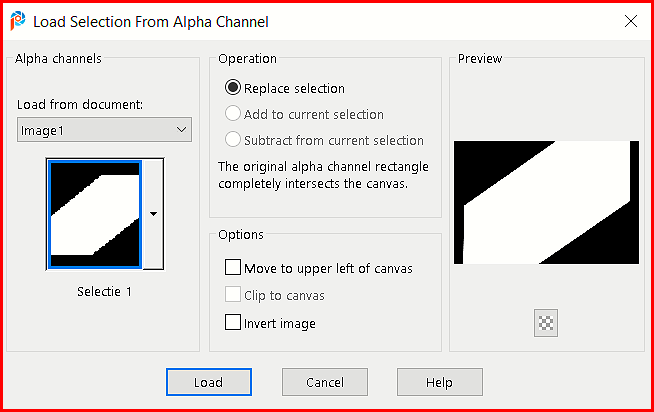
Selections / Load/Save Selection / Load Selection from Alpha Channel Selectie 1
Press the Delete Key on the Keyboard
Selections / Select None
Step 9
In the Layer Palette / Activate the Bottom Layer
Layers / Duplicate
Layers Arrange Bring to Top
Image / Resize 80%
Image / Free Rotate / Right 90º
Effects / 3d Effects / Drop Shadow
.png)
Repeat again with Horizontal and Vertical on 10
Step 10
Activate the Bottom Layer
Selections / Load/Save Selection / Load Selection from Alpha Channel Selectie 2
Selections / Promote Selection to Layer
Layers / Arrange / Bring to Top
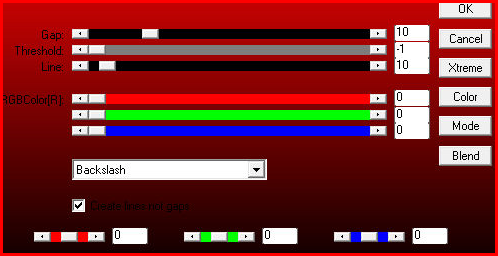
Effects / Plugins / AP [Lines] Lines – SilverLining
Effects / Plugins / Alien Skin Eye Candy 5 / Impact Glass
Settings Tab / Select Clear / Click Ok
Selections / Select None
Step 11
Edit / Copy the tube golf
Edit / Paste as a New Layer
Image / Free Rotate / Right 90º
Effects / Image Effects / Offset
Horizontal at -370 / Vertical at -13 / transparent checked
Layers / Properties / Blend Mode Luminance Legacy
Step 12
Effects / Distortion Effects / Wind from Left / Wind Strength 80
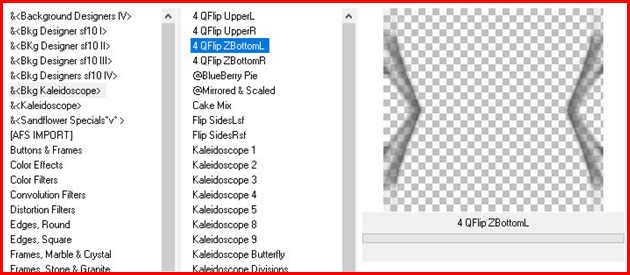
Effects / Plugins / Filters Unlimited 2.0 / & Bkg Kaleidoscope / 1QFlipZBottomL
Effects / Edge Effects / Enhance
Effects / Texture Effects / Blinds

Effects / Edge Effects / Enhance
Step 13
Layers / Merge / Merge Visible
Layers / Duplicate
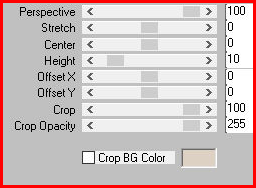
Effects / Plugins / MuRa’s Meister / Perspective Tiling
Adjust / Sharpness / Sharpen
Effects / Image Effects / Page Curl
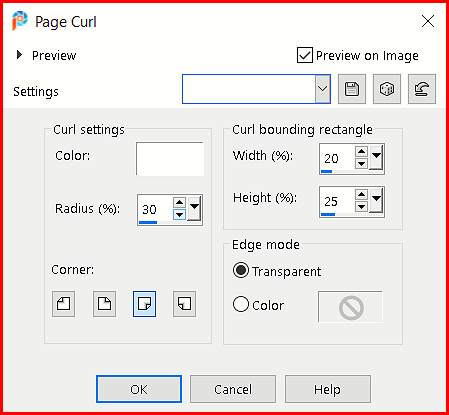
Repeat the Page Curl / but change to the Bottom Left the rest stays the same
Layers / Merge / Merge Visible
Step 14
Layers / New Raster Layer
Flood Fill with Red
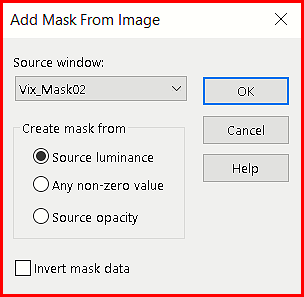
Layers / New Mask Layer / From Image / Vixmask02
Layers Merge / Merge Group
Effects / 3D Effects / Drop Shadow

Step 15
Edit / Copy the Yoka flower Tube
Edit / Paste as a New Layer
Effects / Image Effects / Offset
Horizontal at -270, Vertical at 60 / transparent checked
Effects / 3D Effects / Drop Shadow (same settings)
Step 16
Image / Add Borders / Symmetric Checked
1-pixel Black
2-pixels Red
1-pixel Black
30-pixels White
1-pixel Black
2-pixels Red
1-pixel Black
40-pixels White
1-pixel Black
Step 17
Activate the Magic Wand / select the 30-pixel White Border
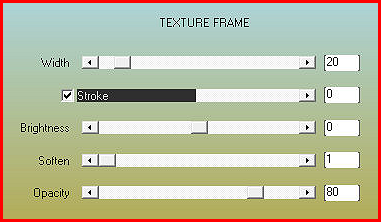
Effects / Plugins / AAA Frames / Texture Frame
Selections / Select None
Step 18
Copy the main tube
Edit / Paste as a New Layer
Effects / 3D Effects / Drop Shadow of choice
Add your name or watermark.
Adjust / Sharpness / Sharpen
Save as jpg
My Version
