Sweety
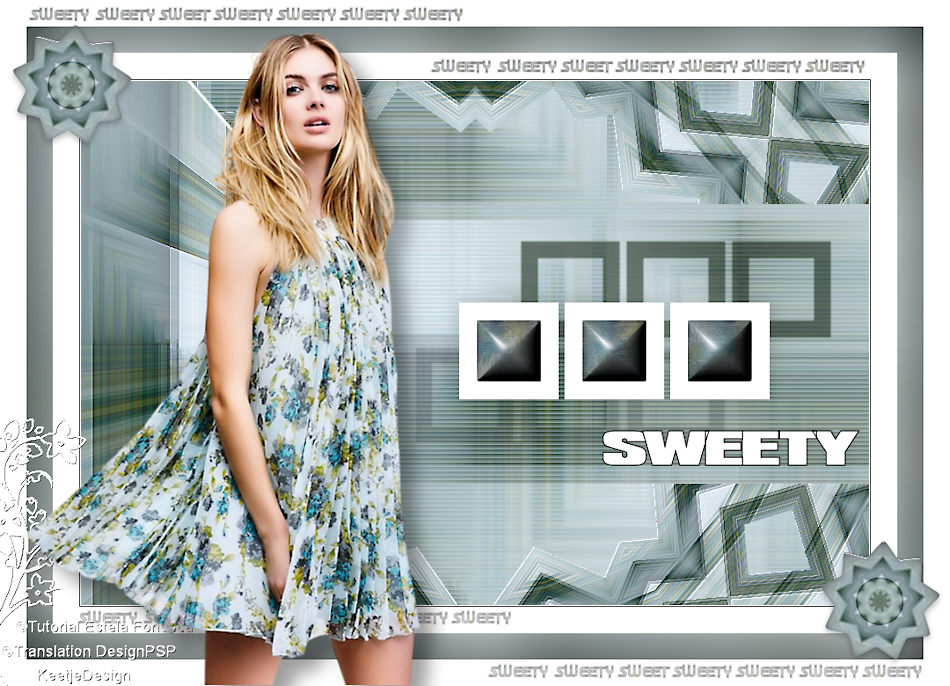
Original tutorial Here
This tutorial is written by Estela Fonseca the © is from her.
It is not allowed to copy, link and / or place these or parts of it without her permission.
The © ️ of the materials wich are used is for the rightful owner.
If you want to use this tutorial on your own forum, club or group, you have to request permission from the writer herself.
We have permission to translate Estela Fonseca’s tutorials into English.
Thank you Estela for the permission to translate your tutorials.
Temos permissão para traduzir os tutoriais da Estela Fonseca para o inglês.
Obrigado Estela pela tradução dos tutriais.
Materials Used: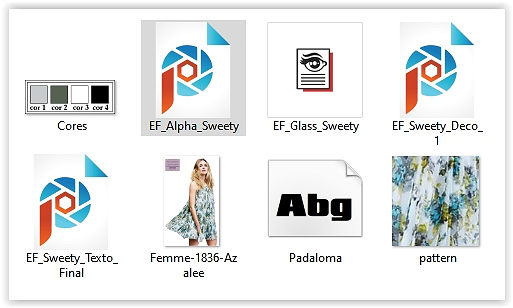
Double click on the preset EF_Glass_Sweety it will install in the right filter
Open the other materials in PSP / minimize pattern
Minimize the font with older versions PSP / install with new versions PSP
Plugins Used:
Mehdi – Sorting Tiles
It@lian Editors Effect – Effetto Fantasma
Graphics Plus – Emboss
Mura’s Meister – Perspective Tiling
Alien Skin Eye Candy 5 Impact – Bevel
Alien Skin Eye Candy 5 Impact – Glass
Alien Skin Eye Candy 5 Impact – Perspective Shadow
The translation was made with PSP 2020 , but can also be done with other versions.
Note : When working with your own colors , play with the Blend Mode and/or Opacity at your own discretion
1
Materials Palette – Foreground Color # ffffff / Background to Pattern with Pattern
Note: When using your own tube you can create your own pattern/Select a part of the tube/Copy/Paste as new image/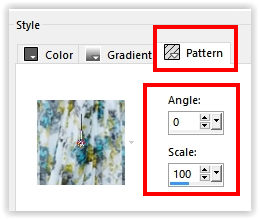
2
Open EF_Alpha_Sweety / Window – Duplicate (or use Shift+D)
Close the original we are working with the copy / This is not empty but has selections in the alpha channel
Fill with the Pattern
3
Effects – Filter Medhi – Sorting Tiles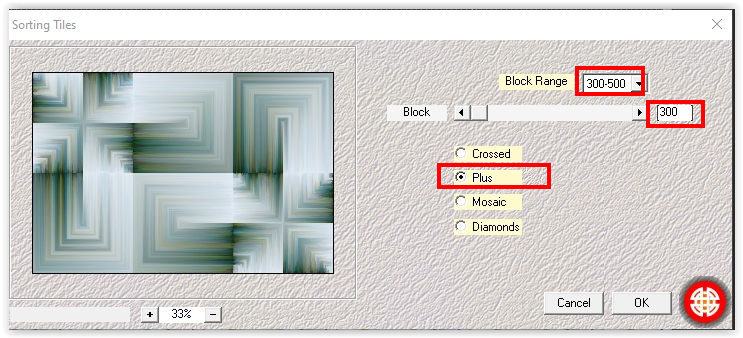
Effecten – Filter It@lian Editors Effect – Effetto Fantasma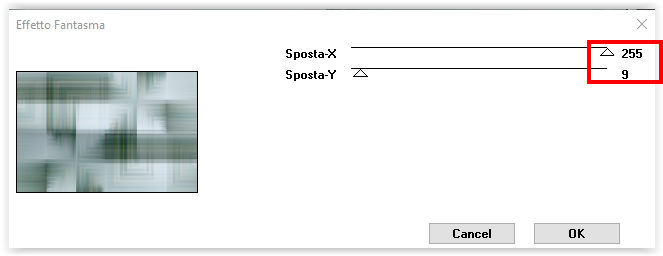
4
Layers – Duplicate
Effects – Geometric Effects – Skew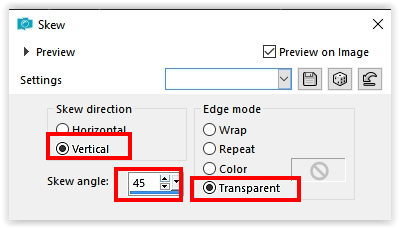
Effects – Reflection Effects – Kaleidoscope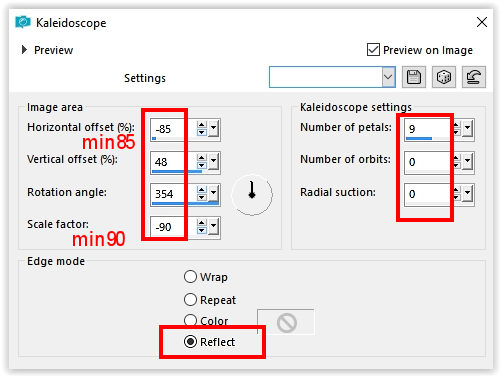
5
Selections – Load/Save – Load selection from alpha channel: Selection #1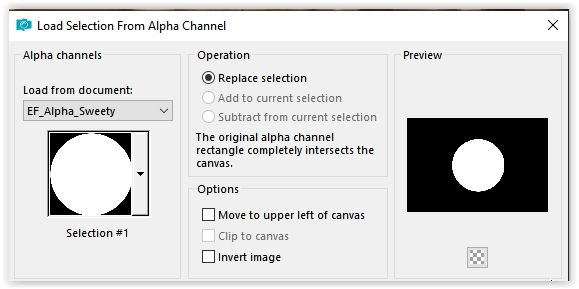
Edit – Cut
Selections – Select none
Edit – Paste as new image (minimize we’ll use it later)
6
Reactivate work
Effects – Filter Graphics Plus – Emboss /Default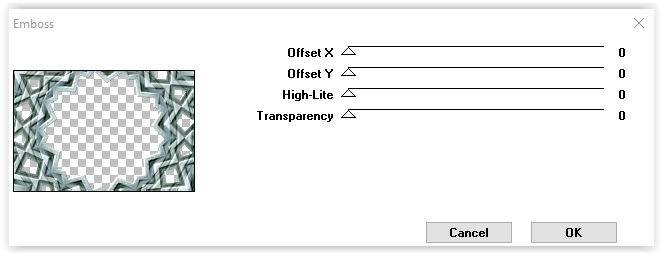
Effects – Reflection Effects – Rotating Mirror / Default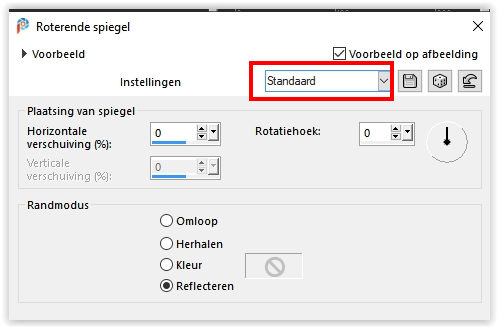
7
Selections – Load/Save – Load selection from alpha channel: Selection #2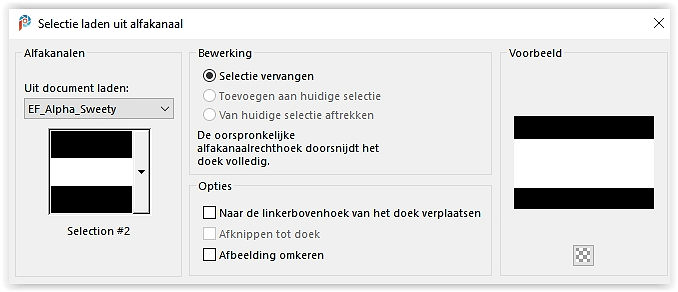
Press Delete on the keyboard
Selection – Hold
8
Layer palette – Activate the layer Raster 1
Selections -Promote selection to layer
Effects – Filter Mura’s Meister – Perspective Tiling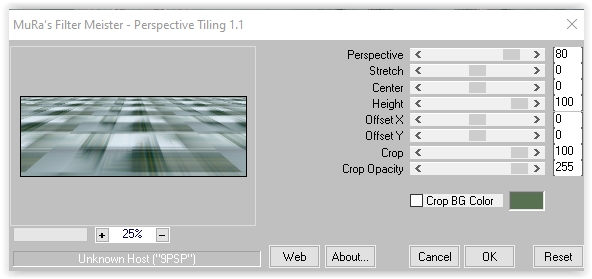
Selections – Select none
9
Effects – Edge Effects – Rembrandt Light
Effects – Edge Effects – Enhance
10
Selections – Load/Save – Load selection from alpha channel: Selection #3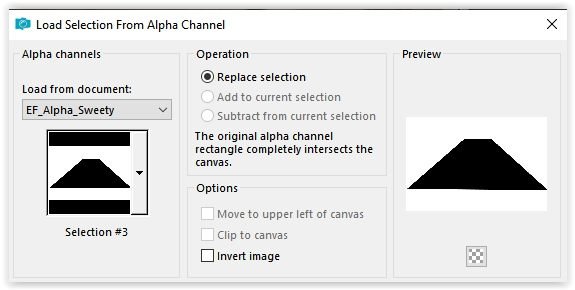
Press Delete on the keyboard
Selections – Select none
Layers – Arrange – Move Up
Image – Free Rotate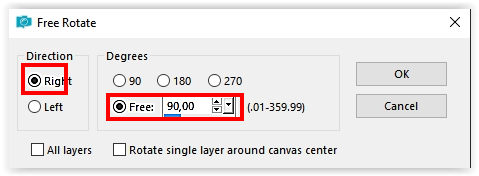
11
Activate the Pick tool (K) / Position Horizontal minus 5 / Position Vertical minus 148
Type M to close the tool
12
Selections – Load/Save – Load selection from alpha channel: Selection #4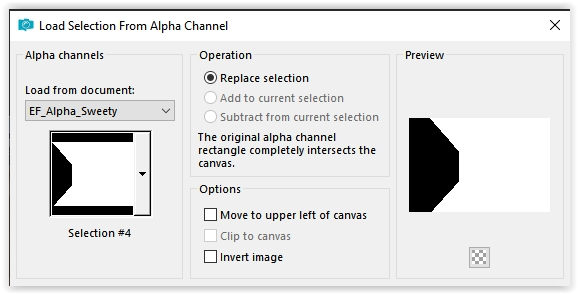
Layer palette – Activate the bottom layer (Raster 1)
Selections – Modify – Expand 4 pixels
Selections – Layer selection
Selections – Select none
Effects – Texture Effects – Blinds /Color # #bfd2d6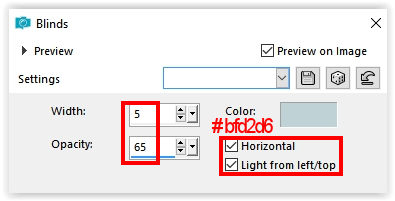
13
Layer palette – Activate the top layer
Layers – New Raster Layer
Selections – Load/Save – Load selection from alpha channel: Selection #5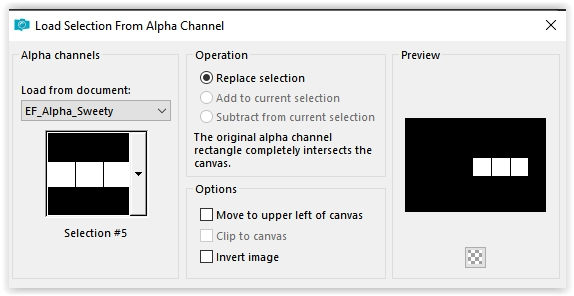
Fill with the color #ffffff
Selections – Modify – Contract 20 pixels
Press Delete on the keyboard
Selections – Select none
14
Effects – 3D Effects – Drop shadow /50/min 50/ 50/1/ # c8cbcb/ Check shadow on new layer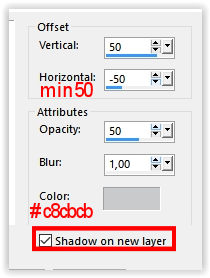
Layer palette – Activate the top layer
Effects – 3D Effects – Drop Shadow / Minus 70/70/ 50/1/ # 566151/ Check Shadow on New Layer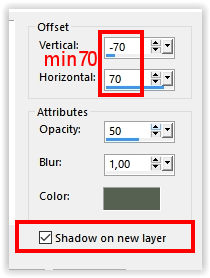
15
Layers – Merge – Merge Down (the two shadow layers)
Effects – Edge Effects – Enhance
Layers – Properties – Blend Mode Multiply
16
Layer palette – Activate the top layer
Layers – New Raster Layer
Selections – Load/Save – Load selection from alpha channel: Selection #6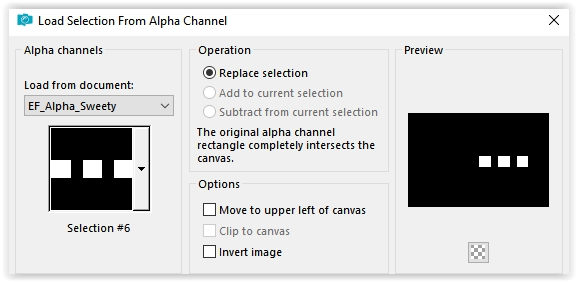
Fill with the pattern
Selection – Hold
17
Effects – Texture Effects – Fur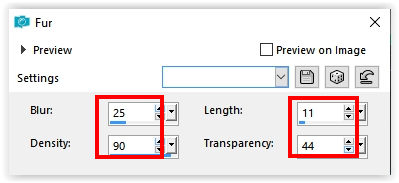
Effects – Filter Alien Skin Eye Candy 5 Impact – Bevel /Plastic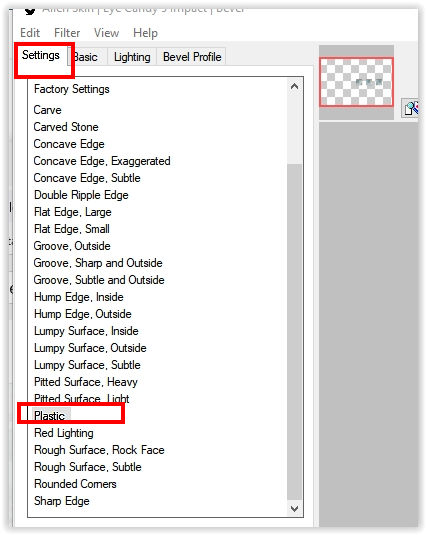
Selections – Select none
18
Layers – merge – merge down
Effects – 3D Effects – Drop Shadow/0/0/40/30/#000000/ Shadow on New Layer OFF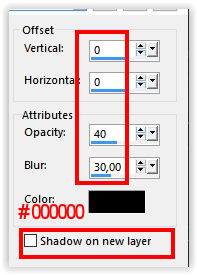
19
Open the tube EF_Sweety_Deco_1 – Copy – Paste as new layer
Layers – Merge – Merge Visible lagen
20
Materials palette – Foreground color # 000000/ Background color # ffffff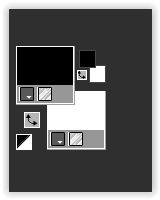
Activate Text tool / Font Padaloma
Type the text SWEETY
Layers – Convert to Raster Layer
Put the text on the example crea
21
Effects – 3D Effects – Drop Shadow/ Min 1/1/40/2/# 000000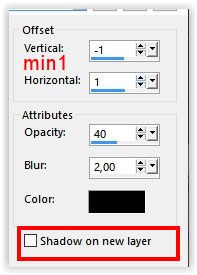
Layers – Merge – Merge Visible lagen
22
Effects – 3D Effects – Buttonize / Color # 000000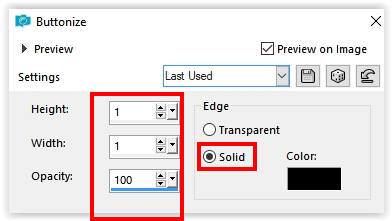
Edit – Copy (now in memory)
23
Image – Add Borders – Symmetric
30 pixels color #ffffff
30 pixels color # 000000
30 pixels color #ffffff
24
Activate Magic Wand tool (Tolerance and Feather 0)
Select the black border
Edit – Paste into Selection (What’s in Memory)
Adjust – Blur – Gaussian Blur / Range 35
Selections – Select none
25
Open the tube EF_Sweety_Texto_Final – Copy – Paste as new layer
26
Activate the image we set apart in step 5
Copy – Paste as New Layer (At work)
Image – Resize – Resize by 50% – Uncheck all layers
27
Effects – Filter Alien Skin Eye Candy 5 Impact – Glass / Preset EF_Glass_Sweety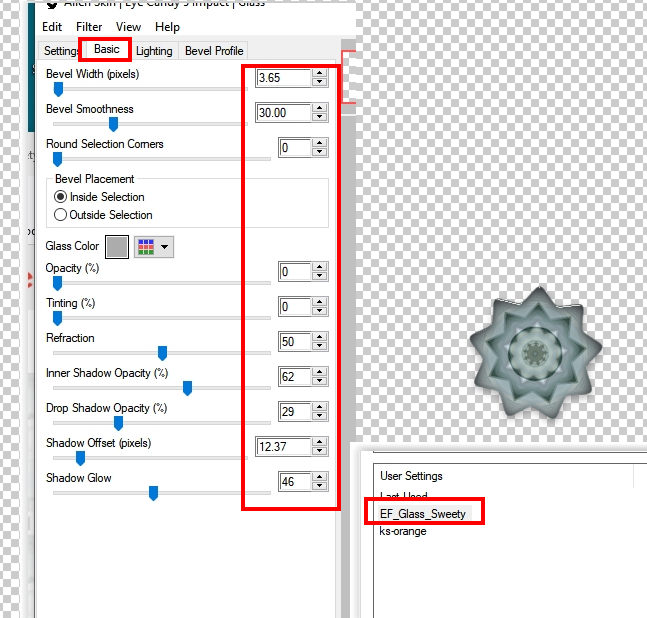
Place in the top left corner
Layers – Duplicate
Place in the lower right corner
28
Open the tube Femme-1836-Azalee – Remove the watermark
Copy – Paste as New Layer
Image – Resize – Resize with 85% – Uncheck all layers
Place of your choice
29
Effects – Filter Alien Skin Eye Candy 5 Impact – Perspective Shadow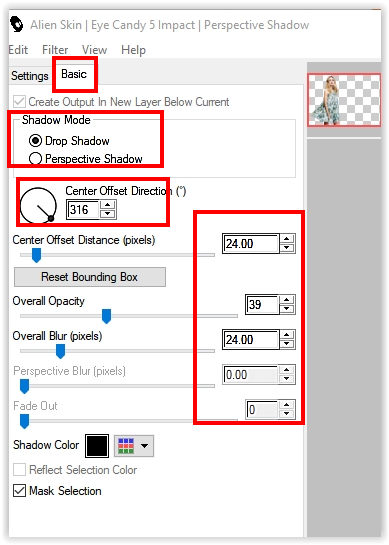
30
Sign your work
Layers – Merge – Merge all layers
31
Effects – 3D Effects – Buttonize/ Color #00
32
Image – Resize – Resize the width to 950 pixels /Check all layers
Adjust – Sharpness – Unsharp Mask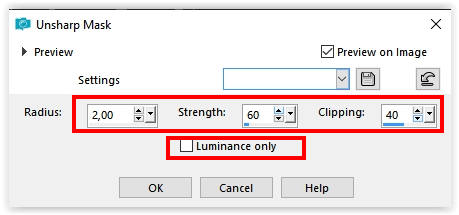
Save as Jpeg.
The translation has been tested by Marianne.
Marianne thank you very much
© Translation DesignPSP KeetjeDesign


