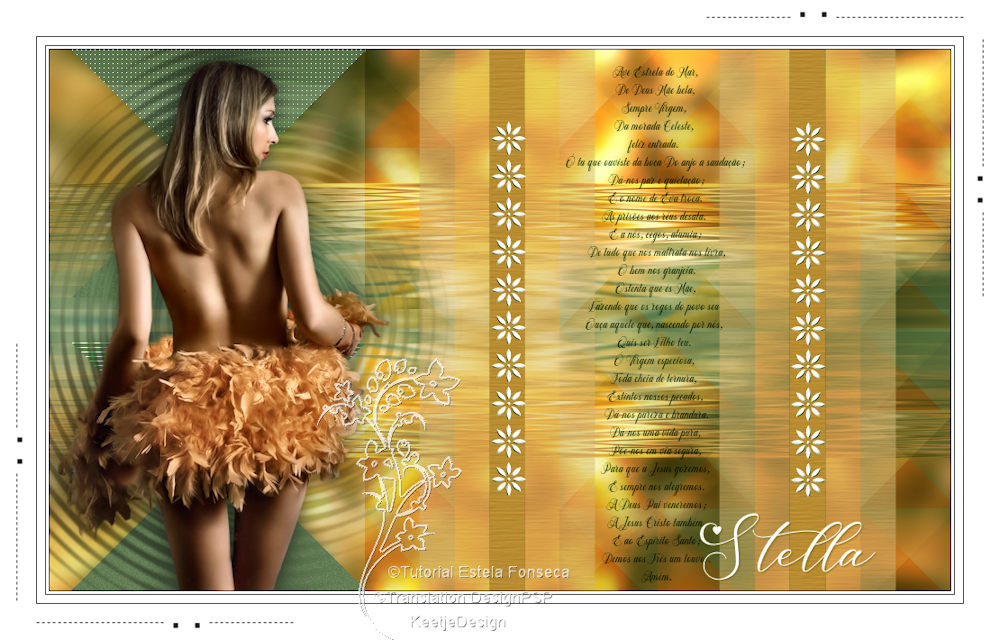
Stella
Original tutorial Here
This tutorial is written by Estela Fonseca the © is from her.
It is not allowed to copy, link and / or place these or parts of it without her permission.
The © ️ of the materials wich are used is for the rightful owner.
If you want to use this tutorial on your own forum, club or group, you have to request permission from the writer herself.
We have permission to translate Estela Fonseca’s tutorials into English.
Thank you Estela for the permission to translate your tutorials.
Temos permissão para traduzir os tutoriais da Estela Fonseca para o inglês.
Obrigado Estela pela tradução dos tutriais.
Materials Used:
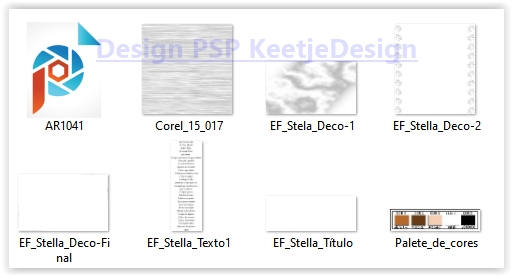
Open the material:
The Texture Corel_15_017 (Grain Long) is included by default in PSP
If you don’t have it put the textures in your PSP folder Textures
Open the tubes in PSP / Duplicate with Shift+D/Close the originals
Plugins Used:
Unlimited 2.0 – VM Natural – Lakeside Reflection
Unlimited 2.0 – VM Toolbox – Instant Tile
Unlimited 2.0 – VM Toolbox – Seamless Tile
Unlimited 2.0 – VM Toolbox – Trimosaic here
Carolaine and Sensibility – CS-HLines
Toadies – What are you
Unlimited 2.0 – Sybia – TILEMIRR
Adjust – Variations
AP 01 Lines – Lines SilverLining
AAA Frames – Foto Frame
Colors Used:

The translation was made with PSP 2020 , but can also be done with other versions.
Note : When working with your own colors , play with the Blend Mode and/or Opacity at your own discretion
1
Materials palette – Foreground color 2 / Background color 1
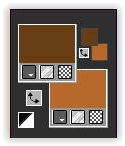
Open a new transparent image 1000 x 600 pixels
Fill with the background color
2
Selections – Select all
Open the tube AR1041 – Copy – Paste into selection
Selections – Select none
3
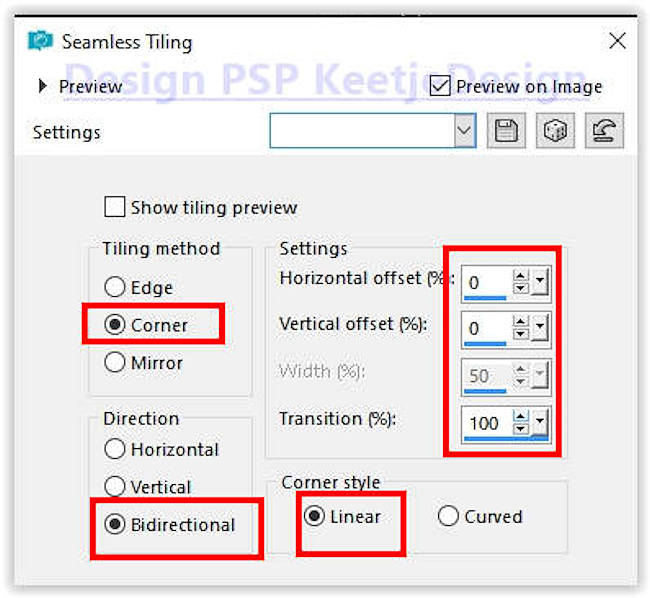
Effects – Image Effects – Seamless Tiling
Adjust – Blur – Gaussian Blur / Range 25
4
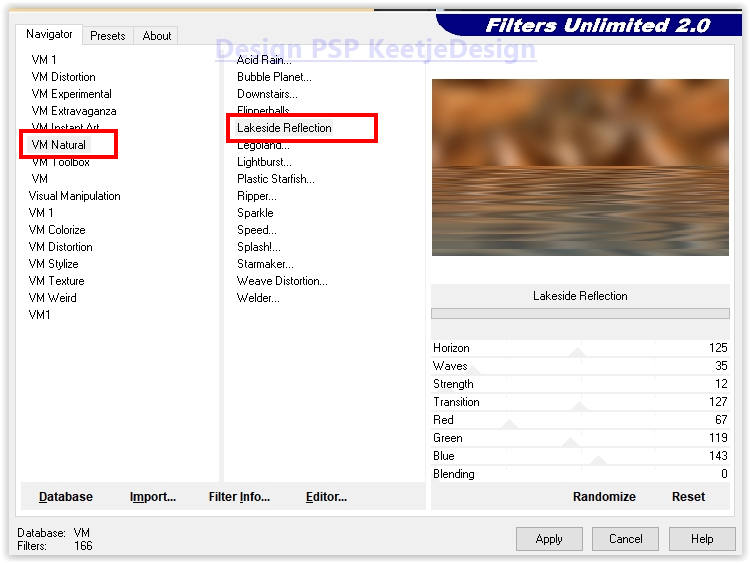
Effects – Filter Unlimited 2.0 – VM Natural – Lakeside Reflection / Default
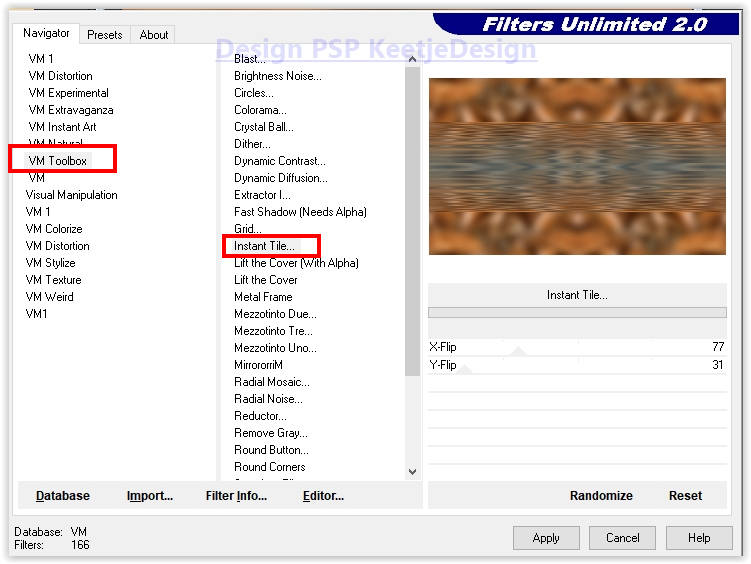
Effects – Filter Unlimited 2.0 – VM Toolbox – Instant Tile / Default
5
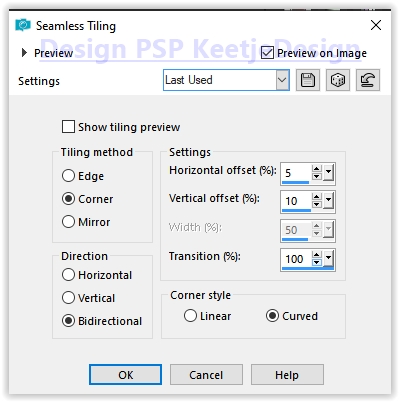
Effects – Image Effects – Seamless Tiling
Layers – Duplicate
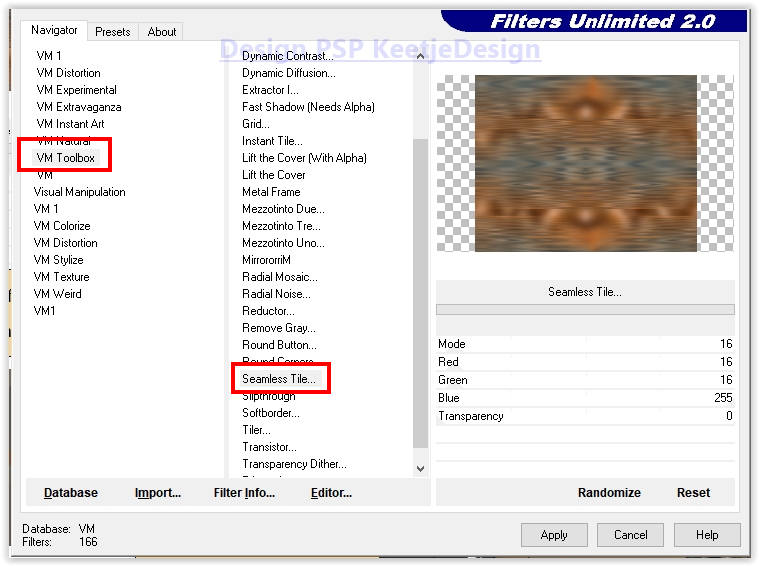
Effects – Filter Unlimited 2.0 – VM Toolbox – Seamless Tile / Default
6
Effects – Edge Effects – Erode
Effects – Filter Unlimited 2.0 – VM Toolbox – Trimosaic
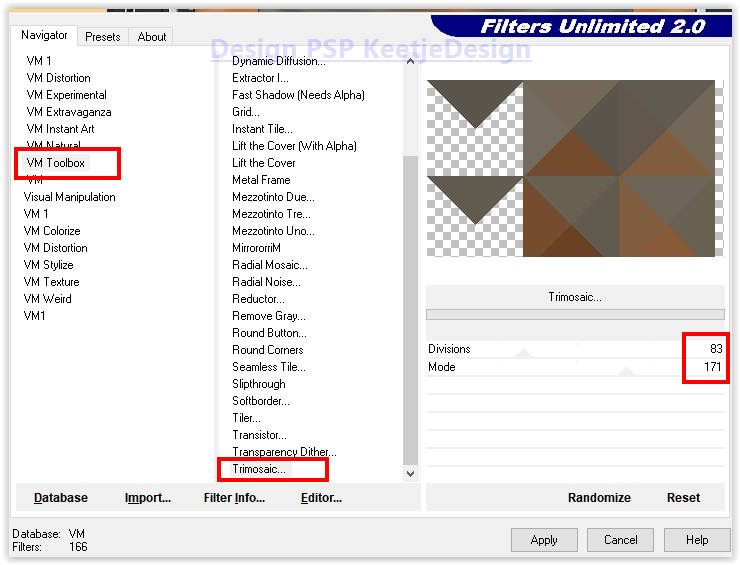
Objects – Align – Right
7
Activate Magic Wand tool

Select the triangle at the top left
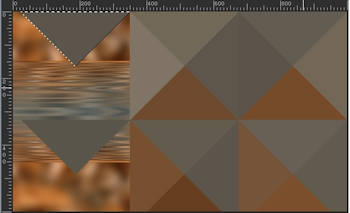
Selections – Promote selection to layer
Selections – Select none
8
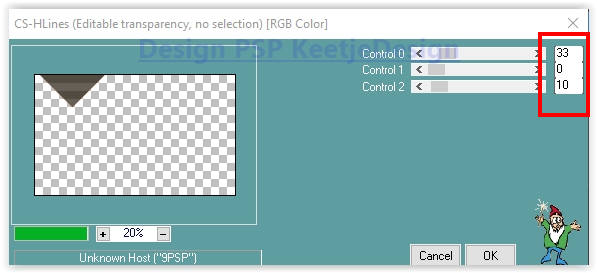
Effects – Filter Carolaine and Sensibility – CS-HLines
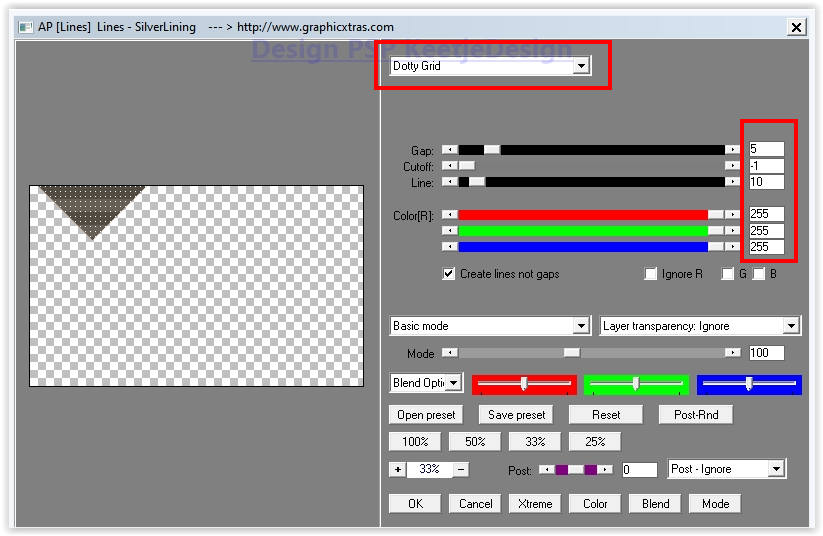
Effects – Filter AP [Lines] – Lines SilverLining / Dotty Grid
9
Layer palette – Activate the layer Copy of Raster 1
Activate the Magic Wand tool
Select the bottom triangle
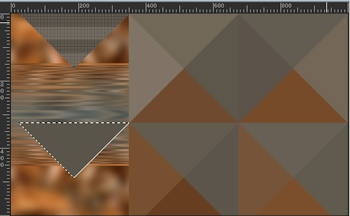
Selections – Promote selection to layer
Selections – Select none
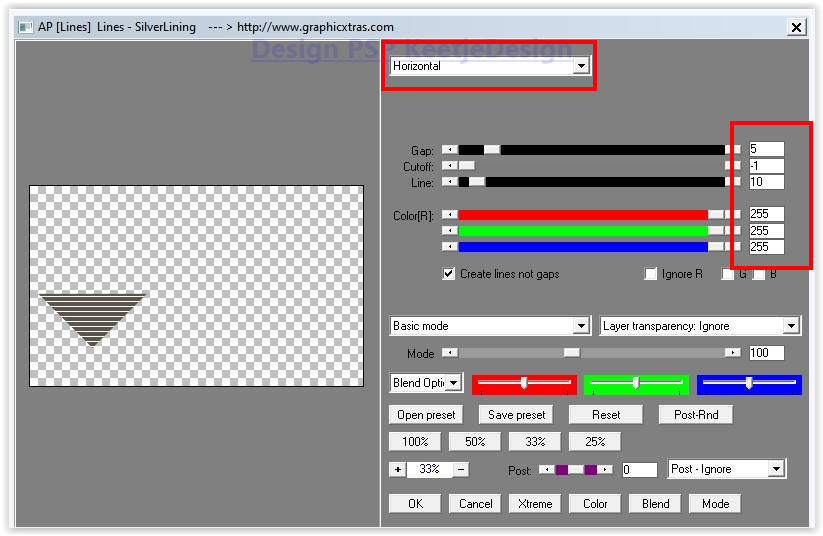
Effects – Filter AP [Lines] – Lines SilverLining / Horizontal
10
Layer palette – Activate the top layer
Layers – merge – merge down
Effects – 3D Effects – Drop Shadow / 0 / 0 / 50 / 30 / Color # 000000
11
Layer palette – Activate the layer Copy of Raster layer 1
Activate Selection Tool (S) – Custom Selection

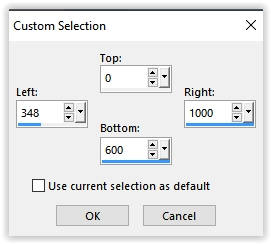
Edit – Cut (now in memory)
Selections – Select none
Edit – Paste as New Layer
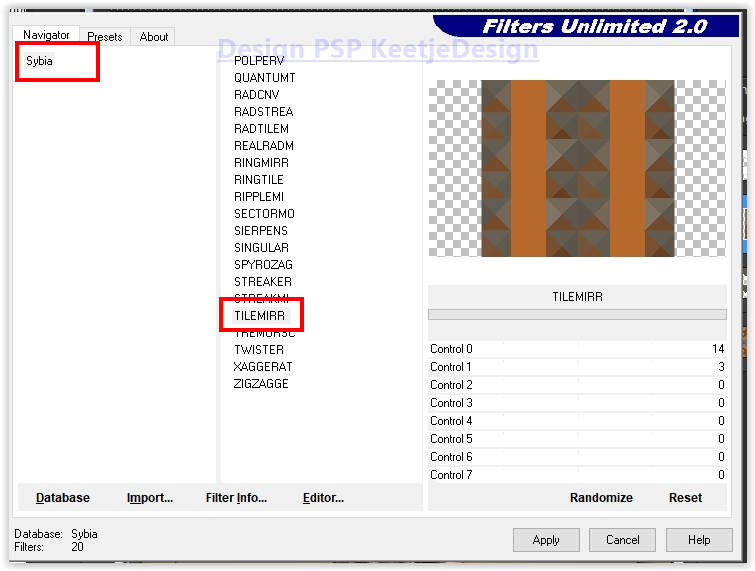
Effects – Filters Unilmited 2.0 – Sybia – TILEMIRR / Default (If you use this filter outside Unlimited you will get a different result)
12
Objects – Align – Right
Activate the Magic Wand tool
Select the 2 vertical stripes
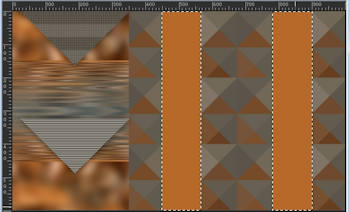
Selections – Promote selection to layer
Selections – Select none
13
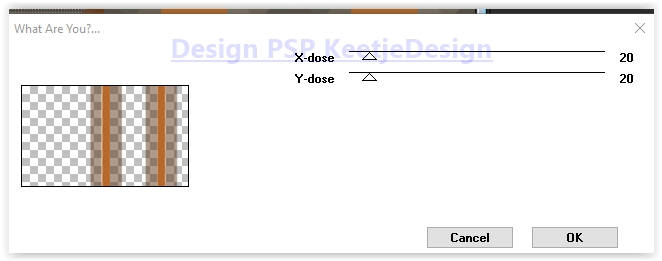
Materials palette – Set the background color 3 (this is necessary for the result with the filter)
Effects – Filter Toadies – What Are You???
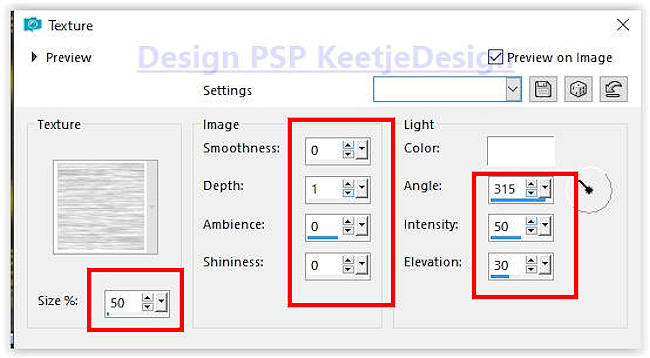
Effects – Texture Effects – Texture – Corel_15_017 (Grain Long)
14
Layer palette – Activate the layer Copy of Raster 1
Image – Flip (Mirror vertically)
Adjust – Add/Remove Noise – Add Noise
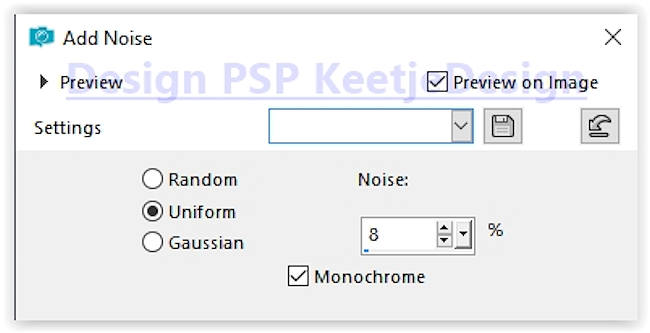
Effects – 3D Effects – Drop Shadow / 0 / 0 / 50 / 30 / Color # 000000
15
Layer palette – Activate the third layer from the top (Raster 2)
Layers – Properties – Blend Mode Overlay
16
Layer palette – Activate the bottom layer (Raster 1)
Open the tube EF_Stella_Deco-1 – Copy – Paste as new layer
Layers – Properties – Blend Mode Overlay
17
Layer palette – Activate the top layer
Open EF_Stella_Texto1 – Copy – Paste as new layer
Activate Selection Tool (K) – Position X 573 / Position Y 18

Effects – 3D Effects – Drop Shadow / 1 / 1 / 50 / 1 / Color 3 (# f2ceb4) 2x
18
Open EF_Stella_Titulo – Copy – Paste as new layer
Place bottom right
19
Open EF_Stella_Deco-2 – Copy – Paste as new layer
Activate Selection Tool (K) – Position X 490 / Position Y 80

Type M to close the tool
Effects – 3D Effects – Drop Shadow / 1 / 1 / 50 / 1 / Color 2 (#683c17)
20
Layers – Merge – Merge Visible
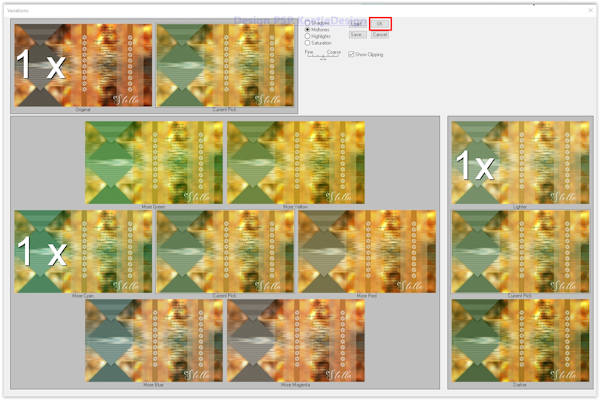
Effects – Filter Adjust – Variation
Click 1 x Original / Click 1 x More Green / Click 1 x Lighter / Click Ok
21
Reactivate the tube AR1041-Copy – Paste as new layer
Image – Resize – Resize by 75% – All layers unchecked
Place on the left
Effects – 3D Effects – Drop Shadow / 0 / 0 / 50 / 30 / Color # 000000
22
Layers – Duplicate
Activate the lower of these two
Adjust – Blur – Gaussian Blur / Range 25
Effects – Distortion Effects – Ripples
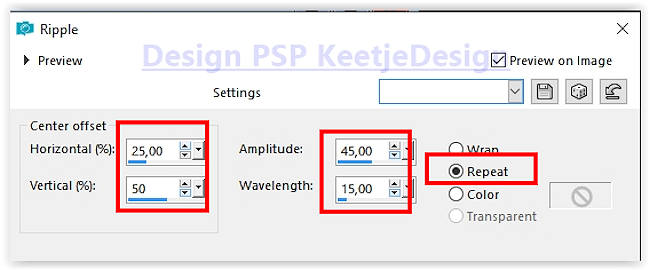
Layers – Properties – Blend Mode Luminance / Opacity 79
23
Image > Add Borders – Symmetric
1 pixel color # 000000
3 pixels color # ffffff
1 pixel color # 000000.
50 pixels color # ffffff
Effects – Filter AAA Frames – Photo Frame
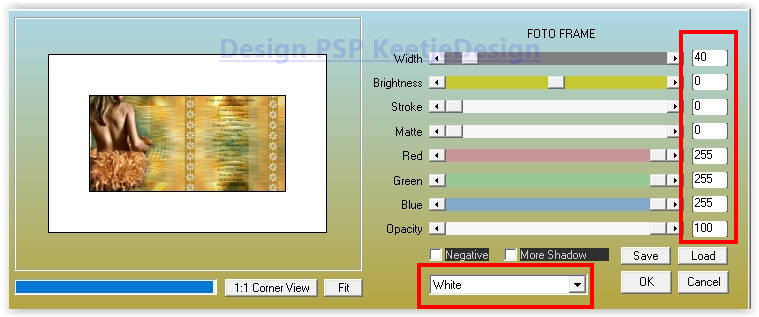
24
Open EF_Stella_Deco-Final – Copy – Paste as new layer
25
Sign your work
Merge All
Image – Rezise – Rezise the width to 1000 pixels
Save as Jpeg
The translation has been tested by Marianne.
Marianne thank you very much
© Translation DesignPSP KeetjeDesign 25-11-2021


