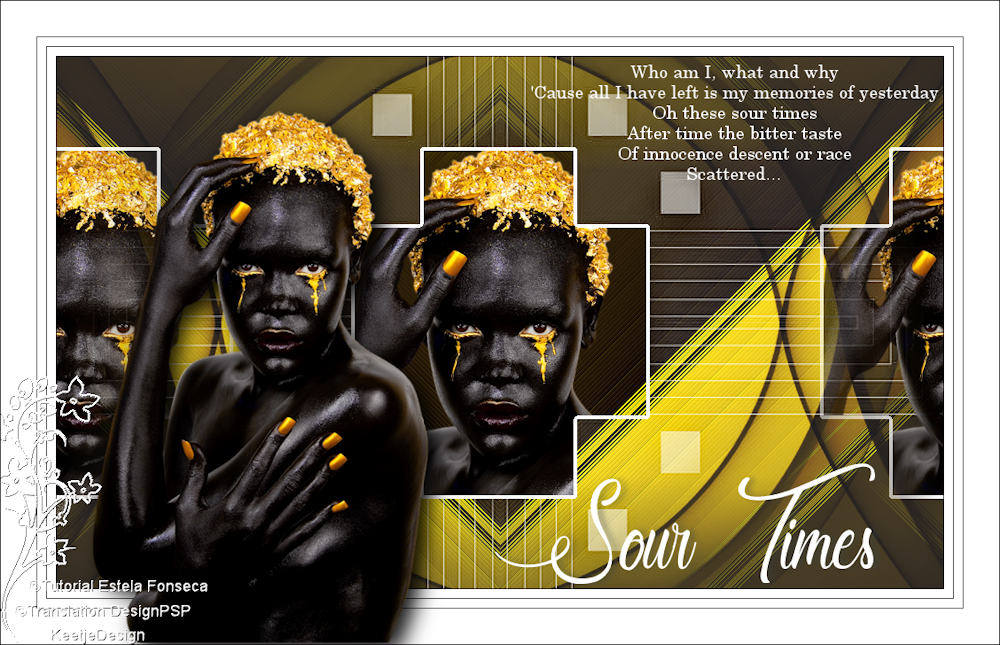
Sour Times
Original tutorial Here
This tutorial is written by Estela Fonseca the © is from her.
It is not allowed to copy, link and / or place these or parts of it without her permission.
The © ️ of the materials wich are used is for the rightful owner.
If you want to use this tutorial on your own forum, club or group, you have to request permission from the writer herself.
We have permission to translate Estela Fonseca’s tutorials into English.
Thank you Estela for the permission to translate your tutorials.
Temos permissão para traduzir os tutoriais da Estela Fonseca para o inglês.
Obrigado Estela pela tradução dos tutriais.
Materials Used:
Place the Sourtimes1 selection in your PSP Selections folder
Open the other material in PSP / Duplicate with Shift+D / Close the originals / Minimize mask
Plugins Used:
Unlimited 2.0 – FunHouse – Angulate
Alien Skin Eye Candy 5 Impact – Perspective Shadow
The translation was made with PSP 2020 but can also be done with other versions
The tutorial is written with these colors and the supplied materials
If you use your own materials, colors or another version of PSP
you may have to play around with the Blend Mode and/or Layer Opacity.
1
Materials palette foreground color # feda03 / background color #110609
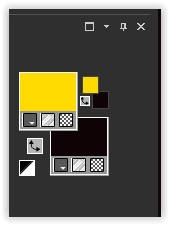
In the foreground, make the gradient Radial
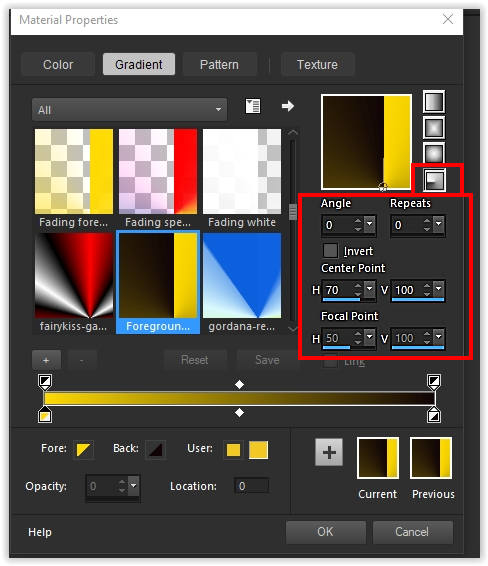
2
Open a new transparent image 1000 x 600 pixels
Fill with the gradient
3
Effects Geometric Effects Skew
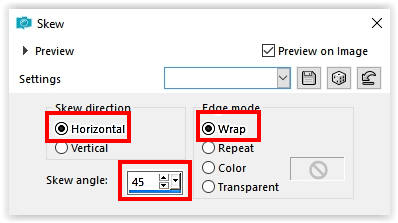
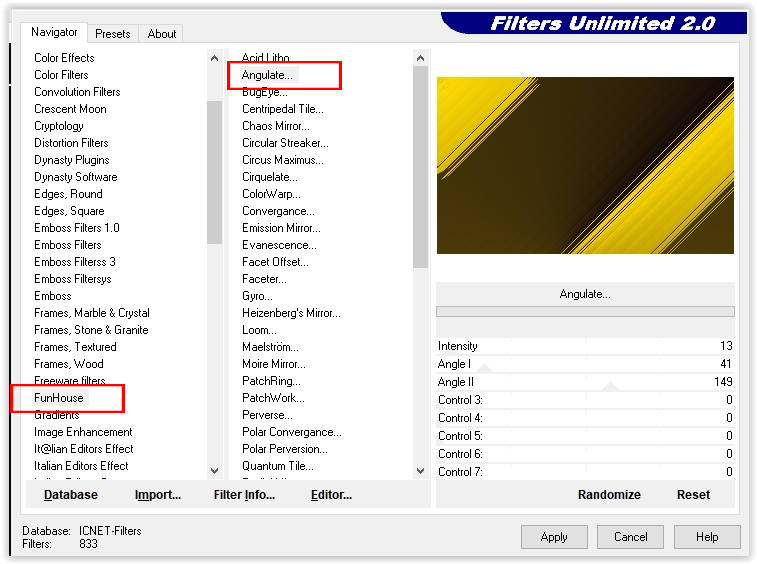
Effects – Filter Unlimited 2.0 – Funhouse – Angulate, Default
4
Effects – Edge Effects – Enhance
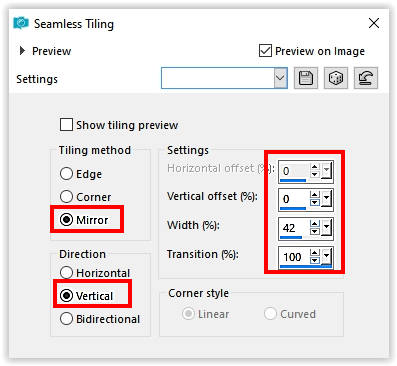
Effects – Image Effects – Seamless Tiling
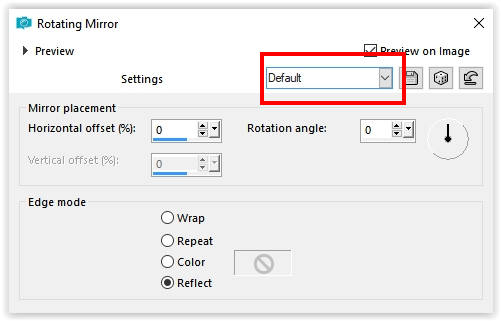
Effects – Reflection Effects – Rotating Mirror/Standard
5
Layers – New Raster Layer
Fill with the background color
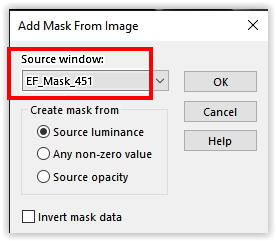
Layers – New Mask Layer – From Image – EF_Mask_451
Layers – Merge – Merge Group
Layers – Duplicate
Layers – Properties – Blend Mode Overlay
6
Open the tube Deco1_SourTimes_EF – Copy – Paste as new layer
7
Selections – Load/save selection – Load selection from disk.
Load the Sourtimes selection
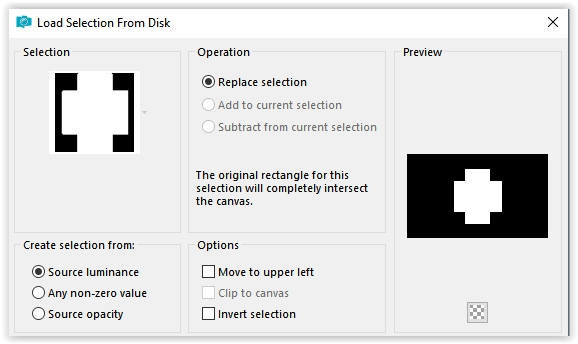
Press Delete on the keyboard
Selections – Hold
8
Open the tube mentali-femme477 – Copy – Paste as new layer.
Place the tube in the selection
Selections – Invert
Press Delete on the keyboard
Selections – Invert
9
Layers – New Raster Layer
Fill the selection with the color #ffffff
Selections – Modify – Contract 4 pixels
Press Delete on the keyboard
Selections – Select none
Layers – merge – merge down
10
Layers – Duplicate
Activate the lower of these two layers
Effects – Image Effects – Seamless Tiling
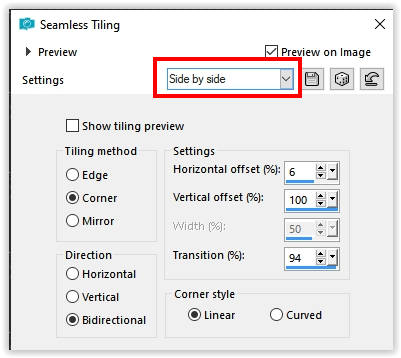
11
Layer palette – Activate the top layer
Open the tube texto-1 – Copy – Paste as new layer
Place at the top right
12
Open the tube Texto-2 – Copy – Paste as new layer
Place the text of your choice
Effects – 3D Effects – Drop Shadow – Color #110609
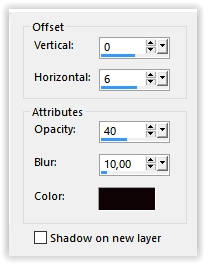
13
Image – Add Borders – Symmetric
1 pixel color #110609
10 pixels color # ffffff
1 pixel color #110609
10 pixels color # ffffff
1 pixel color #110609
40 pixels color #ffffff
14
Open again the tube mentali-femme477 – Copy – Paste as new layer.
Image – Resize – Change with 85% – all layers not checked
Move to the left
15
Effects – Filter Alien Skin Eye Candy 5 Impact – Perspective Shadow / Drop Shadow Blurry
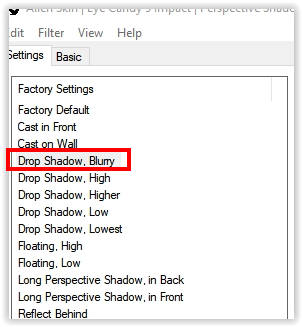
16
Sign your work
Image – Add Borders – Symmetric
1 pixel color #110609
Image – Resize – Resize the width to 1000 pixels
Save as Jpeg
We are done with Estela’s tutorial
The translation has been tested by Marianne.
Marianne thank you very much
© Translation DesignPSP KeetjeDesign


