Orbit
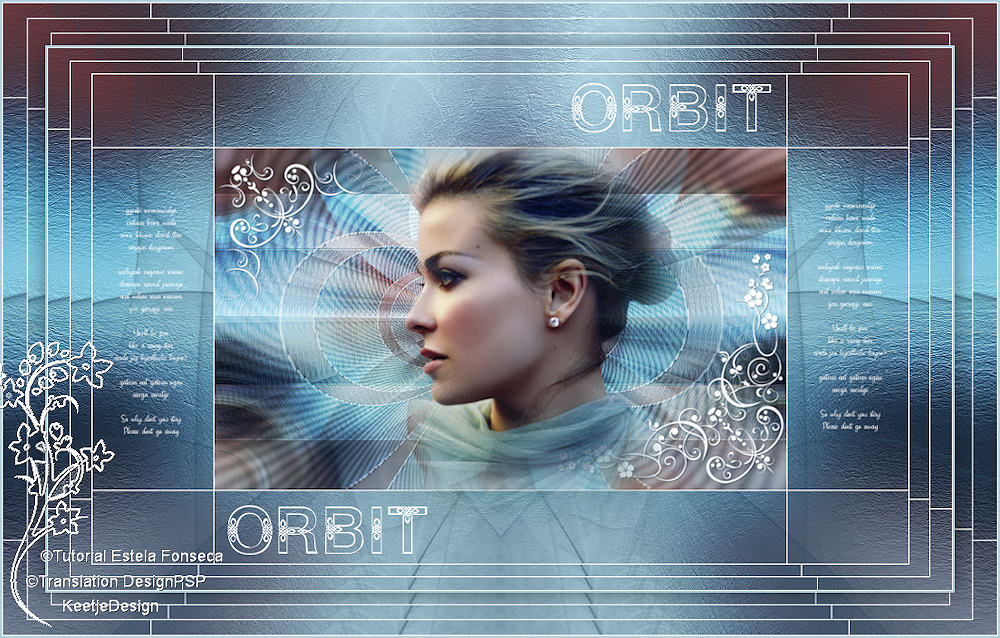
Original tutorial Here
This tutorial is written by Estela Fonseca the © is from her.
It is not allowed to copy, link and / or place these or parts of it without her permission.
The © ️ of the materials wich are used is for the rightful owner.
If you want to use this tutorial on your own forum, club or group, you have to request permission from the writer herself.
We have permission to translate Estela Fonseca’s tutorials into English.
Thank you Estela for the permission to translate your tutorials.
Temos permissão para traduzir os tutoriais da Estela Fonseca para o inglês.
Obrigado Estela pela tradução dos tutriais.
Materials Used:
Plugins Used:
Texture – Tiles a GoGo
VM Extravaganza – Shoutin’!
Simple – Blintz
Simple – Left Right Wrap
Toadies – What Are You?
Carolaine and Sensibility – CS-DLines
Flaming Pear – Flexify 2
FM Tile Tools – Blend Emboss
Italian Editors – Effetto Fantasma
Oliver’s Filters – Toile d’Araignée

The translation was made with PSP 2020 , but can also be done with other versions.
Note : When working with your own colors , play with the Blend Mode and/or Opacity at your own discretion
1
Open EF_Alpha_Orbit – Window – Duplicate or use Shift+D
Close the original we work on the copy
This layer is not empty but contains the selections in the alpha channel
Fill in color 2
2
Selections – Select all
Open the tube 1632-luzcristina – Edit – Copy – Paste into selection
Selections – Select none
3
Adjust – Blur – Radial Blur
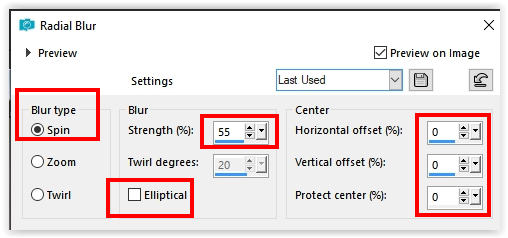
Effects – Edge Effects – Enhance More
Effects – Image Effects – Seamless Loop
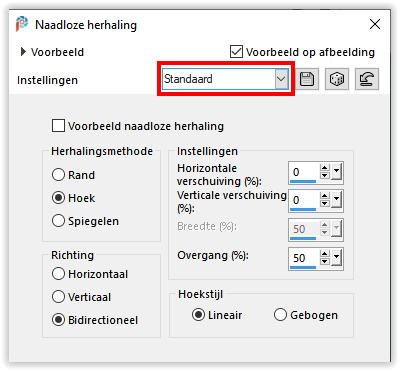
4
Layers – Duplicate
Effects – Reflection Effects – Kaleidoscope
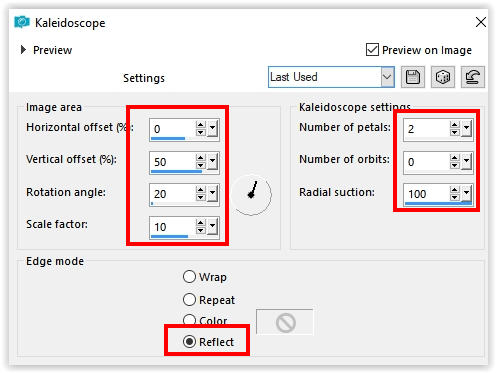
Layers – Properties – Blend Mode Hard Light / Layer Opacity 44
Layers – merge – merge down
5
Layers – Duplicate
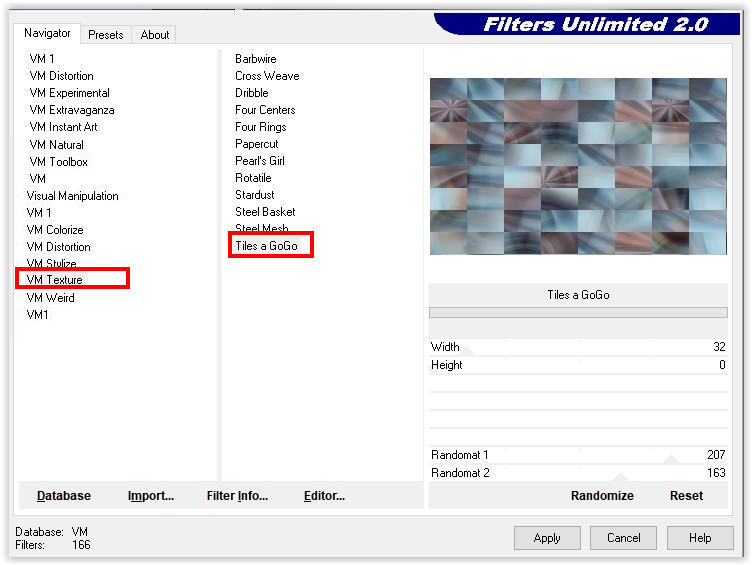
Effects – Filter Unlimited 2.0 – VM Texture Tiles a GoGo
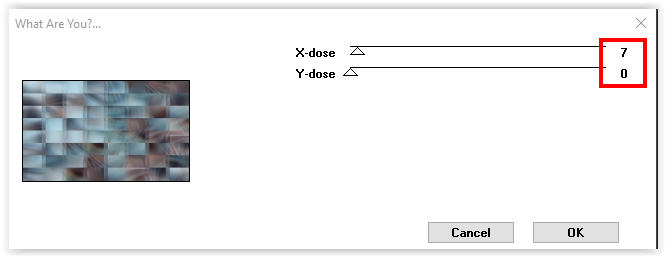
Effects – Filter Toadies – Who Are You???
6
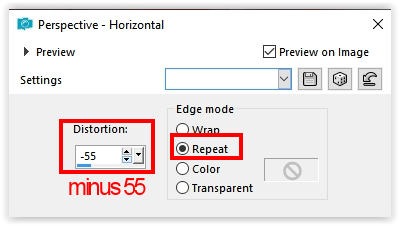
Effects – Geometric Effects – Perspective Horizontal
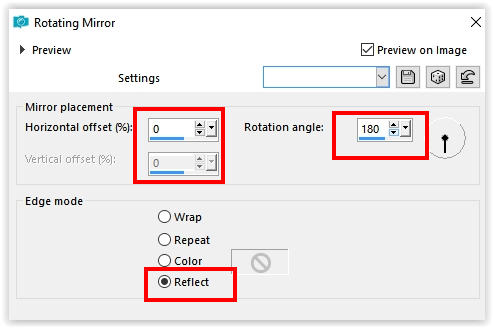
Effects – Reflection Effects – Rotating Mirror
7
Effects – Filter Unlimited 2.0 – VM Extravaganza – Shoutin’!
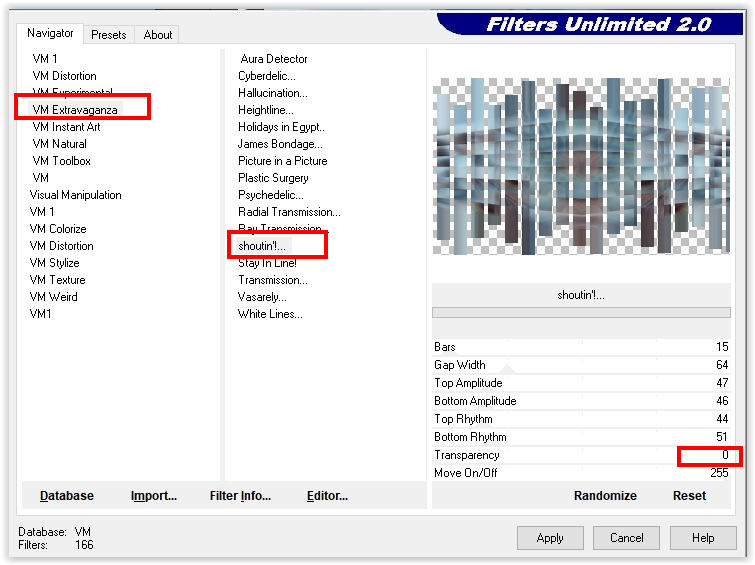
Effects – Edge Effects – Erode
8
Effects – Filter Unlimited 2.0 – Simple – Blintz
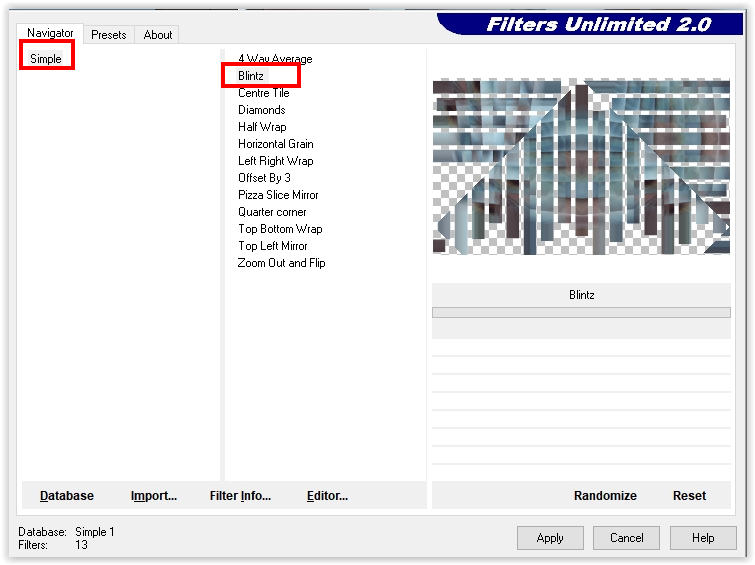
Effects – Reflection effects – Rotating mirror – Setting is right
9
Selections – Load/Save Selection – Load Selection from Alpha Channel: Selection #1
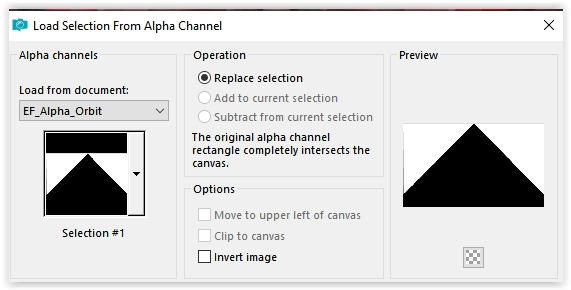
Press Delete on the keyboard
Selections – Select none
10
Effects – Filter Unlimited 2.0 – Simple – Left Right Wrap
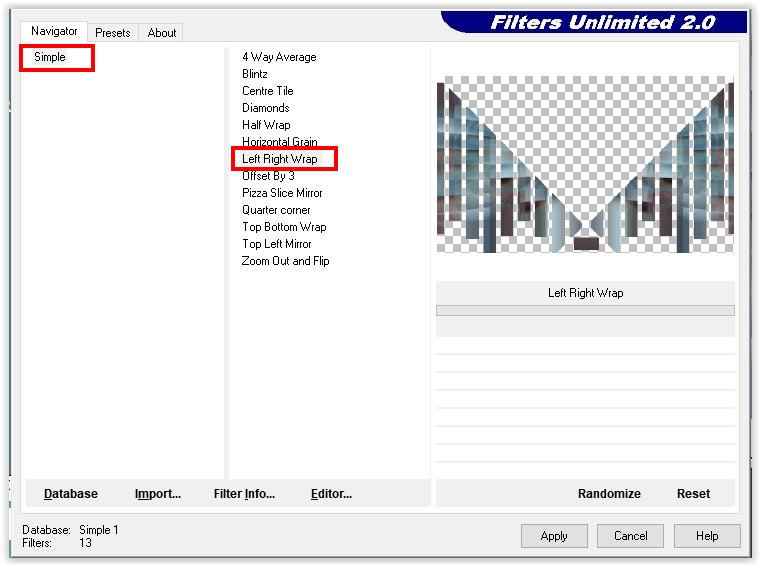
Effects – Filter Carolaine and Sensibility – CS-DLines
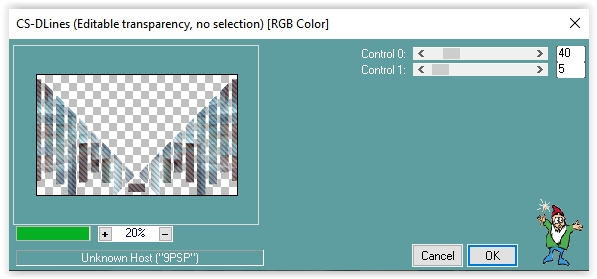
11
Effects – Filter Flaming Pear – Flexify 2
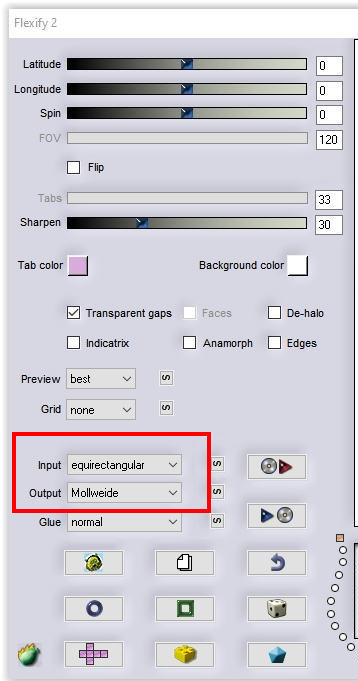
Effects Filter Flaming Pear – Flexify 2
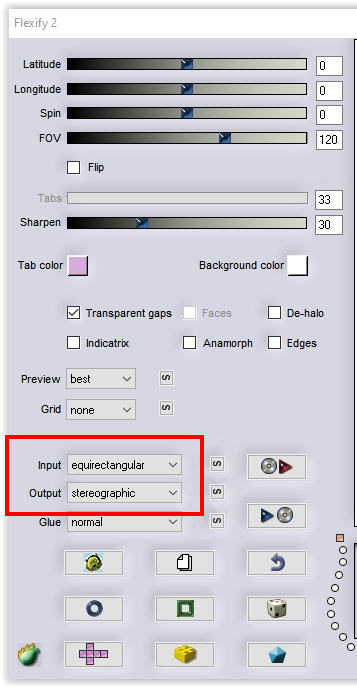
12
Effects – Filter FM Tile Tools – Blend Emboss
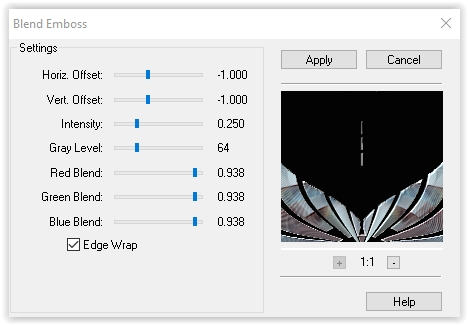
Layers – Properties Blend Mode Overlay
Layers – Merge – Merge Visible
13
Selections – Load/Save Selection – Load Selection from Alpha Channel: Selection # 2
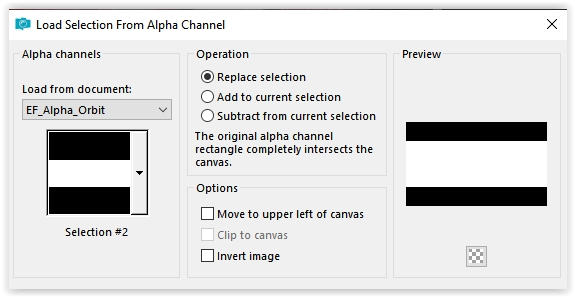
Selections – Layer selection
Adjust – Blur – Gaussian Blur / Range 55
Selections – Select none
14
Effects – Filter It @ lian Editors – Effetto Fantasma
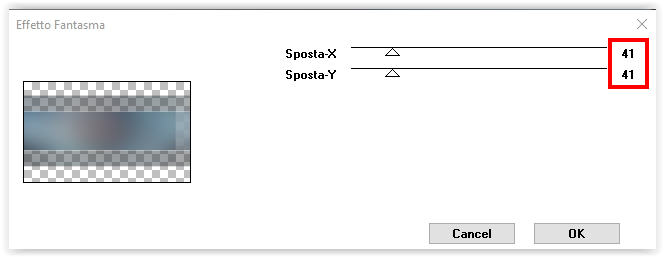
Effects – Reflection Effects – Rotating Mirror / Setting is right
Effects – Edge Effects – Enhance More
15
Effects – Filter Unlimited 2.0 – Olivers Filters – Toile d’Araignée
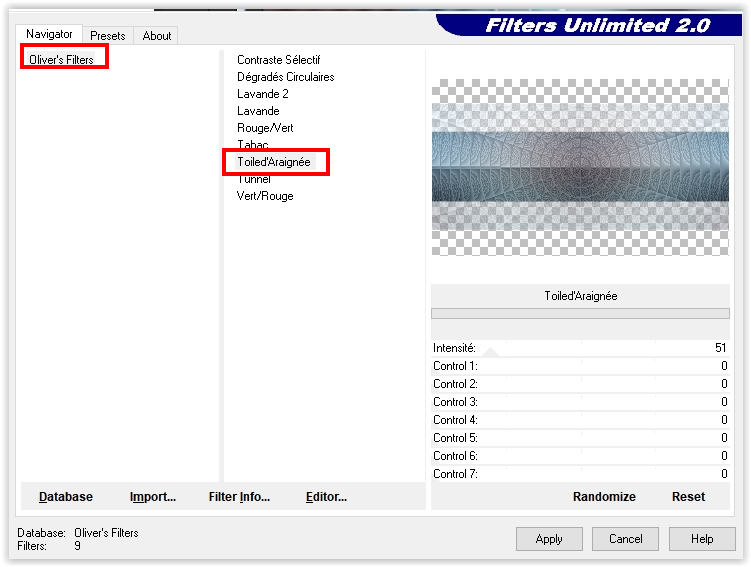
Layers – Properties – Blend Mode Overlay
Layers – merge – merge down
16
Layers – Duplicate
Image – Resize – Resize by 70% – All layers unchecked
Adjust – Sharpness – Sharpen
17
Layer palette – Activate the bottom layer
Adjust – Blur – Gaussian Blur / Range 55
Layers – Duplicate
Image – Mirror Horizontal
Layers – Properties – Blend Mode Hard Light
Layers – merge – merge down
18
Effects – Art Effects – Brush Strokes
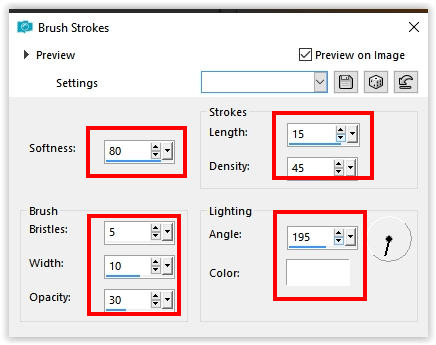
19
Open the tube EF_Orbit_Deco1 – Copy – Paste as new layer
When using custom colors, adjust the color with color changer tool in color 1
20
Layer palette – Activate the top layer
Open the tube EF_Orbit_Deco2 – Copy – Paste as new layer
21
Open the tube EF_Orbit_Deco3 – Copy – Paste as new layer
Effects – 3D Effects – Drop Shadow / Color 1

22
Open the tube 1632-luzcristina again – Copy – Paste as new layer
Image – Resize – Resize by 95% – all layers unchecked
Activate Selection tool (K) Position horizontal: 314 / Position vertical: 59

Type M to close the tool
23
Open the tube EF_Orbit_Texto1 – Copy – Paste as new layer
Layers – Merge – Merge Visible
24
Layers – Duplicate
Image – Resize – Resize by 95% – All layers unchecked
Layers – Duplicate
Image – Resize – Resize by 95% – All layers unchecked
25
Image – Add Borders – Symmetric
2 pixels color 2
Edit – Copy
26
Selections – Select all
Image – Add Borders – Symmetric
50 pixels color 4
27
Selections – Invert
Edit – Paste into Selection
Selections – Invert
Effects -3D Effects – Drop Shadow / Color # 000000
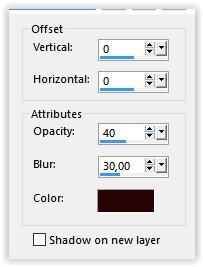
Selections – Select none
28
Open the tube EF_Orbit_Texto2 – Copy – Paste as new layer
Sign your work
Layers – Merge – Merge all layers
Image – Resize – Change to 1000 pixels width
Save as Jpeg
We are done with Estela’s tutorial
The translation has been tested by Marianne.
Marianne thank you very much
© Translation DesignPSP KeetjeDesign 04-06-2021


