

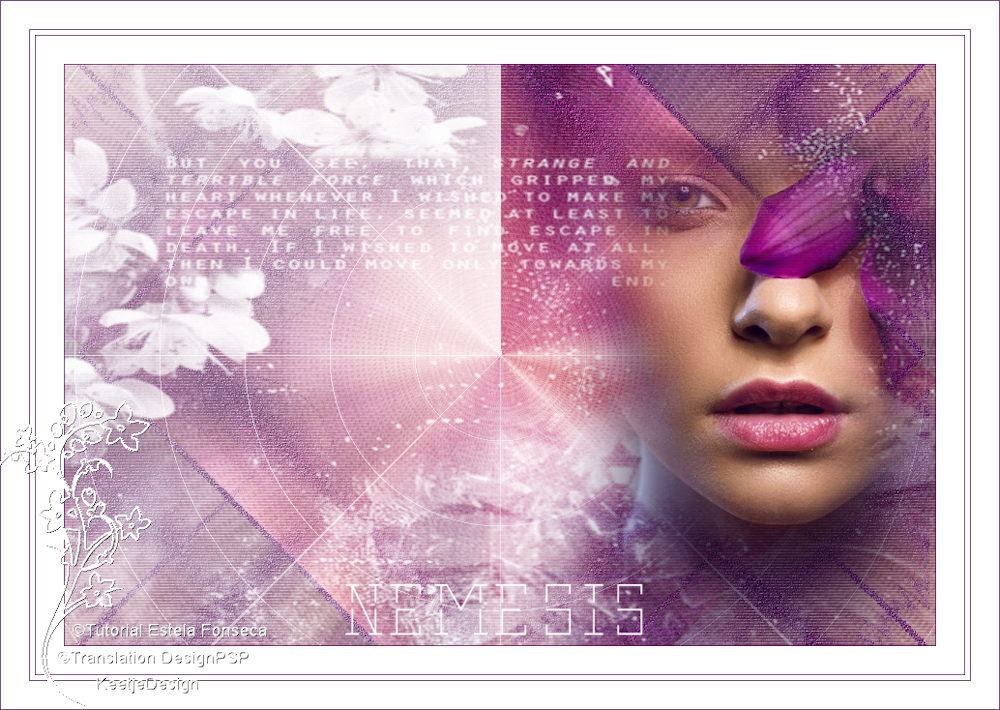
Nemesis

Original tutorial Here
This tutorial is written by Estela Fonseca the © is from her.
It is not allowed to copy, link and / or place these or parts of it without her permission.
The © ️ of the materials wich are used is for the rightful owner.
If you want to use this tutorial on your own forum, club or group, you have to request permission from the writer herself.
We have permission to translate Estela Fonseca’s tutorials into English.
Thank you Estela for the permission to translate your tutorials.
Temos permissão para traduzir os tutoriais da Estela Fonseca para o inglês.
Obrigado Estela pela tradução dos tutriais.
Her site
Materials Used: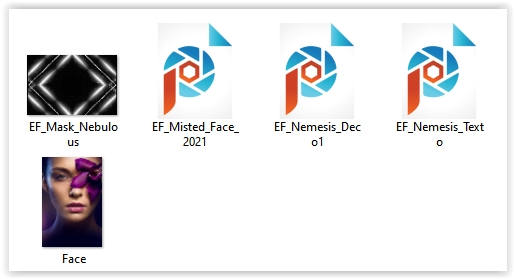
Open these materials in PSP / Duplicate with Shift + D / Close the originals/Minimize Mask
Plugins Used:
Filters Unlimited 2.0 – Andrew’s Filters 33 – Textured Circle
FM Tile Tools – Saturation Emboss
AP 01 [Inovations] – Lines SilverLining (nieuwere versies AP [Lines]-Lins SilverLining)
VanDerLee – UnpluggedX – Radar
The translation was made with PSP 2020 , but can also be done with other versions.
Note : When working with your own colors , play with the Blend Mode and/or Opacity at your own discretion
1
Materials palette Foreground color # 6e3a6d / Background color # ffffff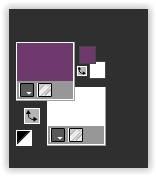
Open a new transparent image 900 x 600 pixels.
Selections – Select all
Note: If you only works with a tube, then fill the transparent layer with a color,
before pasting the tube into the selection
2
Open the image Face – Copy – Paste into selection
Selections – Select none
3.
Effects – Image Effects – Seamless Tiling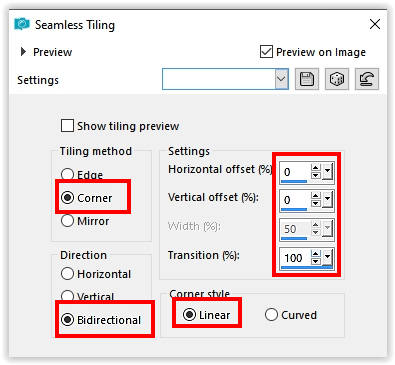
Adjust – Blur – Radial Blur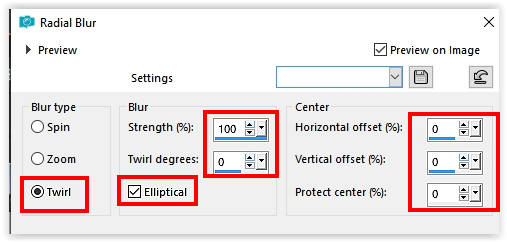
4
Layers – Duplicate.
Image – Invert (Flip vertically)
Layers – Properties – Blend Mode Bleach (adjust this to your colors)
Layers – merge – merge down
5
Layers – Duplicate
Effects – Filter Andrew’s Filter 33 – Textured Circles …Default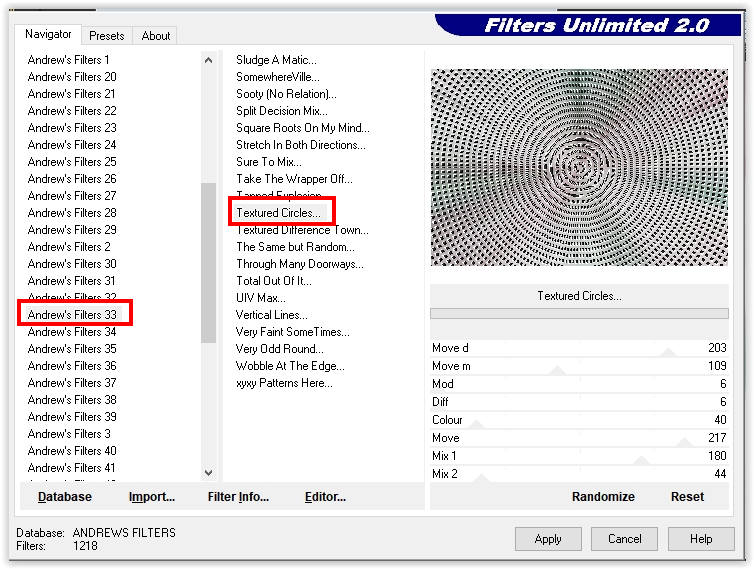
Layers – Properties – Blend Mode Soft Light / Opacity 40
Layers – merge – merge down
6
Layers – New Raster Layer
Fill with foreground color #6e3a6d
Layers – New Mask Layer – From Image: EF_Mask_Nebulous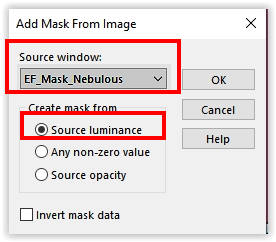
Layers – Merge – Merge Group.
7
Layers – Duplicate
Effects – Image Effects – Seamless Tiling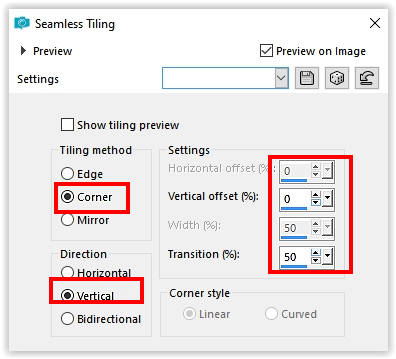
8
Layers – merge – merge down
Adjust – Add/Remove Noise – Add Noise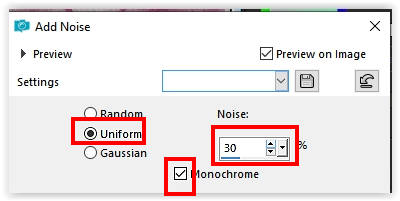
9
Effects – Filter FM Tile Tools – Emboss Saturation default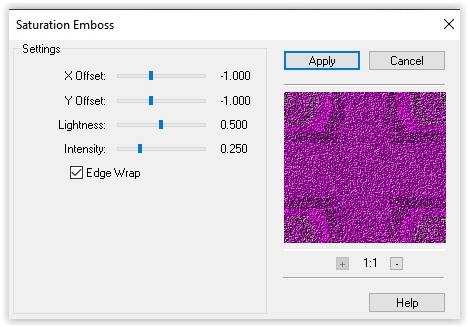
Layers – Duplicate
Adjust – Blur – Gaussian Blur / Range 35
10
Effects – Filter AP 01 [Innovations] – Lines SilverLining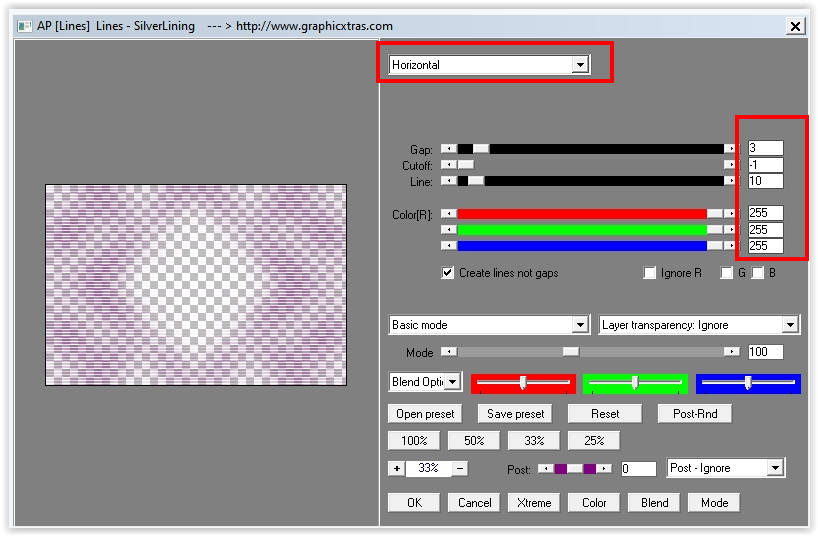
Layers – Properties – Blend Mode Multiply
Layers – Merge – Merge Visible
11
Layers – Duplicate
Image – Resize – Resize with 75% – All layers unchecked.
Effects – Image Effects – Seamless Tiling
12
Image – Free Rotate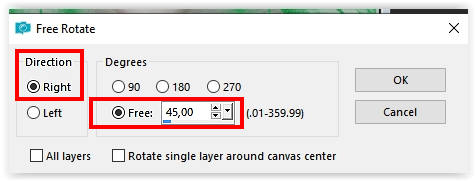
Layers – Properties – Blend Mode Overlay
13
Open the tube EF_Nemesis_Deco1 – Copy – Paste as new layer
Layers – Merge – Merge Visible
Effects – Filters VanDerLee – Unplugged-X Radar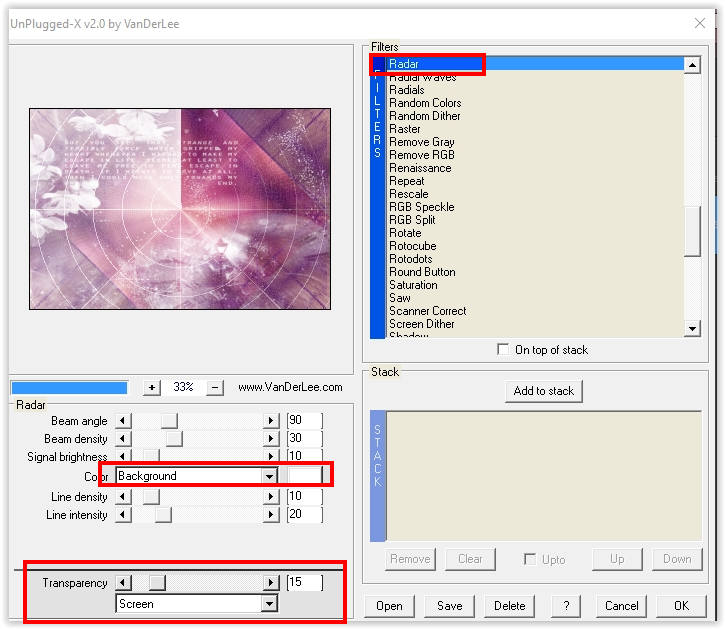
14
Open the tube EF_Misted_Face_2021 – Copy – Paste as new layer
Image – Resize – Resize by 80% – all layers unchecked
Move to the right
15
Layers – Merge – Merge all layers
Image – Add Borders – Symmetric
1 pixel color # 840b6c
29 pixels color #ffffff
1 pixel color # 840b6c
5 pixels color #ffffff
1 pixel color # 840b6c
29 pixels color #ffffff
1 pixel color # 840b6c
16
Open the tube EF_Nemesis_Texto – Copy – Paste as new layer
Layers – Merge – Merge All
Image – Resize – Resize the width to 1000 pixels
Save as Jpeg
Sign your work
Merge All
Save as Jpeg.
The translation has been tested by Marianne.
Marianne thank you very much
© Translation DesignPSP KeetjeDesign 22-06-2021