

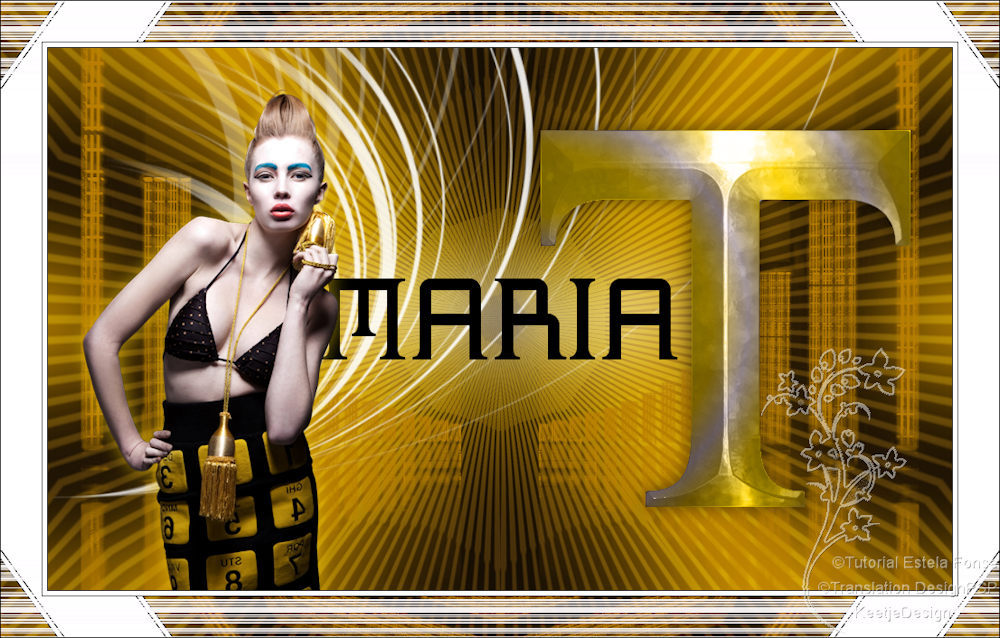
Maria T

Original tutorial Here
This tutorial is written by Estela Fonseca the © is from her.
It is not allowed to copy, link and / or place these or parts of it without her permission.
The © ️ of the materials wich are used is for the rightful owner.
If you want to use this tutorial on your own forum, club or group, you have to request permission from the writer herself.
We have permission to translate Estela Fonseca’s tutorials into English.
Thank you Estela for the permission to translate your tutorials.
Estela Fonseca
https://estela-fonseca.com/
Used for the tutorial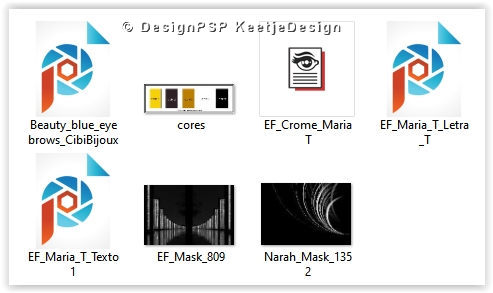
Open the material in PSP/Duplicate with Shift+D/Close the originals/Minimize masks
Filters:
Tramages – Tee Wee
Flaming Pear – Flexify 2
Alien Skin Eye Candy 5 Impact – Chrome
VM Extravaganza – Stay in Line!
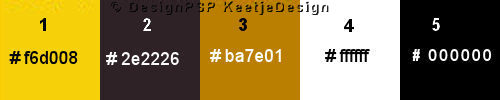
The tutorial is written with these colors and the supplied materials.
If you use your own materials, colors or another version of PSP
you may have to play around with the Blend Mode and/or Layer Opacity.
1
Materials palette – Foreground color 1 / Background color 2
Create a gradient Sunburst in the foreground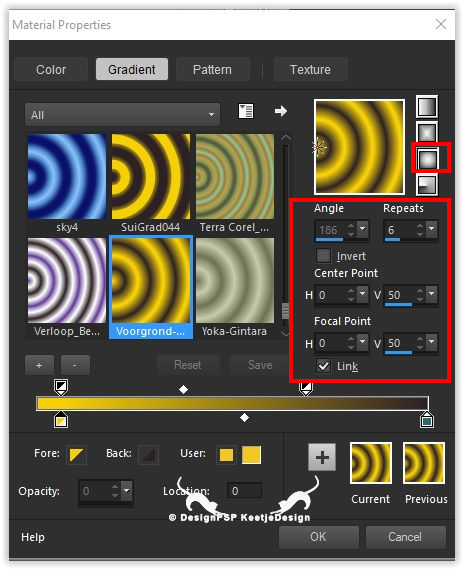
Open a new transparent image 1000 x 600 pixels
Fill with the gradient
2
Effects – Reflection Effects -Rotating Mirror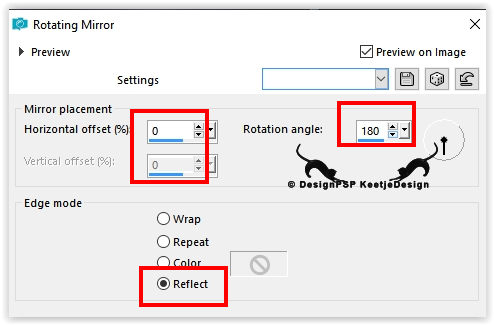
Adjust – Blur – Gaussian Blur / Range 50
3
Layers – Duplicate
Effects – Plugin Tramages – Tee Wee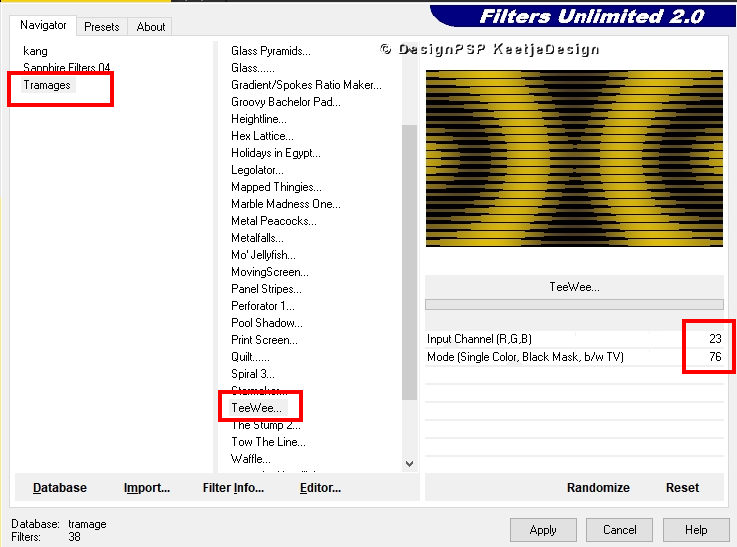
Effects – Plugin Flaming Pear – Flexify 2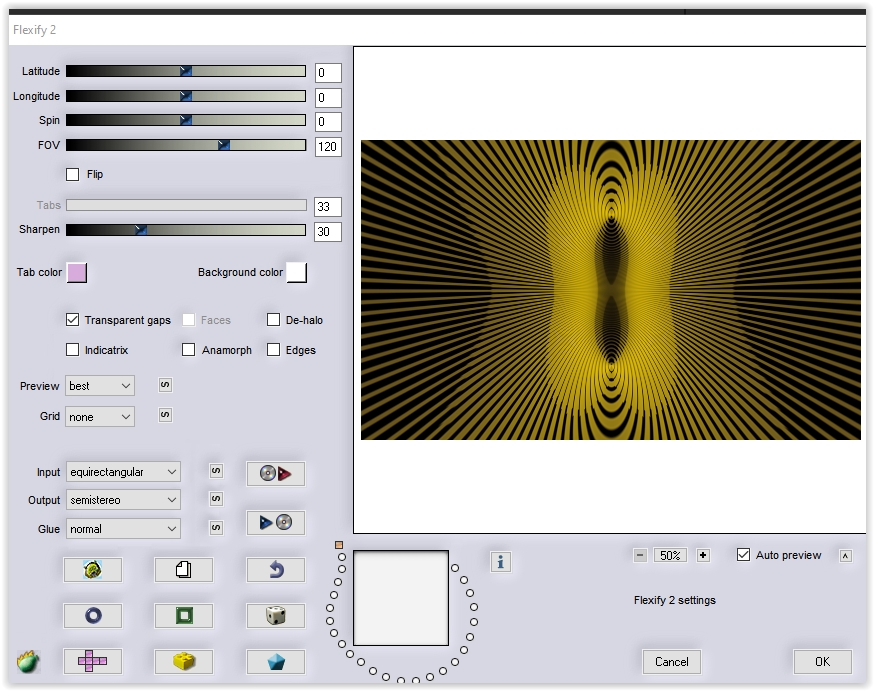
4
Effects – Reflection Effects – Kaleidoscope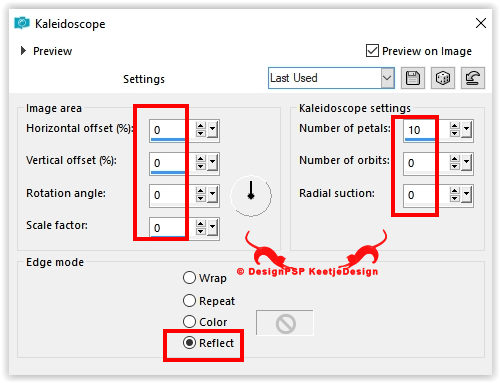
Layers – Properties – Blend Mode Soft Light
Layers – merge – merge down
5
Materials palette – Foreground color 3
Layers – New Raster Layer
Fill with color 3
Layers – New Mask Layer – From Image: EF_Mask_809 Mask
Layers – Merge – Merge Group
Note: If the result is too light
Layers – Duplicate
Layers – Properties – Blend Mode Hard Light
6
Open the tube EF_Maria_T_Texto1 – Copy – Paste as new layer
Looks good
Effects – 3D Effects – Drop Shadow Color 4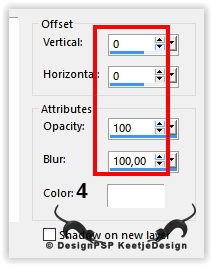
7
Open the tube EF_Maria_T_Letra_T – Copy – Paste as new layer
Effects – Image Effects – Offset / 250 / 0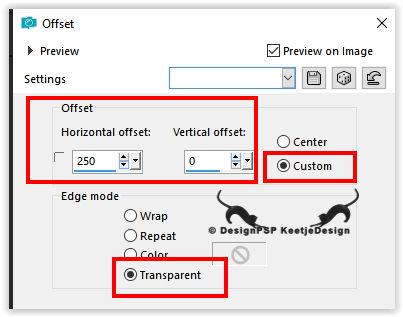
8
Materials palette – Foreground color 1 / Background color 2
Create the gradient Sunburst from point 1 in the Foreground
Activate the Magic Wand tool
Click in the letter T
Fill with the gradient
Selections – Select none
9
Layers – Duplicate
Effects – Plugin Alien Skin Eye Candy 5 Impact – Chrome – Preset EF_Chrome_MariaT
Or do the setting manually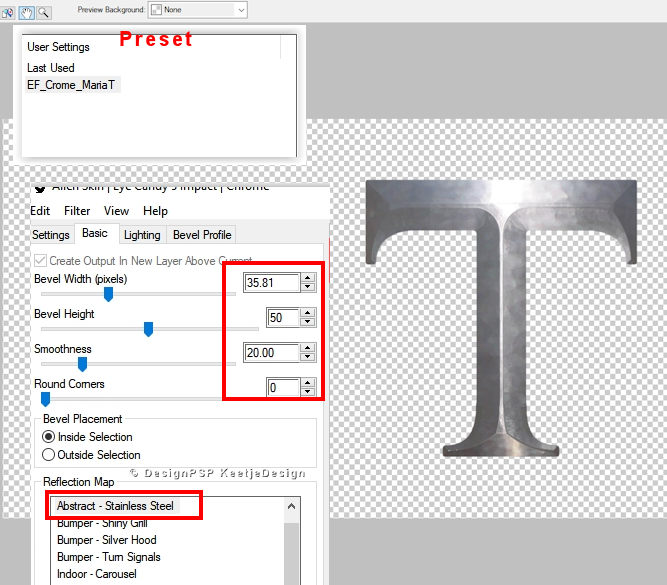
Layers – Properties – Blend Mode Luminance (Legacy)
Layers – merge – merge down
Effects – 3D Effects – Drop Shadow / 0 / 0 / 50 / 30 / Color # 000000.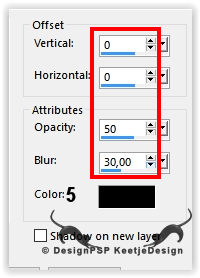
10
Materials palette – Foreground color 4
Layers – New Raster Layer
Fill with color 4
Layers – New Mask Layer – From Image: Narah_Mask_1352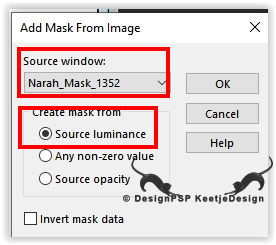
Image – Mirror (horizontal the mask)
Layers – Merge – Merge Group
Layers – Arrange – 2x Down
11
Layer palette – Activate the top layer
Open the tube Beauty_blue_eyebrows_CibiBijoux – Copy – Paste as new layer
Image – Resize – Resize by 75% – All layers unchecked
Adjust – Sharpness – Sharpen
Image – Flip (horizontal)
Effects – Image Effects – Offset / Minus 320 / Minus 23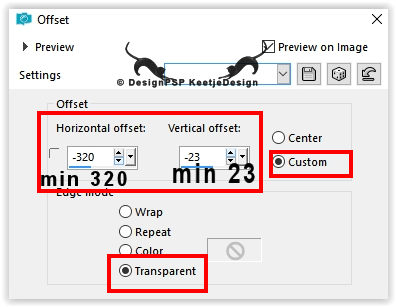
Effects – 3D Effects – Drop Shadow / 0 / 0 / 60 / 30 / Color 1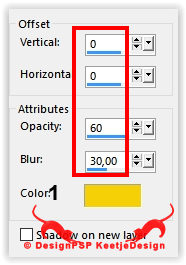
12
Image – Add Borders – Symmetric
1 pixel color 5
5 pixels color 4
1 pixel color 5
13
Selections – Select all
Image – Add Borders – Symmetric
45 pixels color 4
Selections – Invert
14
Effects – Reflection Effects Kaleidoscope
Effects – Plugin VM Extravaganza – Stay in Line ! / 2x with the default setting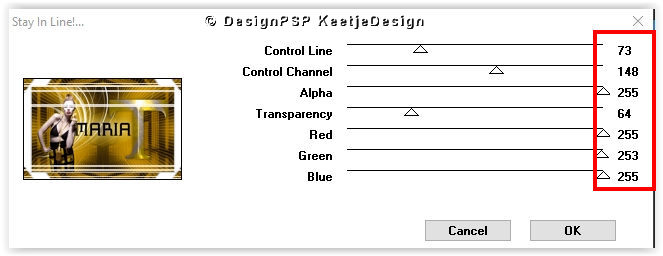
Selections – Select none
15
Sign your work
Image – Add Borders – Symmetric
1 pixel color 5
Image – Resize – Resize the width to 1000 pixels
Save as Jpeg
We are done with Estela’s tutorial
This translation has been tested by Marianne
Marianne thank you / Tube
©Translation DesignPSP KeetjeDesign 22-08-2021