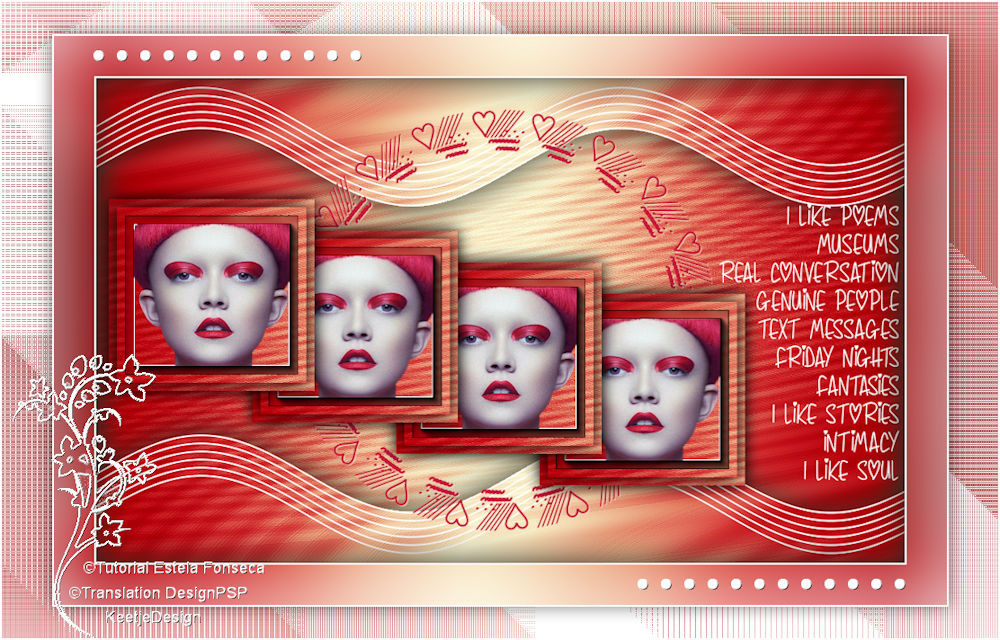
Malva
Original tutorial Here
This tutorial is written by Estela Fonseca the © is from her.
It is not allowed to copy, link and / or place these or parts of it without her permission.
The © ️ of the materials wich are used is for the rightful owner.
If you want to use this tutorial on your own forum, club or group, you have to request permission from the writer herself.
We have permission to translate Estela Fonseca’s tutorials into English.
Thank you Estela for the permission to translate your tutorials.
Temos permissão para traduzir os tutoriais da Estela Fonseca para o inglês.
Obrigado Estela pela tradução dos tutriais.
Materials Used:
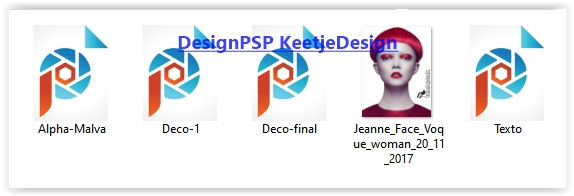
Plugins Used:
Unlimited 2.0 – Filter Gallery E – Splash 2
Unlimited 2.0 – Filter Gallery E – Holycow
AAA Frames – Foto Frame
Mura’s Meister – Copies
Unlimited 2.0 – FunHouse – Loom
The translation was made with PSP 2020 , but can also be done with other versions.
Note : When working with your own colors , play with the Blend Mode and/or Opacity at your own discretion
1
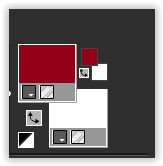
Material palette – Foreground color # 940118 / Background color # e4dcb5
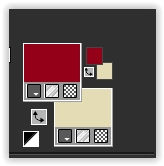
Create the gradient Linear in the Foreground,
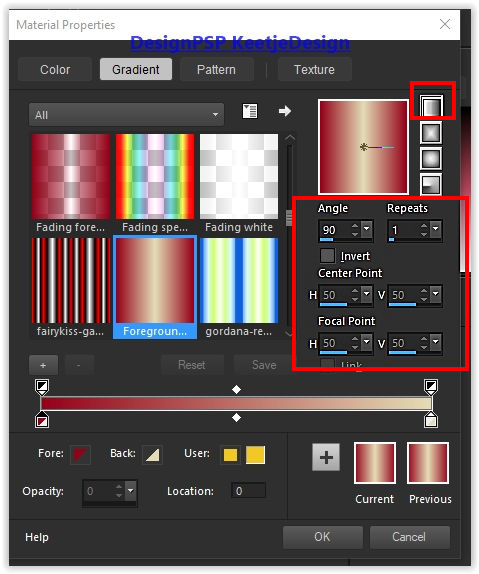
2
Open Alpha-Malva – Window – Duplicate (or use Shift + D) – Close the original we are working on the copy
Fill with the gradient
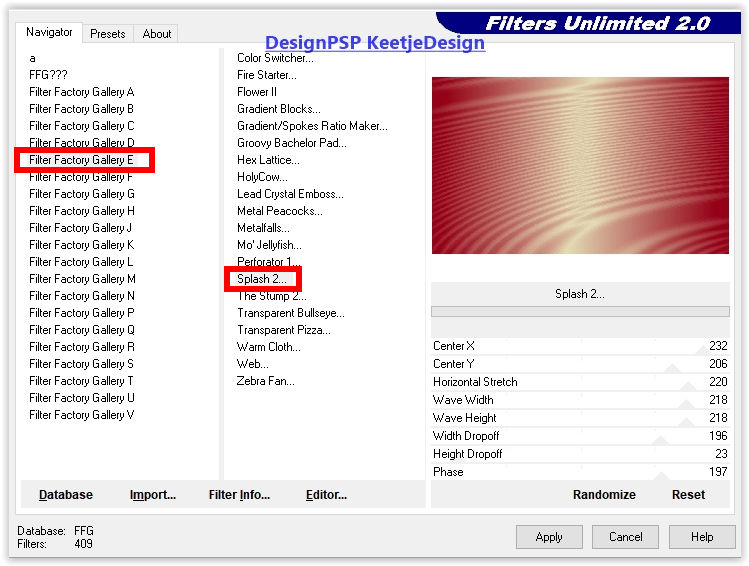
Effects – Plugin Unlimited 2.0 – Filter Factory Gallery E – Splash 2 / Default
3
Effects – Edge Effects – Enhance
Layers – Duplicate
Image – Mirror (horizontal)
Image – Flip (flip vertically)
Layers – Properties – Blend mode Hard light
Layers – merge – merge down
4
Material palette – Background color # ffffff
Layers – New raster layer
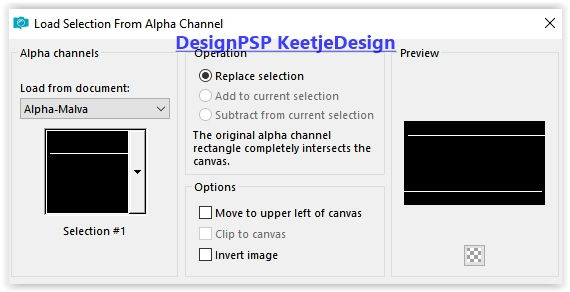
Selections – Load / Save – Load selection from alpha channel: Selection # 1
Fill with the color # ffffff
Selections – Select none
5
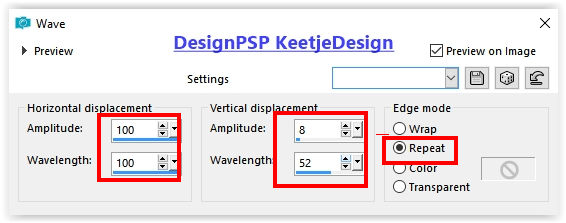
Effects – Distortion Effects – Wave
Activate Magic wand tool – Select the middle of this layer
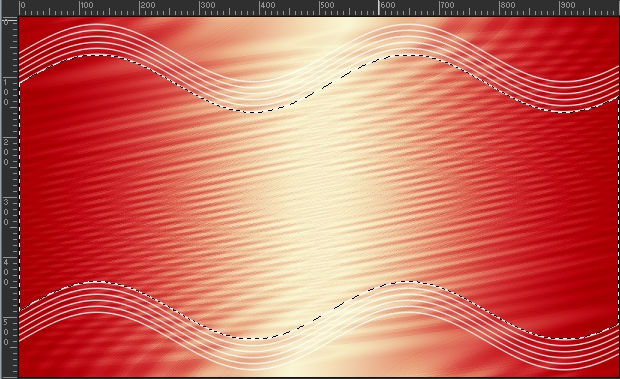
Effects – 3D Effects – Cutout
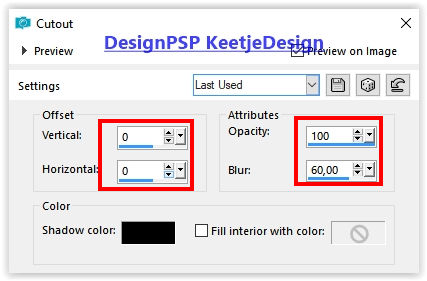
Selections – Select none
6
Selections – Load / Save – Load selection from alpha channel: Selection # 2
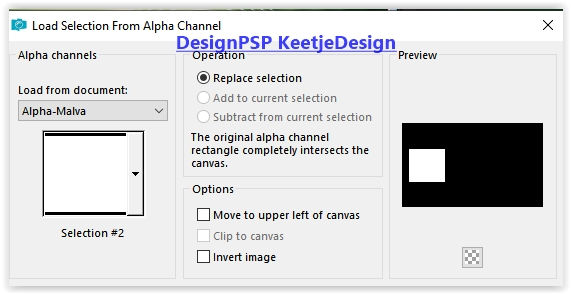
Layer palette – Activate the bottom layer
Selections – Promote selection to layer
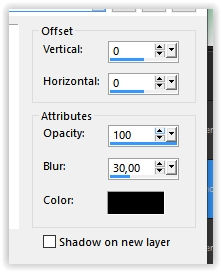
Effects – 3D Effects – Drop Shadow / 0/0/100/30 / # 000000
7
Selections – Modify – Contract 10 pixels
Effects – 3D Effects – Drop Shadow / 0/0/100/30 / # 000000
Selections – Modify – Contract 10 pixels
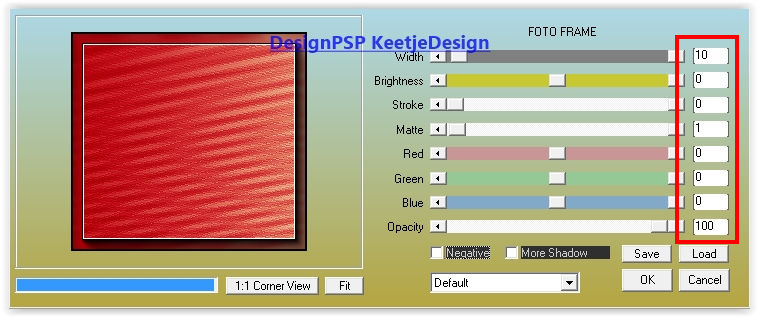
Effects – Plugin AAA Frames – Foto Frame
8
Selections – Modify – Contract 11 pixels
Open the tube Jeanne_Face_Voque_woman_20_11_2017 – Remove the watermark
Copy – Paste as a new layer
Image – Resize – Change with 50% – Uncheck all layers
Place the tube in the selection – See example

9
Selections – Invert
Press Delete on the keyboard
Selections – Select none
Adjust – Sharpness – Sharpen
Layers – merge – merge down
10
Effects – Plugins Mura’s Meister – Copies
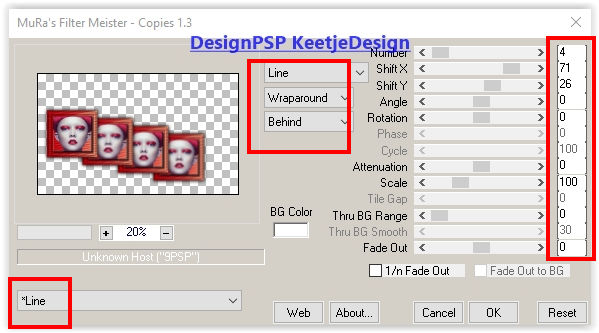
Activate Selection tool (K) / Position X minus 6 / Position Y 128

Layers – Arrange – Bring to Top
11
Open the tube Deco-1 – Copy – Paste as new layer
Layers – Arrange – Move down
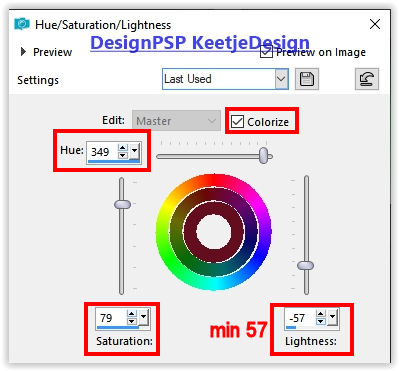
Adjust – Hue and Saturation – Hue / Saturation / Brightness
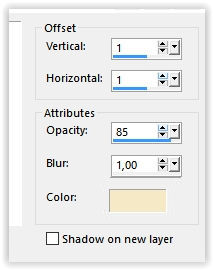
Effects – 3D Effects – Drop Shadow / 1/1/85/1 / # f6e9c6
12
Layer palette – Activate the top layer
Open the tube Texto – Copy – Paste as new layer
Place on the right – See example crea
13
Image – Add Borders – Symmetric
2 pixels color # ffffff
Edit – Copy
14
Selections – Select all
Image – Add borders symmetric
50 pixels of a color that is not in your work
Selections – Invert
Edit – Paste into selection
Adjust – Blur – Gaussian Blur / Range 40
Selections – Invert
15
Selections – Modify – Contract 2 pixels
Effects – 3D Effects – Cutout

Selections – Select none
Image – Add Borders – Symmetric
2 pixels color # ffffff
16
Layers – Duplicate
Image – Resize – Change with 90% – Uncheck all layers
17
Layer palette – Activate the bottom layer
Adjust – Blur – Gaussian Blur / Range 40
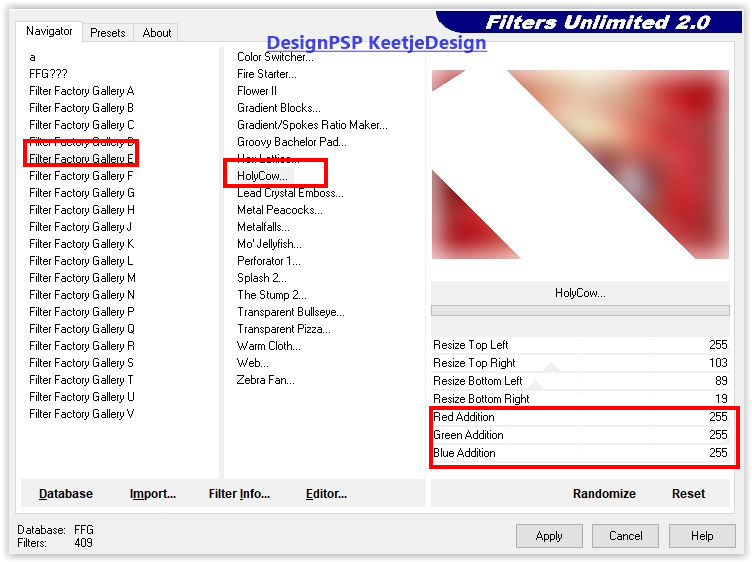
Effceten – Plugin Unlimited 2.0 – Filter Gallery E – Holycow
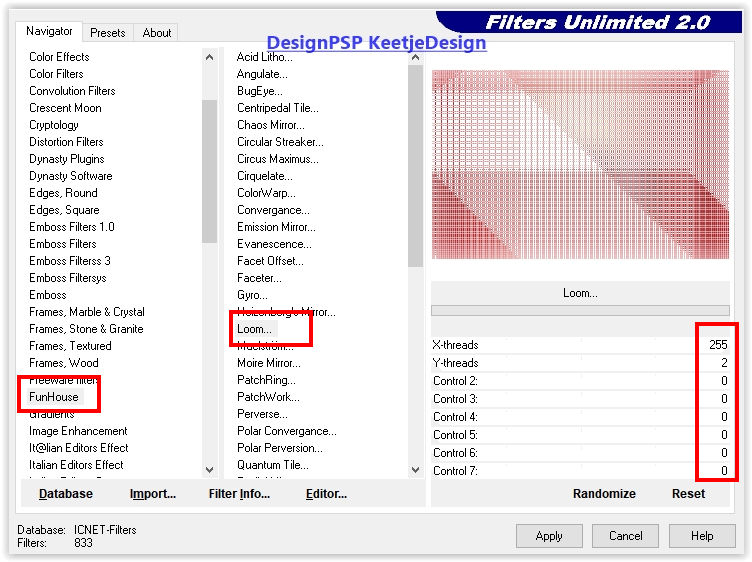
Effects – Plugin Unlimited 2.0 – FunHouse – Loom
18
Layer palette – Activate the top layer
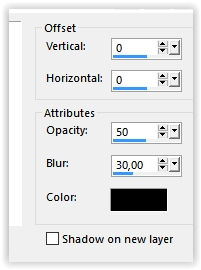
Effects – 3D Effects – Drop Shadow / 0/0/50/30 / # 000000
19
Open the tube Deco-final – Copy – Paste as new layer
Do not move
20
Sign your work
Image – Add Borders – Symmetric
2 pixels color # ffffff
Image – Resize – Change to 1000 pixels width
Save as Jpeg
We have finished the tutorial from Estela
This translation has been tested by Marianne.
Marianne thank you
© Translation DesignPSP KeetjeDesign 15-03-2021


