

Lavender
This tutorial was devised and written by Karin 01/11/2020, the © is mine.
It is not allowed to copy, link and / or place these or parts thereof on any blog or website without my permission.
The tutorial was written with PSP X9 but can also be made with other versions.
If it resembles any other lesson, it is merely a coincidence.
The © of the materials used belong to the rightful owner and the original tubers.
Tubes from Animabelle and Azalee
Masks of Narah
Filters:
Two Moon / Wish it Would Rain
Mehdi / Sorting Tiles
AP 01 Innovations / Silverlining
AAA Frames / Photo Frame
DSB Flux / Linear Transmission
Bkg Designers sf10 IV / Instant Tile
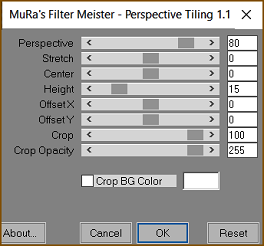
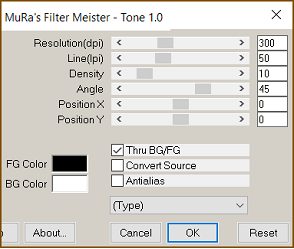
Mura Meister / Perspective Tiling and Tone
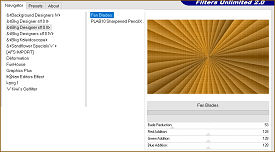
Bkg Designers sf 10 II / Fan Blades

The tutorial is written with these Colors and Materials
Background Color #4d5d46 / Foreground Color
#d0bd93.
If you use the own Colors and / or Materials, you may have to play with Blend Mode and / or Opacity.
Open the material in PSP / Duplicate with Shift + D / Minimize mask / Close the Originals.
Save the attached Selections in the Selections folder of Corel PSP
1. I used a Background Color #4d5d46 / Foreground Color
#d0bd93
Set the Foreground Color to Linear Gradient / 35 / 4 (Invert Checked)
2. Open a New Image 900 × 550
Flood Fill with the Gradient.
Effects / Plugins / Two Moon / Wish it Would Rain
Setting 69 / 243 / 64 (default)
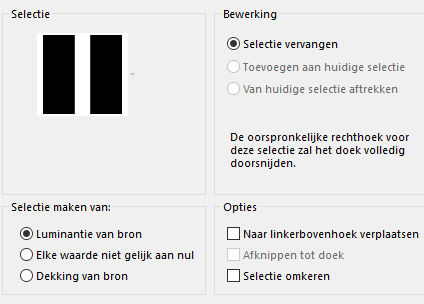
3. Selections / Load/Save Selection / Load Selection from Disk / Lavendeldk1
Layers / New Raster Layer.
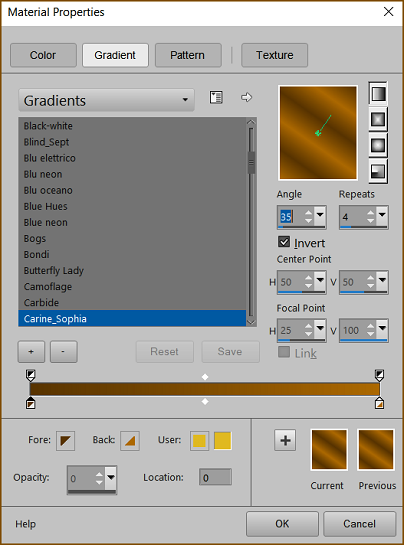
Materials Palette / Foreground / Sunburst Gradient (with the following settings). (Note the Focal Point Setting).
Flood Fill the Selection with this Gradient.
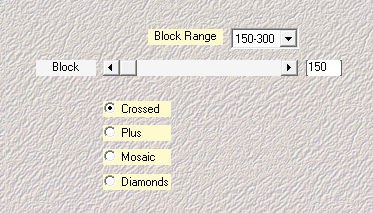
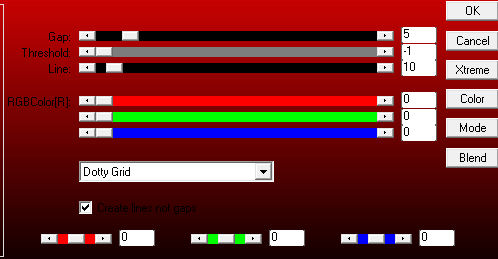
4. Effects / Plugins / Mehdi / Sorting Tiles (with the following settings).
Selections / Select None
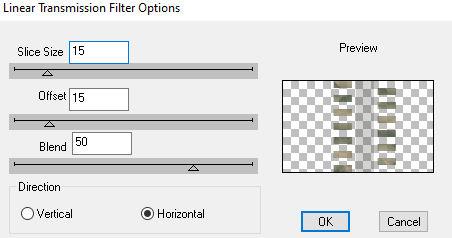
5. Effects / Plugins / DSB Flux / Linear Transmission (with the following settings).
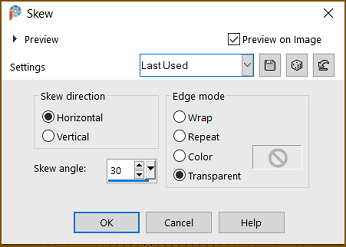
6. Effects / Geometric Effects / Skew (with the following settings).
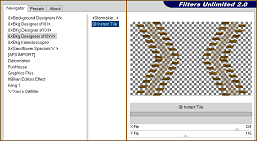
Effects / Plugins / Bkg Designers sf10 IV / Instant Tile
X/Flip on 224 and Y/Flip on 116
Effects / Edge Effects / Enhance
Effects / 3d Effects / Drop Shadow / 2 / 2 / 70 / 30 Black
7. Layers / Duplicate
Effects / Plugins / AP/01 Silverling (with the following setting).
8. Activate the Layer below.
Adjust / Blur / Gaussian Blur 20
Activate the Top Layer in the Layer Palette.
Layers / Merge / Merge Down.
9. Activate the Bottom Layer in the Layers Palette.
Layers / New Raster Layer
Fill with the Background Color.
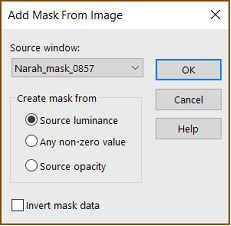
Open the Mask Narah 0857
Layers / New Mask Layer / From Image
Layers / Merge / Merge Group.
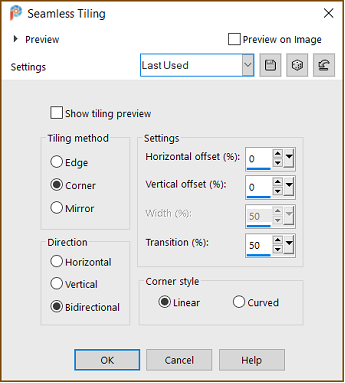
Effects / Image Effects / Seamless Tiling
10. Layers / Duplicate
Image / Mirror / Mirror Horizontal
Layers / Merge / Merge Down
Effects / Edge Effects / Enhance.
11. Activate the Bottom Layer.
Selections / Load/Save Selection / Load Selection from Disk / Lavendeldk2
Layers / New Raster Layer.
Open the nature tube from ANimabelle.
Activate the Selection Tool / Draw a rectangle around the tube.
Edit / Copy.
Edit / Paste into Selection.
Selections / Select None.
12. Layers / Duplicate
Image / Mirror / Mirror Horizontal
Layers / Merge / Merge Down
Layers / Properties
Blend Mode / Multiply / Opacity 80 (may differ with your own tube)
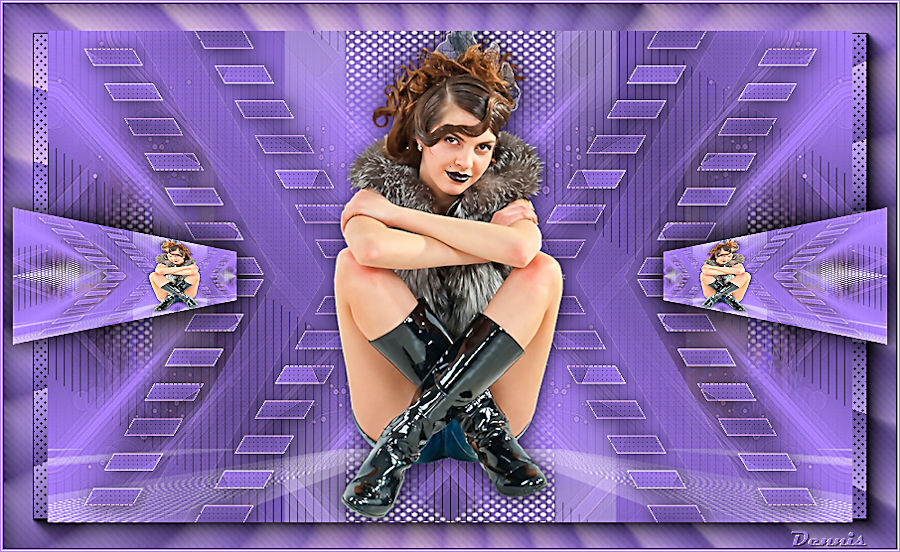
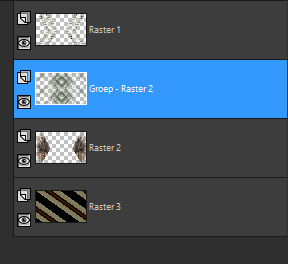
13. You now have this in the Layers Palette.
14. Select the second Layer from the top (like the example above).
Layers / New Raster Layer
Flood Fill with White.
Open the Mask Narah 0366
New Mask Layer / From Image
Mask Narah 0366. (Settings are still correct).
Layers / Merge / Merge Group.
15. Layers / Duplicate
Activate the Layer below.
Effects / Plugins / Mura Meister / Perspective Tiling
16. Activate the Layer above it again.
Effects / Image Effects / Seamless Tiling
Effects / Edge Effects / Enhance
17. Open the tube of Azalee/Fantistic/2 or your own tube.
Remove the watermark.
Activate the Top Layer in the Layer Palette.
Edit / Copy
Edit / Paste as a New Layer.
Image / Resize 63% (Resize all Layers unchecked).
18. Effects / 3d Effects / Drop Shadow / 2 / 2 / 70 / 30 Black
Adjust / Sharpness / Sharpen.
Layers / Merge / Merge Visible.
19. Layer / Duplicate.
Effects / Geometric Effects / Perspective Horizontal / -65 / Transparent

20. Image / Resize 25% (Resize all Layers not checked).
Slide to the right as in the example below.
21. Layers / Duplicate.
Image / Mirror / Mirror Horizontal.
Layers / Merge / Merge Down.
22. Effects / 3d Effects / Drop Shadow / 2 / 2 / 70 / 30 Black
Repeat the Drop Shadow with -2
Adjust / One Step Photo Fix
23. Activate the Bottom Layer.
Image / Resize 90% (Resize all Layers not checked).
24. Layers / New Raster Layer
Layers / Arrange / Move Down.
Activate the Bottom Layer.
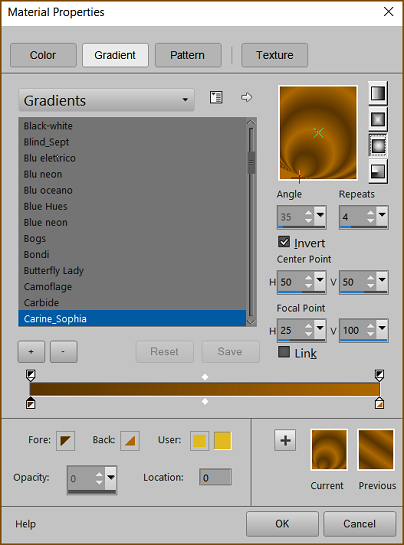
Flood Fill with the Radial Gradient (with the following setting).

25. Effects / Plugins / Mura Meister / Tone (with the following settings).
Effects / Plugins / Bkg Designer sf10 II / Fan Blades (default settings).
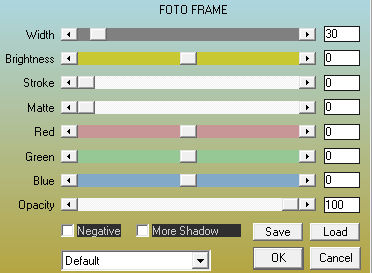
26. Effects / Plugins / AAA Frames / Photo Frame
27. Image / Add Borders / 1-pixel / Background Color (Symmetric Checked)
Image / Add Borders / 1-pixel White (Symmetric Checked)
Image / Add Borders / 1-pixel Background Color (Symmetric Checked)
This Lesson was written by © DesignKarin