China Girl
This tutorial was devised and written by Karin 04/01/2021, the © for translation is mine Dennis
It is not allowed to copy, link and / or place these or parts thereof without my permission
The tutorial is written with PSP 2019 (X9) but can also be made with other versions
If this lesson looks like any other lesson, it is purely coincidental
The © of the materials used is for the rightful owners and the tube makers
I thank the tube maker Animabelle for the tube
Open the material in PSP / Duplicate with Shift + D / Close the originals
Put the Selection in your PSP Selections Folder
———————-
Filters used:
Toadies / What Are You?
AP [LINES] / Lines SilverLining / Dotty Grid
AAA Frames / Photo Frame
MuRa’s Meister / Copies
MuRa’s Meister / Perspective Tiling
Flaming Pear / Flexify 2
Simple / 4 Way Average
Graphics Plus / Cross Shadow
———————-
The tutorial is written with these colors and materials
Color Palette

If you use your own colors and / or materials, you may have to play with Blend Mode and / or Opacity
Toadies / What Are You?
AP [LINES] / Lines SilverLining / Dotty Grid
AAA Frames / Photo Frame
MuRa’s Meister / Copies
MuRa’s Meister / Perspective Tiling
Flaming Pear / Flexify 2
Simple / 4 Way Average
Graphics Plus / Cross Shadow
———————-
Download your materials here:

Find a main tube of your own I used a tube from Fiodorova Maria
———————
Step 1
Open a New Transparent Image 700 x 500 pixels
In your Color Palette, set the Foreground color to Red and the Background color to Gray
Foreground / Radial Gradient (with the following settings)
 Flood Fill with the Gradient
Step 2
Image / Resize 50% resolution on Bicubic
Lock height / width ratio only checked
Objects / Align / Top
Objects Align / Left
Layers / Duplicate
Objects / Align / Bottom
Objects Align / Right
Layers / Merge / Merge Down
Step 3
Layers / Duplicate
Image / Mirror / Mirror Vertical
Layers / Merge / Merge Down
Step 4
Effects / Plugins / Simple / 4 Way Average
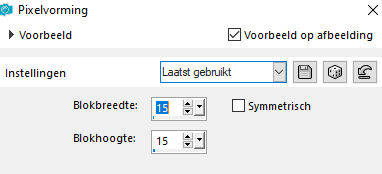
Effects / Distortion Effects / Pixelate (with the following settings)
Effects / Edge Effects / Enhance
Step 5
Layers / New Raster Layer
Flood Fill with Black
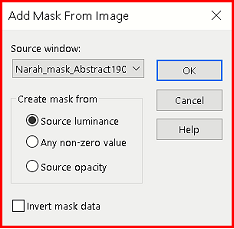
Layers / New Mask Layer from Image
Open the Mask “Narah mask Abstract 190 (with the following settings)
Duplicate the Mask Layer in the Layers Palette
Layers / Merge / Merge Group
Layers / Duplicate
Image / Mirror / Mirror Horizontal
Layers / Merge / Merge Down
Step 6
Layers / New Raster Layer
Flood Fill with White
Layers / New Mask Layer from Image
Open the mask “Narah masks 1614 (with the following settings)

Duplicate the Mask Layer in your Layer Palette
Layers / Merge / Merge Group
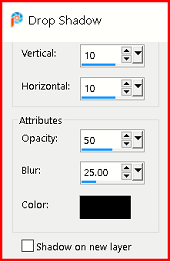
Effects / 3d Effects / Drop Shadow (with the following settings)
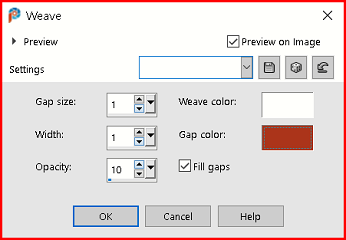
Effects / Texture Effects / Weave (with the following settings)
Step 7
Layers / New Raster Layer
Flood Fill with White
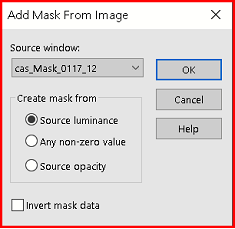
Layers / New Mask Layer / From Image
Open the mask “Cas mask 0117 12 (with the following settings)
Layers / Merge / Merge Group
Effects / Edge Effects / Enhance
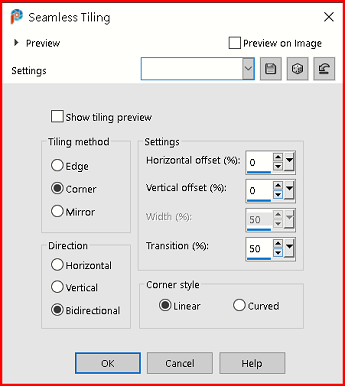
Effects / Image Effects / Seamless Tiling (with the following settings)
Step 8
Layers / New Raster Layer
Selections / Load/Save Selections / Load Selection from disk
Look for your Selection Chinasel1 and then the following institution:
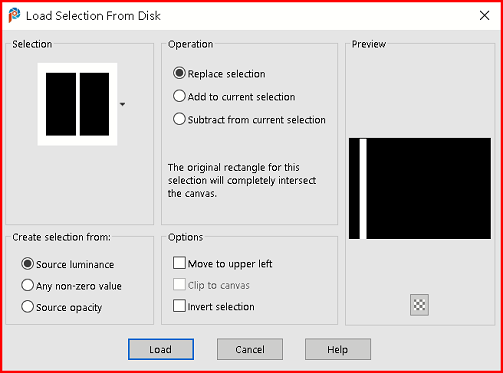
Fill the Selection with White
Selections / Select None
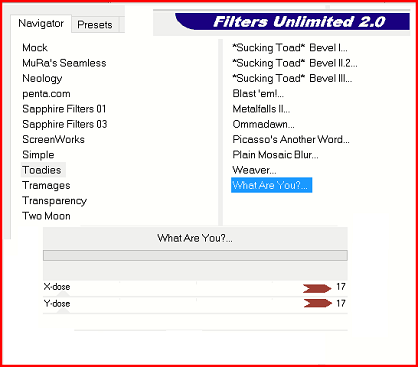
Effects / Plugins / Toadies / What are you? (with the following settings) 17 / 17
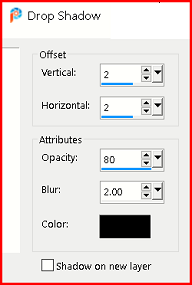
Effects / 3d Effects / Drop Shadow (with the following settings)
Effects / Edge Effects / Enhance
Layers / Duplicate
Image / Mirror / Mirror Horizontal
Effects / Edge Effects / Enhance
Layers / Merge / Merge Down
Step 9
Edit / Copy China girl button
Edit / Paste as a New Layer
Effects / Image Effects / Offset:
Horizontal on (minus) /305 and Vertical on 205, Custom and transparent checked
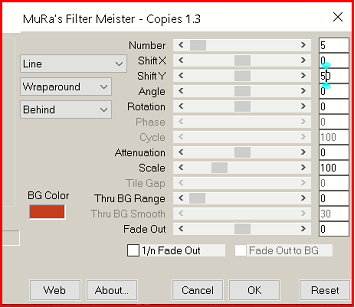
Effects / Plugins / MuRa’s Meister / Copies (with the following settings)
Layers / Duplicate
Image / Mirror / Mirror Horizontal
Image / Mirror / Mirror Vertical
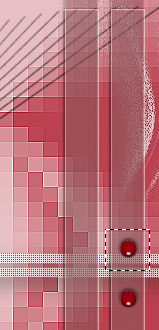
Select the top bubble and press delete
Select None
Layers / Merge / Merge Down
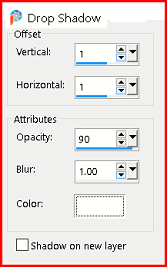
Effects / 3d Effects / Drop Shadow (with the following settings)
Step 10
Image / Add Borders / 2-pixels Black / Symmetric checked

Edit / Copy
Selections / Select all
Add Borders as follows:
Selections / Invert
Edit / Paste into Selection
Step 11
Effects / Plugins / Graphics Plus / Cross Shadow
The bottom 2 sliders on 128, all others on 50
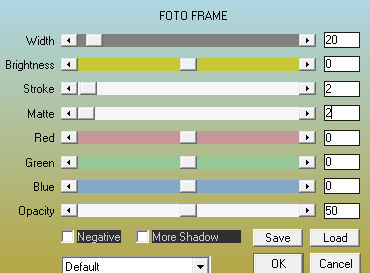
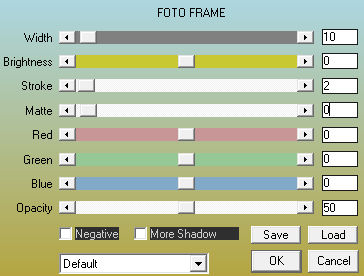
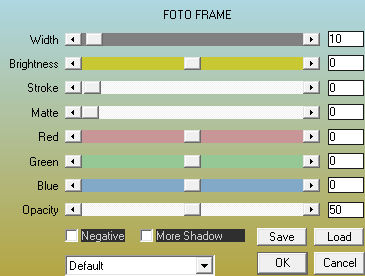
Effects / Plugins / AAA Frames / Photo Frame (with the following settings)
Effects / Stitch Filters / AAA Frames / Photo Frame (with the following settings)
 Select nothing
Step 12
Layers / Duplicate
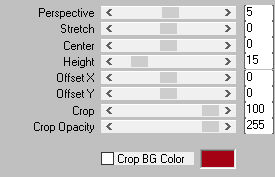
Effects / Plugins / Mura’s Meister / Perspective Tiling (with the following settings)
 Effects / Plugins / Flaming Pear / Flexify 2 (with the following settings)
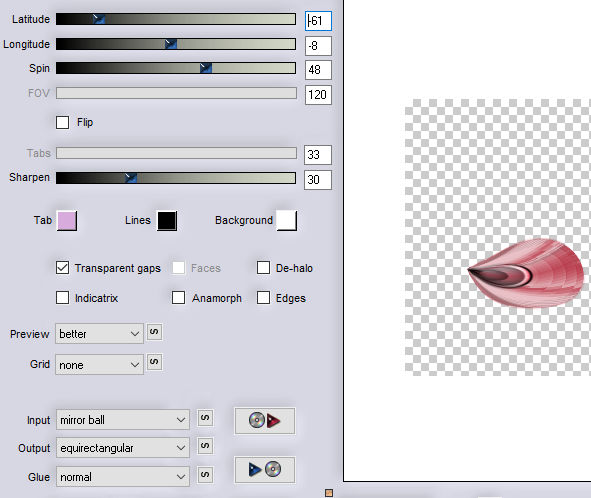
Image / Resize with 50%, only aspect ratio checked
Just leave it and do not move, we will come back to this in a minute
Step 13
Open the vase tube and remove the watermark
Image / Resize with 50%, only aspect ratio checked
Copy and paste as a New Layer
Effects / Image Effects / Offset:
Horizontal at (minus) / -180 and Vertical at -100, Custom and transparent checked
Effects / 3d Effects / Drop Shadow (with the following settings) color gray:
Step 14
Activate the middle Layer in your Layer Palette
(the one with the deco we created earlier)
Effects / Image Effects / Offset
Horizontal at (minus) -85 and Vertical at 20, Custom and transparent checked
Layers / Duplicate
Image / Free rotate / Left / 90
Image / Mirror / Mirror Vertical
Effects / Image Effects / Offset
Horizontal at (minus) -50 and Vertical at (minus) -90, Custom and transparent checked
Layers / Merge / Merge Down
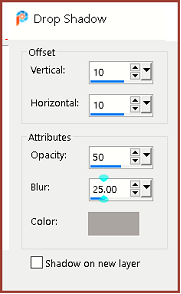
Drop Shadow / 10 / 10 / 50 / 25 Black
Step 15
Image / Add Borders / 2-pixels Black / Symmetric checked
Image / Add Borders / 2-pixels Foreground Color / Symmetric checked
Selections / Select All
Image / Add Borders / 25-pixels White / Symmetric checked
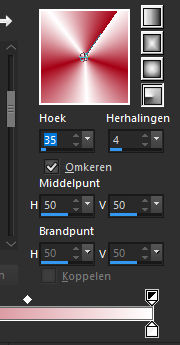
Selections Invert and fill with Foreground / Background Gradient
Radial / 35 / 4 / Invert Checked
Adjust / Blur / Gaussian Blur 20
Effects / Plugins / AAA Frames / Photo Frame (with the following settings)
Selections / Select None
Image / Add Borders / 25-pixels White / Symmetric checked
Image / Add Borders / 2-pixels Black / Symmetric checked
Image / Add Borders / 2-pixels Foreground Color / Symmetric checked
Image / Add Borders / 2-pixels Black / Symmetric checked
Step 16
Copy your own main tube
Edit / Paste as a New Layer
If necessary, adjust the size and move where you like it best
Possibly Drop Shadow to enhance the difference in tubes
Copy attached text
Edit / Paste as a New Layer
Place it at the Bottom Left
Give another Drop Shadow:
Place your watermark and save as JPG
My version