

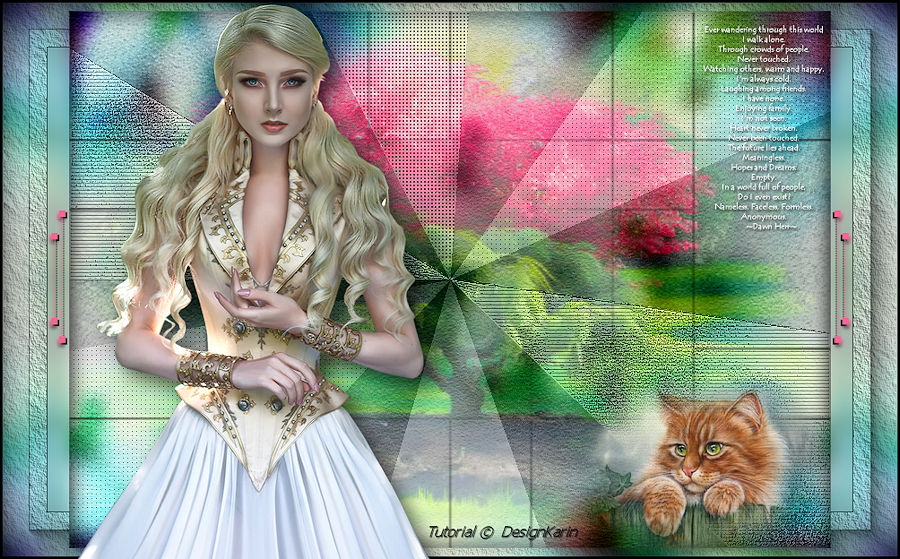
Cat Woman
This tutorial was devised and written by Karin 10/01/2021, the © for the translation is mine Dennis.
It is not allowed to copy, link and / or place these or parts thereof without my permission.
The tutorial is written with PSP19 (X9) but can also be made with other versions.
If this lesson looks like any other lesson, it is purely coincidental.
The © of the materials used is for the rightful owners and the tube makers.
I want to thank the creators of the tubes Csilla and Suzi Sgai
The mask belongs to Narah.
I found the background, lines, and cat on the internet. If you are the owner, please let me know.
Open the material in PSP / Duplicate with Shift + D / Close the originals.
Put the selection in your PSP folder / Selections.
———–
Filters used:
Texture / Texturizer
Visman Extravaganza / Ray Transmission
AP [Lines] – Lines SilverLining
Simple / 4way Average
AAA Frames / Texture Frame
AAA Frames / Photo Frame
———
The tutorial is written with these colors and materials.
If you use your own colors and / or materials, you may have to play with Blend Mode and / or Opacity.
———
Download your materials here:

———
Step 1
Open a New Transparent Image 850 x 600
Selections / Select All
Step 2
Copy the attached flower background
Edit / Paste into Selection
Selections / Select None
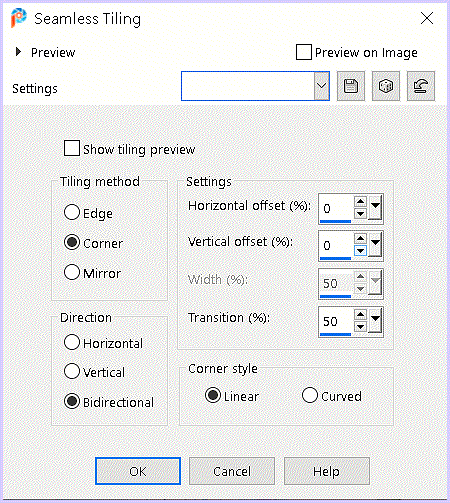
Effects / Image Effects / Seamless Tiling
(with the following settings)
Adjust / Blur / Gaussian Blur10
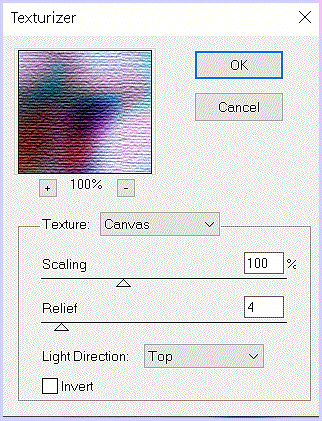
Effects / Plugins / Texture / Texturizer
(with the following settings)
Step 3
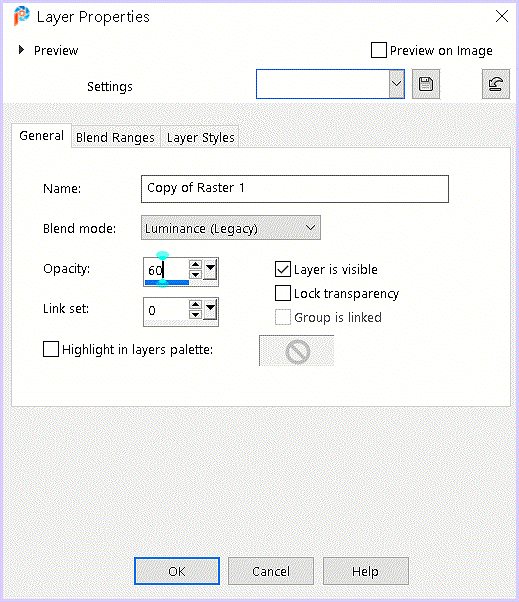
Layers / Duplicate
Effects / Plugins / Visman / Extravaganza / Ray Transmission
![]()
Layers / Properties / Blend Mode Luminance Legacy / Opacity 60
Step 4
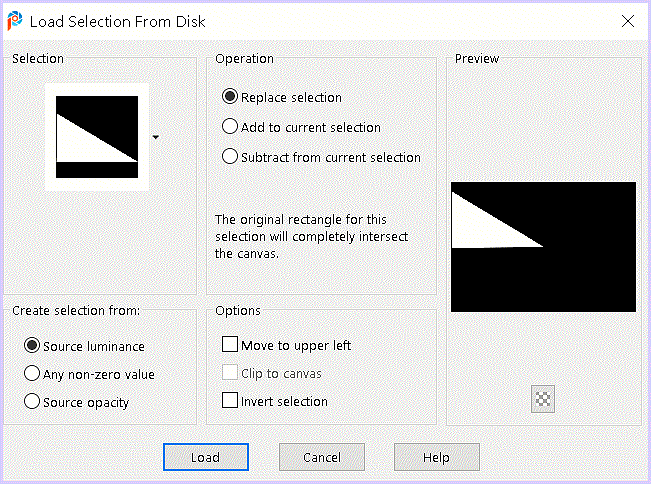
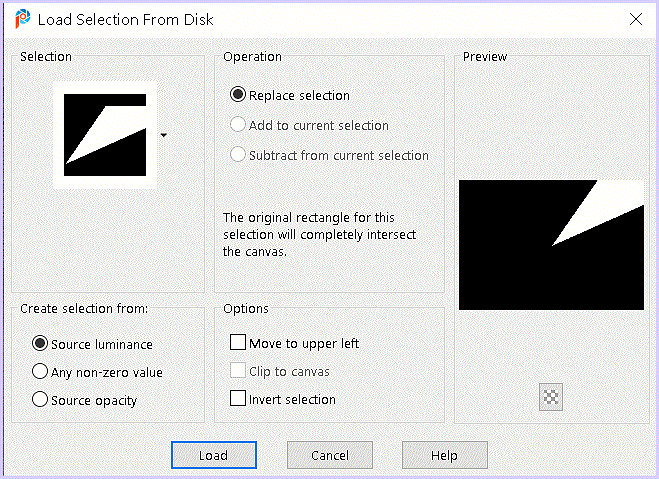
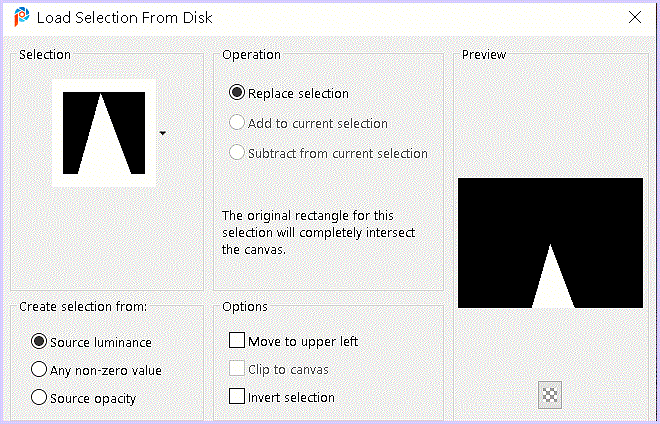
Selections / Load/Save Selection / Load Selection from Disk / CWDKsel1
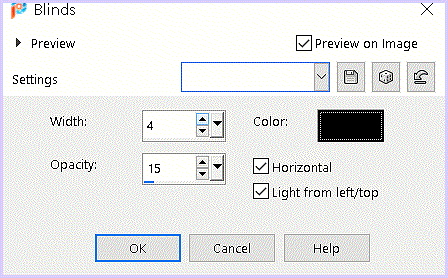
Effects / Texture Effects / Blinds (with the following settings)
Effects / Edge Effects / Enhance More
Selections / Select None
Step 5
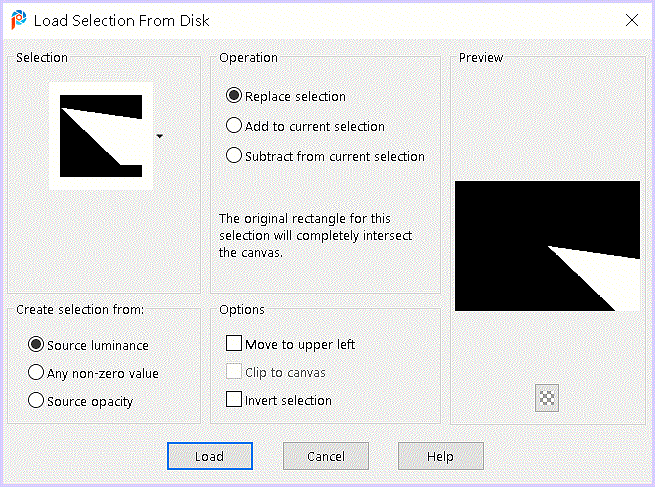
Selections / Load/Save Selection / Load Selection from Disk / CWDKsel2
Effects / Texture Effects / Blinds
Setting is still good
Effects / Edge Effects / Enhance More
Selections / Select None
Step 6
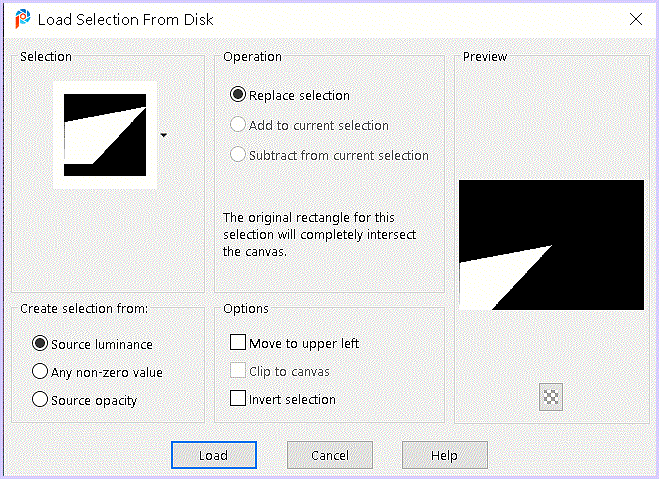
Selections / Load/Save Selection / Load Selection from Disk / CWDKsel3
Effects / Plugins / AP [Lines] – Lines SilverLining
Selections / Select None
Step 7
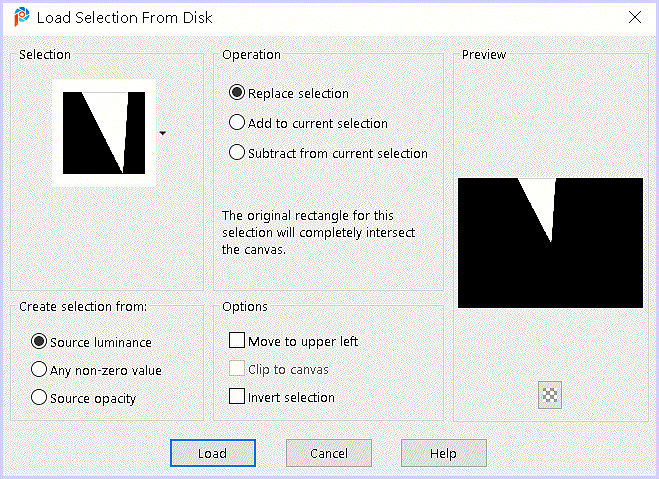
Selections / Load/Save Selection / Load Selection from Disk / CWDKsel4
Effects / Plugins / AP [Lines] – Lines SilverLining.
Setting is still good
Selections / Select None
Step 8
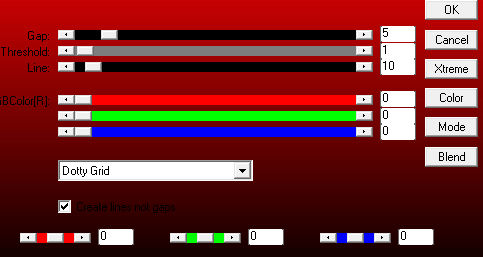
Selections / Load/ Save Selection / Load Selection from Disk / CWDKsel5
Effects / Plugins / Texture Effects / Weave
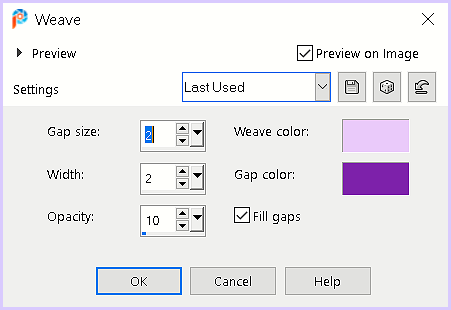
I used the color #004b67.
Selections / Select None.
Step 9
Selections / Load/Save Selection / Load Selection from Disk / CWDKsel6
Effects / Plugins / Texture Effects / Weave
Setting is still good
Selections / Select None
Step 10
Layers / New Raster Layer
Flood Fill with Black
Layers / New Mask Layer from Image (Narah Mask 0882)

Layers / Merge / Merge Group
Step 11
Activate the Bottom Layer
Layers / New Raster Layer
Selections / Select All
Copy the attached trees tube.
Edit / Paste into Selection
Selections / Select None
Layers / Merge / Merge Visible
Step 12
Edit / Copy.
Image / Add Borders (with the following setting)
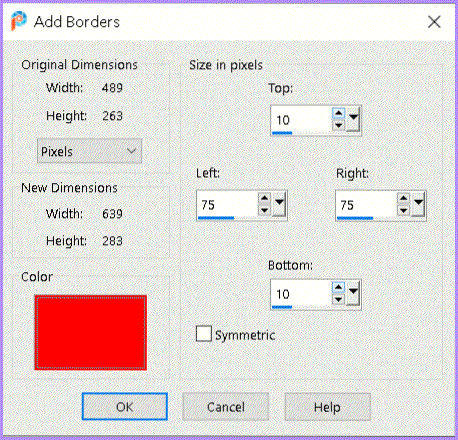
Color is not important
Select the Border with the Magic Wand
Edit / Paste into Selection (your image is still in memory)
Image / Mirror / Mirror Vertical
Step 13
Effects / Plugins / Simple / 4way Average
Adjust / Blur / Gaussian Blur 10
Effects / 3D Effects / Drop Shadow (with the following settings)
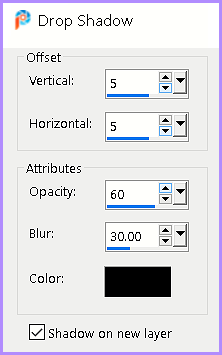
Repeat the Drop Shadow with Vertical and Horizontal at Minus -5
Keep Selected.
Step 14
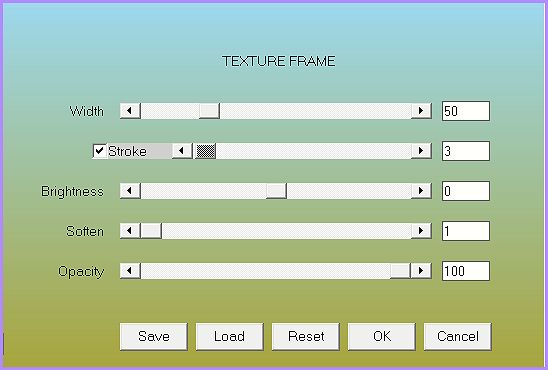
Effects / Plugins / AAA Frames / Texture Frame (with the following settings)
Effects / Plugins / AAA Frames / Photo Frame (with the following settings)

Selections / Select None
Step 15
Copy the Image / Lines
Edit / Paste as a New Layer
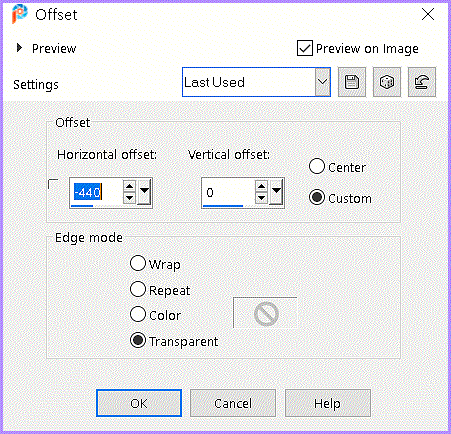
Effects / Image Effects / Offset (with the following settings)
Effects / 3D Effects / Drop Shadow (with the following settings)

Layers / Duplicate
Image / Mirror / Mirror Horizontal
Step 16
Image / Add Borders
2-pixels Color Black
Step 17
Copy the Text
Edit / Paste as a New Layer
Move to the Upper Right Corner (See Example)
Effects / 3D Effects / Drop Shadow (with the following settings)

Step 18
Copy attached woman tube
Image / Resize 70% (or use your own tube)
Move a little to the left
Effects / 3d Effects / Drop Shadow as desired
Step 19
Copy attached cat tube
Image / Resize 50% (or use your own tube)
Move a little to the right
Effects / 3d Effects / Drop Shadow as desired.
Step 20
Layers / Merge / Merge Visible
Add your name or watermark
Save as jpg
Hopefully, the lesson was satisfactory again!
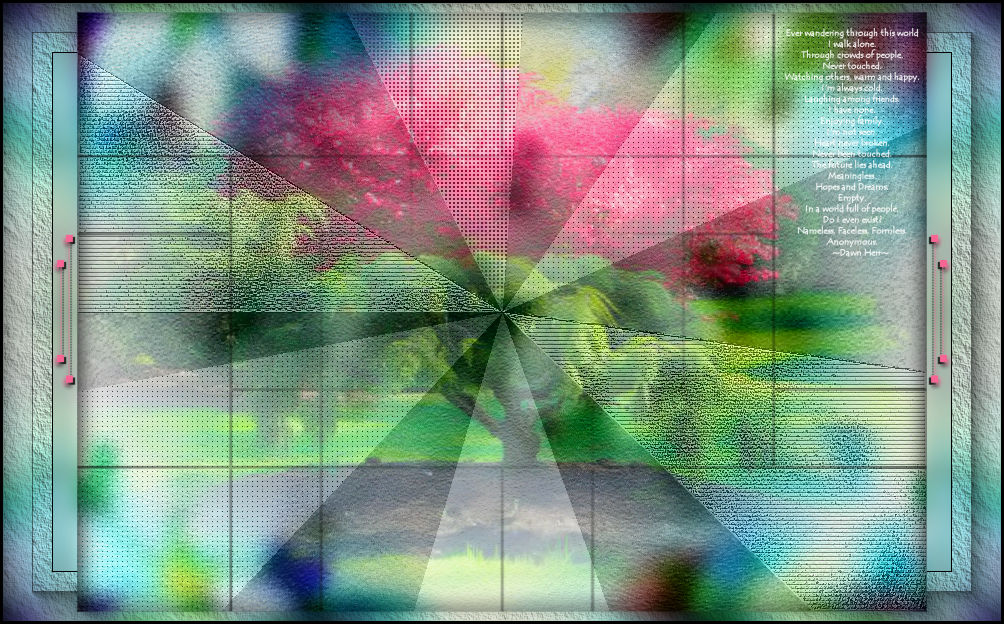
My Version