Ezia
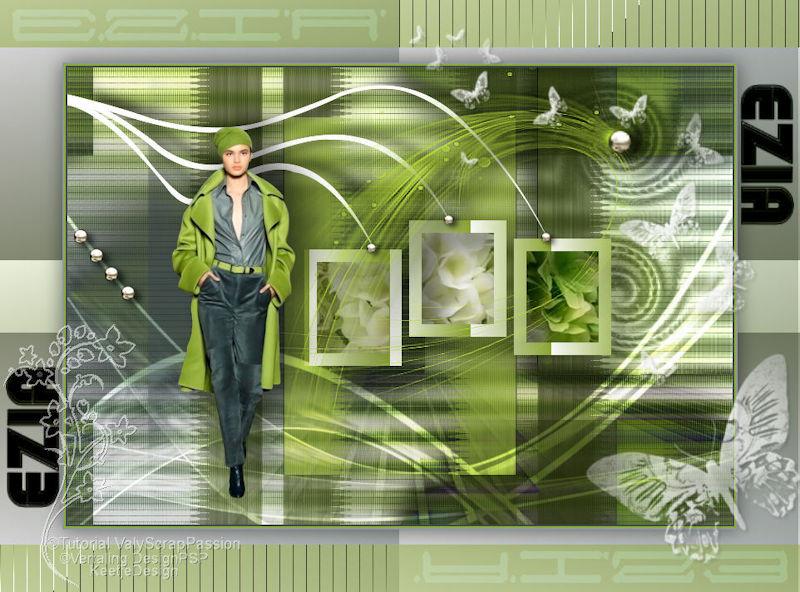
Original tutorial Here
This tutorial is written by Valy Scrap Passion the ©is from her.
You’re not allowed to copy, link and / or place these or parts of it without her permission.
The ©️ of the materials wich are used is for the rightful owner.
If you want to use this tutorial on your own forum, club or group, you have to request permission from the writer herself.
If this tutorial looks like another, it is purely coincidental.
We have permission to translate Valy Scrap Passion tutorials into English.
Thank you Valy for the permission to translate your tutorials.
Nous avons la permission de traduire les tutoriels de Valy Scrap Passion en anglais.
Merci Beaucoup Valy , que je pouvez traduire vos tutoriels en anglais.
Her site
Materials Used
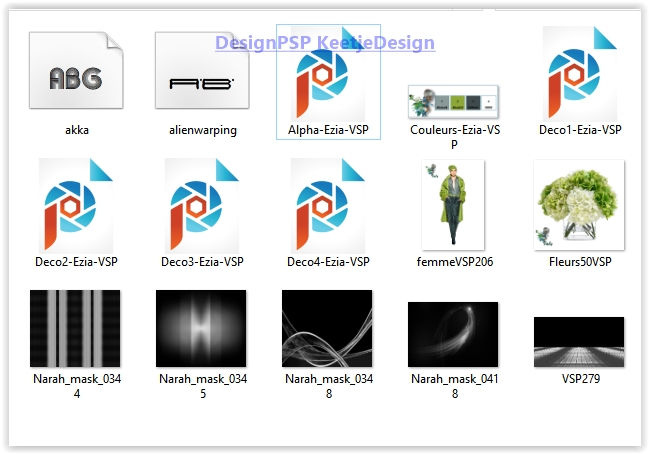
Install both fonts if you want to create your own text
Open the Masks in PSP – Minimize the masks
Plugins Used:
Alien Skin Eye Candy 5 – Impact – Perspective Shadow / Drop Shadow Blurry
Unlimited 2.0 – Two Moon – WarmCloth…
Unlimited 2.0 – Tile&Mirror – Seamless Blend (horizontal)
Richard Rosenman – Solid Border
You can find the plugins Here
The translation is written with PSP 2018, but can also be made with other versions.
Colors Used
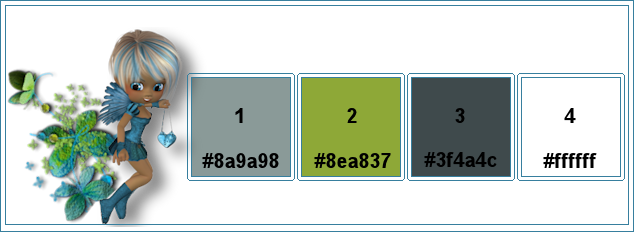
Note : When working with your own colors , play with the Blend Mode and/or Opacity at your own discretion
1
Materials palet – Foreground color 1 / Background color 2
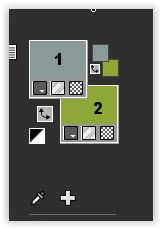
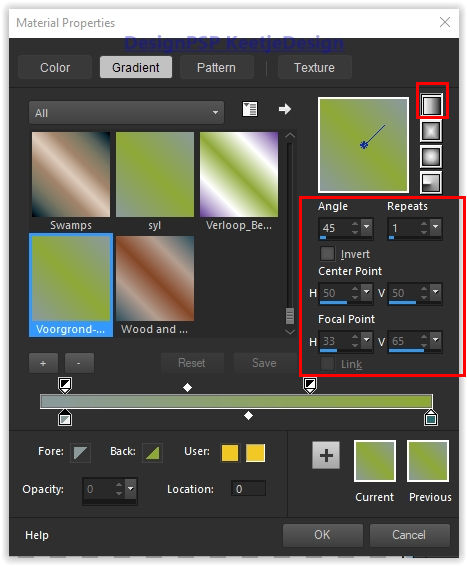
Create a Lineair Gradient on the foreground
Open the Alphafile Alpha-Ezia-VSP – Window – Duplicate (or use Shift+D shortcut) / Close the original file, we working on the duplicate.
Fill in the gradient
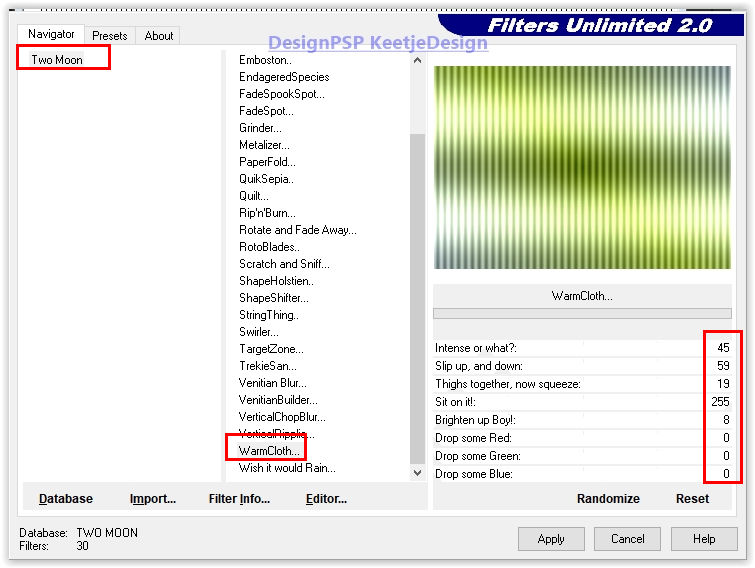
Effects – Plugin Unlimited 2.0 – Two Moon – WarmCloth…
2
Layers – New raster layer
Fill in color 3
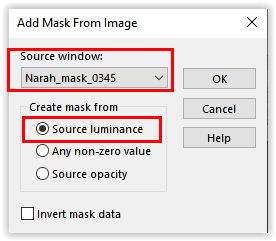
Layers – New mask layer – From image Narah_mask_0345
Layers – Merge – Merge Group
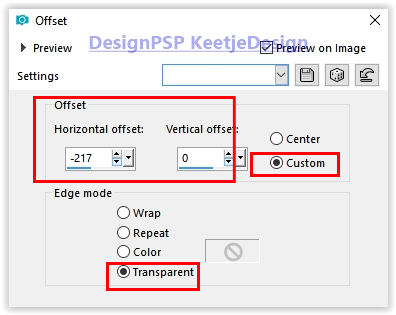
Effects – Image effects – Offset / minus 217 / 0
Layers – Duplicate
Layers – Merge – Merge Down
3
Layers – New raster layer
Fill in color 2
Layers – New mask layer – From image Narah_mask_0344
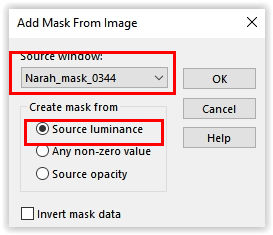
Layers – Merge – Merge Group
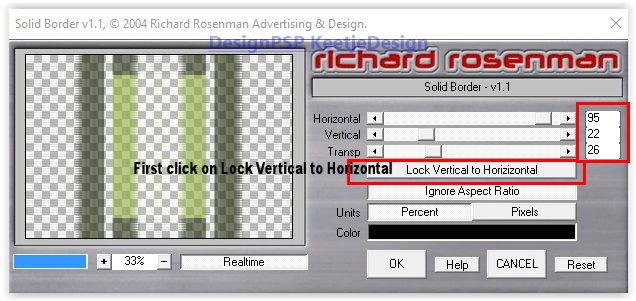
Effects – Plugin Richard Rosenman – Solid Border
First, click on Lock Vertical to Horizontal then the settings
4
Layer palette – Click on the bottom layer
Layers – Duplicate
Layers – New mask layer – From image VSP279
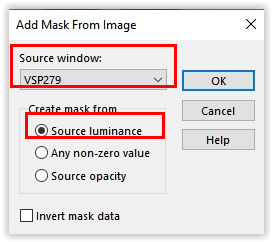
Layers – Merge – Merge Group
You don’t see anything yet, but that’s normal
Layers – Properties – Blend Mode Differance / Opacity 46
View – Rulers
Activate the Pick tool (K) – Mode Scale – Slide the layer in to 365pixels
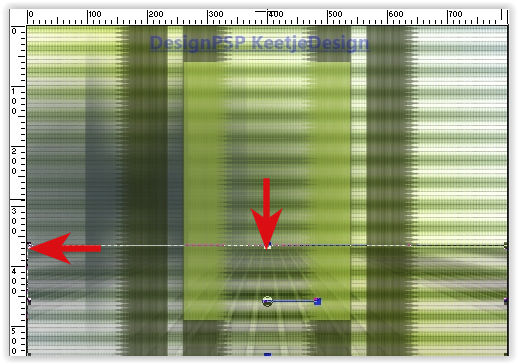
Type M to close the Pick tool
5
Layer palette – Click the bottom layer
Activate the Selection Rectangle Tool (S) – Custom selection
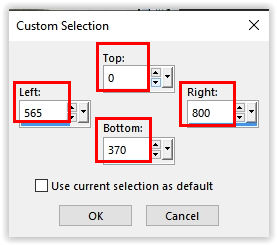
Selections – Promote selection to layer
Selections – Select None
Effects – Distortion effects – Curlicues
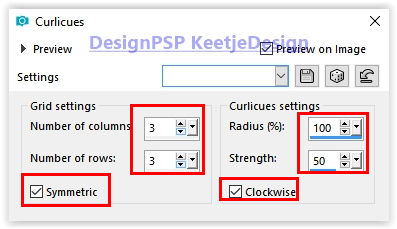
Effects – Edge effects – Erode
Effects – 3D Effects – Drop Shadow / 0 / minus 20 / 65 / 45 / # 000000
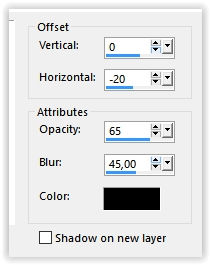
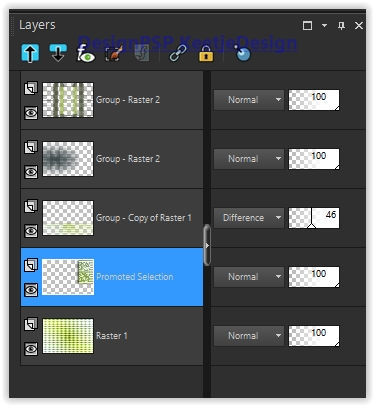
Your layer palette now looks like this
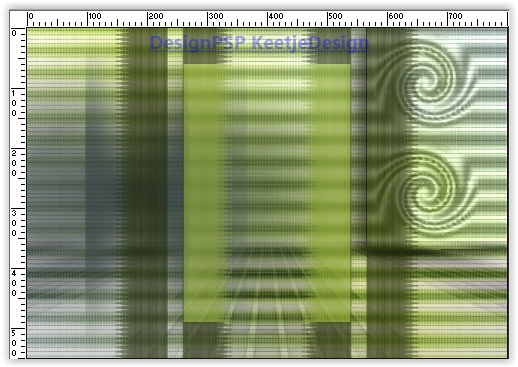
Your work now looks like this
6
Activate the Selection Rectangle Tool (S) – Custom selection
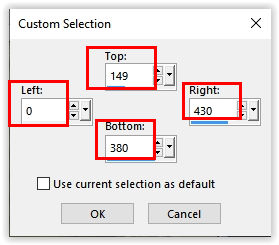
Edit – Copy special – Copy merged
Layers – New raster layer
Edit – Paste into selection
Selections – Select None
Layers – Properties – Blend mode Multiply
7
Effects – Image effects – Seamless Tiling – Default
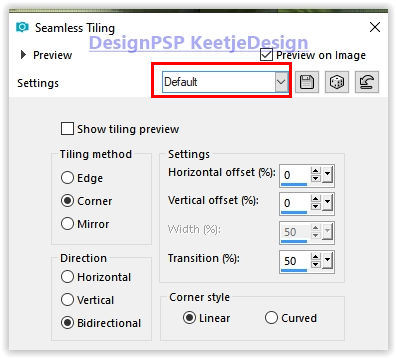
Check the materials palette that you have color 2 in the background
Effects – Plugin Unlimited 2.0 – Tile&Mirror – Seamless Blend (horizontal)
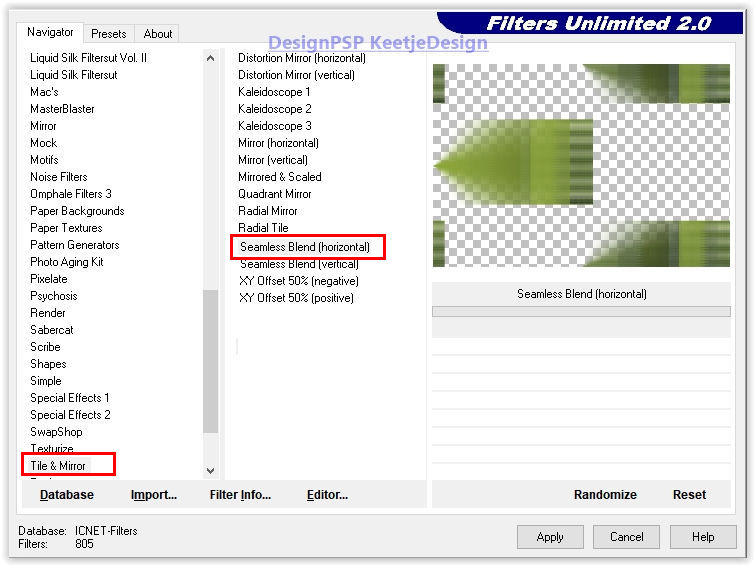
Effects – 3D Effects – Drop Shadow / 0 / minus 20 / 65 / 45 / # 000000
Layers – Merge – Merge Visible
8
Selections – Load /Save Selection – Load selection from alpha channel – Load Selection # 1
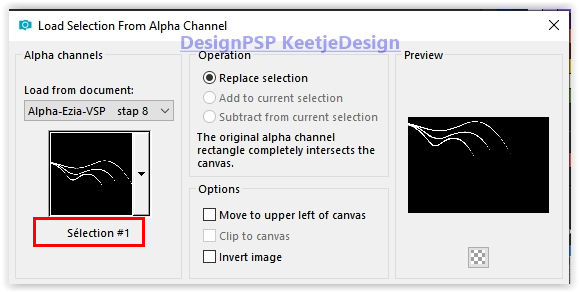
Layers – New raster layer
Fill in color 4
Selections – Select None
Effects – 3D Effects – Drop Shadow / minus 2 / 30 / 78 / 20 / # 000000
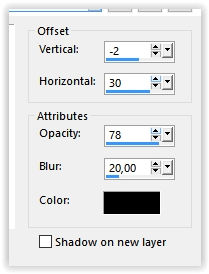
9
Selections – Load /Save Selection – Load selection from alpha channel – Load Selection # 2
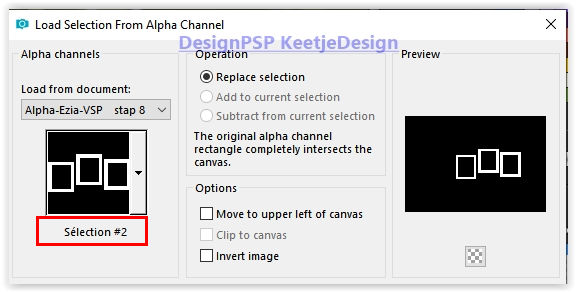
Layers – New raster layer
Fill in color 4
Selections – Select None
10
Open the tube Fleurs50VSP – Remove the watermark – Copy – Paste as new layer
Selections – Load /Save Selection – Load selection from alpha channel – Load Selection # 3
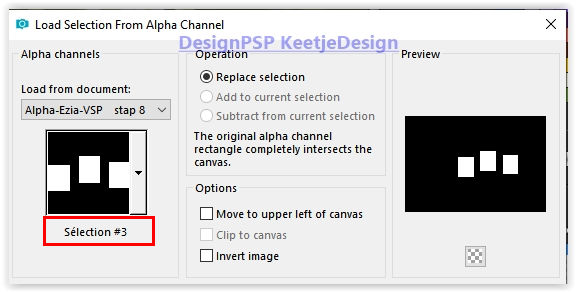
Selections – Invert
Edit – Clear
Selections – Select None
Layers – Arrange – Move Down
11
Layer palette – Click on the top layer
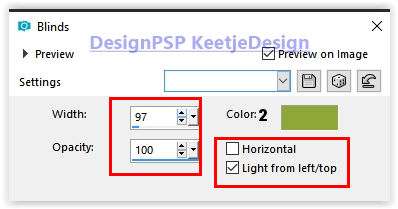
Effects – Texture effects – Blinds / Color 2
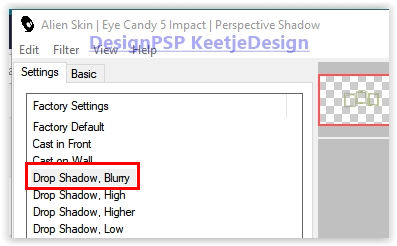
Effects – Plugin Alien Skin Eye Candy 5 – Impact – Perspective Shadow / Drop Shadow Blurry
12
Layers – New raster layer
Fill in color 4
Layers – New mask layer – From image Narah_mask_0348
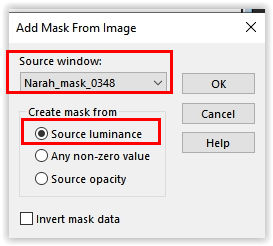
Layers – Merge – Merge Group
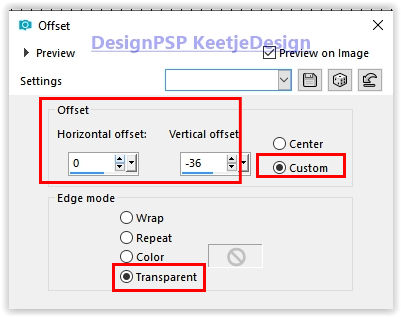
Effects – Image effects – Offset / 0 / minus 36
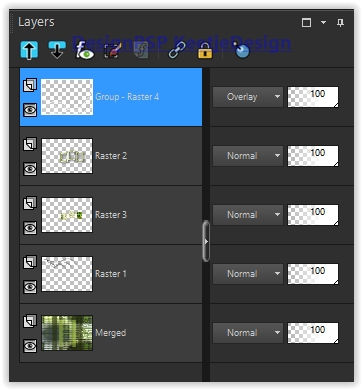
Layers – Properties – Blend mode Overlay
Your layer palette now looks like this
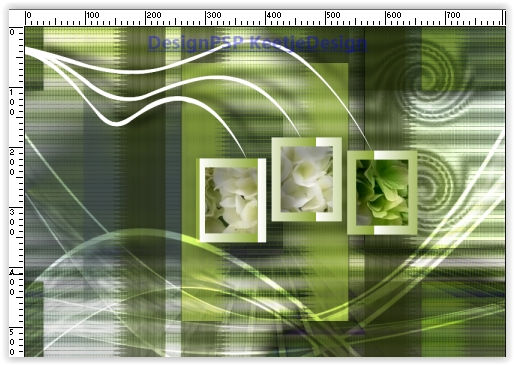
Your work now looks like this
13
Layers – New raster layer
Fill in color 2
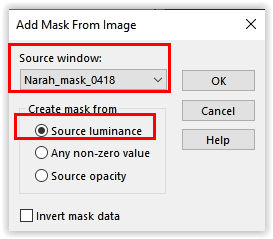
Layers – New mask layer – From image Narah_mask_0418
Effects – Edge effects – Enhance More
Layers – Merge – Merge Group
Image – Mirror – Mirror vertical (Flip vertical)
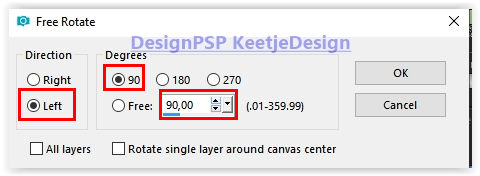
Image- Free rotate
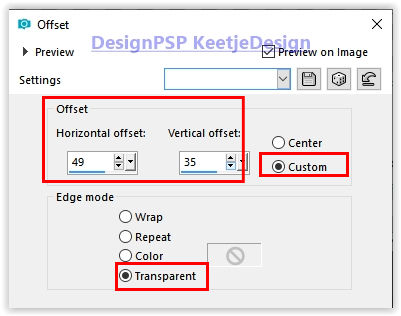
Effects – Image effects – Offset / 49 / 35
Effects – 3D Effects – Drop Shadow / minus 2 / 30 / 78 / 20 / # 000000
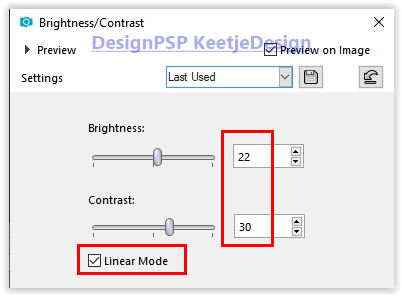
Adjust – Brightness and Contrast / Brightness/Contrast
14
Open the tube Deco1-Ezia-VSP – Copy – Paste as new layer
Activate the Pick tool – Mode Scale / Position X 6 / Position Y 69

Type M to close the tool
15
Image – Add Borders – Symmetric checked
2 pixels color 3
2 pixels color 2
2 pixels color 1
Selections – Select All
Image – Add Borders – Symmetric checked
75 pixels color 4
Selections – Invert
Keep selection active
16
Effects – Texture effects – Blinds / Color 1
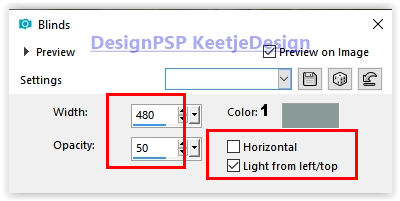
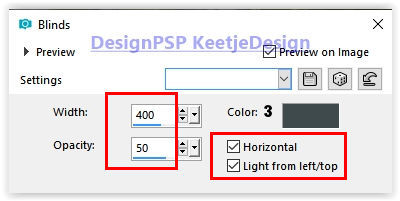
Effects – Texture effects – Blinds / Color 3
Selections – Promote selection to layer
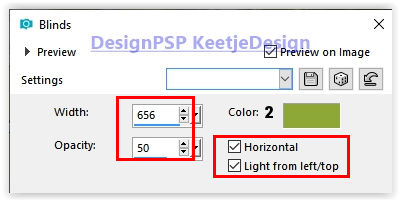
Effects – Texture effects – Blinds / Color 2
Selections – Select None
17
Layers – Duplicate
Image – Mirror – Mirror vertical (Flip vertical)
Activate Selection tool Rectangle (S) – Custom selection
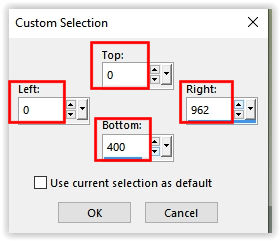
Press Delete on the Keybord
Selections – Select None
Layers – Merge – Merge Visible
18
Selections – Select All
Selections – Modify – Contract number of pixels 75
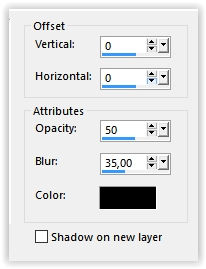
Effects – 3D Effects – Drop Shadow / 0 / 0 / 50 / 35 / # 000000
Selections – Select None
19
Open the tube Deco2-Ezia-VSP – Copy – Paste as new layer
The tube is in Overlay mode, so there is no need to change the color
Don’t move it. It is in its place.
20
Open the tube Deco3-Ezia-VSP – Copy – Paste as new layer
The tube is in Inherited Luminance mode , so there is no need to change the color
Don’t move it. It is in its place.
21
Open the tube Deco4-Ezia-VSP – Copy – Paste as new layer
Objects – Align – Right
22
Activate the tube femmeVSP206 – Copy – Paste as new layer
Image – Resize – Resize 2 times with 75% – Resize all layers not checked
Adjust – Sharpness – Sharpen
Activate the Pick tool / Mode Scale / Position X 206 / Position Y 152

Type M to close the tool
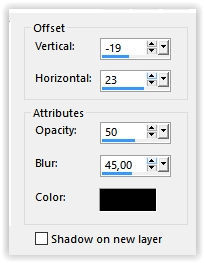
Effects – 3D Effects – Drop Shadow / minus 19 / 23 / 50 / 45 / # 000000
23
Layers – Merge – Merge All (Flatten)
Image – Resize to 800 pixels width
24
Sign your work
Merge All
Save as Jpeg.
The translation is tested by Marianne.
Marianne thank you very much / Tubes off VSP and Alies
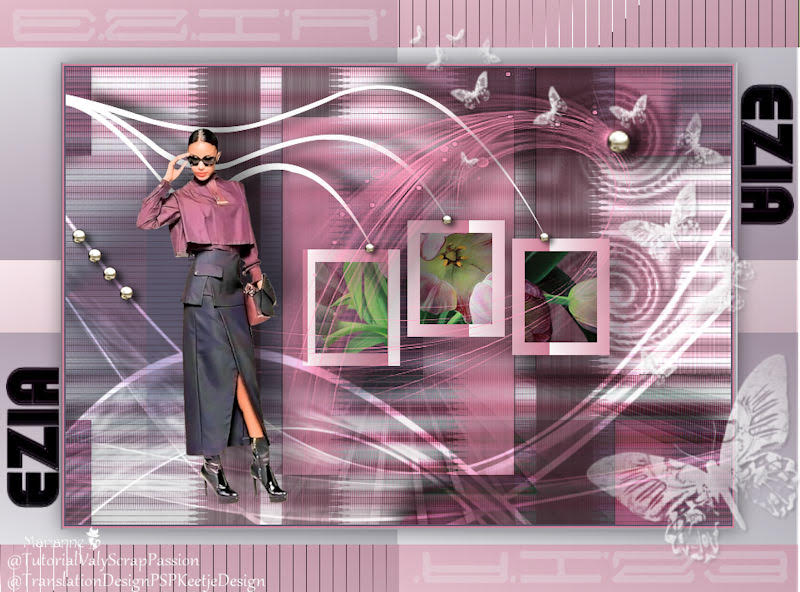
Another version / Tubes off CickaDesign en KeetjeDesign
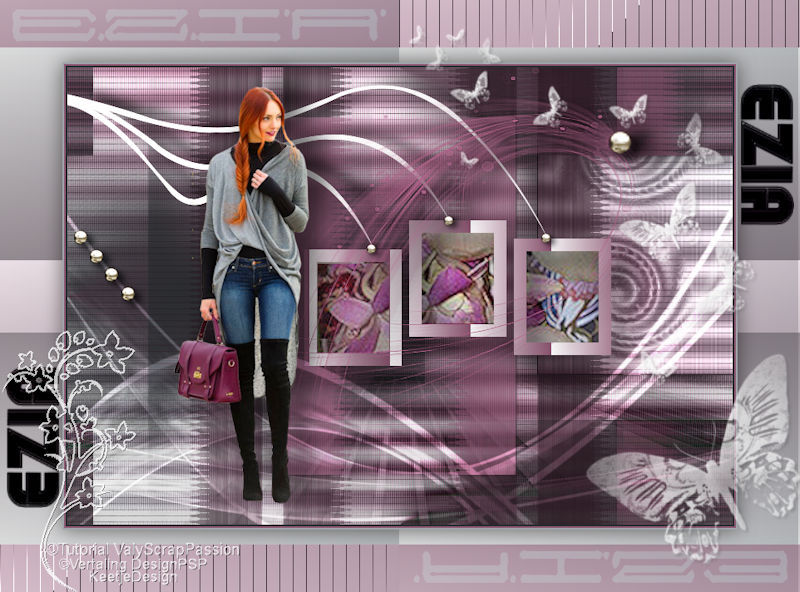
©Translation Flowers DesignPSP KeetjeDesign
This translation is registered with LSBene


