The Stump
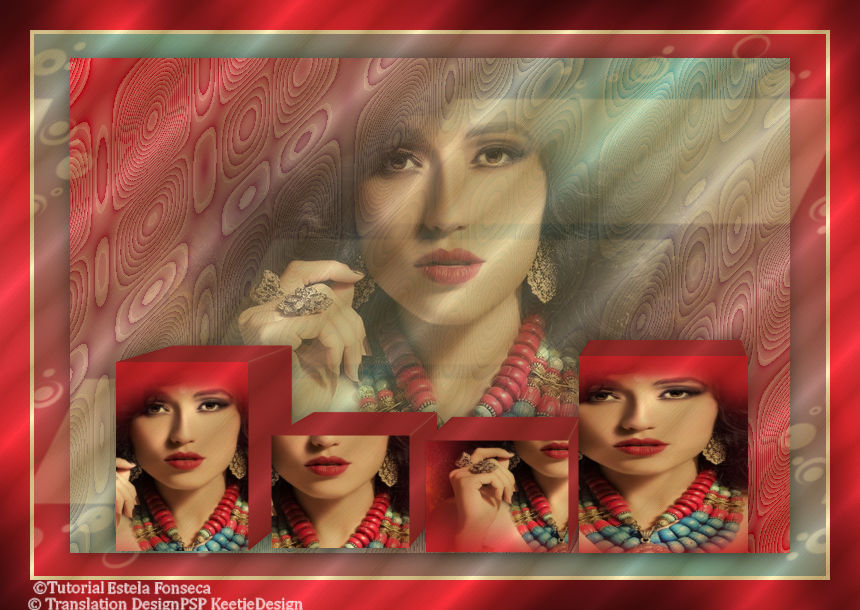
Original tutorial Here
This tutorial is written by Estela Fonseca the © is from her.
You’re not allowed to copy, link and / or place these or parts of it without her permission.
The © ️ of the materials wich are used is for the rightful owner.
If you want to use this tutorial on your own forum, club or group, you have to request permission from the writer herself.
We have permission to translate Estela Fonseca’s tutorials into English.
Thank you Estela for the permission to translate your tutorials.
Temos permissão para traduzir os tutoriais da Estela Fonseca para o inglês.
Obrigado Estela pela tradução dos tutriais.
Materials Used:
1 Pattern – Arguld10 Place in your PSP folder Patterns
1 Selection – EF-Sel_TheStump Place in your PSP folder Selections
1 Mask – shimmers mask 5 Image8
1 Tube – 2303-luzcristina
Download Materials Here
Plugins Used:
Unlimited 2.0 – Graphics Plus – Cross Shadow
Unlimited 2.0 – Tramage – The Stump 2
Alien Skin – Eye Candy 5 – Impact – Extrude
The translation was made with PSP 2018 , but can also be done with other versions.
Colors Used

Note : When working with your own colors , play with the Blend Mode and/or Opacity at your own discretion
1
Material palette Choose two colors from the character tube
My Colors – Foreground Color # e32d46 / Background Color # 8fcfeb
Make a Gradient Linear in the Foreground / Angle 45 / Repeats 1

2
Open a new transparent image of 800 X 550 pixels
Fill in the Gradient
3
Layers – Duplicate
Image – Mirror – Mirror Horizontal
Image – Resize – Resize 90% – Resize all layers unchecked
4
Effects – Plugin Unlimited 2.0 – Tramage – The Stump 2
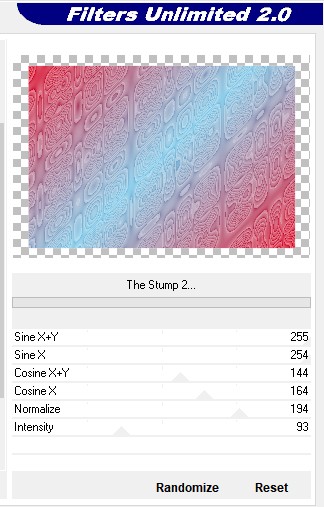
Effects – 3D Effects – Drop Shadow
Color # 000000 / 0 / 0 / 50 / 30

5
Layers – New Raster Layer
Fill in the color # ffffff
Open the mask shimmers mask 5 Image8 – Minimize
Layers – New Mask Layer – From Image

Layers – Merge – Merge Group
Layer palette – Blend Mode Soft Light or another of your choise
6
Effects – Geometric Effects – Skew / Vertical 27 Wrap

Layers – Merge – Merge Visible
7
Open the tube 2303-luzcristina – Copy – Past as New Layer
Layers – Properties – Opacity 60
do not move
8
Layers – New Raster Layer
Selections – Load/Save – Load Selection from Disk EF-Sel_TheStump
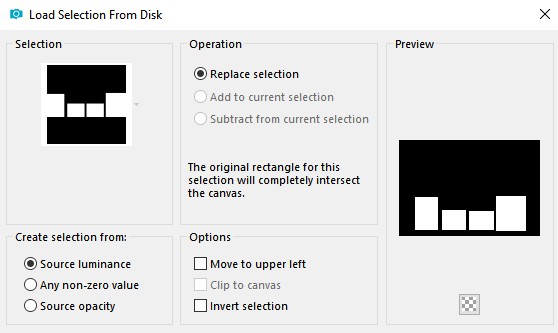
Fill in the Foreground Color
Keep – Selected
9
Effects – Plugin Alien Skin – Eye Candy 5 – Impact – Extrude

Selections – Select None
10
Activate the Magic Wand Tool / Tolerance and Feather 0
Select the first retangle on the left
Activate the tube 2303-luzcristina – Select a part of the womans face – Copy
Activate your work – paste into the selection
Selections – Select None
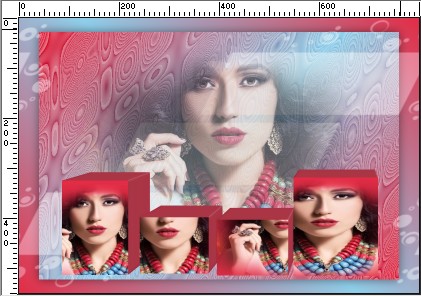
repeat this with all rectangles with different parts of the face
Your work looks like this
11
Effects – Image Effects – Offset / 0 / minus 7 / Transparent

Effects – 3D Effects – Drop Shadow
Color # 000000 / 0 / 0 / 50 / 30
12
Layers – New Raster Layer
Fill in one of your colors or use the color # ffffff (I used the color # ffffff)
Selections – Select All
Selections – Modify – Contract – Number of pixels 4
Click Delete on the keybord
Selections – Select None
13
Image – Add Borders – Symmetric checked
30 pixels Foreground Color
14
Activate the Magic Wand Tool – Select the 30 pixel border
Effects – Plugin Unlimited 2.0 – Graphics Plus – Cross Shadow – Default
15
Layers – New Raster Layer
Material Properties The Foreground on Pattern Arguld10

Fill in the Pattern
Layers – Properties – Blend Mode Multiply / Opacity 70
Sign your work
Merge All
Save as Jpeg.
The translation has been tested by Marianne
Thank you Marianne
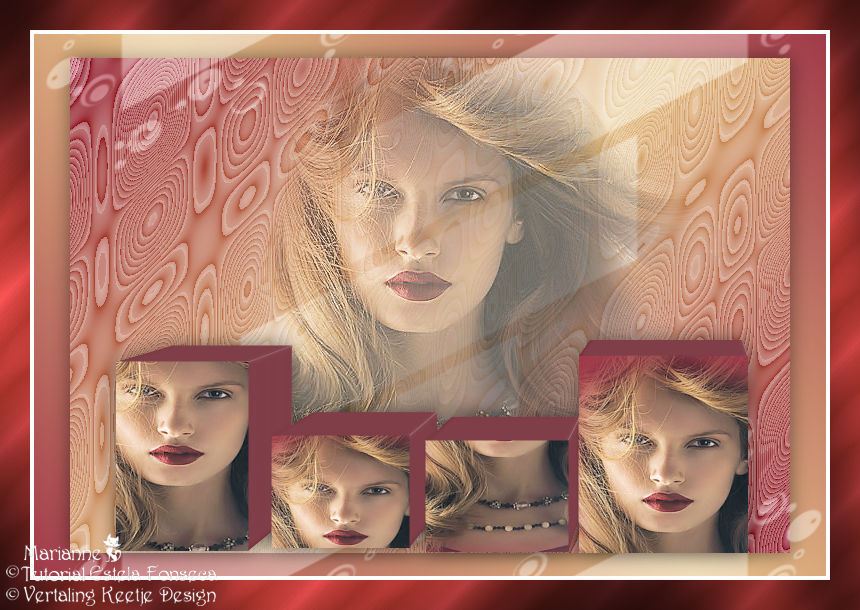
© Translation The Stump DesignPSP KeetjeDesign 02-09-2018
This translation is registered with LSBene


