Bad Day

Original tutorial Here
This tutorial is written by Estela Fonseca the © is from her.
You’re not allowd to copy, link and / or place these or parts of it without her permission.
The © ️ of the materials witch are used is for the rightful owner.
If you want to use this tutorial on your forum, club or group, you have to request permission from the writer herself.
We have permission to translate Estela Fonseca’s tutorials into English.
Thank you Estela for the permission to translate your the tutrials.
Temos permissão para traduzir os tutoriais da Estela Fonseca para o inglês.
Obrigado Estela pela permissão para traduzir seus tutoriais.
Materials Needed
1 Tube – text_badday
1 Tube – anna.br-1171_gisele-bundchen
Download Materials Here
Plugins Used
Unlimited – Toadies – Weaver
FM Tile Tools – Blend Emboss
It@lian Editor – Effetto Fantasma
Flaming Pear – Flood
The tutorial was made with PSP X2, but can also be done with orther versions.
The translation was made with PSP 2018.
Used Colors

Note : When working with your own colors , play with the Blend Mode and/or Opacity at your own discretion
1
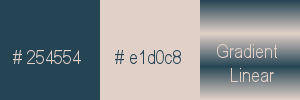
Foreground Color # 254554 / Background Color # e1d0c8
Make a Gradient Linear in the Foreground as follows

Open a New Transparent Image of 700 X 550 pixels
Fill with the Gradient
2
Effects – Plugin Unlimited 2.0 – Toadies – Weaver

3
Layers – Duplicate
Effects – Geometric Effects – Skew ( twice )

4
Effects – Distortion Effects – Pinch ( twice )

5
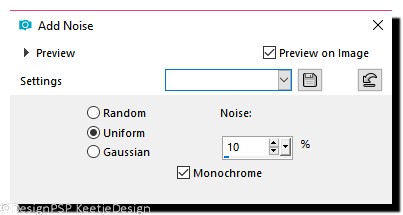
Adjust – Add Remove Noise / Add Noise

6
Effects – Plugin FM Tile Tools – Blend Emboss / Default
7
Effects – 3D Effects – Drop Shadow
Color # 000000 / 0 / 0 / 75 / 20,00

8
Activate the Lower Layer
Effects – Plugin Unlimited 2.0 – It@lian Editor – Effetto Fantasma

9
Effects – Plugin Flaming Pear – Flood

10
Layers – New Raster Layer
Selection Tool / Rectangle / Custom Selection


Fill in the selection with the Background Color
Selections – Modify – Contract / 10 pixels
Fill with the Gradient
Effects – Art Medium Effects – Brush Strokes

11
Layers – New Raster Layer
Open the tube anna.br-1171_gisele-bundchen – Copy – Paste into Selection
Effects – 3D Effects – Drop Shadow
Color # 000000 / 0 / 0 / 75 / 20,00
Selections – Select None
Layers – Merge – Merge Down
12
Layers – Duplicate
Image – Resize – 80% – Resize All Layers Uncheked
Position as in the example on the top
13
Layers – Duplicate
Image – Resize – 80% – Resize All Layers Uncheked
Position as in the example on the top
14
Example of your Layers

15
Image – Add Borders – Symmetric / 2 pixels Foreground Color
Image – Add Borders – Symmetric / 25 pixels Background Color
16
Open the tube anna.br-1171_gisele-bundchen – Copy – Paste As New Layer
Image – Resize – 90% – Resize All Layers Uncheked
Image – Mirror (Horizontal)
Position as in the example on the top
17
Image – Add Borders / Symmetric / 2 pixels Foreground Color
Image – Add Borders / Symmetric / 5 pixels Background Color
Image – Add Borders / Symmetric / 2 pixels Foreground Color
18
Open the tube text_badday – Copy – Paste As New Layer
Position in de Lower Left Corner
Apply a Drop Shadow of your choice
19
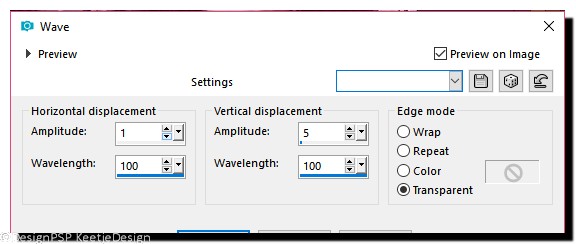
Effects – Distortion Effects – Wave

Layers – Properties / Opacity 59
20
Sign your work
Layers – Merge – Merge All (Flatten)
Save as Jpeg File and you’re are done !
The translation has been tested by Marianne
Thank you Marianne

© Translation Tag Bad Day DesignPSP KeetjeDesign
This translation is registered with LSBene


