Olhares

Original tutorial Here
This tutorial is written by Estela Fonseca the © is from her.
You’re not allowed to copy, link and / or place these or parts of it without her permission.
The © ️of the materials wich are used is for the rightful owner.
If you want to use this tutorial on your own forum, club or group, you have to request permission from the writer herself.
We have permission to translate Estela Fonseca’s tutorials into English.
Thank you Estela for the permission to translate your tutorials.
Temos permissão para traduzir os tutoriais da Estela Fonseca para o inglês.
Obrigado Estela pela tradução dos tutriais.
Materials Used:
1 Mask – dmsk0124
1 Tube – poudreor
1 Tube – 01 Elisha Cuthbert021107
1 Tube – 04Elisha Cuthbert
Download Materials Here
Plugins Used:
None
The tutorial was made with PSP X2.
The translation was made with PSP 2018 , but can also be done with other versions.
Note : When working with your own colors , play with the Blend Mode and/or Opacity at your own discretion
1
Materials palette – Foreground color # 594157 / Background color #cfc3cd

Open a new transparent image of 750 X 550 pixels
Fill in the Foreground color
2
Open the tube 01 Elisha Cuthbert021107 – Copy – Paste as new layer (at your work)
Place on the left and slightly down
Layers – Duplicate
Image – Mirror – Mirror horizontal
move a little upwards
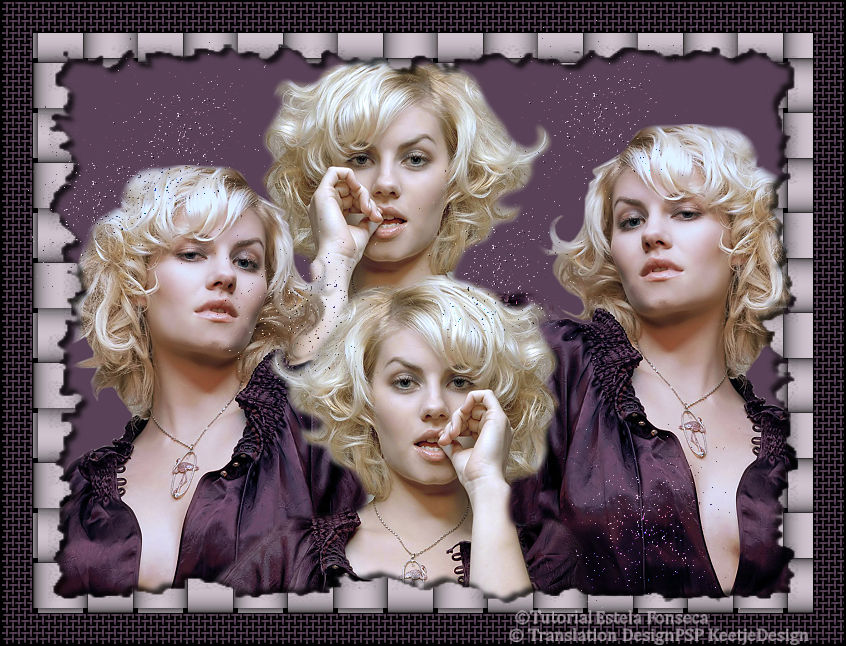
Look at the image of point 3
3
Open the tube 04Elisha Cuthbert – Copy – Paste as new layer (at your work)
Layers – Arrange – Move Down (2 times)
Layers – Duplicate
Layers – Arrange – Bring to top
Move slightly down

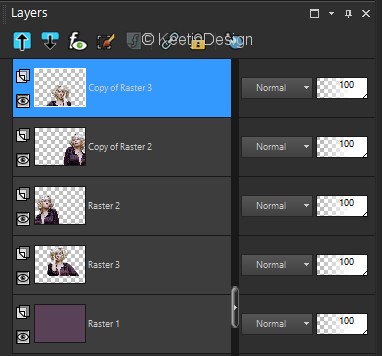
Your layer palette looks like this

4
Layers – Merge – Merge Visible
Image – Add Borders – Symmetric checked
15 pixels color # cfc3cd
5
Layers – New raster layer
Fill in the color # cfc3cd
6
Open the Mask dmsk0124 – Minimize
Layers – New Mask layer – From Image / Invert mask data checked

Layers – Merge – Merge Group
7
Effects – 3D Effects – Drop Shadow
Color # 000000 / 5 / 5 / 80 / 6

Effects – 3D Effects – Drop Shadow
Color # 000000 / minus 5 / minus 5 / 80 / 6

8
Effects – Texture effects – Weave
Weave color and Gap color # 000000 / Fill gaps checked

9
Image – Add Borders – Symmetric
1 pixel color # 000000
30 pixels color # 594157
10
Activate the Magic Wand Tool – Select this border
Effects – Texture effects Weave
Weave color and Gap color # 000000 / Fill gaps checked

Selections – Select None
Image – Add Borders – Symmetric
2 pixels color # 000000
11
Open the tube poudreor / File – Export – Picture tube

Layers – New Raster Layer
Activate the Picture Tube Tool /poudreor Stamp a few times as on the example

12
Sign your work
Merge All
Save as Jpeg.
The translation has been tested by Marianne
Thank you Marianne tube of Valéry

© Translation Olhares DesignPSP KeetjeDesign 02-01-2019
This translation is registered with LSBene


